I woke up Saturday morning (October 24, 2020) with one goal in mind for that day: activate Toxaway State Game Land (K-6960).
This year, I’ve had a blast finding game lands to activate for the Parks On The Air (POTA) program as they are typically are less crowded, have open areas to hang long antennas, and sometimes even give me a chance to do a little off-roading.
I’ve had Toxaway on my list of game lands to activate since April, but it’s a good 1.5 hour drive from the QTH and not in a part of the state I routinely drive through these days. After some searching, via the excellent WRC interactive map, I was able to find one access point that even appeared to have parking for a trail head.
I checked with the family and they were all up for a drive and picnic lunch.
It’s still “leaf-looking” season here in the mountains of western North Carolina, so the roads were pretty crowded with tourists. The closer we got to this relatively remote site, though, the less traffic. A very good sign!
Chameleon Antennas recently sent me their new CHA MPAS Lite vertical to evaluate and I had planned on deploying it for this activation, but once I arrived on site, I realized I should have checked a topo map first: it was deep in a valley near a creek and I questioned the wisdom of using a short vertical in this situation. That and propagation wasn’t exactly stellar.
Fortunately, there were tall trees around, so I deployed the CHA Emcomm III Portable random wire antenna which has become one of my favorite field antennas.
Saturday was also the CQ WW SSB contest, so the phone portions of the bands were very busy with contest activity. I planned to make this primarily a CW activation.
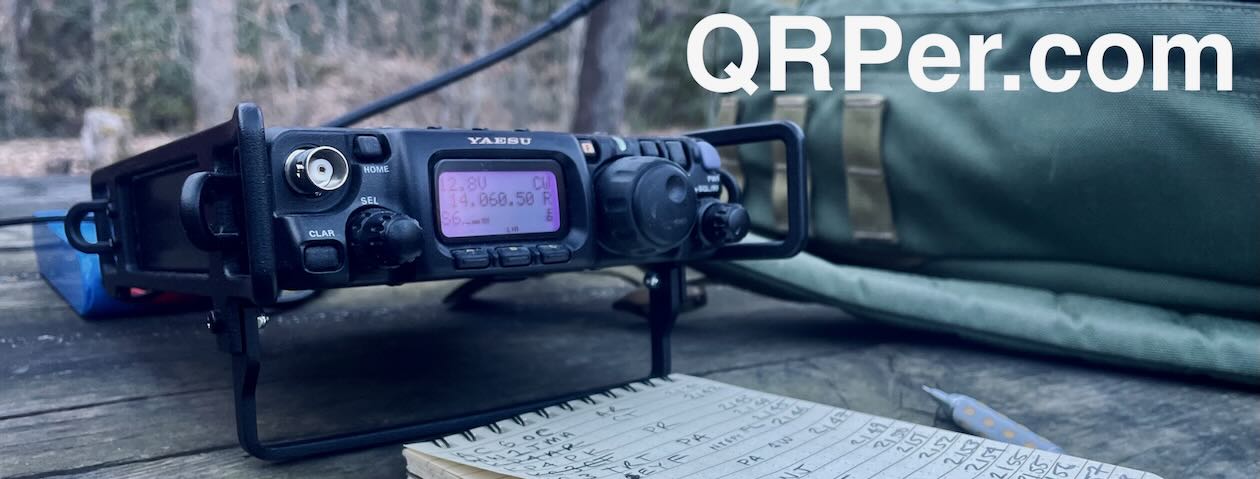
After setting up the Icom IC-705, I attached my Elecraft T1 ATU to the rig and antenna. Since this turned out to be a parking area activation, I could have set up my portable table, but instead, I used the Red Oxx C-Ruck pack to support the IC-705 and ATU.
Using the C-Ruck as a mini field table saves time. I discovered how useful this pack was while evaluating the lab599 Discovery TX-500 in August.
I started calling CQ POTA on 40 meters and within seconds the the POTA site auto-spotted me via the Reverse Beacon Network (RBN). I only called CQ POTA twice before I started working pile-ups.
The Emcomm III Portable antenna performed admirably as I pushed a full 10 watts of power.
Indeed, for me, this activation was a bit of a sprint to answer everyone calling me in the amount of time I had at the site. To make the activation work in our Saturday schedule, I only allowed for one hour on the air.
QSO Map and logs:
Map courtesy of QSOMap.org Green=CW Red=Phone (Click to enlarge)
Not at all bad for 10 watts and a wire!
I could have worked many more stations had I moved to 20 meters CW and then back to 40 meters CW, but I did want to make a few SSB QSOs and even attempt hunting other POTA parks.
Some highlights: working my buddies (and fellow SEORAT members) Eric (WD8RIF) in park-to-park contacts, and Mike (K8RAT) who is one of the top hunters in POTA and also huge support to Eric and me in the field.
I was also very pleased to work another local park activator, Steve (KC5F), who is an excellent CW op–indeed, I believe this was our first SSB contact! Steve primarily operates CW with his Xiegu G90. We typically struggle working each other because we’re simply too close geographically!
All in all, it was amazing fun!
Once again, I was impressed with the IC-705’s capabilities, the T1’s excellent matching skills, and the Emcomm III portable’s performance.
I also find the CW Morse Pocket Paddle to be a brilliant portable paddle. It’s slightly larger than my N0SA paddles, but still very portable. I’ve been carrying them in the top flap of my ruck sack.
I will plan to return to Toxaway, perhaps this winter, and spend more time at the site.
On Monday (October 19, 2020) I received an inquiry from Dale (KI5ARH) only an hour or so before packing up my radio gear to activate Lake Norman State Park (K-2740).
Dale is interested in using his recently acquired Icom IC-705 to get involved with Parks On The Air (POTA) and play radio in the field.
What’s in my field kit
Dale was curious about all of the components of the field kit I use with the IC-705, so I made this video:
Since I had already set up my phone to record the video above, I decided to make a couple more.
I thought there might be some value in making real-time videos showing what it’s like operating CW and SSB during a POTA activation. The videos have no edits and haven’t been trimmed. It’s as if the viewer were there at the activation sitting next to me at the picnic table.
Operating CW with the IC-705
After setting up my station, I first started on the 40M band in CW. I meant to start the camera rolling during tune-up, but forgot to hit record. The video begins after I’d made a few CW contacts, but shows what it’s like changing bands and relying on the Reverse Beacon Network (RBN) to pick me up then the POTA website to auto spot me.
Note: to be automatically spotted by the RBN, you must schedule your activation via the POTA website in advance, or have been already spotted by yourself or someone else, so the system will know to look for you.
My video cut off abruptly due to a low battery message. I had to give my iPhone a quick power charge to make the next video.
Operating SSB with the IC-705
After operating CW for a while, I plugged in the hand mic that ships with the IC-705 for a little SSB action. My main goal with this video was to show how I call CQ and use the voice keyer memories in order to manage the field “work flow” process. I also speak to how important it is to either self-spot or have a friend spot you to the POTA network while operating phone.
I spent so much time setting up and running the camera, I wasn’t actually on the air for very long, but I easily managed to achieve a valid activation and had a lot of fun in the process.
I’m not a pro “YouTuber” as I say in one of my videos. I much prefer blogging my experiences rather than “vlogging,” I suppose.
Still, I think I’ll do a few more “real-time” videos of POTA activations and speak to the various techniques I use to activate parks. Since these videos aren’t edited for time, they may not appeal to the seasoned POTA activator or QRPer–that’s okay, though. My goal is primarily to assist first-time POTA activators.
Have you been activating Parks or Summits lately? Do you have any advice or suggestions I failed to mention? Or do you have suggestions for future topics? Please comment!
On Thursday October 15, 2020, my family made an impromptu trip to Mount Mitchell State Park to enjoy the amazing weather and gorgeous fall colors.
The Blue Ridge Parkway and Mount Mitchell State Park were predictably crowded with tourists, although nowhere near as crowded as the following three days which were “peak” leaf color days.
After arriving at the park, we claimed one of the little picnic areas tucked away from the crowds. After a picnic lunch, I set up the station, my wife painted, one daughter caught up on her favorite book, and the other daughter took a deep dive in her recently acquired Yaesu FT-60R (and also helped me log).
And Hazel, predictably, slumbered.
I swear that dog is only awake maybe one hour a day.
On this particular activation, I didn’t want to deploy a wire antenna. Being the highest elevation east of the Mississippi river, the trees are short .
I consider the WRC vertical to be a “compromised” antenna especially in our region which is rocky and has poor ground conductivity. But at times like this when the park is crowded, it’s a great low-profile way to get on the air–and it’s self-supporting! In any other year, I’m actually okay with my radio set-up being conspicuous–I love telling passersby about ham radio and Parks On The Air–but at the moment I choose to keep my social distance.
When I use the WRC antenna, I typically pair it with one of my favorite transceivers: the Mission RGO One.
I like to pair the RGO One with the WRC vertical because the RGO One is capable of 50 watts of output power (the real max for the WRC), which I feel makes up for a bit of the antenna compromise. I typically start at QRP levels and increase wattage if I get no response.
At Mt. Mitchell, I rarely have internet access via my mobile phone, so I rely on the Reverse Beacon Network to spot me to the POTA network when I call “CQ POTA.”
Within a minute of calling CQ, I started logging stations. Thanks RBN!
I operated for almost an hour off and on. I took a few breaks during low activity to help my daughter with the FT-60R. At one point, she was in hysterics over a conversation she picked up on a local repeater. (Hysterics in a good way, fortunately. I do worry about some of the conversations I hear on local repeaters at times!)
Here’s my tally from Mt Mitchell:
Mt. Mitchell is one of our family’s favorite state parks and is accessible from my QTH via the Blue Ridge Parkway.
Unfortunately, the Blue Ridge Parkway is often closed during the winter, so we hope to make at least one more trip to Mitchell within the next few weeks.
I’ll add that this was the third time I’d taken the CW Morse“Pocket Paddle” to the field. It’s a brilliant set of paddles. It’s has a fantastic field-adjustable response. I’m uncertain if they’re on the market yet–CW Morse sent them to me for evaluation in the field.
I also have a set of N0SA paddles I love and typically keep packed in my dedicated MTR-3B pack.
On Wednesday, October, 14 2020, the weather was gorgeous so I decided to make an impromptu POTA activation of Pisgah National Forest and the Pisgah Game Land (K-4510 and K-6937). These sites are the closest to my QTH and only a 15 minute drive (in fact, I can even hike up to the same trail network from my back yard).
My canine companion, Hazel, jumped into the car before I could even invite her to come along.
We drove to the trailhead, parked, and hiked a short distance into one of my favorite spots where it’s relatively flat, with lots of tall trees and almost no foot traffic from other hikers.
This activation gave me an opportunity to use the Icom IC-705 in more of a “backpack” setting since I hiked in with only my pack, Hazel, and my folding three-leg stool. Up to this point, I’d only used the IC-705 on picnic tables and flat surfaces since it can’t easily fit on my clip board like my MTR-3B, KX2, and KX1 can.
The activation also gave me a chance to evaluate a new product sent to me by the CW Morse company: their “Pocket Paddle” designed specifically for portable operations.
I decided to set up the Icom IC-705 much like I did the lab599 Discover TX-500 when I took it on hikes: mount the radio above the front pocket of my Red Oxx C-Ruck backpack.
The arrangement works quite well–I simply sit on the stool in front of the pack and hold my simple logging notepad and paddles on a clipboard.
While this particular site is great because it’s so accessible to me, the negative is it’s deep down in a valley surrounded by high ridge lines. I feel like this does have some impact on how well my signal travels.
Wednesday, it took nearly 50 minutes to rack up a total of 12 contacts in CW mode. I never bothered with SSB/phone because this site had no cell phone service and, thus, there was no way to spot myself on the POTA network.
That’s okay, I felt pretty chuffed about racking up 12 contacts with 5 watts and a wire! This is what field radio is all about, in my opinion.
After a little falling out with the mAT-705, I decided I wanted to try other ATUs with the IC-705. I used to own an Elecraft T1 ATU and loved it, but I eventually sold it for a song to a friend since all of my field rigs at that point had internal ATUs.
I reached out to Elecraft and they sent me a T1 on loan to give it a go. I’d forgotten how much I love this simple, effective ATU.
Even though the EFT-MTR is resonant on 40, 30, and 20 meters, moving to the 30 meter band requires lowering the antenna, pulling off an SMA cap on the coil, then re-hanging it. Not a big deal at all, really, but it’s so much easier to simply press the tune button on the T1 and have it match 30 meters without going through the normal process.
CW Morse Pocket Paddle
I also thoroughly enjoyed using the CW Morse “Pocket Paddles.” I’m not sure when they’ll be available to purchase (perhaps they are already?) but I can highly recommend them.
The paddle action is field-adjustable and even though there’s an Allen wrench built into the paddle base, the machined screws are easy to twist by hand.
They feel very sturdy, too, much like the other CW Morse paddles and keys I’ve used.
I believe the Pocket Paddles are going to permanently pack with my IC-705!
While visiting my parents this week in the Piedmont of North Carolina, I took some time Monday afternoon to take the new Icom IC-705 to field and activate Lake Norman State Park (K-2740) for the Parks On The Air (POTA) program.
So far, most of my time with the IC-705 has been in CW mode but a number of my readers have been asking about SSB operation and performance.
My goal for this park activation was to give the IC-705 a proper shake-out on SSB.
Set-up
The activation was very much impromptu–I only decided I could fit it into my day an hour before my start time. In addition, while it wasn’t raining per se, there was a very heavy mist/fog that, at times, felt like a light sprinkle/drizzle.
I packed and planned on using my IC-705, mAT-705 external ATU, and Vibroplex End-Fedz EFT-MTR wire antenna.
I had an issue with the mAT-705 ATU (read more here), so opted for my trusty and incredibly capable Emtech ZM-2.
I did begin the activation in CW and quickly racked up a dozen or more contacts in short order after spotting myself. One of the great things about Lake Norman State Park is it’s one of the few locations I activate these days with proper cell phone coverage for mobile internet so that I can update my own activation spots on the POTA site.
I also moved up to 20 meters and switched over to my recently (re)acquired Elecraft KX1 (FYI, I named her “Ruby” so no way will I sell her again).
I quickly snagged two states (Iowa and Kansas) with 1 watt of power from the KX1’s internal AA cells, then 20 meters fell silent, so I moved to 30 meters to work a few more stations.
SSB on 40 meters
I then moved to the 40 meter band and decided to record a quick video after spotting myself on 7197 kHz. I wasn’t expecting such a productive mini pile-up.
As you can tell from the video, I had my hands full trying to hold my phone/camera, log, and manage the hand mic. Note, too, I prefer not hooking up the speaker portion of the microphone because audio from the IC-705 internal speaker is far superior:
I operated SSB for a good 30 or so minutes and was busy with contacts thanks to all of those excellent POTA hunters.
IC-705 Voice Memory Keyer
Before packing up, I remembered that my buddy Dave had asked me to make a video showing how I use the IC-705’s voice memory keyer, so I moved up to 20 meters (which you’ll see was pretty much dead) and recorded this.
Doh! I had the SSB position in LSB instead of USB! Thanks to one of my YouTube viewers who noticed this. I had been tinkering with mode settings earlier while evaluating the rig. No worries, though, this was more a demo of the memory keyer–check out SSB operation in the video above.
I was actually very relieved 20 meters was dead because I’m terrible at managing a camera, a tablet, and a microphone all at once!
The Icom IC-705 is an SSB champ
Photo taken at South Mountain Game Land last week.
Despite the fact that I was using the default microphone settings and had not even touched the TX EQ or compression, I received no less than three unsolicited compliments about my audio during this activation. That is probably a personal record.
No doubt, the IC-705 is a very capable rig for QRP SSB where audio quality is essential.
On top of that, the eight voice keyer memories are incredibly useful when activating a park, a summit, or even running a contest where you could truly automate your exchanges.
Have you been using the IC-705 in the field? What are your thoughts? Do you have any questions? Please feel free to comment!
I feel pretty lucky that my QTH borders tens of thousands of acres of protected lands: a watershed, Pisgah National Forest, and Pisgah Game Land WRC. Our family enjoys hiking, so we often venture into the forest around our house and explore the ridge lines, peaks, and views.
This year, while exploring all of the public lands available to activate in the Parks On The Air (POTA) program, I realized there were no less than two sites within a 30-35 minute hike of my home! Quite literally, in my back yard.
In fact, there’s a large area where two POTA entities overlap–Pisgah National Forest and Pisgah Game Land–giving me the opportunity to activate both sites simultaneously as a “two-fer.”
If it’s so close, you may wonder why I haven’t activated it yet–? Well, by the time I realized the park boundary overlap was within hiking distance of the house, we were well into spring, thus the forest was lush with vegetation and the hike to the site requires proper trail-blazing with an elevation change of 600′ (183M). It’s a much easier hike in fall and winter when you can actually see where you’re going through the trees.
Still: Saturday morning, the weather was so perfect for hiking I floated the idea by my teenage daughter, Geneva: “I’ve got a hankering to hike up the mountain today and do a POTA activation.” She replied, “I’ll need to pack my daypack and take the HT.” She was eager to see if she could communicate back to the house simplex with her mom and sis with her new FT-60R handheld.
My wife gave me her blessing, so I packed my trusty Red Oxx C-Ruck with my Elecraft KX2 kit, CHA Emcomm III Portable antenna, water, snacks, logbook and tablet, and used the ruck top flap to secure my three leg folding stool.
Pisgah Game Land WRC (K-6937) & Pisgah National Forest (K-4510)
We arrived at a suitable site about 40 minutes after leaving the QTH. My Garmin GPS and topo maps confirmed we were well within park boundaries. I found a rock outcropping and set up my station.
Even though the area was pretty dense with trees, Rhododendrons, and Mountain Laurel, I had no difficulty deploying the Emcomm III Portable antenna using my throw line.
That’s not a flying squirrel, it’s the winder/balun of the Emcomm III.
The Elecraft KX2 had no trouble at all matching the Emcomm III on all bands.
Even though Geneva was busy communicating with her sister (back at “Mission Control” via simplex) on the FT-60R, she actively logged all of my contact on the Surface Go tablet using N3FJP’s excellent contact log.
I quickly logged eleven contacts on 80 and 40 meters and my daughter suggested we cut the activation a bit short to take in more hiking.
We both wanted to follow a trail we found and see if it lead to the Blue Ridge Parkway.
Hazel has that “Seriously? You want to continue hiking?” look.
I packed up the station and hit the trail!
It turned out to be a good 45 minute trek along a ridge line increasing our elevation about 1,000′ (305M) ASL compared with home. The trail to the BRP was what I would call a moderately difficult trail (much easier than trail-blazing up the mountain!).
In the end, we found the Blue Ridge Parkway and the trail head to ascend Lane Pinnacle which is an excellent SOTA site. We decided to save Lane for another day this fall/winter with a very early departure from home.
Neva also discovered she could easily chat with her sister back at the QTH via 2 meter simplex at the parkway. This means I can definitely chat with the family back home when I eventually make that Lane Pinnacle SOTA activation.
The hike back to the POTA site was mostly downhill so only took about 40 minutes. I then veered off the path to trail-blaze our way back to the house. I did get a little off course which added about 25 minutes (!!) to our descent and requiring us to mitigate the steepest part of the ridge. Next time, I’ll pay more attention to my GPS map (although, in the winter, it’ll be much easier).
Still, it was a very enjoyable hike and certainly one of the more challenging I’ve been on in ages mainly due to the steep part at the end.
All-in-all: I discovered that there are no less than three POTA sites and one SOTA site within hiking distance of the QTH. The best part, by far, was the father/daughter time. Geneva is always up for an adventure (including currently studying for her General class license!).
Thursday, I set out to test how long the Icom IC-705 could operate during a Parks On The Air (POTA) activation with one fully-charged Icom BP-272 Li-ion battery pack. This, following my listening endurance test.
I knew conditions were pretty terrible Thursday in terms of propagation, but that didn’t really matter. I intended to call “CQ POTA” in CW until the ‘705 finally shut down due to low voltage. In my head, I imagined this wouldn’t take much longer than 1.5 to 2 hours and during that time, despite propagation, surely I’d work 10 stations to validate the activation, right–?
Sandy Mush Game Lands (K-6949)
I picked Sandy Mush Game Lands as my test site. Since I’d been there before, I knew there were ample trees to hang the Vibroplex EFT-MTR end-fed antenna, and I knew I’d likely be the only one in the parking area as this site is secluded and this was not a designated hunting day.
The Vibroplex/End-Fedz EFT-MTR antenna
Setup at the site was pretty straight-forward. I quickly deployed the EFT-MTR antenna–using my arborist throw line–in a “V” shape hanging over a high tree branch.
I picked the EFT-MTR because it’s resonant on my three favorite POTA bands: 40, 30, and 20 meters. Note that the IC-705 does not have an internal ATU.
Although I have an mAT-705 external ATU on loan to test, I didn’t take it to this first activation–I wanted to keep the set up simple for testing battery endurance.
On the Air
I started calling CQ at 16:30 UTC on the 40 meter band and set the IC-705 to beacon mode call “CQ POTA K4SWL.” No replies for 10 minutes. At that point, I discovered the POTA spots website was down for a scheduled upgrade (I have impeccable timing!), so I posted my spot on the POTA Facebook page.
Then my buddy Mike (K8RAT) sent a text message stating that the Reverse Beacon Network (RBN) had spotted me, but with a very low signal report. Hmmm….why would that be?
Note to IC-705 owners: zero watts is not zero watts!
I turned up the power to 5 watts (the max the IC-705 will achieve on a 7.4V battery pack) and was greeted by an instant CW pile-up.
What a blast! I started on 40 meters in CW, but eventually worked both 40 and 20 meters in SSB and CW. I then lowered the antenna, removed the SMA cap on the EFT-MTR coil, and worked 30 meters CW for the remainder of my time.
I logged my first contact at 16:28, my last at 18:18 UTC. So 1 hour 50 minutes of near constant operating.
Remaining battery capacity after 1:50 of operating.
The IC-705 battery pack was still going strong and had about 40% capacity left, but I simply ran out of time as I needed to run an errand in town, so had to shut down the radio and pack up.
I must admit: the IC-705 is doing a much better job managing battery usage than I would have expected. I’m guessing I could have operated for 3 hours or so at 5 watts without needing to recharge the BP-272 1880 mAh Li-ion battery pack.
I do believe I’ll invest in the larger BP-307 battery pack which has a capacity of 3100 mAh. It’s a pricey battery, though, at $130 US.
How does the IC-705’s battery endurance compare with the Elecraft KX2? I’m not sure yet, but I’m guessing the KX2 will have even better longevity as its current drain is less than half that of the IC-705. The KX2 will operate at 10 watts output for about 1 hour 15 minutes with the internal battery pack, before decreasing to 5 watts output. I’ve never tried a battery endurance test with the KX2 at only 5 watts.
Of course, with an external 12 volt battery, the IC-705 will pump out a full 10 watts of power as well.
Five watts and a wire–wow!
The biggest surprise of the day?
I worked stations from Oregon, and Saskatchewan to the Azores…in single sideband!
Here’s a map of my contacts–red signal paths are SSB, CW in green (click to enlarge):
This was one activation where 5 watts SSB actually snagged more DX than CW. Great fun!
While I’d like to think it was a little IC-705 “mojo” on its first field outing, in truth it had everything to do with the EFT-MTR antenna and what must have been a moment of propagation stability.
This was also my maiden voyage with the CW Morse Single Lever paddle. CW Morse sent this paddle, along with their double lever paddle and a selection of straight keys, for me to evaluate. If you’ve been considering an affordable, portable single-lever paddle, this is a brilliant one. I really enjoyed using it and the action is very easy to adjust.
I’m already regretting the decision to send it to my buddy Eric (WD8RIF) for a proper evaluation. (Just kidding, Eric! (Maybe.)) He only uses a single lever paddle for his numerous field radio adventures.
Eric will give this single-lever paddle a proper workout and give us a full report.
I must admit, I had a lot of fun with the IC-705/EFT-MTR antenna combo.
Of course, I’ll be taking the IC-705 to the field a lot in the coming weeks.
IC-705 Questions?
Feel free to comment and ask any questions you may have about the IC-705. I’ll do my best to answer them.
Practicing left hand lunching, right hand keying/logging!
It seems like lately I’ve had to work hard to log 10-15 contacts during my Parks On The Air (POTA) activations. Propagation has been so flaky, I use every trick in the book to snag at least my ten contacts for a valid activation: change antenna configuration, run up to 40-50 watts output, employ both CW and SSB, have friends spot me on the network, and try every band possible (typically from 80-17).
Note that the majority of my activations are proper QRP and rarely do I spend longer than 60 to 90 minutes actually on the air. Indeed, many of my activations are only 60 minutes long including set-up and take-down. That may seem short to most POTA folks, but that’s what works in my schedule and family life: quick hits. It’s one of the reasons I’m not more active in Summits On The Air (SOTA)–I need more time for those sites as they’re not as accessible as our numerous POTA entities.
Still, our local star has been misbehaving, and I had not planned to do an activation on Sunday (September 28) because I saw the propagation forecast and it was rather discouraging (A index 26, SW 505, Bz -2).
From home that morning, I chased a few parks but found it challenging to hear most of them. QSB was incredibly deep–strong stations gone in an instant.
Still, my wife suggested we take a picnic to one of our favorite local spots and how could I possibly visit a park without activating it? Right–?
Zebulon B. Vance Birthplace (K-6856)
What we, as a family, love about this site is the large covered picnic area and historic log cabins. Also, the site receives very few visitors on Sundays when the main museum is closed.
Each time we visit the Vance site, we bring my MSR liquid fuel stove and make lunch/dinner.
I set up the stove, got lunch started and my wife took over food prep.
Knowing propagation was unstable, I opted for more than QRP power this time–at least, at first–so I chose the Mission RGO One transceiver (capable of 55 W output) and CHA Emcomm III Portable antenna for this activation.
I deployed the Emcomm III in a sloping configuration with the end of the 73′ radiator high in a nearby (dead) tree and the counterpoise on the ground. I also suspended the winder/balun from the corner of one of the shelter’s rafter’s with paracord.
Since it’s difficult to see a wire antenna in photos, I’ve labeled the components in the following image (click to enlarge):
I didn’t know if this configuration would prove useful, but I knew it would be better than attempting this activation with my Wolf River Coils TIA vertical antenna.
I hopped on the air starting on 80M CW (at the request of my buddy WD8RIF), worked him and three stations in rapid succession. After a few minutes of silence, I moved up to the 40 meter band and worked 16 stations. I then moved to 30 meters and worked 11 stations.
I was working more stations than I would have ever guessed beforehand.
Since I only had about 10 minutes to spare after working 30 meters, I decided to plug in the microphone and work some park-to-park contacts. While I always intend to hunt for other parks while I’m in the field, more times than not, I don’t have the luxury of an Internet connection to check the POTA spots page like I did at Vance on Sunday.
I must say, I really love the CW Morse double paddles. They’re fully (and easily) adjustable, the action is responsive and smooth, and with the base, they’re incredibly stable on a hard surface. I highly recommend them.
At a setting like we had at Vance, I love the heavy base plate, but if I planned to hike into a site, I believe I’d remove the base to save on weight.
Unpredictable Propagation?
Perhaps there was a brief window of stability between solar events and I was able to take advantage of that while I was on the air? I’m not sure.
I never expected to log 37 contacts in the space of a little over an hour (with some of that time being off the air to help with picnic prep). Not on that Sunday when the solar numbers were in the dumps.
I’d like to believe it was a combination of things:
A large wire field antenna with decent gain and the ability to work multiple bands
40 watts of power (at first, I backed down to QRP on 30 meters)
Using CW for 34 of the 37 contacts
Perhaps unintentionally good timing
All I know is, I had a blast! It’s hard to beat a combination of good radio, good food, good scenery, and good weather!
I suppose this was also a lesson in simply hitting the field and ignoring the propagation.
Or as Rear Admiral David G. Farragut once famously said, “Damn the torpedoes, full speed ahead!”
Weather in North Carolina has been absolutely stunning over the past week, with the exception of two days where the remnants of Hurricane Sally dumped torrential rain. Two cold fronts provided us with gorgeous clear skies and dry conditions before and after Sally’s visit.
Of course, what better way to enjoy the outdoors than taking my radios to the field?
Last Wednesday, after several hours of knocking out home projects, my wife and I decided to enjoy the fall-like weather and get lost in Pisgah National Forest. My daughters were also keen for a little outdoor adventure, waterfalls, and hiking.
And our canine family member, Hazel? Always up for an outing!
“Let’s go, daddy!”
Of course, my wife was throwing me a bone as she knew I was chomping at the bit to try the new-to-me Chameleon Emcomm IIIantenna.
CHA Emcomm III antenna
Photo Source: Chameleon Antenna
I decided I’d pair the Emcomm III with the amazing Mission RGO One transceiver (a rig I’ll be reviewing in an upcoming issue of The Spectrum Monitor magazine).
Up to this point, I’d never used a Chameleon antenna in the field.
Chameleon Antenna kindly sent me both the CHA Emcomm III and CHA P-Loop a couple weeks ago for an honest field evaluation (and disclaimer: at no cost to me).
And being honest? The overall length of the Emcomm III wire antenna was intimidating. I’m used to field-ready wire antennas that are perhaps 30-41 feet in total length. The Emcomm III has a 73 foot long radiator and 25′ counterpoise! Holy smokes!
In my head, I imagined the only places I’d be able to use the Emcomm III would be in an open park with large, widely-spaces trees.
Turns out, I was wrong.
Two things make deploying the Emcomm III a breeze–even in the middle of a forest:
1.) An arborist throw line: this piece of kithas revolutionized my field antenna deployments. Not only does it give me the ability to suspend antennas much higher than I could before, but also to raise/lower antennas with ease compared with fishing line.
2.) The Emcomm III also has a floating dielectric ring on the radiator wire that allows you to create a suspension point. In fact, there are a number of ways you can deploy the Emcomm III which, I see now, makes it such a popular antenna among POTA operators.
To the field!
The first activation was actually a “two-fer”–meaning, two geographically-overlapping POTA park entities.
Wednesday, September 16: Pisgah National Forest (K-4510) & Pisgah Game Lands WRC (K-6937)
Propagation conditions on Wednesday were so crappy I found myself breaking with QRP to run 40 watts with the Mission RGO One into the Emcomm III. (The Emcomm III can actually handle up to 50 watts CW, 100 watts SSB.)
I first deployed the Emcomm III by pulling the radiator over a tree branch about 50′ high with the balun and winder near the ground. I then unrolled the counterpoise stretched out on the ground.
After only snagging about eight contacts in 50 minutes (a very meager amount for the typical park activation), I decided to re-configure the Emcomm III Portable so that it would act more like a NVIS antenna and perhaps grab a few regional hunters on 80 meters. There was no way I was leaving the forest without my 10 contacts to validate the activation!
I reeled in the radiator and re-attached my throw line to the floating loop and reconfigured the antenna to roughly match this “V” shape with a lower (roughly 25 ft) apex point:
NVIS “V” configuration (lifted from the CHA Emcomm III Portable product page)
I used the RGO One’s internal ATU to match the 80 meter band 1:1.
I started calling CQ on 80 meters CW and, evidently, the POTA site auto-spotted me via the Reverse Beacon Network (RBN) because within a minute, I found myself at the other side of a mini pile-up! I very rapidly worked 8 stations–most of them were in nearby Tennessee. These were callsigns I was not used to logging because typically they’d be under my skip zone–a little too local.
It was nice to get solid copy on 80 meters without the deep QSB on 40, 30 and 20 meters.
The thing that struck me about the Emcomm III at this first activation was how easy it was to reconfigure in the field despite the lengthy radiator. The wire is Copper Clad KEVLAR PTFE (Telflon-coated) and doesn’t easily tangle. It slides so easily through the trees–there’s no coil or bulky bits to get caught in the limbs.
When packing up, it wraps around its built-in winder very easily. Kudos to the designer.
Saturday, September 19: Pisgah National Forest (K-4510) & Pisgah Game Lands WRC (K-6937)
Last Saturday, I wanted to try the CHA Emcomm III in a different region of Pisgah National Forest and see how well it might pair with my Elecraft KX2.
We found an ideal spot to set up: a forest service road that had obviously been closed the entire season.
I deployed the Emcomm III Portable in the same “V” configuration as I did during the first activation, but this time raising the apex of the “V” up to 45 feet.
It’s important to note here that being a random wire antenna, the Emcomm III relies an an ATU to get good matches on each band. The Mission RGO One’s internal ATU did a brilliant job finding matches and, turns out, my KX2 did as well.
In fact, before I started calling CQ, I moved across the bands to see if I could get good matches with the KX2 ATU. From 80-20 meters, I think the highest SWR I had was 1.3:1. (The KX series ATU is truly a benchmark in my book!)
That day, even though the weather was gorgeous, propagation was terrible. I read a few reports from experienced POTA and SOTA folks who couldn’t snag the needed 10 contacts for a valid activation earlier that day. There were contests and QSO parties on the bands so lots of signals–but more than once on the phone portion of the 40 meter band, I could hear two stations calling CQ on the same frequency and trying to work the same stations totally unaware of each other. Not a good day to play radio in the field and was starting to wonder if I could even snag my needed ten contacts.
Turns out, I had nothing to fear.
Since I could, quite literally, pick any band the KX2 could transmit on, I was able to float across the HF spectrum, call CQ, and the RBN would make sure I was spotted properly to the POTA network.
Getting that first ten is a great feeling!
I pretty effortlessly snagged my ten, and then a number to boot.
When I seek a spot to set up in a national forest, I often look for forest service roads with locked gates. When I set up on an unused road, it typically means I’ll have a high branch to hang the antenna and also a little space to deploy it without touching other trees. Our spot on Saturday was ideal.
Again, hanging and deploying the Emcomm III was effortless. I did bring about 12 feet of paracord with me this time allowing me to tie off the end of the radiator if I chose the “V” shape.
Monday, September 21: Mitchell River Game Land (K-6926) & Stone Mountain State Park (K-2754)
Monday was another stunning weather day.
I decided I wanted to finally make a pilgrimage to an ATNO (All Time New One) POTA site I’d been eyeing for a few months: Mitchell River Game Land.
Because propagation was fickle and this site was a good 3 hour round trip from where I was staying with family, I planned to use the Mission RGO One and run 40-50 watts or so.
However, when I got to the site, I realized I’d left the RGO One’s power cable at home. Fortunately, I still had my Elecraft KX2, so 10 watts would have to do.
I found a large parking pull-off area surrounded by trees. There was a ton of room to deploy the Emcomm III.
I decided to extend the radiator in a sloping configuration and elevate the 25 foot counterpoise.
The configuration was Identical to the one above , but the balun/center winder and counterpoise were suspended about 4 feet off the ground.
I fired up the KX2 and started calling CQ on 80 meters. The RBN picked me up and the POTA site auto spotted me. In a couple of minutes, I snagged my first three stations, then I heard no other calls, so moved up to 40 meters where I worked a big pile-up of stations. It felt like a mini-DXpedition at times. I loved it!
I even hopped on the phone portion of the 40 meter band and worked a few stations, getting respectable signal reports despite unstable propagation.
This activation went so well and the weather was so ideal, I decided to fit in another park that was only a 30 minute drive and was new to me: Stone Mountain State Park.
The thirty minute drive was relaxing and reminded me how much I enjoy this portion of the NC foothills leading up to the Blue Ridge Parkway and escarpment.
By the time I reached the park it was 1:30 pm on a Monday and I essentially had the place to myself (even though in my head I was preparing for crowds).
I had my pick of picnic spots so I found the one with the highest branches. One shot with the arborist throw line and I snagged a branch that must have been 45-50 feet high.
I first deployed the Emcomm III by simply running the radiator over a tree branch and laying the counterpoise on the ground–much like I did in the first Emcomm III activation and deployment.
I started calling CQ and worked about 4 stations, then nothing. The bands simply died on me!
After 30 minutes, I reconfigured the Emcomm III into a similar “V” shape I used at Pisgah National Forest with the apex at about 40 ft and the center winder and counterpoise elevated about 3 feet.
After some persistence, I finished off my ten contacts and then packed up–I spent about 70 minutes on the air and needed to grab lunch!
I honestly believe I would have found this activation even more challenging if I didn’t have an antenna that could snag stations on the 80 meter band since it was in the best shape that afternoon.
Again, I was very impressed with how easy it was to reconfigure the Emcomm III.
Tuesday, September 22: Tuttle Educational State Forest (K-2754)
After staying two nights with my parents in the Piedmont of North Carolina, I made my way back home to the mountains Tuesday afternoon. Again, the weather lured me back out to make just one more activation! (Let’s face it: the weather is a bit of an excuse).
One of my favorite parks that’s only a 20 minute detour off my path is Tuttle Educational Forest. It’s never busy there and they have a large picnic area with ideal trees for hanging antennas.
After searching through my main field pack (a Red Oxx C-Ruck), I found a spare power cord that would work with the Mission RGO One transceiver.
I didn’t have a microphone, though. That’s okay: it would be a CW-only activation.
Although I had the park to myself, I didn’t want to take up a large portion of the picnic area by deploying the Emcomm III in a sloping configuration similar to my activation at Mitchell River. I decided, instead, to be space efficient and use the “V” configuration once again with the apex at about 35 feet and the counterpoise on the ground. By doing this, the antenna footprint could almost fit within my picnic table area (although my counterpoise did snake into the woods).
I can’t remember how long I was on the air, but I do remember it was a breeze logging contacts that afternoon. Very enjoyable. I do love the Mission RGO One–the receiver is amazingly quiet, sensitive, selective, and signals simply pop out of the ether. It also sports silky-smooth QSK. Again, although I’m 90-95% a QRPer, it’s nice to push the juice a bit when propagation isn’t kind. The RGO One will push 55 watts.
The Mission RGO One ATU also snags excellent SWR matches across the band with the Emcomm III.
Emcomm III initial impressions
This past week, I gained some serious respect for the Emcomm III.
What impresses me most is its versatility and robust quality.
Don’t get me wrong: it’s not a magic antenna or anything. It’s essentially a random wire antenna.
What makes it such a fabulous field antenna, though, is its configurability. That and its uncompromised military-grade construction.
I shouldn’t have been so concerned about the radiator length as it’s actually pretty easy to accommodate and helps make this an efficient antenna on the low bands. (Look for me activating parks on 160 meters this winter!)
I believe I can deploy the Emcomm III anytime I have a half-decent tree nearby. I believe I could also use my 31′ Jackite fiberglass pole to extend one end or even the middle of the antenna if I wanted to go NVIS, but I would have to be careful to accommodate strain relief since the Emcomm III Portable is made of heavier materials than my EFT Trail-friendly antenna, for example.
I’m not sure I’d ever reach for the Emcomm III for a SOTA activation when I’d need to take a close look at weight and size. But for POTA? It’s brilliant. And, of course, for emergency communications (as the model name implies). The Emcomm III would also be an excellent addition to a radio club’s antenna arsenal.
The Emcomm III, like all Chameleon products, is designed and made in the USA. Since they use military-grade components, you pay a premium. The Emcomm III is one of their least expensive products at $139 US. Is it worth the price? Absolutely. In fact, I’m thinking about buying a second one to keep in my camper.
Thank you, Chameleon Antenna, for sending me the Emcomm III Portable for a proper field evaluation. I’d also like to thank Chameleon Antenna for agreeing to be a sponsor of QRPer.com!
At least 95% of the time I’m playing radio in the field, I use wire antennas and suspend them in trees.
Since I do a lot of park activations for the POTA program, trees are typically very easy to come by and most of the time the park office doesn’t care if I hang an antenna in their tree for a couple of hours.
For years, I’ve been using a heavy steel nut–a nut that would fit a very large bolt–as a weight and attach it to fishing line. I then simply throw the nut into a tree and pray the fishing line deploys properly. I have reasonably good aim, so–on a good day–I typically only need one or two throws/tries to get the fishing line over a branch. On bad days? Well… let’s just not talk about that.
There are some inherent weaknesses in the fishing line/monofilament system:
First of all, I’m lobbing a heavy metal object into the trees. If it ricochets–and it eventually will–it can come back down to earth and land where you might not want it to (for example, on your radio, on your car, or on your friend’s head). Fortunately, I’ve never hit anything or anyone as I’m careful to clear the area first, but unfortunately, I once had the nut hit a tree and come back down near me. That was a little scary.
Secondly, fishing line isn’t exactly recyclable and you simply can’t use it over and over. I get at most three deployments with a section of fishing line before it gets too stretched and unworkable.
Finally, fishing line is incredibly prone to tangle, especially near the end of the spool.
A Better Solution? The Arborist’s Throw Line
The arborist throw line is no recent innovation. For years, I’ve read recommendations from other ham radio operators who swear by arborist throw lines but I only recently decided to take the plunge after one very frustrating park activation where my fishing line knotted and almost got permanently stuck in a gorgeous tree. I’m very much a “Leave No Trace” kind of guy, so I was incredibly relieved when I was finally able to work the fishing line out of the tree.
I once talked with an arborist about throw lines and he stressed the importance of getting not just the line, but also a throw line storage cube. The cube allows you to both deploy and take up the line without any tangles or knots.
All in, I spent about $50.00 US for both.
Preparing the throw line
My arborist buddy gave me an important tip: the throw line needs to be stretched.
As you can see in the photo above, the throw line is packed in a bundle that’s easy to unroll. After you unroll it for the first time, though, the line has a “memory” of all those bends from its life in the package.
You can remove much of the throw line memory by tying one end of the line to a tree and stretching the line to its full length. The line is 150 (or so) feet long, so you’ll need an open space to do this.
The arborist in this video shows how this is done (I’ve queued it to the point in the video where he shows how to do this):
Knots
You’ll need to attach the throw line to the throw weight, of course.
There are a number of knots arborists use, but I’m a fan of the slipped simple noose knot. Perhaps it’s because it’s easy to tie even with semi-rigid line, it holds quite well and, most importantly, it’s easy to untie.
Looks like arborists use it too because when searching for an instructional video, the first result was from an arborists’ channel:
Throwing up!
There are a few different ways to launch a throw line into a tree.
Take my advice here: practice at home before you hit the field! It could save you a lot of embarrassment, although, admittedly, my at-home practice sessions gave my wife and my daughters good reasons to chuckle.
I’ve only been using the throw line for a little over a week, so I’m still sorting out which method works best for me. One thing I discovered very quickly, though: no matter which launch method I use, I can send that throw weight into a tree at least 60% higher than I could before.
No doubt, the throw line and weight really put the laws of physics in your favor!
Here’s a great video highlighting different throw line launch techniques:
In practice
I took the throw line to the field today for the first time and I’m very pleased with how effectively it works.
I was able to place my antenna on a much higher branch than I could have otherwise. It took me three tries today, but it had more to do with my poor aim. As with any skill, this will, I think, improve with practice.
The storage cube folds down flat and keeps the line from tangling
Besides the improved antenna height, I love that the line can be used over and over again. Also, it’s strong enough that should it ever get caught in a tree, I can pull it out without the line breaking.
I can also reel in the line at least three or four times faster than I could with fishing line. Simply flake it into the storage cube one foot at a time.
When the line has been stored along with the throw weight, you can fold the storage cube down flat, then fold and secure it into a compact triangle.
Are there any negatives with the throw line system? Here are a few I’d note:
Bulk. Even when packed down, the line in the storage cube take up much more space than fishing line. Although it easily fits in even my smallest backpack (the GoRuck Bullet), I’m not sure I’d take it on a long hike.
This system requires a little practice and skill–you can’t pull it out of the package for the first time in the field and expect perfect line launches.
The throw line is more conspicuous than fishing line. If you’re trying to be a bit stealthy–as many of us are these days during the Covid-19 pandemic–the bright yellow throw line will attract more attention and questions from other hikers/campers, etc.
One happy activator!
Even though it’s bulky by my standards, I see the throw line becoming a permanent part of my field kit and I expect I’ll use it on most of my POTA activations.
Have you been using a throw line to hang field antennas? Or do you use a different system? Please comment!
QRP radios, product announcements, reviews, news and more. Low power amateur radio fun!
Please support QRPer by adding us to your whitelist in your ad blocker. Ads are what helps us stay online. All of our ads are ham radio related--no junk, we promise! Thank you!


 Not at all bad for 10 watts and a wire!


