Yesterday was one of those rare days where I had no pressing reason to leave the house—other than the temptation of a POTA activation. These days are a rarity, and honestly, staying home often wins out. As much as I love POTA, it’s also nice to settle in and simply enjoy being at home.
Yesterday afternoon, I deployed an EFHW antenna outside and tinkered with digital modes I hadn’t used in a while—mainly FT8, FT4, and PSK31. I connected my IC-705 to my MacBook Pro over WiFi using the excellent SDR-Control app.
When the cold started to bite (14°F/-10°C with a brisk breeze), I retreated indoors to my warm shack. With a mug of hot chocolate in hand, I performed a small ritual I repeat every few months as part of my field radio workflow:
Re-reading the manual
That’s right!
You’ll be seeing more of the Currahee soon!
I typically have a particular radio I want to revisit. Yesterday, I focused on the KH1 and the MTR-3B, as well as the new Currahee (see above).
Recently, while using the KH1 in the field, I couldn’t recall how to move between CW message memory banks (M1, M2, M3 and M4, M5, M6). Even though I know this radio well—since I’m in the testing group, it’s one I’ve explored extensively—I had a mental blank. So, I grabbed the manual, found the answer, and practiced the process until it felt second nature again.
After that, I skimmed the manual cover to cover. I didn’t read every single word but focused on pages that covered features I rarely use during POTA or SOTA activations.
Every time I do this, I learn something new.
I decided to make a short video about this habit of mine and why I think others should give it a try (see below). I get so many questions from readers about how to operate their radios—often their only radio—and it’s clear that many haven’t opened the manual since unboxing their rig. Instead, they rely on Google or YouTube for answers.
When someone asks me how to perform a specific function, I don’t want to sound grumpy by saying, “Read the manual!” Instead, I point them to the exact page they need and encourage them to read the entire manual. It doesn’t take that long and there’s a reward in the end.
Here’s the thing: when you invest in a high-quality transceiver, you owe it to yourself to fully explore its functions and features. Why not maximize your “return on investment” by understanding everything your radio is capable of?
Reading the manual isn’t just about solving immediate problems—it’s about discovering hidden gems that could enhance your experience on the air.
On the Ham Radio Workbench Podcast, we’ve talked about this very topic, and it turns out I’m not the only one who re-reads manuals regularly.
So, do you ever revisit your radio manuals? Have you found this practice helpful? I’d love to hear your thoughts—please share in the comments!
Many thanks to Christian (IX1CKN) who shares the following field report:
How the Red Corners uSDR+ Performed on Its First Field Test
by Christian (IX1CKN)
24 QSOs in 104 minutes at 5 watts—how would you rate that? The answer isn’t exactly scientific, as it depends on personal opinions, habits, and the unique propagation conditions during the activation. But in my eyes, as the first test of the “Red Corners” (a.k.a. USDR+), it’s definitely a positive result.
I wanted the “first time” with my new QRP radio (which has been catching the attention of more and more operators) to be out in the field, so on Thursday, the 29th August 2024, I headed to the Tsatelet Reserve (IT-0120) to contribute to the Parks on the Air (POTA) program.
I have to admit, I had doubts about reaching the 10 contacts needed for validation. I arrived at the site at 15:16 UTC and set up a 1/4-wave vertical antenna on the ground. I decided not to use an external mic, just the built-in one. The setup was then in “walkie-talkie” mode, fitting in one hand, leaving the other free for logging or filming. Conceptually and practically, it was real freedom.
The first few calls brought in four quick responses, one per minute.
Encouraging start, but then it felt like the band “died.” So, I adjusted, searching for stations that were calling in return. I found several, including Roberto (IG9ITO) from Lampedusa Island —always a pleasure to QSO with him—and I also logged Carmelo (IT9ESF) from Messina.
Between calling and moving around to catch other activators spotted on the cluster (thanks to the dual VFO, although you need to navigate through the menu to switch), I managed to increase the contact count to 24 by the end.
Notably, I logged 9 “park-to-park” QSOs, including the longest distance of the day—1820 km to TA1EYE. That’s a rare feat for a single activation. Some colleagues were operating from 2-fer areas, but I prefer to count unique calls, which is still interesting data.
It’s interesting because it shows that the “Red Corners” has the power to reach operators who, as activators, don’t necessarily have fancy antennas or are dealing with challenging terrain and horizon. It happened 9 times today, so it’s not a coincidence. I’d also like to point out that I didn’t use an external tuner. I noticed that adjusting the vertical whip length allowed for an SWR of 1.2 across the band, which I found acceptable. Plus, it feels like a solid device in hand and looks good sitting on a rock.
What else can I add that the video below doesn’t show? The “Red Corners” uSDR, like the Quansheng UV-K5 (another recent “must-have”), has some objective limitations. I won’t rehash them here—there are plenty of posts covering that. This makes it impossible to consider this Chinese QRP rig as a replacement for our shack radios. However, considering its limitations and focusing on portable use, its value for money becomes a strong point and offers an interesting angle.
The first test went well, but there will be more (I’ll also get the monoband whip, and it will be fun to try pure “walkie-talkie” operations).
The video was only recently published, but I’ve added it to Christian’s original field report. We’re highlighting it here for those who may otherwise miss it. (Note: Some of the video is in Italian, but YouTube closed captioning can auto-translate.)
On Wednesday, July 10, 2024, my wife and I were in the middle of a week-long stay in Wilmington, North Carolina, while our daughters attended residential programs at NCSU and UNCW.
That particular day, we couldn’t decide what to do because the weather was fickle! Temperatures and humidity were high, fueling a constant string of isolated thunderstorms rolling over Wilmington and the Cape Fear River area. Every hour or so, a new storm would roll past.
Heather suggested I fit in a POTA activation, and, of course, I loved the idea. I just didn’t want to play radio anywhere near thunderstorms.
We decided to drive south to one of my favorite coastal towns in North Carolina: Southport. Based on the weather radar, it looked like we could drive to Southport on the west side of the river, then return via the Fort Fisher Ferry on the east side, potentially avoiding most of the isolated thunderstorms moving north along the coast.
En route, we drove into a thundershower with rain so intense that most cars on the road turned on their hazard lights and slowed to a crawl. Visibility was nil.
Fortunately, the heaviest rain only lasted 10 or so minutes, and by the time we were two minutes from the park entrance, it had slowed to a drizzle. As we parked at the visitor’s center, it had all but cleared up.
Brunswick Town/Ft. Anderson State Historic Site (US-6834)
Brunswick Town/Fort Anderson State Historic Site is unique in that it offers a blend of colonial and Civil War history along the beautiful Cape Fear River.
Founded in 1726, Brunswick quickly grew into a bustling port town known for exporting naval stores. However, the town was burned by British troops in 1776 and never rebuilt, leaving behind ruins for visitors to explore today.
During the Civil War, Confederate forces constructed Fort Anderson atop the remnants of Brunswick. The fort’s earthen walls and impressive gun emplacements now stand as a reminder of the region’s strategic importance during this turbulent period.
Visitors can explore the colonial foundations and Civil War earthworks, while enjoying the river waterfront.
There’s also a visitor’s center with exhibits detailing the area’s rich history.
I was pleased to spot a picnic area on the opposite side of the parking lot from the visitors’ center. This would allow me to set up close enough to the car that if another storm approached, I could pack up quickly.
First, I introduced myself to the staff and asked for permission to activate. I was confident they would grant it, as this site had been activated 39 times already (mine would be the 40th).
The two park rangers inside were incredibly kind and accommodating. My wife and I ended up speaking with them about history for nearly 30 minutes. I also gave them more insight into the POTA program and asked if activators were following their rules. Fortunately, they gave a very positive report. NC State Historic Sites protect both the archaeology of the site and the natural resources, so I always ask for permission to activate because some sites have restrictions about putting lines in trees or stakes/spikes in the ground. Fortunately, this was not an issue at the picnic area.
Setting up
Since weather was iffy and since Heather and I wanted to spend the rest of the afternoon in nearby Southport, I decided to pair my Elecraft KX2 with my AX1 antenna.
This also gave me a chance to try out a new 3D-printed bipod that my friend Mike (KE8PTX) sent me.
I was really amazed at 1.) how easy it was to attach the clip to the antenna’s BNC base and 2.) how incredibly stable this Bipod felt even compared with the OEM bipod.
Thank you, Mike (and Adam)!
With the radio set up, I was ready to activate!
Gear
Note: All Amazon, CW Morse, ABR, Chelegance, eBay, and Radioddity links are affiliate links that support QRPer.com at no cost to you.
I assumed 20 meters would be the best place to start and, frankly, I hoped it would be productive enough to cap off my activation in short order so that my wife and I could continue our travels.
Those of you who know me know that I’m a huge World War II history buff. Ever since I was a child, I’ve been fascinated by the stories of bravery, sacrifice, and technological innovation that defined this era.
That’s why the activation I performed on Tuesday, July 9, 2024, was very special.
I activated the Battleship North Carolina from inside the ship, using a modern transceiver, and one of the original vertical antennas mounted on the ship.
The Battleship North Carolina State Historic Site (US-6831)
The Battleship North Carolina is a World War II-era battleship that served in the United States Navy from 1941 to 1960. It is currently a museum ship in Wilmington, North Carolina.
The ship was launched in 1940 and commissioned in 1941. During World War II, it served in the Atlantic and Pacific theaters, participating in several major battles, including the Battle of the Atlantic and the Battle of Iwo Jima.
The USS North Carolina in Pearl Harbor in November 1942 for repairs. (Photo Source: U.S. National Archives and Records Administration)
The Battleship North Carolina was decommissioned in 1960 and donated to the state of North Carolina in 1961. It has been open to the public as a museum ship since 1962.
Growing up in North Carolina, I’ve always considered the Battleship North Carolina the icon of Wilmington. You can’t cross the Cape Fear river and miss this brilliant bit of naval history–it’s so prominent and accessible.
I had not actually toured the battleship since I was a child–some 40+ years ago. Last week, however, our family spent the week in Wilmington and the battleship was first on the to-do list.
Azalea Coast Amateur Radio Club
A couple months ago, I mentioned to my buddy Bob (K4RLC), in passing, that one of my daughters was attending a week-long residential program at NC State University while the other daughter would be attending The University of North Carolina Wilmington. My wife and I would stay in Wilmington for the week and I would somehow love to activate the Battleship North Carolina for the POTA program.
Fortuitously, shortly thereafter, Bob attended a presentation about the Battleship North Carolina by Mike Hartmann (NI2S) at a radio club meeting in Raleigh. Mike is with the Azalea Coast Amateur Radio Club, the caretakers and curators of radio central in the battleship.
Bob put me in touch with Mike who then graciously accommodated my schedule, even though it required his presence throughout the activation.
Mike did make it clear that the radio room is three decks below, has no air conditioning and is a proper “sweat box.” Turns out, too, that the week we were in Wilmington coincided with a bit of a heat wave which was affecting much of the eastern US. Because of this, I asked if we could meet on Tuesday, July 9, 2024, at the earliest possible time–8:00 AM, when the museum opened.
It was a beautiful morning and I arrived on site perhaps 15 minutes in advance. I needed to pull my camera gear out of the car and allow some time for it to adjust to the humidity (which was extremely high).
I thought my lens had finally acclimatized when I started the video before Mike arrived, but it turned out the lens was still a bit foggy for a minute or two.
Mike arrived and we walked into the ticket booth where I purchased my ticket. He then led me onto the deck and into one of the roped-off entrances to the lower decks.
He kindly allowed me to film walking through the ship into the radio central area. I’ll admit that it was difficult for me to keep my attention on the camera as I was walking through a ship I remembered from my childhood! Since my video is real-time, real-life, you experience it with me–I didn’t check out the ship in advance.
I was amazed at how much of the ship was open to the public and in superb, original condition.
In radio central, Mike allowed me to peek behind some of the closed off sections with my camera, so you’ll get the follow along with me.
What I didn’t realize was just how much signal intelligence was happening on a fast battleship like the USS NC.
There were rooms dedicated to listening posts, decryption/encryption, and sharing of intelligence. This was all so fascinating and enlightening.
Next, Mike opened up the actual radio room where an Icom IC-756 Pro III was hidden in one of the original ship radio desks. This being a museum, all modern gear was hidden as well as possible.
Mike was right about the room being a sweat box–even in the early morning, it was pretty hot and humid in there. Fortunately, he had two fans he turned on and pointed at us.
The view from my operating position.
Mike set up the IC-756 Pro III by connecting it to a power supply, then attaching a Bencher paddle.
The vertical–again, one of the original Battleship North Carolina antennas–also required a little bit of matching for 20 meters.
Any movement of 10 kHz or so, required engaging the 756’s internal ATU.
As I set up the camera and made a comfortable operating position, I realized just how noisy the room was with the normal ship sounds (it has its own fresh air ventilation system) and the two fans running full-bore.
I set up my wireless mics–one on me and the other inside the portion of the desk that housed the radio.
In truth, I wasn’t confident the audio would work out at all. First thing I did when I made it back to the house that day was to check the audio–turns out, it came out pretty darn well all things considered.
In fact, the audio in the video was much better than my own two ears experienced while operating. Having one of the mics much closer to the speaker and protected from the wind blowing really made a difference.
Black-A-Tor Copse National Nature ReserveMany thanks to Lee (M0VKR) who shares the following field report and video:
A QRP CW POTA Adventure on Black-a-Tor
by Lee (M0VKR)
It was another sunny morning when my wife Joanne and I set off for a new mini adventure. Our destination was Black-a-Tor on Dartmoor, Devon, a scenic location ideal for a Parks on the Air (POTA) activation. We had not activated this park before so didn’t know what to expect. With excitement abound and a bit of nervous anticipation after looking at the propagation figures, we parked their car at Meldon Dam Reservoir car park, the starting point of our trek.
The weather was pleasantly warm as we began the journey, following a meandering river that gently led us towards our destination. The path was relatively easy, allowing us to enjoy the natural beauty surrounding us. At one point a horse fly latched onto my arm, and although I indicated my displeasure it continued to harass me for a good 10 minutes or so, before eventually giving up.
As we hiked, the silhouette of Black-a-Tor gradually appeared on the horizon, beckoning us closer. A short climb later, we found ourselves at the summit, ready to set up for our POTA activation.
After a delicious boil in the bag meal of Chicken curry and a pot noodle heated on the jet boil stove (and of course a mug of tea!), we started proceedings with the trusty Elecraft KH1 hooked up to the MPAS, calling out into the ether for about 45 minutes.
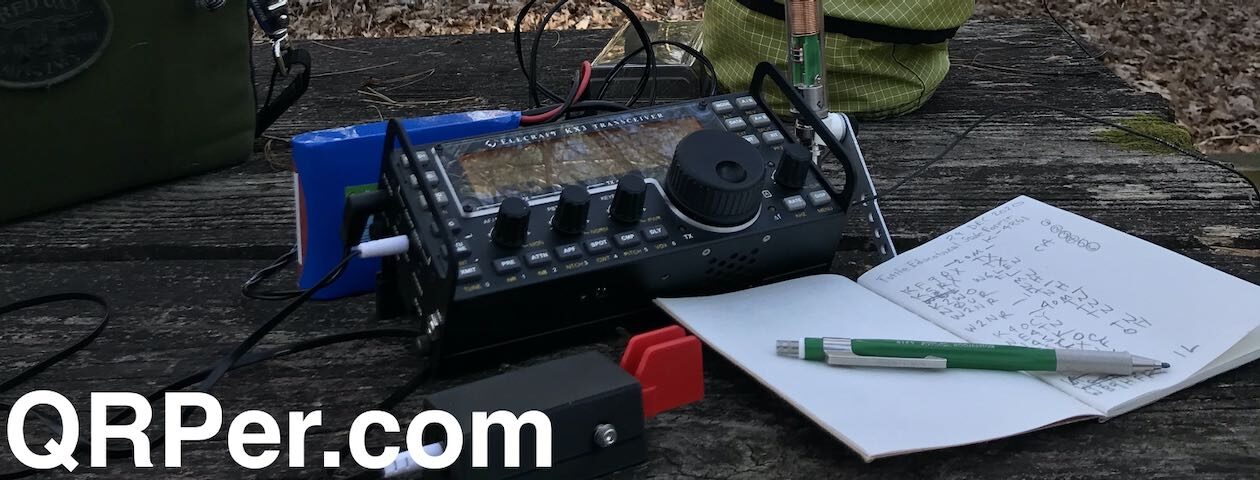
Despite best efforts, the airwaves remained silent, and no contacts were made. Relatively unfazed but a little dejected, I decided to bring out the backup—the Elecraft KX3. This radio, with its extra power, held the promise of better luck. I think in hindsight if I had just stuck with the KH1 a little longer the RF gods would swing things in our favour, or perhaps the extra little bit of power helped? Now I know you need to quadruple your power to make a single S unit of difference at the receiving station, but maybe, just maybe the extra 5 watts or so might have helped us just break over the noise threshold?
After setting up the KX3, we managed to make a very scratchy CW contact with my son, Daniel, who was back at home on 40 meters, around 70 miles away. I must admit at this point enthusiasm was depleted a little and the poor propagation conditions continued to be a challenge on this activation, and I was struggling sending with the Bamatech key for some reason. I think I had been a bit over enthusiastic when setting it up and it felt a tight in operation. A couple of European stations faded out just as quickly as they had appeared, leaving me feeling a bit frustrated to be honest. Things are not normally this difficult! I think this is the point of these longer videos (se below) it’s important to show the struggles and the highlights.
With all this being said, as if by magic after calling again on 20m, the station K2UPD suddenly erupted out of the KX3’s speaker loud and clear, as if he was on the next hill. The sudden clarity of the signal was surprising and caught me off guard. I simply couldn’t believe I was hearing a letter K, and I struggled to comprehend the characters, once my brain had recalibrated itself. I couldn’t help but smile.
It was a gentle reminder of the CW innovations Comprehensive Instant Character recognition course that coach Jon KC1FUU has mentioned so many times, Ignore the scope, and ignore the propagation predictors, persevere, and just call, as you never know who will answer! In ham radio, sometimes it’s all or nothing. The contacts started to come in more steadily after that and it really woke me up. Suddenly we were back in the game, and eventually, we reached the 10 contacts required for a successful POTA activation.
As the summit grew busier with curious passersby, Joanne found herself fielding numerous questions about our intriguing setup. The interest from the public added an unexpected but enjoyable social element to our adventure. With our mission accomplished, we decided it was time to pack up.
On our way back down, we took a detour through the ancient woodland at Black-a-Tor. The old oak trees, with their branches draped in lichen, and the river running quite fast down the slope as it meandered through created an enchanting atmosphere. It felt as if we had stepped back in time. We lingered there for about 20 minutes, absorbing the serene beauty of the place.
It was an 8km round trip. The walk back to the car was under the blazing sun, and we were both getting a little tired from it. By the time we reached the car, we realised we had gotten sunburned on the back of our necks. It was a small price to pay for such a fulfilling day, and we made a mental note to remember the sunscreen next time, perhaps I will add a small travel tube to the admin pouch.
Reflecting on our adventure, and despite the sunburn, Joanne and I felt a deep sense of satisfaction that had overridden the previous frustration. Despite the challenges, we had successfully activated Black-a-Tor and enjoyed a day immersed in nature. The memory of this outing, like the lichen on the ancient oaks, would stay with us for a long time.
If you’ve followed my field reports in the past couple of years, you’ll know that I predominantly use Rite In The Rain notepads and mechanical pencils.
When I first started my POTA journey in 2019, I would print out log sheets for each activation just like I did during the National Parks On The Air program in 2016. It was a very inexpensive and organized way to manage all of my written logs.
Over time, though, I made a shift to small pocket-sized notepads (Moleskine, Moji, Mead…) basically any pad that took up less space and could remain in my QRP field kits.
Rite In The Rain
After a couple of moisture mishaps with Moleskine pads (which, by the way, I otherwise love) I decided to completely shift to using Rite In The Rain spiral-bound notepads.
I resisted doing this for a long time because Rite In The Rain pads aren’t cheap; they typically cost about $6-$7 US each, but they are made in the US and are very high quality. They don’t smudge or smear.
My father-in-law is a retired professor of Botany and the bulk of his research time was (literally) in the field–in the mountains of western North Carolina. He’s always been a huge fan of Rite In The Rain and we often purchased these for him as gifts.
I switched to Rite In The Rain and haven’t regretted it. Yes, they’re pricier than all of the previous options I’d used, but they are insanely durable, can survive getting wet, and they hold quite a lot of my 45-60 minute POTA and SOTA activations! One pad will typically last me several months.
Please note that all of the Amazon.com links on this page are affiliate links that support QRPer.com.
The 3×5″ sixe easily fits in my Pelican 1060 case
I find that both sizes work well. I tend to use the larger 4×6 size most of the time, but I love the 3×5 size because it fits in some of my smallest field kits including the MTR-3B SOTA kit I highlighted last week.
When you use a Rite in the Rain pad, it will hold up in the rain if you are using any pencil, or one of their pens which has a special ink that bonds to the paper permanently.
I use mechanical pencils when I log, although I plan to start using pens more often only because it makes it easier for my YouTube video subscribers to read my logbook as I write (pencil can be more difficult to read from the camera angle, depending on reflection, etc.).
Mechanical Pencils
This is an area where (being fully transparent here) I can geek out a bit (understatement alert).
I’ve always had a place in my heart for mechanical pencils. It dates back to my high school years when I took drafting classes. These were the days when drafting desks, pencils, T-Squares, triangles, and templates were tools of the trade (CAD was just becoming accessible to students).
I found mechanical pencils to be an amazing piece of engineering and, while I couldn’t afford a lot of them, I would spend my hard-earned money to buy them. To me, visiting our local drafting store was like a trip to the toy store.
But I digress…
In the field, performing a POTA or SOTA activation, I don’t look for the same precision I needed in drafting class. Quite the opposite–I’m looking for durability and reliability.
Wooden pencils, to be clear, are both of those things and will serve you well in the field. What I love about mechanical pencils is that their leads are consistent when writing and there’s no need to pause and activation to sharpen them. Just click and keep going.
There are currently three mechanical pencil models I use.
My wife recently gave me a uni Core Keeps Sharp Mechanical Pencilas a gift. She did so after reading a comment from one of my readers (I had no idea she even read QRPer–I’ve got to be careful what I say around here!). 🙂
What makes this particular pencil unique is that it rotates the lead as you use it. This keeps the line looking sharp since the lead doesn’t wear to one side.
So far, I love it. This one has a .5mm lead, which is small–I tend to prefer .7 or .9mm because they’re more durable. Expect to see this in activation videos soon.
Next is the Zebra Mechanical Pencil, Del Guard, 0.7mm. This particular pencil lives in my MTR-3B SOTA field kit. The Del Guard has a double spring mechanism that acts as a shock absorber when you write. If you apply a little too much vertical or angled pressure, it absorbs the energy thus saving your lead from breaking.
I find it works really well, in fact. I tend to have a heavy hand when I write in my log books and I find I have less lead breakage in the field.
Finally, the mechanical pencil I’ve adopted as my primary SOTA and POTA pencil is the amazing GraphGear 0.9mm 1000.
This pencil is the most durable mechanical pencil I’ve ever used.
Bruce (KO4ZRN) introduced this to me when he joined me on a SOTA activation of Craggy Dome a couple years ago. This pencil is incredibly strong. In fact, I’ve even used it in woodworking and carpentry projects to mark cuts on wood.
At this point, I think I probably own about six of these GraphGear pencils and I couldn’t be happier.
Video
I actually made a short (for me) video about my notepads and pencils:
If you’re not into waterproof paper and mechanical pencils, just use what you have to log.
I remember once using the back side of an envelop and a pen I found in my car to log a NPOTA activation–it worked perfectly! I even remember another NPOTA activation using a pen to log and running out of ink, so I used the pen to log in the dirt on the ground. I only copied three or so more contacts then took a photo of the ground. (I can’t recommend this, but point is, practically anything can be used for logging!)
I just find that when I do something on a regular basis, I’m willing to invest in tools I love using. I feel they serve me well in the end.
How do you log?
I’m curious how you log. I know that a large percentage of POTA activations never write a thing on paper logs–they simple log directly to an app on their phone, tablet, or laptop.
I prefer making a paper copy of my logs, then taking a photo of them when the activation is complete. I worry less about my app crashing, phone running out of power, and, frankly, I just find the process of logging more fun on paper. Furthermore, rain can disrupt touch accuracy on capacitive touchscreen devices, making logging difficult in wet conditions.
I’m curious how you log in the field. Please comment!
Thank you
Thank you for reading this post!
Of course, I’d also like to send a special thanks to those of you who have been supporting the site and channel through Patreon, and the Coffee Fund. While not a requirement, as my content will always be free, I really appreciate the support.
Have a brilliant week and I hope you run out of paper due to the number of contacts you must log!
Many thanks to Lee (M0VKR) who shares the following field report and video:
SOTA CW Activation on High Willhayes Dartmoor
by Lee (M0VKR)
It was an overcast and breezy morning when wife Joanne and myself Lee, M0VKR set out on our latest SOTA (Summits on the Air) activation adventure. Our destination was High Willhays, the highest point in Devon UK – SOTA G/DC001, Dartmoor is well known for its rugged beauty and challenging terrain.
We parked the car a short distance up the road from the army camp, slung our packs over our backs and set off. The gravel tracks leading to the summit stretched out before us and took a winding path through the moorland.
A few sheep and cattle grazed in the rough grass as we made our way upwards on the gentle slope. It was a breezy morning and we had had rain a short while earlier. Despite the weather our spirits were high, and we were eager to reach the top and get on the air with the Elecraft KH1.
In my pack was my now trusty Elecraft KH1 and an MPAS 2.0 vertical antenna, with the KX3 as backup, a reliable setup for such expeditions. I’m pretty sure I could halve the weight in my pack, but as it’s not a huge walk to the summit I don’t mind ferrying the extra gear to the top. The weather, though overcast, was adding a touch of drama to the landscape, and the breeze kept us cool as we trekked upward.
Joanne, ever the supportive partner, helped carry some of the cooking equipment and victuals and she kept the mood light with her cheerful conversation.
After a brisk hike, we reached the summit of High Willhays. The view, even under the Grey sky, was breathtaking. Rolling green hills and expansive moorland stretched out as far as the eye could see.
I set about preparing the station, using the MPAS 2.0 vertical antenna, which is quick to deploy and ideal for the variable conditions we faced. Despite the less-than-ideal propagation conditions, I was determined to make the activation a success.
Although the MPAS in vertical form isn’t very efficient on 40, I prefer to take advantage of the quick setup that it offers, one of these days I will look at adding a top section to make 40 more efficient, perhaps as a sloping inverted L or something similar, more reading of the manual required!
With everything set up, I made the first call on the 40m band. My Friend Matt MW0KAX answered, he was essentially line of sight from Wales, so his signal was strong. That was the first and last contact on 40m. I changed to 20 meters, where the MPAS was more efficient for the little KH1 and it was able to breathe a bit easier. The tuner in the KH1 is nothing short of amazing, and quite happily tuned 40 meters in a few seconds.
The static crackled, and for a moment, there was silence. Then, a faint reply came through. The thrill of making that first contact was palpable. It still amazes me every time I make those first few contacts that QRP does work, even with a compromised antenna system. Despite the challenging conditions, My limited skill, Plenty of luck and the reliability of the equipment began to shine. All the equipment I was using was off the shelf, I hadn’t made a single thing myself, maybe one day.
One by one, contacts started to come in. Each short QSO contact was a small victory, a testament to perseverance and the joy of ham radio. It is necessary to persevere as a newer CW operator and use QRP power levels and poor propagation conditions. It’s non-negotiable after driving for 2 hours, and a 4km hike that we go home empty handed. I logged each contact meticulously, my excitement growing with every successful connection. Joanne watched on slightly bemused but very supportive of the hobby, sharing in the triumphs that each contact brings and providing much-needed encouragement.
By the end of the activation, We had made several QSOs. While the propagation conditions had been far from ideal, the activation was undeniably a success. We had achieved what we set out to do: connect with fellow hams across the airwaves from the summit of High Willhays for a SOTA activation.
As we packed up our gear, the breeze picked up, and the clouds began to clear slightly, offering a glimpse of blue sky. The trek back down was filled with reflections on the day’s achievements and plans for future activations. We both felt a deep sense of accomplishment. We had braved the elements, navigated the challenging RF conditions, and emerged victorious.
This activation, like many before it, was a reminder of the joys of ham radio, CW and QRP operation and the adventure it can bring. For me and my wife Joanne, High Willhays would always hold a special place in our memories, not just for its height, but for the heights that we reached together on the airwaves.
Our friend Alan (W2AEW) just published this excellent short video demonstrating how to quickly tune the Penntek TR-45L’s Z-Match ATU. Of course, this same technique can be applied to the Emtech ZM-2 or any other manual Z-Match tuner:


 After that, I skimmed the manual cover to cover. I didn’t read every single word but focused on pages that covered features I rarely use during POTA or SOTA activations.
 Every time I do this, I learn something new.
 Reading the manual isn’t just about solving immediate problems—it’s about discovering hidden gems that could enhance your experience on the air.


