Our friend Alan (W2AEW) just published this excellent short video demonstrating how to quickly tune the Penntek TR-45L’s Z-Match ATU. Of course, this same technique can be applied to the Emtech ZM-2 or any other manual Z-Match tuner:
Last month, I received a comment and question from Gordon (KO4AYC) here on QRPer.com:
“I am curious if anyone has used the AX1 with the AXE1 40 meter extender and tuned this antenna for 40 meters using the Emtech ZM-2 tuner?”
For the life of me, I couldn’t remember if I’d tried this combo before.
The ZM-2 ATU is a simple manual antenna tuner that you can purchase either as a fun-to-build kit or fully assembled and tested.
I’ve owned my ZM-2 for many years, and I believe every QRP field operator should have one. They do a brilliant job of matching random wire antennas and taking your resonant antenna to a non-resonant band. Being a manual ATU, they require no power source. If you’d like to read a quick tutorial on tuning the ZM-2, read this previous post.
I figured the easiest way to answer Gordon’s question was to give it a go!
The AX1 does require a counterpoise, so before hitting the field, I did check to make sure there was continuity between the shield of the ZM-2’s BNC connector and the black binding post when the ZM-2 was switched to “GND” for coax antennas. Fortunately, there was! I loved this idea because it meant that no matter the radio, I knew I’d have an easy connection to ground for the AX1 counterpoise.
Blue Ridge Parkway (K-3378)
On Wednesday, February 21, 2024, I grabbed the ZM-2, AX1, and AXE 40M coil (since Gordon specifically asked about 40M) along with my Yaesu FT-818ND. It was time to see just how effectively the ZM-2 might match the AX1.
I store my AX1 in this Maxpedition pouch (see link in gear section below).
Upon arrival, I began setting up the station.
Even though it was approaching 2:00 PM locally, I wanted to see if the ZM-2 would match the AX1 (with AXE coil) on 40 meters first. I didn’t expect a lot of activity on that band so early in the afternoon, but I figured I could hopefully work a couple of stations.
I attached the AX1 directly to the ZM-2 antenna port and deployed the whip and 40M counterpoise.
It was a bit gusty, and I quickly realized that the AX1 might topple over in the wind. To secure the antenna, I used the handle of my GR1 backpack. It was a semi-effective arrangement (actually, the handle sort of pulled the antenna toward the pack, which wasn’t ideal either–I eventually removed it).
In calm conditions, I wouldn’t worry about the antenna toppling over; the ZM-2 provides enough of a base that it’s stable. In the wind, though, you’ll definitely need to secure the ZM-2/AX1 combo to keep it from being blown over.
My plan was to start on 40 meters, then also hit 30, 20, and 17 meters. This would give me an opportunity to see if the ZM-2 could match the AX1 on multiple bands.
Side note: I can’t remember if I mentioned this in a previous field report, but one sad bit of news for me is that there’s a new source of QRM at the Folk Art Center. It’s likely coming from the VA medical complex next door, but it raised the noise floor to at least S5 on most bands. This will make it more difficult for me to work weak signals from this particular POTA site.
Then again? My buddy Alan (W2AEW) recently pointed out to me that compromised antennas like the AX1 don’t feel the effects of local QRM as a higher-gain antenna would. I’d been thinking the same thing.
Gear:
Note: All Amazon, CW Morse, ABR, Chelegance, eBay, and Radioddity links are affiliate links that support QRPer.com at no cost to you.
I hopped on the air and started calling CQ POTA on the 40-meter band. I worked one station quickly (thanks, W5GDW) and then silence. I didn’t expect 40 meters to be active this time of day, but I didn’t think it would be completely dead either.
I checked the POTA spots page and discovered that the connection to the Reverse Beacon Network was down. Even though I scheduled the activation, the system hadn’t spotted me.
Once spotted, I worked three more stations in quick succession.
Many thanks to HUAQIANG Gu (BD4LB) who shares the following information about his homemade L-Match. Note that BD4LB doesn’t speak English, and I don’t speak Chinese, so the following was machine-translated via Google Translate:
Homemade L-Match for Field Operating
by HUAQIANG Gu (BD4LB)
L-MATCH has a simple structure and is easy to make.
It is mainly composed of a coil and an adjustable capacitor.
The coil is made of copper wire with a diameter of 1.8mm, and the outer diameter of the coil is 50mm.
The capacitance of the thin film adjustable capacitor is 0pF–200pF.
When using, a balanced ground wire needs to be installed.
(Different bands, multiple quarter-wave length wires, and together. I use a row of wires. For example: two balanced ground wires 10 meters and 5 meters long, respectively 40 meters band and 20 meters band balanced ground wire.)
After many outdoor communications, I adjusted the end-fed antenna. The length of the radiator was 10 meters, which was appropriate.
One end of it is hung from the top of a 6-meter-long fiberglass fishing rod. On the other end, connect the red binding post of L-match.
Balance the ground wire and connect it to the black binding post. Spread it out on the ground.
The L-match is placed on the ground and connected to the HS1B or KVE60C antenna analyzer using a one meter long 50-3 coaxial cable. (This reduces the length and weight of the coaxial cable.)
When using an inverted V antenna, the length of the coaxial cable needs to be at least 8 meters.
My outdoor communication is mainly on the top of a hill in the park, or on the beach by the sea.
On the beach, there is plenty of space. In addition to setting up end-fed antennas, you can also set up inverted V antennas.
On the top of the mountain in the park, the space is limited, and it is difficult to deploy the 20-meter-long antenna oscillator. Only 10-meter end-fed antennas can be used.
After fixing the fishing rod, installing the antenna radiator and balanced ground wire, first connect the antenna analyzer KVE60C.
Use copper alligator clips to clip on the coil and adjust the adjustable capacitance to minimize the standing wave ratio of 7.023 MHz.
(Change different coil taps, adjust the adjustable capacitor, and try several times.)
I carry a compass to adjust the transmitting direction of the end-fed antenna. I won’t get lost.
The actual communication effect is quite good.
In the 40-meter band, it is suitable for short-distance communication within 800 kilometers.
In the 20-meter band, it is suitable for communication within 1000-2000 kilometers.
I love testing new stuff in the field and on Tuesday, May 2, 2023 I had a great opportunity to test a number of new items.
FT-818ND Upgrades
I mentioned in a previous post that I purchased a new Yaesu FT-818ND from DX Engineering on December 28, 2022. It smacked of an impulse purchase only in that I had not planned to purchase the radio that very day.
Thing is, Yaesu announced they were discontinuing the FT-818 and I always planned to purchase one to replace out one of my two FT-817NDs. I didn’t want to miss the opportunity to buy a new one under warranty, so I bit the bullet on short notice.
I had all of the upgrades in hand by mid-February, but that Yaesu FT-818ND sat in its box under my radio bench until late April. I was so busy evaluating other gear and keeping up with my busy family life, it had almost slipped my mind. Well, that and I received the incorrect narrow Collins filter from a seller on eBay; instead of sourcing a replacement, I decided to steal an original 500 Hz filter from one of my other radios while waiting on a replacement.
Those narrow Collins filters? They’ve become pure unobtainium over the past couple of months. At one point, eBay was chock full of them. No longer…
It had actually been a very long time since I pulled out a brand new (non-loaner) radio from the box. It’s funny because I remember opening my first FT-817 back in…what…2001? The box and packaging were identical some twenty one years later!
I unboxed then immediately opened the chassis of the FT-818ND to add the Collins filter, attach my Portable Zero side rails (stolen from my FT-817), add the Windcamp battery pack, and add the Windcamp Anderson PP adapter.
JNCRadio CS-818 ATU
Around the same time, Jesse, with Chelegance, also sent me his latest ATU: the CS-818 which is specifically designed to work with the FT-817 and FT-818 series radios. To be clear, Jesse sent the MC-818 at no cost to me to evaluate.
The CS-818 actually works with any radio, but it ships with the command cable for the FT-817/818 for full integration.
The CS-818 can handle up to 30 watts of power, so it’ll pair nicely with any QRP radio. If using it with a QRO radio, you’d have to be very careful not to push more than 30 watts.
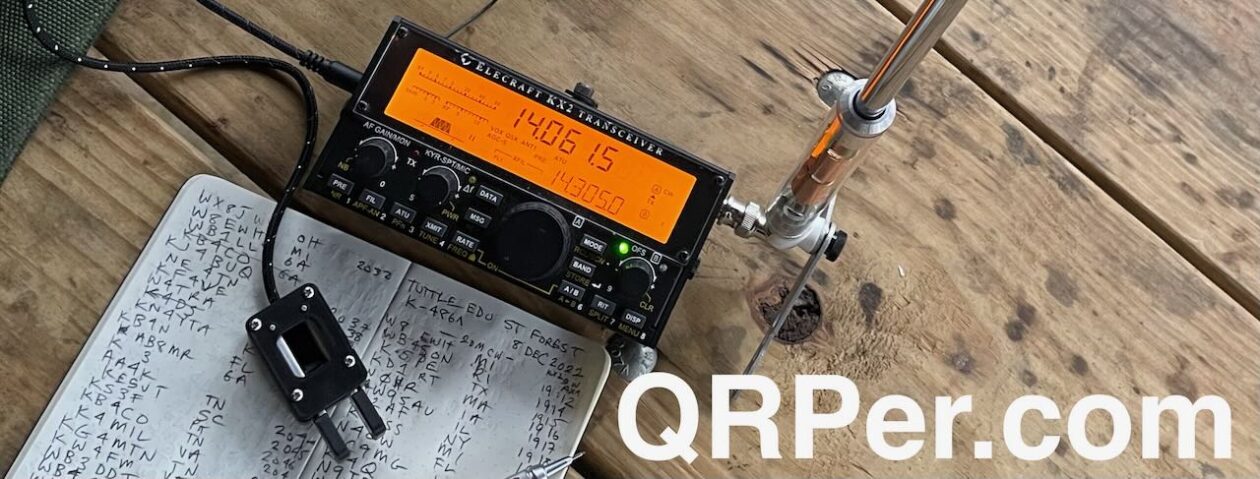
NOTE: Due to the frame rate of my camera and the refresh rate of the OLED display, only a portion of the display shows up in my shots.
Because I receive so many tips from readers here on QRPer, I wanted way to share them in a concise newsletter format. To that end, welcome to QRPer Notes, a collection of links/videos to interesting stories and tips making waves in the world of radio!
Just before Thanksgiving, I received an email from Cara Chen at Retevis. She wrote,
I am responsible for the radio review cooperation. We have a SDR radio HS2 for review cooperation. Are you willing to test and write a blog about it?
When I asked her what that meant, she said that she would send me an Ailunce HS2 SDR Radio, if I would review it here on my blog. When I told her that I would be brutally honest in my review, she seemed OK with that and sent me the radio.
What follows is an honest review. It’s not a QST-style review. I don’t have the test equipment that they do, nor did I have the time to put the radio through all its paces. Even so, I did operate the radio on HF and VHF, phone and CW, enough to make the review worth reading, I think.
If you don’t want to read the rest of this review, I can sum it up as follows: The Ailunce HS2 is a fun, little radio, with lots of potential. It’s not perfect, though. The buttons are too small, the display is too small, and the manual needs work. More about all those below.
What’s in the box?
As you can see below, the radio came with a handheld microphone, a DC power cord, and a USB cable.
First impressions:
It’s really small. It’s 45 mm H x 120 mm W x 190 mm D (1.77 in H x 4.72 in W x 7.5 in D)
The carrying case is kind of nifty. If you’re going to operate portable, it’s nice to have.
The extruded metal case include a nice heat sink.
There are a lot of connectors on the rear panel, including the power connector, an SO-239 for HF and VHF antennas, an SMA for a GPS antenna, two USB connectors, an Ethernet connector, and four 3 mm phone jacks.
You’ve no doubt heard me brag about the Emtech ZM-2 ATU in previous field reports. I think it’s an accessory every field operator should have.
The ZM-2 is a very capable manual transmatch/ATU and is also one of the more affordable tuners on the market. It’s available as both a kit and a fully-assembled unit. Both well under $100.
I do believe the “manual” part of the ZM-2 scares off some and it really shouldn’t. We are used to simply pressing a button these days and allowing our automatic ATUs to do all of the matching work for us.
Manual ATUs do require some amount of skill, but truth is, the learning curve is very modest and intuitive.
Manual ATUs require no power source in order to operate–you adjust the L and C values by hand–thus there’s never a worry about the ATU’s battery being depleted. They also are easy to manipulate outside the ham bands because they require no RF in order to read the SWR–you simply make adjustments to the L and C until you hear the noise peak. This is why many shortwave broadcast listeners love the ZM-2 so much. It’ll match most any antenna you hook up to it!
I also argue that everyone should have a portable ATU even if you operate resonant antennas. Think of an ATU as a First Aid Kit for your antenna: if the deployment is less than ideal, or if you damage it in the field, an ATU can help you find an impedance match your radio can live with. ATUs have saved several of my activations.
Mountain Topper MTR-4B V2
I’ve also mentioned that I’ve had an MTR-4B on loan from a very kind and generous reader for most of the year. He was in no particular hurry for me to send it back to him, but I wrote him in early November and said, “I’m doing one more activation with this little rig, then I’m shipping it to its rightful owner!”
He had a request, and it was a good one:
I think it would be a good little twist to the usual YouTube if you paired a random wire with the ZM-2 and the MTR-4B…showing how to tune the ZM-2 with a Mountain Topper…
I really liked this idea, so I made plans to to hit the Blue Ridge Parkway nearby and give it a go.
The first time I tried this in the field, I paired the MTR-4B with one of my Sony amplified speakers because the MTR-4B 1.) has no internal speaker and 2.) has no volume control. During the video, however, I realized that there simply wasn’t enough audio amplification so that the viewer would be able to hear a noise peak as I manually tuned the ATU. I decided to scratch that video and just do the activation on my own. I really wanted to show how the tuning process worked in the video.
Many thanks to Joshua (KO4AWH) who shares the following update to his previous guest review of the ATU-10 automatic antenna tuner:
Update on the ATU-10: new firmware released
by Joshua (KO4AWH)
The short story is that David N7DDC has a Firmware update with a new tuning algorithm that seems to fix the previously seen failure to find a decent match. As noted earlier in comparison with the Elecraft T1, the ATU-10 still does not necessarily get as close a match to 1:1 SWR but it now does indeed find a good match making this tuner my go to for use with my IC-705.
Not previously mentioned, the ATU-10 is also designed to work with the IC-705 for tuning commands when connected with a TRS 3.5mm cable, not just as an auto tuner when given a signal. And, in practice it works just as it should. I actually took the IC-705 and the ATU-10 and worked a SOTA/POTA with the beta version of this new firmware. I ran a 35’ wire and it worked great allowing me to work 40m, 20m, 15m and 6m for a total of 26 contacts. As a followup to my previous testing with the prior firmware 1.4, below are my results with the current new 1.5 firmware.
Testing on August 20th, 2022
The only difference from the original testing is the 31.5’ radiator was replaced with a 35’ and I did not tune and record results with the T1.
Conclusion on the ATU-10
I now feel very comfortable recommending this ATU. newdiytech.com has a great price and the build quality seems just fine. With the new algorithm update, a good match is found. The ATU-10 works great stand alone and also works fully automatically when used with a IC-705. This configuration means you can put the ATU at the antenna feed point and run a control cable back to the IC-705 and have a 50 ohm across the coax to help minimize loss, making for a nice portable setup with great band hopping flexibility.
If your curiosity is strong, here is some testing I did for David as he was updating the Algorithm now used in firmware 1.5.
UPDATE August 3rd 2022:
David Fainitski N7DDC has released a test firmware with a new tuning Algorithm with some promising initial results. A quick test on each band in the table has been added to reflect the new algorithm. This is not a firmware update yet but I suspect it will be soon. Results are great as tested. I hope to see this in a new FW soon.
August 6th, 2022
A second test firmware from David Fainitski N7DDC with the ability to increase or decrease the L and C manually allowed me to verify if a better match could be made. Turns out in a few cases it could. After testing again with a Tufteln 9:1 T80-2X2 on a 41ft sloping radiator I was able to achieve much better results than with the current version 1.4. In two cases I was able to find a better match manually. I realized later that if I were to tune a second time the ATU-10 would find the same, better match, on its own. Again, not a full firmware update, i.e. you have to flash back to 1.4 if you want to be able to turn off the turner.
(Click to enlarge.)
August 7th, 2022
Another test firmware David asked me to check. This version seemed more likely to find the best match. I did have the ATU go to L0, C0 twice but then find a match on a second try. This happened once on 40m and once on 10m. Almost like it faulted but there was some switching/clicking involved before stopping, it just landed at a 3:1 or higher with 0 for L and C. A second tune however straightened it out. I did not record those two cases. Below are the results. I was able to find a slightly better match twice but I am sure one would never notice the difference during normal use. The improvement both times was within the error of SWR across the three device measurements.
Many thanks to Joshua (KO4AWH) who shares the following guest post:
UPDATE: Please check out Joshua’s most recent review after updating the ATU-10 with new firmware. The results have improved dramatically.
ATU-10 Random Wire Testing
by Joshua (KO4AWH)
I had a bit of time to do some field tests and I recently acquired an ATU-10. So I jumped right in and did some ATU-10 Random Wire Testing. The testing was completed with a Tufteln 9:1 QRP Antenna configured with an elevated feed point sloper and a counterpoise hanging straight down. The coax feed was RG316 17′ with the ATU at the radio with a short jumper. Several different radiator lengths are used as mentioned below. The ATU-10 was sourced from newdiytech.com, price was $120.24 shipped to me in GA USA, Ordered June 25, delivered July 8th.
A quick list of ATU-10 Features:
0.91″ OLED Display that shows Power, SWR and internal battery remaining.
USB-C Rechargeable LiPo 1.7Ah
Grounding Lug
Bypass Mode (When I set to this mode however it would tune anyways)
Latching Relays (No power needed to keep in position. Hold tune with ATU off)
Input port for communication with IC705 (and potentially others)
7 Inductors, 7 capacitors
(Elecraft QRP)
C array, pF 10, 20, 39, 82, 160, 330, 660
L array, uH 0.05, 0.11, 0.22, 0.45, 0.95, 1.9, 3.8
ATU-10
C array, pF 22, 47, 100, 220, 470, 1000, 2220
L array, uH 0.1, 0.22, 0.45, 1.0, 2.2, 4.5, 10.0
USB-C firmware update (ATU shows up as a drive, simply copy the new firmware file to the device and it will automatically update)
Weight 232g (8.1oz)
Tufteln Case adds 23g (.8oz) for a Total of 255g (8.9oz)
Compared to the T1 with cover for a total weight of 187g (6.5oz)
SWR measured with a RigExpert RigStick 320, Lab599 Discovery TX-500 and the ATU-10
The test process was to first check the SWR on the antenna with no tuner. SWR values recorded from the TX500 and RigExpert Stick 320. Values recorded in the 2 columns under the “No Tuner” section. This was completed for each of the Bands listed in the table rows (see below). SWR values were the lowest in the band range for all recorded numbers. Continue reading Joshua tests the ATU-10 portable automatic antenna tuner→
Long-time QRPer.com reader and supporter, Joshua (KO4AWH), runs an Etsy store with a wide range of products primarily designed for field operators. Over the past few months, Joshua has sent me various prototypes for feedback and also to test in the field. You’ll see some of his antennas in upcoming field reports and activation videos. I’m very impressed with his designs.
If you’re an Elecraft T1 owner, you should be especially interested in his T1 Protection Case.
Joshua sent me an early version of this clip-on case several months ago and it immediately replaced the simple cover I printed from a Thingiverse file. (To be clear, the Thingiverse case served me well for a couple years, but I prefer this one since it doesn’t require a rubber band to hold it on the T1.)
The Elecraft T1 is a hearty little ATU and I don’t worry about damaging it while tucked away in my SOTA pack, but the little buttons on the front are prone to be pushed with any amount of applied pressure. This can result in unintentional operation which can accidentally place it in bypass mode or at least shorten the life of your 9V cell.
The Elecraft T1 is not an inexpensive station accessory and, at the moment, they’re about as rare as hen’s teeth. The lead time on new T1s is counted in months rather than weeks (at time of posting, this is due to vendor board issues).
The Tufteln Protection Case simply snaps on the Elecraft T1 and protects the BNC connectors, ground point, and the front panel buttons.
The case material is durable and adds very little to the bulk of the T1.
Of course, you can’t operate the T1 with the case around it because the BNC connectors are covered, but I have propped up my T1 on the case while using it on rough concrete picnic tables. I’d rather the case be scratched than my T1!
If you own an Elecraft T1 and don’t have a protective cover, I’d encourage you to either print one, or buy Joshua’s T1 case. For years, I simply removed or reversed the 9V battery to keep the T1 from engaging while packed, but that doesn’t protect the buttons and (frankly) it’s a pain to pop the battery out and flip it for each use (then to remember to flip it back when packing away).
The Tufteln case is a simple and affordable ($16.50) solution!
Thanks for sending this to me, Joshua. I dropped my T1 while setting up my TX-500 for Field Day and it protected my favorite little ATU!
Many thanks to Barry (KU3X) for sharing the following guest post originally posted on his website:
ATU-10 from Banggood.com
by Barry (KU3X)
There are times I find myself in need of an ATU. One example is when I use my half wave end fed 40. I can not always erect this antenna in the clear. I did purchase the LDG Z100 Plus 705 with interfacing cable. The unit does as advertised but I am not impressed with its performance. My biggest complaint is, when interfaced and the IC-705 tells the LDG to tune and it does not know the antenna is matched and resonant, the LDG adds capacitance and inductance which actually raises the SWR. It’s too dumb to go into bypass. I resolved this by not using the interface cable. Now I only tell the LDG to tune where needed. Most of the time I turn the LDG off by toggling between bypass and tune using the button of the front of the unit.
Size matters to me and the LDG ATU is too big. Another downside is it uses SO-239 connectors instead of BNC connectors. Everything I have relating to QRP operating uses all BNC connectors, including my home brew two position antenna switch. I do want to get my hands on an Elecraft T1 ATU but Elecraft can’t get the parts from the manufactures to make them. So the hunt was on for a small ATU with internal batteries and BNC’s instead of the dreaded SO-239 connectors. Here is what I came up with.
I ordered the above pictured ATU-10 from Banggood.com. I have also seen them posted on Amazon.com. They can be found on eBay as well. I did not provide a link for ebay because some ebay adds are dated. There is a very good demo posted on YouTube. Here is an overview of the ATU-10 [PDF].
My ATU-10 arrived 11 June 2022. Here are my findings:
The package contained an Allen wrench and a USB cable for charging the battery as well as for updating the firmware. The package DID NOT include the interface cable for the Icom 705 nor did it included any paperwork…….no manual! My battery showed about half charged and firmware version 1.4 was installed. If you forget to charge the battery and go on site with a dead battery, you can supply power to the ATU-10 via the USB charging cable. You may have to give it a few minutes for the batteries to take a little charge, but from that point on just leave keep the ATU-10 connected to the USB cable.
The needed interface cable is nothing more than a stereo audio cable with 1/8″ male plugs on both ends. But, the ATU works without the interface cable, it’s just not controllable from the radio. As for the matching, I can say it works as good as or as bad as my LDG Z-100 Plus. Where ever the LDG provided a match, so did the ATU-10. On 80 meters where the LDG did not do so well, neither did the ATU-10.
I first tried the ATU-10 without the interface cable. I just sent a carrier from the radio and the tuner went into the tune mode. It’s that simple. It takes anywhere from 2 to 5 seconds to find a reasonable match.
To use the ATU-10 with the interface cable, there is the setup procedure. Hook up all of the cables, including the interface cable to the IC-705. Now turn the ATU-10 on. Once booted, turn on the IC-705. Go into the, “Function” screen and tap the, “tuner” icon. You are ready to go. You do not have to change modes to have the ATU-10 go into the tune mode. In any mode on the radio, like SSB, just key the mic and the tuner will tune. Give it a second or two and you are ready to go. Change bands and key the mic, same results. I lost communication between the radio and the ATU-10 when I went to 80 meters. I have no idea why? I just turned the radio off, then back on and everything was reset…ready to go.
When I received my ATU-10, I noticed all of the hardware was not that tight. I retightened each nut and Allen screw.
Size…the ATU-10 is small enough to carry in your shirt pocket ( 5″ x 2-3/4″ x 1″ )
Antenna connections… BNC. All of my cables used when I set up portable use BNC connectors.
Power source ….the ATU-10 has two internal rechargeable batteries so no external power source is needed. Since the ATU-10 uses latching relays, the only power that is needed is for the display. The display has a time out timer and the ATU will turn off after 30 minutes on non use. The ATU will last you for months on end before needing to be recharged.
Display… the display shows SWR, power out and the state of charge for the internal batteries. It also shows what firmware is installed. The display will fall asleep after 5 minutes of non use. If power is applied, the display will wake up. The entire ATU will turn off after 30 minutes of non use.
Bypass mode (simply turn the ATU-10 off)
Construction…..the ATU-10 is built inside of a solid metal enclosure.
Cons:
Loss of communication….more than once communication was lost between the radio and the tuner. Easy fix by turning the radio off and then back on but this is very inconvenient.
No manual…..not even a little sheet of paper showing the specs. Whatever you need to know can be found on this site: ATU-10 info at GitHub.
Final notes:
For the price, it think this is a great buy. It does exactly what I want it to do and provides a reasonable match to make the radio happy. You can use the ATU-10 with any radio at power level of 10 watts or less. It’s a perfect size for backpackers. I don’t think the interfacing between the radio and the ATU-10 is all that importable. I myself choose not to use the interface cable. Since the tuner will go into a tune mode if the SWR is too high, that’s all that is really needed.
QRP radios, product announcements, reviews, news and more. Low power amateur radio fun!
Please support QRPer by adding us to your whitelist in your ad blocker. Ads are what helps us stay online. All of our ads are ham radio related--no junk, we promise! Thank you!