If you listened to the latest Ham Radio Workbench Podcast episode–our Field Day Debrief–you will have heard that my Field Day was a pretty low-key event.
Originally, I had hoped to fly out to Oregon and hang with my friend George (KJ6VU) and his radio club, but there were just too many family activities happening this year for me to travel for a week.
Instead, my wife, daughters, and I met up with my buddy Vlado (N3CZ) and his sister, who was visiting from North Macedonia.
We met at the Zebulon Vance Birthplace (US-6856) and, luckily, had the picnic shelter to ourselves. The weather was gorgeous, and we put together a proper potluck picnic.
Field Day POTA
Vlado and I decided to do some casual Field Day operating, and I brought the radio gear.
Since I’m currently testing the Xiegu X6200, I brought it along to see how it might handle the RF-dense environment of Field Day.
We made a few contacts with the X6200, but the audio and receiver struggled in that RF-congested environment. This isn’t a surprise, in truth. Most portable field radios aren’t designed to have contest-grade performance—they’re designed for portability and functionality in normal field conditions.
The other radio I brought along was the Penntek TR-45L. I can’t remember if I’ve used it during Field Day in the past, but all Vlado and I could say was…
Wow!
The TR-45L sounded phenomenal!
I’ve always believed that the TR-45L (both the original and skinny version) has some of the best audio in the world of field radio. That is a major plus when it comes to Field Day.
The thing is, it also has a stable front end—the TR-45L receiver handled those packed RF conditions with ease. In fact, we were both amazed at how easily we could hear all of those competing signals. There was absolutely no listening fatigue at all, and both of us could hear weak and strong signals all occupying the same space..
It sounded distinctly analog and “pure.”
Vlado and I both tend to operate with filters wide open—using the filter between our ears—so the audio produced had excellent fidelity.
Vlado and I also made short work of Vesna’s Feta cheese bread!
A couple of times, we did narrow the TR-45L’s audio filter when there was a strong competing station, but by and large, the audio was so clear, we really didn’t need to.
Top-Shelf
The takeaway for me is that the TR-45L series radios have proper contest-grade performance even if they lack contest-grade filtering.
I shouldn’t be surprised because even its predecessor, the TR-35, can handle crowded conditions with ease.
I should add here that the supply of new Penntek radios may already be dried up. As I mentioned in a previous announcement, John (WA3RNC), is retiring and selling off all of his existing radio inventory.
According to his website, he might still have some TR-45L Skinny models, but that’s it. In fact, that notice was dated May 28, 2024, so I’m not sure if it’s still correct.
The TR-45L Skinny
I love the Skinny as much as the original TR-45L—they sport the same receiver and audio; the Skinny simply lacks the ability to add an internal battery and Z-Match ATU. What you get, though, is a radio that’s even more portable and provides an excellent operating angle with the bail folded out.
Have you ever operated a Penntek radio during a contest or Field Day? What are your other favorite field radios for this type of environment? Please comment!
After 126 Days, A Long-Awaited Unboxing: The KH1 Arrives!
by Emily (NI1Q)
If there was one thing being in a physical rehab facility for 4 months taught me it was friends and families were a comfort. They brought encouragement, broke the boredom and were helpful in bringing hope when I wasn’t sure if I would be walking again. I was able to have my DMR handheld and checked into nets and talked with friends, but I really missed being on HF.
Although I own an IC-705 and a QRP Labs QMX, managing them in a room would have been difficult. I really love the 705, and can manage the QMX, but the 705 is not the kind of rig you can put in a bedside table drawer; the QMX with an EFHW + batteries becomes about as large and difficult to deploy. Especially in bed.
It was with this mindset that I watched in interest Tom’s initial videos of the Elecraft KH1. I initially saw it as something akin to the QMX, and I had some reservations about the key. As I watched several of Tom’s exploits, my mindset began to change. On January 29, 2024, I placed an order for KH1 Edgewood package. I would soon (I hoped) become an Elecraft owner, part of what sometimes seems to be a cult, and other times seem to be the most loyal fanbase in ham radio.
I initially calculated I would get delivery sometime in April, just in time for my birthday. As that time passed I talked to Elecraft and they opined that I would have it in time for Dayton. A week before, it wasn’t going to happen, and I packed heavy to take the IC-705 with me.
And, then, May 30th, my wait was over. An email arrived: The KH1 was on the way!
Boxes Arrives: I can’t contain myself…
On June 1st, I was out playing fetch with Zoe and saw the postal truck coming down the street, and I rushed over to the curb to meet him. As he clicked his phone to certify delivery I asked “It’s from Watsonville CA, right?” He smiled; “You must have been waiting for this one.” “126 days for sure.” I rushed into the house with my package quicker than Ralphie Parker running out into the snow with a Red Ryder BB-gun on Christmas day.
I had previously ordered the right angle antenna adapter, so together I had two boxes to unwrap. The KH1 was packed well enough the box puffed up with what I assumed was bubble-wrap.
Carefully cutting the packing tape confirmed my assumption, and I was greeted by a very nice and unexpected colour manual that confirmed I had now become an Elecraft owner for the first time.
I thumbed through the manual and made a mental note of the sections I’d need for a quick “getting started” activity. Time set – check. Antenna selection – check. Charging – check. On-off switch – check.
I was ready (and eager) to go.
Pieces, Lots of Pieces.
Even though it looks like a tidy group of four things, there were multiple layers. First out was the Edgewood case. It’s a nice case but with only one extra pocket. I would later learn it wasn’t really enough. The case was well padded, so for now it would be where the radio lived. Continue reading NI1Q’s Long-Awaited Elecraft KH1: Worth the Wait?→
Update as of May 31, 2024: I’ve just learned that the prototype unit I used for this activation has been superseded by a production model Xiegu X6200. While many of my initial impressions remain valid, some of the bugs and quirks I noted have likely been addressed in the production model.
When I published this post, I was under the impression that this loaner unit was representative of the final production run. In light of this new information, I’ve removed the mention of some specific bugs until I have the opportunity to evaluate the production run unit.
I’ll be receiving a production model loaner in the coming weeks, and I’ll update this post and share a video demonstrating the updated radio. Stay tuned!
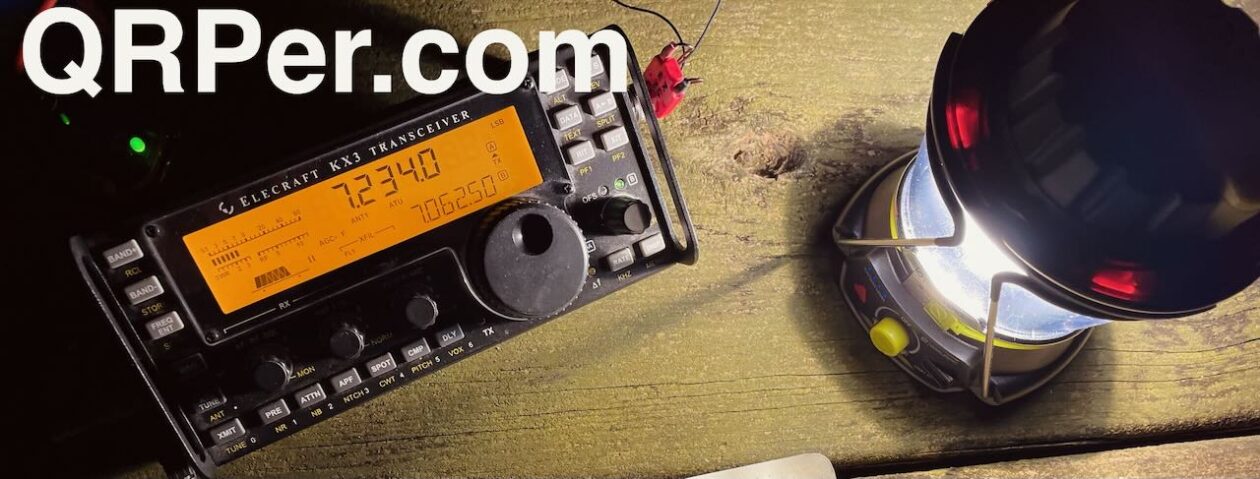
After publishing my post yesterday morning, I ran a few errands in town, then headed to Lake Powhatan in Pisgah National Forest to perform a POTA activation with the new Xiegu X6200.
In short, my buddy Vince summed it all up in a text he sent, stating that I sure picked an interesting time to get on the air. I received this image from Vince–while calling CQ POTA for the 100th time–showing the results of our X-Class Flare:
It was a radio blackout.
In the end, I did log eleven stations: 1 on 30 meters, and 10 on 20 meters, all with CW.
Eventually, I did plug in an external battery and run the X6200 at its full 8 watts of power in SSB mode, but there were no takers on 20 meters. The bands were so dead, I even received reports from some of you that the FT8 portions of the band had little to no activity.
That dead!
I did manage to hunt some other park activators successfully–we activators had to work together to get through this one!
Video: Change of plans
I had originally planned to create a video of the activation, write a detailed field report, and answer some of the questions you left in the comments section of my previous post. I was actually able to make a video, but it’s incredibly long. Because of that, I’m only going to upload it to Vimeo for QRPer.com Patreon supporters to view. I simply don’t want to deal with the inevitable drive-by comments on YouTube from people expecting quick-hit thoughts about the X6200 in a nearly two-hour video.
No worries, though, I will make another video witht he X6200 in the next few days and publish that one on YouTube.
In the meantime, I’ve also taken some thorough notes that I’ll be sharing here.
X6200: Initial Impressions and Notes
Disclaimer: It’s important to keep in mind that this is a prototype loaner unit, and the firmware is still in its early stages (Version 1.0). Because of this, the following observations and notes should be taken with a grain of salt.
Many issues will likely be addressed in firmware updates that Xiegu will be releasing in the coming days and weeks.
The date of publication for this article is May 30, 2024. Considering
I will eventually be posting a comprehensive review of the X6200, but only after I’ve spent a significant amount of time (weeks, not just hours) with the radio. This initial write-up is just to share my first impressions.
Moving on…
Since there simply wasn’t enough band activity and the X-class flare created more band noise than normal, I wasn’t able to properly evaluate the X6200’s filtering (thus how it might handle a pileup, crowded band conditions, etc.). I also couldn’t get a good read on the radio’s noise floor and overall audio characteristics.
I did, however, spend nearly two full hours with the X6200 going full bore sending CQs, so I had quite a bit of hands-on time, and I feel the X6200 got a proper burn-in period.
Due to antenna limitations – a 17-foot wire antenna with a 6-foot counterpoise hanging from a second-floor condo balcony, matched through a Tokyo Hi-Power antenna coupler for an SWR well below 2:1 – I’ve been operating exclusively on the 20-meter band.
A short coax run into the dining room has given me some great on-air time over the weekend, with good band conditions for 20-meter CW.
The radio powers up when 13VDC is applied and I quickly figured out the menu structure with the minimal documentation available from DL2MAN.
I’ve learned that the filter is best set to 500Hz and it is effective for the conditions, and as the band gets hot with all the various weekend contests, I drop in a little attenuation and soon the radio begins to sound good – actually, for the money, it sounds really good.
QSK set to ON allows my keyer in Iambic B to do a good job and I don’t miss any contacts which are forthcoming across the US from Oregon out to the East coast, on down to the Virgin Islands and then, quite a surprise, my Magnificent 7 Watts is heard for a choice contact with a VK2 down under.
I pound out contest QSO’s all up and down the band, adding in a few SOTA and POTA stations and very few have trouble copying me – I certainly had no problem copying weak signals from them.
I do notice that this is not a $1,500 transceiver, especially in the receiver performance, but for the price the satisfaction derived from effortlessly working CW makes up for any limitations.
During the MST contest, as I write this, stations were piled on top of each other. I found that tightening the filter down to 50Hz wasn’t ideal – 500Hz worked better for my ears. Signals filled the band from 14.030 to nearly 14.050, ranging from very weak to extremely strong. Thankfully, the well-behaved AGC prevented any ear-splitting surprises.
I also tested SSB mode briefly and it works and sounds good, though I’m unlikely to use it much myself.
Overall, this little gem is far from a toy. With its filters, AGC, attenuator, and fine-tuning, it should bring a smile to any CW operator’s face.
On Sunday, March 3, 2024, I had a couple of errands to run in downtown Asheville and also had to pick up my daughter.
I ended up having about 40 minutes to kill and, since I had my Elecraft KH1 field kit packed in my EDC bag, I thought it might be fun to fit in a little radio time.
Since I was downtown, the only viable POTA site to hit would be the Thomas Wolfe Memorial–you might recall my activation there last year–but technically, the park was closed. It is an urban park in the middle of Asheville, and there are no gates to keep people from walking across the grounds, but still, I’d feel better activating with permission from the staff first. (I’m pretty sure they’ll grant that permission, by the way.)
Instead of activating, I decided to do a little POTA hunting.
I parked at the spot where I planned to meet my daughter and grabbed my KH1 field kit.
My good friend, Ara (N6ARA), designed a small 3D-printed adapter that allows his TinyPaddle Plug to fit the KH1 securely. He sent me (free of charge) this new key/adapter to evaluate.
The adapter is a super simple design that works with the TinyPaddle Plug (not the TinyPaddle Jack).
I hadn’t used this new adapter in the field yet–I only very briefly tested it at the QTH a couple of days prior.
I mentioned last year, shortly after the KH1 was introduced, that I expected a number of 3rd party paddles to start appearing on the market. Since the interface with the KH1 is a standard 3.5mm plug, it does open the door to 3D-printed designs and experimentation. Admittedly, it’s a small space to fit in a paddle, but it’s doable.
I believe N6ARA was actually the first non-Elecraft paddle I used on my KH1 because his TinyPaddle Plug will fit it natively. That said, the new KH1 adapter makes it a proper secure fit–the way it should be!
Side Note: The OEM Elecraft KH1 paddles (the KHPD1s) are now in Revision 2, and all KH1 owners (who received the original paddles) will get version 2 paddles eventually via Elecraft for free.
The original KH1 paddles have a green circuit board.
I haven’t received my Rev 2 paddles yet, but I know I will before long. It’s my understanding that the Rev 2 paddles have a much better feel, and keying is more accurate.
Still…it’s brilliant that Elecraft used a standard jack so that we hams can design our own paddles if we like.
The TinyPaddle Plug
Ara’s TinyPaddle design is super simple, and while he originally designed the TinyPaddle to be a back-up option, I know a number of hams who use the TinyPaddle as their main field key.
Again, I can’t stress how cool it is to have a radio that allows you the flexibility to hit the air pretty much anywhere, anytime.
The KH1 is so quick to deploy, low-impact, and low-profile.
It’s as conspicuous as holding a transistor radio with a telescoping whip. So far (it’s still early days, let’s be honest here) no one has seen me with the KH1 and asked me if I’m a spy. I can’t count the number of times I’ve been asked this over the years of POTA activating!
It’s funny how sometimes one small accessory can have a huge impact on a field radio kit.
When I first learned about the Elecraft KH1 (basically, the day I was invited to join the volunteer testing group), I felt like Elecraft had designed my ideal QRP radio. The KH1 is super compact, weighs 13 oz completely loaded, covers my favorite bands, and has features I would expect in much pricier radios. It reminded me of my beloved KX1, but even more portable with more features.
The KH1 caters to handheld or pedestrian mobile operating–at least, that was the overarching design objective. It accomplishes this amazingly well. It’s so easy to operate handheld, and there’s nothing else quite like it on the market. I suspect that when others copy the design (I’m sure they’re already doing so–!) it won’t be as versatile, functional, and lightweight.
At the end of the day, though, I feel like I’m only using the KH1 pedestrian mobile about 30% of the time I have it on the air. Of that 30%, I’d say that only 10% of the time I’m pedestrian mobile while activating, and 20% of the time I’m doing little impromptu radio sessions in parking lots, ballparks, while visiting family, and even on my own mountain property.
While handheld operating is simply a game-changer, I knew I wouldn’t do this 100% of the time with the KH1. It’s for this reason that my very first bit of proper KH1 feedback to Elecraft, well before I had my hands on a prototype, was that a right-angle adapter for the whip antenna would truly round out the KH1’s field prowess.
This would basically give my KH1 the same functionality of my beloved KX2 and AX1 antenna combo, but in an even more portable package.
Turned out, Elecraft already had a right-angle adapter on the design board!
Fast-forward to present day…
Last week, Elecraft sent me a prototype of the right-angle adapter to test and evaluate. They’ve given it the model number KHRA1.
Full disclosure: Elecraft also gave me permission to post a video and article about this new accessory even though (at time of publishing) it’s not even showing up on their website. I will, however, link to it here as soon as Elecraft makes it available. This is an item I would otherwise have tested in private–thanks, Elecraft!
The KHRA1 is a simple adapter. Other than metal attachment hardware, most of it is lightweight and 3D-printed from a durable material (I assume the same material they use in the KH1).
Attaching it to the KH1 is very easy.
First, you unthread the large metal thumb nut from the KHRA1. You will need to hold together the remaining KHRA1 components (legs and attachment bracket) so that they don’t come apart before you attach them to the KH1. This is actually pretty easy to do, but users should know to follow the KHRA1 instruction sheet. If these parts fall apart in the field, it might require a bit of searching the ground for the pieces.
You simply thread the large thumb nut onto the KH1’s whip antenna antenna port, then thread the rest of the KHRA1 bracket/legs onto the large thumb nut.
Check out Elecraft’s illustration:
I then position the KHRA1 legs as shown above, then tighten the KHRA1 adapter so that everything is secure.
It’s super simple to do, and you can see this process in my activation video below.
Speaking of an activation…
On Saturday, March 2, 2024, (yes, only two days ago) I had my first small window of opportunity to squeeze in a POTA activation and test the KHRA1.
That day, my daughters and I had a number of errands to run, then a three-hour round-trip drive to pick up my wife. We were on a very tight schedule, but I had a 30-ish minute window of opportunity to fit in some POTA radio therapy.
I set my sights on the easiest-for-me-to-hit POTA site on the Blue Ridge Parkway: the Folk Art Center.
Amazingly, I discovered that morning, that the KHRA1 fits in my Pelican M40 Micro case along with my KH1, whip, counterpoise, key, spare N6ARA key, and earphones.
With the KHRA1, this means my M40 field kit can do both pedestrian mobile and tabletop operating. Woo hoo!
The weather that morning was simply glorious. A very wet front swept through the previous day leaving behind clear skies and warm temps. Frankly, it was a bit odd activating without wearing a jacket or hoodie.
Gear:
Note: All Amazon, CW Morse, ABR, Chelegance, eBay, and Radioddity links are affiliate links that support QRPer.com at no cost to you.
Setting up was quick and easy, even though this was my first time using the KHRA1 in the field.
I hopped on the air and started calling CQ. Once spotted (for some reason the RBN auto-spotting feature wasn’t working again), the contacts started flowing in.
I worked a total of 18 contacts in 16 minutes. It hardly gets better than that for a CW activation!
I had to call QRT after my 18th contact. Even though I had a 30-minute window to POTA, nearly 14 minutes of that was taken up with my intro and summary for the activation video.
I called QRT with a small pileup still in place. I really hate doing that, but I had a schedule to keep!
QSO Map
Here’s what this five-watt activation with a 4′ telescoping whip antenna looked like when plotted out on a QSO Map:
Activation Video
Here’s my real-time, real-life video of the entire activation. As with all of my videos, I don’t edit out any parts of the on-air activation time. In addition, I have monetization turned off on YouTube, although that doesn’t stop them from inserting ads before and after my videos.
The KH1 works amazingly well as a tabletop radio when combined with the KHRA1 adapter.
At the end of the day, the KHRA1 is a very simple piece of hardware, but it effectively transforms the KH1 from a handheld radio to a tabletop.
Of course, I’ve used the KH1 numerous times with wire antennas in a tabletop configuration (I’m a massive fan of wire antennas) but the ability to use the 4′ whip antenna and internal KH1 loading coils means that I can operate anywhere I have a surface.
Herein lies the thing I love about my KX2/AX1 pairing as well. It’s just with the KHRA1, the KH1 makes for an even smaller, lighter-weight field kit.
Any negatives? The only one I’ve come up with is that the KH1 is so lightweight that I realize I need to carry a small piece of shelf liner (something like this) to provide the KH1 with a bit more grip on a slick park table, especially those composite ones.
Again, I will update this post when Elecraft announces KHRA1 pricing and availability.
Thank you
I still can’t believe the entire kit fits in this small case. Even when I put the KHRA1 thumb screw on backwards!
Thank you for joining me on this quick little tabletop activation!
I hope you enjoyed the field report and my activation video as much as I enjoyed creating them!
Of course, I’d also like to send a special thanks to those of you who have been supporting the site and channel through Patreon, and the Coffee Fund. While certainly not a requirement as my content will always be free, I really appreciate the support.
As I mentioned before, the Patreon platform connected to Vimeo make it possible for me to share videos that are not only 100% ad-free, but also downloadable for offline viewing. The Vimeo account also serves as a third backup for my video files.
The QMX by QRP Labs is a five band, multi-mode radio introduced by Hans Summers G0UPL at FDIM in 2023. The QMX is the next logical step in the radio development journey at QRP Labs, bringing together the innovative approach to FSK modes like FT8 from the QDX and the CW performance of the QCX series. This is all done in same enclosure as the QCX-Mini which is not much larger than a deck of playing cards.
The QMX is about the size of a deck of cards.
The keen observer will notice that the QMX also sports a built-in microphone which, along with associated circuitry, supports future introduction of voice modes by way of firmware update. Other notable features include SWR metering with protection as well as solid-state “PIN” diode T/R switching, plus the option for “high band” coverage of 20 through 10 meters in addition to the original 80m-20m version.
Most hams have, at one point or other, forgotten to throw the antenna switch, adjust the tuner, or even connect an antenna before transmitting. The SWR meter and protection really sets the QMX apart from earlier QRP Labs radios. There are plenty of sad tales on the QRP-Labs forums from QCX or QDX users that “smoked” the BS170 mosfet finals in a moment of operating into a badly mismatched load. It’s remarkably easy to do, ask me how I know!
The Build
Based on experience with the QCX-Mini and having put together several QDX’s, I admit to being hesitant to starting assembly of this radio. The level of integration in the QMX as a multi-band, multi-mode unit is probably the highest yet to come out of QRP Labs. The components that were merely small in earlier radios are absolutely tiny in the QMX, specifically the LPF toroidal cores. The main board, internal switching power supplies, display, and controls board are all sandwiched together in a tight fit for the custom enclosure.
Most of the electronic components installed on the main board.
The build started with a slow and methodical approach of doing a little bit each day and working in the morning when my mind was fresh and there was good light on my workbench, a.k.a. the dining room table.
The first “disaster” happened when performing the factory recommended modification to Revision 2 boards shipped in 2023. The mod calls for a protection diode to be installed across a SMD mosfet. Several leaded 1N4148 diodes were available in my “junque” box so I attempted to carefully fit one of these in the right position on the board. While soldering the diode in place I managed to lift C508, a microscopic .1uF SMD capacitor, clean off the board!
The suggested modification adding a protection diode.
Given the tools at my disposal, there was no way I was going to be able to get that capacitor back into place. Therefore, I grabbed a standard through hole .1uF cap and painstakingly got it connected in the right place, verified by lots of continuity testing.
Once finished with all the electronic components on the main board, I was feeling pretty cocky and also the completion of the project was more clearly in view. The cautious and methodical approach gave way to a faster build pace, which directly lead to the second “disaster.” While installing the headers that connect the main board to the display board, I failed to CAREFULLY READ THE ASSEMBLY MANUAL and soldered the male pin headers where I should have installed the female sockets!
This misstep might have ended the project right then and there if I had not at some point in the last year bought a proper desoldering tool. This is not an expensive automatic vacuum pump powered solder re-work stations, but rather a heating tip and manually actuated solder sucker built into one tool. Twenty-two unsoldered connections later, we were back on track. Continue reading QMX – From Kit to Field!→
In late December 2023, I received a package from Jesse at JNCRadio/Chelegance. It was their new MC-599 portable dipole antenna. They sent it—full disclaimer: at no cost to me—for evaluation, but shortly after receiving it, life got crazy and I was delayed in taking it to the field.
Fast-forward to February, and I was eager to take it to the field and see how it might perform. On February 5, 2024, a nice window of opportunity opened in the afternoon while one of my daughters was rehearsing A Midsummer Night’s Dream with her cast. Pisgah National Forest and Game Land were a 20-minute drive from her meeting site, so I headed there to deploy this new antenna.
The JNCRADIO MC-599
On-site, I pulled out the two main components of the MC-599 dipole system: the bespoke padded bag holding the antenna and the portable mast.
I knew the basics about assembling the MC-599 because I had watched a video on the Chelegance website that morning.
However, this was the very first time I had deployed the MC-599. I had never even removed any of the antenna components from the padded bag.
With this antenna, it’s best to have an open area for the two sides of the dipole (two telescoping whips) to fully extend without touching tree branches, etc. I had one particular picnic site in mind at the roadside picnic area I chose, but a couple was having a picnic there when I arrived. I waited to see if they might be leaving soon, but they weren’t, so I chose a site I had used before, even though it was flanked by trees.
Assembly was easy: I simply attached the center of the dipole to the 13′ mast, then attached the two telescoping whips to either side and extended them to the 20M position silkscreened on the whip (identical to the MC-750 vertical markings—see below).
Next, you simply attach your coax to the center of the dipole, then extend the mast all the way up.
I had to avoid touching tree branches, but it actually fit quite easily into this small space.
Since it was a bit breezy, I used some line to guy the mast. Ideally, you’d want a minimum of three guying points, but I only had two lines with me, so I made do, and it worked fine—the antenna was stable.
Next, I set up my radio: the Yaesu FT-818ND. Since the MC-599 was, in theory, resonant, I didn’t need an ATU for a match.
I turned on the FT-818 and discovered that the SWR was a perfect 1:1. Amazing.
I suppose I shouldn’t have been surprised because my Chelegance MC-750 is always perfectly resonant (without needing a transformer) simply following the whip markings for guidance.
I should note here that the MC-599 can handle up to 200 Watts PEP—I was pushing 5-6 Watts. Also, the frequency range using the whips is from 20-6 meters. Chelegance also includes two 7 MHz wire elements that can be deployed in an inverted vee shape to play radio on the 40-meter band. It’s an efficient system and has many fewer components than a Buddipole systems I’ve used in the past.
Gear:
Note: All Amazon, CW Morse, ABR, Chelegance, eBay, and Radioddity links are affiliate links that support QRPer.com at no cost to you.
Keep in mind that my POTA site was in a deep valley, flanked by high ridge lines–I wasn’t sure what to expect as I hopped on the air.
I started calling CQ POTA and the first station I heard was DL1OK operating in Spain as EA8/DL1OK. Logging Dmitrij was a good sign indeed for this portable dipole!
Stations kept flowing in. I worked my first ten contacts in ten minutes.
I continued working stations in a continuous pileup until I ran out of time. I ended up logging a total of 46 contact all within 50 minutes. I did spend a few extra minutes (as I always do) trying to pull out weak stations and slower code stations.
What fun!
QSO Map
Here’s what this five-watt activation looked like when plotted out on a QSO Map.
Note that this map does not include my contact with EA8/DL1OK in Spain:
Activation Video
Here’s my real-time, real-life video of the entire activation. As with all of my videos, I don’t edit out any parts of the on-air activation time. In addition, I have monetization turned off on YouTube, although that doesn’t stop them from inserting ads before and after my videos.
I’ve got to admit: the MC-599 made a great first impression.
As with the MC-750, I’m most impressed with the build quality. The components are all sturdy and nicely machined. The padded case was custom made to hold the MC-599 and its components. Everything fits together as it should and—again—was resonant when deployed according to the whip markings.
Even on this inaugural deployment, it didn’t take long to set up. The next time I deploy it, it will go even faster. Packing it up afterward (as you can see in the video) went very quickly.
Keep in mind: the MC-599 is a low-impact, high-profile antenna.
If you’re at a site that doesn’t allow antennas in trees, the MC-599 could be an excellent option. Other than using optional guy lines that would require tent stakes in the ground, it would have no impact on park grounds.
I love the fact that the MC-599 is self-supporting. This would be an absolutely brilliant antenna to use at parks with wide-open spaces and few trees for support.
That said, it is not a stealthy antenna. In fact, portable dipole antennas are some of the most conspicuous portable antennas you could deploy. They’re maybe slightly less conspicuous than a hex beam or Yagi. Even though I was cloaked by a few trees, the couple that was occupying the picnic site I had hoped to use couldn’t help but stop by on their way out and ask what it was I was doing. I bet if I had been using a wire antenna, they wouldn’t have even seen it.
I would always ask permission before setting up an antenna like the MC-599 at, say, a small historic site or urban park.
I could also see using the MC-599 for SOTA (Summits On The Air), but primarily on summits that are either drive-up, or where the hike is minimal. The aluminum alloy mast is lightweight for its size, but it’s quite large to consider taking on an extended hike. However, for a nice drive-up summit, I imagine you could work some serious DX. Just bring a few guy lines in case it’s windy.
I do think the MC-599 would make for a great Field Day antenna. Since it can handle up to 200W PEP and is easy to lower and switch bands, it would be a brilliant portable option for those operating a multi-band 100W rig.
But obviously? It’s an exceptional performer with QRP power. It’s hard to beat a dipole even when it’s only 13′ off the ground.
Thank you
Thank you for joining me on this fun activation!
I hope you enjoyed the field report and my activation video as much as I enjoyed creating them!
Of course, I’d also like to send a special thanks to those of you who have been supporting the site and channel through Patreon, and the Coffee Fund. While certainly not a requirement as my content will always be free, I really appreciate the support.
As I mentioned before, the Patreon platform connected to Vimeo make it possible for me to share videos that are not only 100% ad-free, but also downloadable for offline viewing. The Vimeo account also serves as a third backup for my video files.
I’m very fortunate in that in the past few years I’ve acquired a number of QRP radios that I use in rotation when I do park and summit activations.
I’m often asked for advice on choosing radios, and as I’ve mentioned in the past, I feel like the decision is a very personal one–everything is based on an operator’s own particular preferences.
I’ve written formal reviews about most of the field radios in my collection. In those reviews, I try to take a wide angle view of a radio–to see how it might appeal to a number of types of operators. I highlight the pros and cons, but I don’t focus on my own particular take because, again, my style of operating might not match that of readers. I try to present the full picture as clearly as I can and let the reader decide.
The Getting To Know You series gives me an opportunity to highlight one radio at a time and showcase what I love about it and why it’s a part of my permanent radio collection. After we spend a bit of time talking about the radio, we’ll do a park or summit activation with it!
The Yaesu FT-817 and FT-818 Series
As I mention in my “Getting To Know You” video below, my very first dedicated QRP field radio was the original Yaesu FT-817 (non-ND version), so it has a special place in my heart.
At the time, I was living in the UK and travelling extensively throughout Europe with my UK call (M0CYI).
The FT-817 hit the market and it blew my mind. Up to that point, there were no general coverage QRP radios on the market that small, that comprehensive, and that even sported VHF/UHF multi-mode coverage. It even had a small internal battery pack! What?!
I was an early adopter of this radio and travelled with it extensively–indeed, in all of the years I lived in the UK and Europe, the FT-817 was my only amateur radio transceiver.
Fast-forward to 2023–some 23 years later–and I still have an 817. Actually, I have two 817ND’s and one 818ND (although, I plan to sell one of my 817NDs soon–I don’t need three!).
I find the 817/818 to be an incredibly robust and capable field radio. It’s also a brilliant value–few radios offer you the capabilities of the FT-817/818 for under $700.
My FT-817ND in an Armoloq TPA-817 Frame.
Yaesu discontinued the FT-818ND almost exactly one year ago. Retailers no longer have new stock, but there are loads of them on the used market. Keep in mind that the FT-817/818 was a cash cow for Yaesu for over two decades–the used price remains fair because there’s just so much supply out there. I routinely see 817ND and 818ND models selling for between $375-700 depending on how they’re configured and what’s included.
Yesterday, I posted some initial notes about the Elecraft KH1 and mentioned that I hoped to perform a POTA activation later in the day.
I’m pleased to report that I was able to fit in that activation!
I’m pushing this report and video to the front of the line because so many readers are eager to see how the KH1 performs during a field activation. Instead of focusing on the park, in this field report we’ll be taking a closer look at the KH1 and my initial impressions after performing a pedestrian mobile POTA activation with it.
Packing the KH1
I had a very hectic schedule yesterday and was on the road in/around Asheville from 8:00AM to 2:00PM before an opportunity opened to fit in an activation.
After a quick trip back to the QTH for lunch, I packed the Elecraft KH1 field kit in my EDC pack (a travel laptop bag).
Herein lies my first impression of the KH1: even though I knew I had packed the entire kit, I felt like I must have been leaving something behind.
Sounds funny, but even though I pride myself on making fully self-contained field radio kits, I felt like there must have be something else I needed. The KH1 field kit just seemed too small, too lightweight, and too compact to have included everything I needed for an activation.
Intellectually, I knew that it included everything needed, but I still did a mental inventory:
Radio? Check.
Antenna? Check.
ATU? Check.
Paddles? Check.
Battery? Check.
Counterpoise? Check.
Log book and pencil? Check.
Hard to believe, but it was all there.
Trust me: the first time you take your KH1 to the field, I bet you’ll feel the same way I did.
Blue Ridge Parkway (K-3378)
Because I was so short on time, I decided to activate the Blue Ridge Parkway which is the most convenient POTA entity when I travel into Asheville from Swannanoa.
It was cold and blustery afternoon the afternoon of November 1, 2023. At my QTH, I checked the temperature and it was about 34F. I knew it would be a bit warmer in town which is a good 1,000 feet lower in elevation, but I still grabbed my gloves on the way out the door. Glad I did!
As I mention in the activation video below, I wasn’t exactly on my “A Game.” I had received a couple of vaccines the previous day and my body was a bit achy as if I was starting to get the flu. But, of course, I wasn’t. Still… I didn’t feel 100%.
I arrived on site and set up couldn’t have been easier:
Open the KH1 pack
Remove the KH1
Attach the counterpoise and string out on ground
Remove whip from clips and attach to top of KH1
Extend whip
Turn on radio
Find a clear frequency
Hit the ATU button for a 1:1 match!
We’re talking a 30 second process even for someone who moves slowly.
Important notes about my KH1
Keep in mind the following notes that are relevant at time of posting this field report (November 2, 2023):
I am waiting on a firmware update to add:
CW Message Memories
CW Decoding
Internal Logging
I purchased the full “Edgewood” package but I don’t yet have my logging tray/cover yet. Elecraft plans to ship this within the next few days.
My KH1 is a very early serial number because I’m in the volunteer testing group.
The KH1 Speaker
The KH1 internal speaker is located on the bottom of the radio between the AF Gain and Encoder knobs.
I consider the Elecraft KH1 speaker to be a “bonus” feature. The speaker is small (1.1 x 0.65”) and limited in fidelity.
QRP radios, product announcements, reviews, news and more. Low power amateur radio fun!
Please support QRPer by adding us to your whitelist in your ad blocker. Ads are what helps us stay online. All of our ads are ham radio related--no junk, we promise! Thank you!