Because I receive so many tips from readers here on QRPer, I wanted way to share them in a concise newsletter format. To that end, welcome to QRPer Notes, a collection of links to interesting stories and tips making waves in the world of radio!
Foldable feet for small radios
Many thanks to Randall (K8UFM) who shares the following tip:
Thomas,
I found these on Amazon and they work great for small radios.
PONICOR 2PCS Zinc Alloy Mini Foldable Laptop Stand, Portable Computer Keyboard Riser with 2 Adjustable Angles, Self-Adhesive Invisible Notebook Stand and Keyboard Lift for Desk (Black)
This is Tom WW8D in Salem Va. I sure do enjoy your videos on youtube. I received a new KH1 yesterday and I just wanted to tell you that I have a clear waterproof case like the one you but its a slight bigger fromHarbor Freight. Its an Apache 550 and everything fits perfect in it.
I purchased the Apache 550 a few days prior to Helene hitting our area. I intend to make a post or video soon showing how this apache case compares size-wise with my Pelican cases. It is, in general, a much larger case than the M40 I currently use with the KH1. See photo below.
Video: Demystifying SWR
Many thanks to Vince (VE6LK) who writes:
Here is an EXCELLENT video explaining return loss, why lossy coax hides SWR issues and many other things:
All I wanna know is howcome our local star decides to throw in a monkey wrench when I go to activate? Huh? Huh?
Monday August 5 was a statutory holiday for me and I decided to get out early at a popular picnic area in south Calgary and get some radio therapy. I listened to the IARU beacons while driving and even 15m sounded promising.
I’m not nearly as adept as Thomas at using an arborist throw line as I famously exclaimed once and had to be beeped out, so it took me close to a half hour to get my VE6VID OCF antenna how I wanted it with one end supported by the tree and the opposite my carbon-fibre mast. Given I was also setting up video equipment, It was an hour before I made my first contact from when I had arrived.
I started off very optimistic that I’d be able to get 10 contacts as I was hearing all kinds of DX on 20m FT8. I connected my iPad with iFTx software along with some cables I heard about via KD7DTS and I started working it off at 1 watt (just to be cocky) and it took me a while to get 2 contacts. This simply won’t do as I don’t have all day!
So I switched to CW. 10 minutes of calling and only one spot on RBN at 5 watts. So I did what any reasonable person would do and I moved to 10 watts because more is better, right?
Two entries in RBN, one for 5W and the other for 10W.
I then had a couple of contacts. At one point I did a visual check to ensure my antenna wasn’t on the ground (it wasn’t). So I proceeded with my logical thinking and moved to SSB at 10 watts, because after all, I was there to experiment! Clearly I was delirious to think that SSB would be better than CW – that’s my story and I’m sticking to it!
This got me nowhere, slowly. Me, I prefer nowhere fast, but beggars should not be choosers. After 20 minutes of calling on SSB I decided it was time for more powah! and thus I took down my gear and moved into my truck with the trusty FT-857D and the ATAS-120A antenna with the lengthened whip. By this point I had zero hesitation to run 100 watts as I’d been at the park for close to two hours.
I posted a spot and began calling. I even turned my spotting into something humourous in an attempt to woo callers:
I got creative when posting spots 🙂
Along the way I attracted at least one bystander and spoke with them about the hobby for a bit, and I worked 4 contacts between being hunted and being the hunter. At least those 4 “only” took 15 minutes. But they were getting progressively harder. Can you spot why in the image below?
A=46
I’ll give you a clue: it starts with the letter A. I had noticed some small M-class flares over the past couple of hours and they were adding up fast. Conditions were deteriorating for me. I must have been damn near a direct hit to those flares, as others in the southern USA were making 50 contacts an hour at the same time as I wasn’t. So I finally did the right thing and moved to CW at 100 watts. I felt like Scotty “I’m givin’ ‘er all I can Cap’n!” …
…and I was met with mediocre results. Nobody answered my calls so the remaining contacts I obtained were found by hunting. Some that were calling were super loud to me and giving out 72s -indicating they were QRP- but could not hear me after my callsign was given 4 times. My final contact was with my friend VE3JO who has just returned to CW and was at a slower pace which helped to bring my blood pressure down a notch 🙂
Summary
Yes, there is a video with plenty of wise-cracking with myself to reduce tension, one of my coping mechanisms.
It’s not a race, sometimes it is a marathon that you didn’t plan on and only takes patience to have whatever you define as success finally fulfilled.
Still, how bad is it to be out in a park for a bunch of hours? It’s not too bad at all if you ask me!
72, 73 and dit dit,
…Vince
First introduced to the magic of radio by a family member in 1969, Vince has been active in the hobby since 2002. He is an Accredited examiner in Canada and the USA, operates on almost all of the modes, and is continually working on making his CW proficiency suck less. He participates in public service events around Western Canada and is active on the air while glamping, mobile, at home or doing a POTA activation. You can hear him on the Ham Radio Workbench podcast, follow him on Twitter @VE6LK, check out his YouTube channel, and view the projects and articles on his website.
Those of you who know me know that I’m a huge World War II history buff. Ever since I was a child, I’ve been fascinated by the stories of bravery, sacrifice, and technological innovation that defined this era.
That’s why the activation I performed on Tuesday, July 9, 2024, was very special.
I activated the Battleship North Carolina from inside the ship, using a modern transceiver, and one of the original vertical antennas mounted on the ship.
The Battleship North Carolina State Historic Site (US-6831)
The Battleship North Carolina is a World War II-era battleship that served in the United States Navy from 1941 to 1960. It is currently a museum ship in Wilmington, North Carolina.
The ship was launched in 1940 and commissioned in 1941. During World War II, it served in the Atlantic and Pacific theaters, participating in several major battles, including the Battle of the Atlantic and the Battle of Iwo Jima.
The USS North Carolina in Pearl Harbor in November 1942 for repairs. (Photo Source: U.S. National Archives and Records Administration)
The Battleship North Carolina was decommissioned in 1960 and donated to the state of North Carolina in 1961. It has been open to the public as a museum ship since 1962.
Growing up in North Carolina, I’ve always considered the Battleship North Carolina the icon of Wilmington. You can’t cross the Cape Fear river and miss this brilliant bit of naval history–it’s so prominent and accessible.
I had not actually toured the battleship since I was a child–some 40+ years ago. Last week, however, our family spent the week in Wilmington and the battleship was first on the to-do list.
Azalea Coast Amateur Radio Club
A couple months ago, I mentioned to my buddy Bob (K4RLC), in passing, that one of my daughters was attending a week-long residential program at NC State University while the other daughter would be attending The University of North Carolina Wilmington. My wife and I would stay in Wilmington for the week and I would somehow love to activate the Battleship North Carolina for the POTA program.
Fortuitously, shortly thereafter, Bob attended a presentation about the Battleship North Carolina by Mike Hartmann (NI2S) at a radio club meeting in Raleigh. Mike is with the Azalea Coast Amateur Radio Club, the caretakers and curators of radio central in the battleship.
Bob put me in touch with Mike who then graciously accommodated my schedule, even though it required his presence throughout the activation.
Mike did make it clear that the radio room is three decks below, has no air conditioning and is a proper “sweat box.” Turns out, too, that the week we were in Wilmington coincided with a bit of a heat wave which was affecting much of the eastern US. Because of this, I asked if we could meet on Tuesday, July 9, 2024, at the earliest possible time–8:00 AM, when the museum opened.
It was a beautiful morning and I arrived on site perhaps 15 minutes in advance. I needed to pull my camera gear out of the car and allow some time for it to adjust to the humidity (which was extremely high).
I thought my lens had finally acclimatized when I started the video before Mike arrived, but it turned out the lens was still a bit foggy for a minute or two.
Mike arrived and we walked into the ticket booth where I purchased my ticket. He then led me onto the deck and into one of the roped-off entrances to the lower decks.
He kindly allowed me to film walking through the ship into the radio central area. I’ll admit that it was difficult for me to keep my attention on the camera as I was walking through a ship I remembered from my childhood! Since my video is real-time, real-life, you experience it with me–I didn’t check out the ship in advance.
I was amazed at how much of the ship was open to the public and in superb, original condition.
In radio central, Mike allowed me to peek behind some of the closed off sections with my camera, so you’ll get the follow along with me.
What I didn’t realize was just how much signal intelligence was happening on a fast battleship like the USS NC.
There were rooms dedicated to listening posts, decryption/encryption, and sharing of intelligence. This was all so fascinating and enlightening.
Next, Mike opened up the actual radio room where an Icom IC-756 Pro III was hidden in one of the original ship radio desks. This being a museum, all modern gear was hidden as well as possible.
Mike was right about the room being a sweat box–even in the early morning, it was pretty hot and humid in there. Fortunately, he had two fans he turned on and pointed at us.
The view from my operating position.
Mike set up the IC-756 Pro III by connecting it to a power supply, then attaching a Bencher paddle.
The vertical–again, one of the original Battleship North Carolina antennas–also required a little bit of matching for 20 meters.
Any movement of 10 kHz or so, required engaging the 756’s internal ATU.
As I set up the camera and made a comfortable operating position, I realized just how noisy the room was with the normal ship sounds (it has its own fresh air ventilation system) and the two fans running full-bore.
I set up my wireless mics–one on me and the other inside the portion of the desk that housed the radio.
In truth, I wasn’t confident the audio would work out at all. First thing I did when I made it back to the house that day was to check the audio–turns out, it came out pretty darn well all things considered.
In fact, the audio in the video was much better than my own two ears experienced while operating. Having one of the mics much closer to the speaker and protected from the wind blowing really made a difference.
Those of you that read the final article for my spring-break Florida POTA trip know that I recently reconciled with someone dear to me. This man, Glenn W4YES, has moved to Savannah, Georgia and we are in a relationship. He is a CW op and the person behind CW Innovations’ Comprehensive ICR course. He knows how much I love POTA and joined me Friday, May 3rd for an activation.
I could have resumed my quest for 60 new-to-me parks. However, I figured we had enough “new” stuff going on with a new activator and a different set up for Glenn. POTA tends to throw the unexpected at you already and the more variables you add, the more opportunities there are for mistakes (er, learning opportunities) and/or hilarity to ensue. So I chose to return to Evans County Fishing Lake (US-7464), a site already known to me, for our dual activation.
photo: Glenn W4YES
What a gorgeous day! Sunny skies and 71 degrees! The drive is a short (about 50 minutes) and easy one to this park.
Given Glenn would use QRO equipment and didn’t have a chair or knee board like myself, I chose one of the few spots with a picnic table. The site looks out on Bidd Sands lake. We could have shared my QRP set-up but decided to activate at the same time which necessitated two sets of equipment.
road in the park. photo: Glenn W4YESboaters on the lake
I chose familiarity over reinventing the wheel when it came to picking equipment for Glenn – I grabbed my Yaesu FC-50 tuner and Yaesu FT-891 rig from my ham shack and the Pacific Antenna 2040 trap dipole antenna and SOTABeams travel mast from my equipment stash. This was the set-up I used for POTA before I went QRP with the KX2 and Tufteln EFRW last May. It wasn’t long before a station was set up on the picnic table for Glenn. However, the antenna was another matter.
Glenn’s set up
When I grabbed coax for the antenna, I forgot the connector is a BNC connector which is why I have a coil of RG-174 in my stash. Instead of grabbing that RG-174, I grabbed my 50’ coil of RG-8x. (Doh!) That coax is extremely heavy for the SOTABeams travel mast and, after adding an adapter for the BNC to SO-239 connector, the antenna was hanging over precipitously. It just goes to show how well-made and durable the SOTABeams travel mast is. I was mortified as I like the best possible arrangement for my antennas but Glenn wasn’t. He knew what we had was good enough for contacts (see his QSO map down below) and his thinking turned out to be correct.
20-40 Pacific Antenna
While Glenn finished getting everything in order for his activation, I began setting up for mine. I know this park allows antennas in the trees so it wasn’t long before the trusty Tufteln EFRW was installed. Daisy and I chose a shady location near the antenna, got comfortable, and began my activation.
attaching throw weight to arbor line. photo: Glenn W4YESgranny swing to snag the branch I want. photo: Glenn W4YESgetting down to business! photo: Glenn W4YES
As Glenn was running QRO (the power I usually run on my Yaesu FT-891 is 75 watts) on 20 meters, I began working other bands. I initially wondered if I would have any difficulty running a QRP station so close to a QRO set-up, but I didn’t. Continue reading The POTA Babe Gets a Partner!→
Many thanks to Scott (KK4Z) who shares the following post from his blog KK4Z.com:
The Happenstance Rove
by Scott KK4Z
Happenstance: a chance circumstance.
That is how it started out.
I recently sold one of my radios and, for giggles, I thought I would check out QTH.com to see if there was anything I just had to have (Danger Will Robinson). I stumbled across a nice IC-7100 and thought I could install it in my truck to make quick POTA activations a little easier. The ad looked good and the call sign sounded familiar. I checked the seller out on QRZ.com. I do this with every ham radio transaction to reduce the opprtunity of being scammed.
Low and behold! the seller John KX6F, is an old army buddy of mine. We served together in the 101st Airborne Division in C/158 TF 160. That was 40 years ago and I hadn’t seen him in at least 15 years. John is a good guy and was a major influence to me becoming a ham. I served with him from about 1980-1983 when I was transferred to Germany. Life and stuff took over and I was finally able to get licensed in 1995.
I sent John an email asking if I could pick up the radio in person and take him out to lunch. He told me that he suffered a severe stroke a couple of years ago and that dining in would be a better option. No problem. On Monday 04/22, I asked when would be a good time to come. He said Tuesday would be good. I had one night to plan a trip. He lives about 5 hours away from me so I thought I would turn this into a rove. I decided on two nights of camping and 5 parks in 5 states. The XYL had a hip replaced so I hadn’t been out in a while, it was time to stretch my legs.
Here is a map showing the stops.
Blue is day one, red is day 2 and green is day 3 and the trip home.
#1 Clarskville, TN. First stop was John’s. We had pizza for lunch and reminisced about old times. John looked good and was as jovial as ever. I was glad I made the trip. He and his wife were very gracious. After about an hour and half, I could tell it was time to go. The radio is in great shape and I am sure I will enjoy it.
KK4Z with KX6FMy new radio at the QTH
From John’s house I drove to Lake Barkley State Park (US-1284 and #2 on the map). I spent the night there in a very nice campsite. Right at dusk, a Barred Owl flew into my campsite. He was less than 20 feet away from me at eye level. Once we made eye contact, he flew off to another perch – silent as a ghost.
All the states on this trip were new activation states for me so I made sure I had enough contacts for a valid activation. I was prepared to do either CW or FT8 but due to band conditions, it looked like FT8 was going to be the weapon of choice. I made 20 contacts and managed to work Australia, Canada and France.
Wednesday morning I broke camp and headed toward Ft Massac State Park (US-0993 and #3 on the map) just over the line from Kentucky. It was a nice park inside of the town of Metropolis. I found a spot with clean restrooms nearby and enough room for my truck and camper. There were a lot people using the park to exercise. I used FT8 to make 20 contacts on 30 and 10 meters and the only DX was Canada.
From Ft Massac State Park my next destination was Big Oak Tree State Park (US-1749 and #4 on the map) in MO about 1 1/2 hours away. Along the way near the town of Omstead, IL, I spotted a Bald Eagle having lunch with Vultures at the roadkill cafe.
The park is located in rural MO. and surrounded by farms. There was no cell service here but the park and the views were great. I set up near the picnic area. Ten meters was hopping. DX stations included: Hawaii, Belize, Portugal, Puerto Rico, Sardinia, and Spain. I was running 25 watts. I made 20 contacts before packing it up and moving to my next park.
Stop #5 and my second overnight was Mississippi River State Park (US-1102). This was a very nice park and I managed to reserve a campsite on the water. It also had zero cell service, even my cell phone went SOS.
My money band was 10 meters again making DX contacts with Argentina, Australia, Brazil, Canada, Chile, Japan, and New Zealand. Ten meters acted like 20 meters, and 20 meters acted like 40 meters. I ended up with 33 contacts total.
Thursday morning had me heading toward home with Georgia on my mind (I even heard the song on the radio). I made a stop at Trace State Park (US-2554 and stop #6) just outside of Tupelo, MS. I stayed long enough to make 20 contacts and one DX into Canada.
I got home about 1600 hrs eastern Thursday afternoon. I worked 5 parks in 5 states: Kentucky, Illinois, Missouri, Arkansas, and Mississippi, in 2 days. I crossed 4 major rivers: Cumberland, Tennessee, Ohio, and Mississippi (twice). I added 5 new states to my POTA activations.
It was a good trip considering I only had about 2 hours to plan it. I learned some new things about my equipment and I have plans to make things better for next time.
My first rove proved to be a lot of fun. Usually I drive to a park, spend a couple of days and then drive home. I am hoping to try another rove before the year is out.
Video
See the YouTube video below. Until then — 73 de Scott
Our Parks On The Air (POTA) community has experienced exponential growth since my introduction to POTA activations in 2019. Today, POTA boasts over 500,000 participants, including both hunters and activators.
Gone are the days of awkwardly explaining our hobby to park staff who were unfamiliar with amateur radio, let alone park activations. Nowadays, when I approach park staff for permission to operate, they often direct me to areas where other POTA activators have set up in the past, showcasing a growing acceptance and understanding of our community.
Goal: Positive Impact
With such a large and expanding community, we have the potential to significantly impact our park systems positively. It is crucial for POTA activators to not only leave a positive impression with park staff but also actively support and contribute to the well-being of our parks.
Why now?
This post has been sitting in my drafts folder for several months. I hesitated to publish it because of my inclination towards positivity and reluctance to dwell on the negatives.
However, recent conversations with park rangers and staff from three different sites between June and November last year prompted me to share these insights. While acknowledging that interactions with POTA activators are generally positive, all three shared some concerns and criticisms.
I was surprised, in one case, that they hadn’t banned POTA activators from their site entirely. (I detail two examples at the end of this article.)
I imagine each and every one of these park rangers has had more negative interactions with the general public, but we POTA activators and amateur radio operators are a cohesive community that they lump into one group for better or for worse.
For instance, while a rowdy family gathering might disrupt the peace in a park, it doesn’t lead to a ban on families. However, repeated negative interactions involving POTA activators could result in our exclusion from parks or even escalation to wider park networks since many individual parks are tied to state, provincial, or national park systems.
Indeed, this has already happened at National Wildlife Refuges in Virginia. Check out the following message posted to Facebook this week from John (AB0O) who is a US mapping volunteer for POTA:
Time to be a positive force!
As John states in his message above, it’s time for us to proactively become ambassadors for POTA and good stewards of our parks and public lands.
I could have easily titled this post, “Ask not what your park can do for you; ask what you can do for your park!”
Let’s delve into some simple suggestions that I personally follow. This list is not exhaustive, so I invite you to share your strategies for promoting POTA positively in the comments below.
1. Obtain permission before operating
Despite the temptation to activate first and ask questions later, it’s essential to seek permission before setting up your station in a park. Some parks may require written permission for activations, regardless of the setup’s profile or impact (remember Leo’s recent field report?).
While most POTA sites allow activations as long as park rules are followed and other visitors aren’t disturbed, it’s prudent to confirm with park staff or experienced activators when in doubt.
In my experience, asking for permission is particularly crucial in parks with historical or ecological significance and limited facilities.
A piece of advice: When seeking permission, showcase your most portable, low-profile radio gear to help park staff understand the minimal impact of your setup. Over the years, this approach has resulted in successful activations for me, with only one instance of declined permission, primarily due to supervisor unavailability.
2. Choose inconspicuous locations
At the Cape Hatteras Lighthouse, I received permission to operate and I set up my station well outside the viewshed of the lighthouse.
When setting up your station, avoid obstructing viewsheds or high-traffic areas within the park. Instead, opt for spots away from major attractions or foot traffic, ensuring minimal disruption to other visitors’ experiences.
Most POTA sites offer designated picnic or parking areas that are suitable for activations without interfering with scenic views. When uncertain, seek guidance from park staff to identify suitable locations.
3. Default to low-impact, low-profile gear
Unless you know in advance that a park allows wires in trees, stakes in the ground, or other antenna support structures, default to your most portable, low-profile, low-impact field setup.
Unless explicitly permitted, refrain from deploying antennas in trees or using stakes that could damage park grounds.
I believe every POTA activator should possess a compact, self-supporting antenna system to minimize environmental impact. Additionally, consider operating from your vehicle if uncertain about setup requirements.
An NC State Park ranger told me last fall, “I like to see POTA activators that aren’t taking up a lot of space and yelling at their radio.”
Let’s not be the guy or gal he described!
4. Leave No Trace
Adhering to the principles of Leave No Trace is paramount during POTA activations and other outdoor adventures. Always dispose of trash properly and, if at all possible, pick up any litter you encounter at your operating site. My goal is to always leave the site cleaner and tidier than I found it.
In my backpack and car, I keep small litter bags along with nitrile gloves so that I can pick up and dispose of any trash I find.
Over the years I’ve operated POTA, park rangers and game wardens have caught me in the act of collecting trash and thanked me. I made a point of telling them that I’m an amateur radio operator doing a POTA activation. I feel like this can only leave a positive impression in their minds and help future activators who might seek permission to operate at a particular site.
Want to go a step further? Consider organizing group clean-up events with your amateur radio club. This collaborative effort not only benefits the park but also strengthens park and community ties.
5. Support your park financially
Show your appreciation for park access by contributing financially, especially at smaller locations with visitor centers or donation boxes. Whether purchasing items from the gift shop or making direct donations, your support is invaluable in maintaining park facilities and programs.
For instance, during a recent visit to a historic site, I made a point to purchase items from the gift shop and donate to the park.
The park rangers thanked me and noted that another frequent POTA activator also donates a bit of money or buys something in the shop each time he visits. They pointed out how much they appreciate that type of support.
While I usually prefer inconspicuous contributions, I intentionally inform park staff of my status as a POTA activator during these interactions. This transparency reinforces the positive image of amateur radio operators as park supporters.
6. Respect park operating hours
Ensure that your activations align with park operating hours to avoid overstaying your welcome. Familiarize yourself with park schedules and plan your activities accordingly to minimize disruptions and inconvenience to park staff.
I learned this lesson firsthand during an activation at Lake Norman State Park in 2021, where I unintentionally extended my stay past park closing hours. This happened during the week they shifted from more liberal summer hours, to winter hours. I was apologetic to park staff. Since then, I make a conscious effort to wrap up my activities well before closing time and communicate my intentions with park staff if I feel like I might cut it a bit close.
Be a POTA Ambassador
Vlado (N3CZ) draws a crowd on the Blue Ridge Parkway.
By following basic guidelines like these, POTA activators can cultivate positive relationships with park staff and demonstrate our commitment to responsible outdoor recreation.
As POTA Ambassadors, let’s engage with park staff, address any concerns they may have, and showcase the respectful conduct of our community. Listening to their feedback and acknowledging past issues can help mitigate negative perceptions and foster mutual understanding.
Real-word example
During a visit to a new-to-me urban park last year, I proactively sought permission to operate, considering the site’s limited space and popularity among POTA activators. Park staff appreciated my courtesy and expressed gratitude for my considerate approach.
Our conversation revealed previous negative experiences involving POTA activators. These included instances where operators failed to comply with park rules and even exhibited disruptive behavior. For example:
One operator tried to set up an antenna by tying a short 2×4 to fishing line and attempting to throw it into a tree. However, this park prohibits the use of trees for antenna support, and his “method” was causing damage to small branches. When asked to refrain from using the tree, the operator became confrontational, insisting on his ‘legal right’ to do so. Despite the staff’s polite explanation of the park rules, the operator angrily packed up and left.
Another incident involved a mobile activator who parked his truck in the park’s small lot, occupying three parking spaces, while deploying a hitch-mounted vertical. With a public event underway and all parking spaces occupied, park guests raised complaints. Despite staff requests to reposition his truck to free up space, the activator responded angrily, rolled up his window, operated for a few minutes, and then departed.
Despite these incidents, the staff emphasized that they were exceptions rather than the rule. They mentioned several regular activators whom they enjoy interacting with during their visits. Undoubtedly, these individuals serve as POTA ambassadors, exemplifying our community’s respect for parks and public lands.
Privilege and Responsibility
Wiseman’s View in Pisgah National Forest (K-4510)
While our tax dollars support public lands, park staff retain the authority to regulate activities that may impact park ecosystems or visitor experiences.
The recent notice regarding National Wildlife Refuges in Virginia serves as a reminder of this privilege and responsibility.
Let’s strive to represent POTA activators positively and proactively contribute to our parks’ well-being. Together, we can ensure that future generations continue to enjoy the beauty and tranquility of our public lands.
What are your strategies? Please share your tips and advice in the comments section!
Many thank to Bob (K4RLC) who shares the following guest post:
Visiting VOA Site B: The Edward R. Murrow Transmitting Station
by Bob (K4RLC)
Two week sago, Dale (W4AUV) and I were treated to a “under the hood” visit to the last remaining Voice of America transmitting station in the United States. It is located in eastern North Carolina, and officially known as the “Edward R. Murrow Transmitting Station” part of the “Office of Cuba Broadcasting” in Grimesland, North Carolina. Also, known as “VOA Site B.” This type of shortwave broadcast station is only one of a few remaining worldwide.
[Note: Click on images to enlarge.]
VOA QSL Card showing some of the 38 antennas
This VOA site has been on the air continuously (24/7/365) since the 1963 on-site dedication by President John Kennedy, broadcasting up 8 transmitters at a time on the short wave bands. There are three 250,000 watt and five 500,000 watt GE, Continental and Telefunken transmitters feeding 38 possible antenna configurations, with an Effective Radiated Power of 2,000,000 watts. (There is also a 39th antenna, that is a Dummy Load that will handle 500,000 watts).
The antenna field covers over 6,000 acres of flat, costal plain wetlands, not far from the Atlantic Ocean, so it has a minimal absorption factor and a salt water boost.
Front of VOA Edward R. Murrow Transmitting StationWall plaque in lobby explaining the legacy of Edward R. Murrow, who became known while a CBS Radio correspondent in London, broadcasting during the “Blitz” the infamous bombing of London by the Nazis during WW2 (click image to enlarge)TCI “Curtain” antenna made of 4 dipoles wide & 6 dipoles high, pointed at Cuba. It is controllable in both vertical and horizontal azimuth, depending on the configuration has to up 23dB gain at a 4 degree take off angle
The antennas are fed by over 26 miles of 300 Ohm open line “ladder line” with a minimal SWR and minimal signal loss. The largest antennas are called “Curtain” antennas, given their configuration, of matched horizonal and vertical dipoles suspended between large towers, giving the visual impression of huge curtains.
There are also rhombics, each 6 wave lengths long. The rhombics are not used as often, given their narrow bandwidth and narrow beamwidth. The Curtains can bathe a large geographic area (such as part of a continent) with a very strong signal. The primary broadcast areas for this station are Cuba, Central and South America, and Africa (although the antennas could reach out and touch Russia and eastern Europe, when needed).
Curtain and Rhombic antennas fed from the antenna switching centerGlenn showing Dale features of the GB-6 transmitter console in the large 8 transmitter control bayGB-6 Transmitter Monitor & switchesThe antennas are well constructed & fed with minimal-loss open feed line. Note SWR of 1.1:1 at 75,000 watts !Glenn & Dale studying the transmitter output in the main control room complexLarger control panel for each transmitter. Note image of “Casper the Friendly Ghost” over the meters for GB-7: There are current problems with the transmitter and, in technical terms, “it’s spooked” !Antenna switch controller for matching the 8 transmitters with 38 antenna configs.
Glenn & Dale examining the open feedline from Switching station to antenna field; 8 inch coax to Switching station
Many of the engineers are hams, including Macon (WB4PMQ), the chief engineer. Gary (N2AD) transferred to Greenville when the VOA in Bethany, Ohio closed. (The Bethany VOA site operated during WW2 into Germany, and was referred as the “Ohio Liars” by Hilter !)
Many thanks to Conrad (N2YCH) who shares the following field report:
Conrad’s January Alaska Activation
By: Conrad Trautmann, N2YCH
“Why would you go to Alaska in January?” is what everyone asked me.
I’ve wanted to see the Northern Lights for as long as I can remember. The best time to see the aurora borealis is between late August to late April in Fairbanks, Alaska. Days are short in January, sunrise is at 10:24am local time and sunset is at 3:38pm. It’s twilight before the sun comes up and after it sets so it’s not pitch dark, but it’s mostly dark for about 19 hours a day in Fairbanks at this time of year. Once I began researching, I learned that peak viewing times for the aurora are between 10p and 2a local time even with the extended darkness. Check aurorasaurus.org for more information.
So, the answer to the question is, “The odds are better to catch the Northern Lights in the winter.”
Cold weather and snow doesn’t bother me having lived in Syracuse, New York for ten years. I have experience with winter weather and driving. Fairbanks is one of the best places in the state to see the aurora since it is directly below the “Aurora Oval” and it has over 100 days a year when the aurora is visible. Except for January 12th through the 15th, 2024, when the sky had 98% cloud cover and it was snowing. Aurora viewing was not happening during my visit.
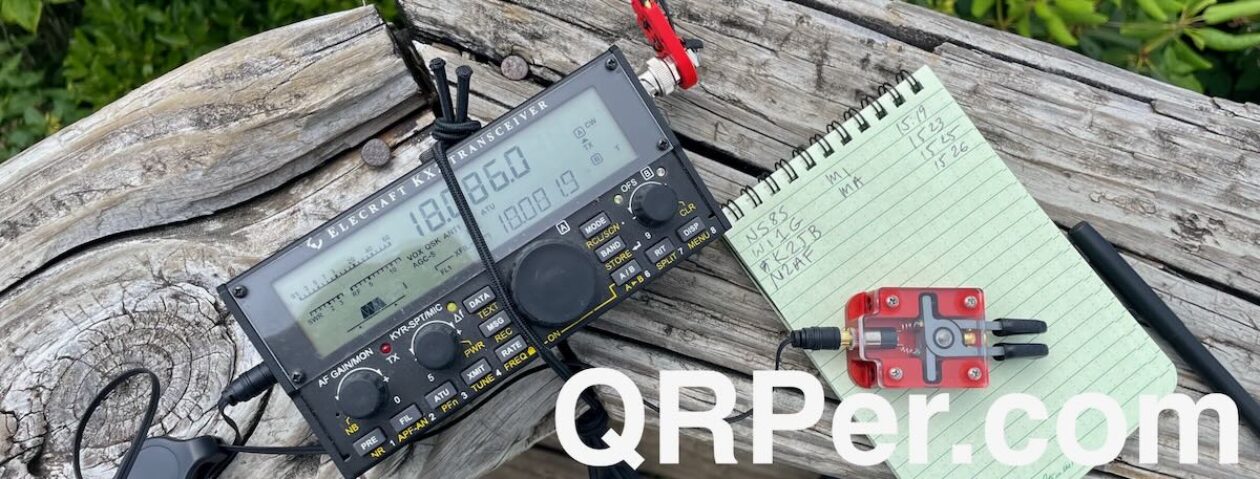
However, this trip was not a total loss by any means. There are things to see and do here, including activating parks! I activated three parks in three days, Denali National Park (K-0022), Chena River State Recreation Area (K-7228) and Creamer’s Field Wildlife Refuge (K-9697). I’ve heard stories from hams in Alaska that propagation can be spotty, that there can be total radio blackouts from solar flares and that bands we don’t usually worry about in the lower 48, like 20 meters, can be useless at times. I packed enough equipment and antennas to activate on any band from 40 meters to 6 meters, up to 100 watts using my Elecraft KX3 with the Elecraft KXPA100 amplifier. On the first day at Denali, I used the amp for the entire activation, but I realized at the end of the day that Thomas, K4SWL, who runs “QRPer.com” wouldn’t be too happy with a field report from “QROer.com” Conrad, N2YCH. To remedy that, I activated my second park using just my KX3, no amp. At K-7228, my first 11 QSO’s were QRP and the park was officially activated using only QRP power. I activated my third park QRO, read on and I’ll explain why.
[Thomas here: For the record, readers, I gave Conrad a Special Use Permit to mention QRO on QRPer! Ha ha! Of course there’s no problem going QRO from time to time!]
Back to propagation, I emailed one of the most active POTA activators in the area prior to my trip to get a sense of what to expect. I highly recommend doing this for anyone planning to travel somewhere and activate. Look at the POTA pages for the parks you want to activate and you’ll surely see a repeat activator with a Kilo award or many visits to those parks. They know the parks the best and also what to expect for propagation. They also share your passion for POTA and are usually very happy to help. The advice I received was that it would be difficult to make contacts on 20 meters and that watching the MUF (maximum usable frequency) charts would serve me well. (Check out hf.dxview.org) The activator said 10 meters would probably be the best band during daylight hours. He was exactly right. Even with QRO power, 20 meter reception in Alaska was noisy and my signal did not get out very far on FT8 watching the pskreporter.com spot map. I moved to 10 meters and quickly had a steady pile up. I stayed on the air until I depleted a 9ah and a 3ah battery I brought. What fun!
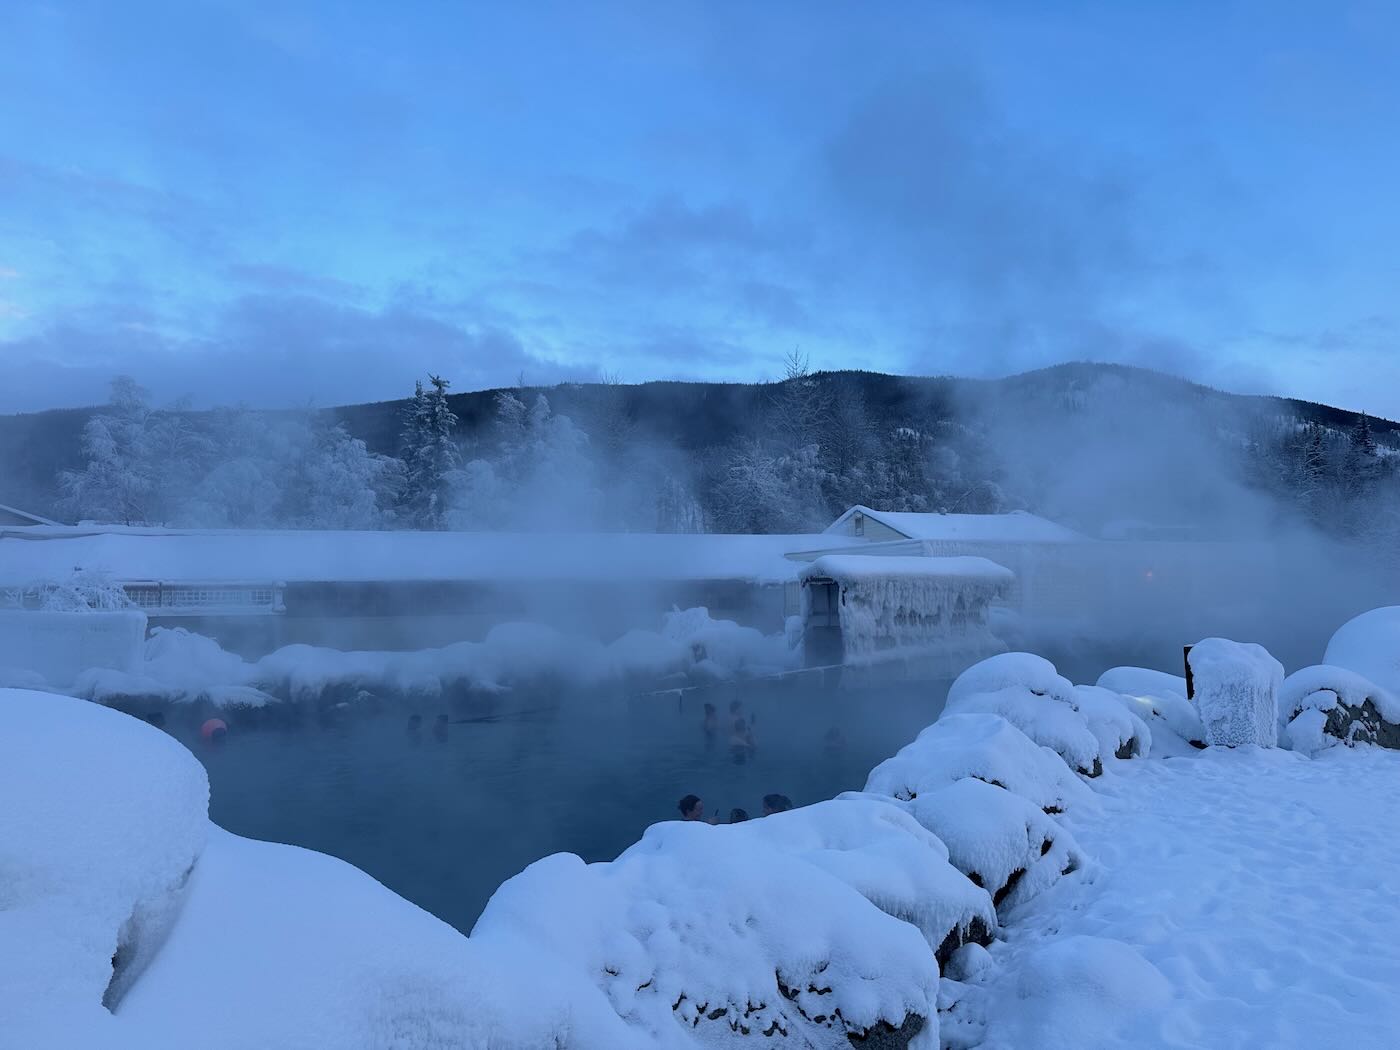
Okay, so for the QRP activation, I was at a trailhead parking area out near the Chena Hot Springs resort. Before the activation, I stopped and did the tour of the Aurora Ice Museum and took a dip in the natural hot springs. I do recommend the hot springs if you ever go to Fairbanks. It was -10F degrees when I was there, quite an experience.
Chena Hot Springs
I intentionally wanted to delay my activation from early morning to closer to sunset to see if operating during the evening gray line passing over would help improve the number of contacts I could get. The short answer is that it was worse…way worse. I went back to activating closer to sunrise on my third day and had similar results as I did the first day, much better. Sunrise wins.
The map above shows my initial ten QRP QSO’s from K-7228.
What really continues to amaze me is just how far my signal can reach with the portable equipment I was using. I brought the Buddipole so I could configure it as a vertical or a dipole. I tried it as a vertical on 20 meters on my first day and as I said, the reception was poor. The beauty of the Buddipole is that I could quickly reconfigure it to a 10 meter dipole. With the tripod, it’s roughly 10’ off the ground. There was no wind to speak of, so I didn’t need to guy it. If there was, I would have used a bungee cord to secure it to the car bumper or side mirror.
It breaks down and fits in the bag I bought with the Buddipole tripod and I tossed it into my checked bag on the plane. With the tripod and mast, it’s just a little too long for the carry-on bag. I could have brought a fiberglass push up mast and wire antennas in my carry-on, but I decided on the checked bag and brought the Buddipole to have as many options as possible. After all, I was traveling all the way to Alaska. Continue reading N2YCH: January POTA Travel in Frozen Alaska!→
Many thanks to John (KF6EFG) who shares the following article about his portable field radio kit which will be featured on our Field Kit Gallery page. If you would like to share your field kit with the QRPer community, read this post.
Hello Thomas,
Thanks for posting so much interesting content on your website, and helping to host the Ham Radio Workbench! I have gotten a number of ideas for my ‘Fat Boy’ kit from you guys.
I am sending a couple of images of my not-so-lightweight field boxes.
I have been under time constraints while at work, so I developed a series of boxes that can be used in the field while on lunch break.
The core is a black watertight box and a 21ft mast. I can make do with my truck battery in a pinch, and did until I purchased an external battery.
Since I took these images, I have moved the RG-174 and choke to the black box, making black box a complete kit, sans power.
I am playing with a small netbook and will become FT-capable soon!
Various power pole wires and other ends (clamps, cigarette lighter, ring)
Tool kit:
Multi tool
Tape
Connectors (one screw on UHF, ring, butt)
4 Radial wires , 17 ft.
This box resides in the truck bed for use when I want to use a vertical antenna.
I usually end up on my lunch break at the local RC flying club. I work at a multi use airfield, and the club has graciously allowed me to use their field when no flying activity is present.
Many thanks to Andrew (VA7EKA) who shares the following article about his portable field radio kit which will be featured on our Field Kit Gallery page.
You may note that this isn’t a QRP radio, but the FT-857D will run QRP power! If you would like to share your field kit with the QRPer community, read this post. Check out Andrew’s field kit below:
Yaesu FT-857D off-grid portable kit
Andrew (VA7EKA)
As part of my amateur radio operations, I’ve quickly seen the advantage of having a small, portable radio I can operate anywhere and deploy quickly. Especially as I don’t have a permanent HF antenna installation at home, being able to set up in the yard (or even indoors) in a pinch is pretty high on the list of requirements for me.
I started reading online and watching videos about this topic, and found an excellent video from KT7RUN “The Tech Prepper” (and an earlier one) which showed a super-slick portable radio setup featuring the Yaesu FT-857D. Prior to finding those videos, I had already acquired an FT-857D due to its all-band, all-mode operation and compact size, and Gaston KT7RUN’s kit seemed like a very compelling setup for this radio.
Here’s what I’ve ended up with for my off-grid-capable “grab’n’go” radio station:
High Ground Gear PRC-117G pouch (purchased from Optics Planet so I could get it in black, plus it was never in stock on High Ground’s website after literally months of watching for it)
75-watt solar panel (got this for $80 CAD on sale – couldn’t say no to that!)
Details
Of course, the core of this kit is the radio. It’s popular for a reason. All-band, all-mode “shack in a box” in a truly portable form factor. Capable of 100w operation, it’s more than enough to make whatever contacts you need. In my case, because the battery has a max 20A continuous-discharge specification, I wouldn’t actually transmit at a full 100w with this exact configuration. Not a problem – I’m not expecting to transmit at those levels with a pack of this size.
The pack frame is truly solid, though it adds a good amount of weight (1.364lbs with all options). It’s absolutely worth it though. Not only does it provide rigidity and protection, it also provides convenient mount points for attachments, like the relocated antenna connections and Digirig holster. I could securely attach additional items if needed.
The battery just fits into the MOLLE pouch which is pretty lucky. I got a small PowerPole distribution block so I can not only connect the radio to the battery, but also the Genasun solar charge controller and whatever other power-related accessories I might use (e.g. Dakota Lithium’s 5v USB charger which I’ve adapted to PowerPole). Solar-wise, the charge controller I went with has a little more capacity than what I’m using currently with the 75w panel. I figured I should bump up to the 10amp charge controller to allow for a larger solar panel later on.
For CW operation I’ve relocated the jack with a basic 3.5mm audio extension cable going up through the bag and looped through the PALS webbing on the High Ground Gear PRC-117G bag. For a key I’m usually packing a basic 3d-printed iambic paddle I got at a swap meet for $20. I’d love a N0SA SP4 paddle but… $$$ :‘D
In the following photos you can see how I’ve laid out the relocation cables. I specifically took photos of these to show people who want to re-create this kit, because it was pretty tedious to get it all in there. Hopefully these will save someone a bit of time. 😉
All in all, this kit weighs in at 11 pounds. It’s a bit heavy to carry for a SOTA activation, but for POTA it’s no problem at all. I have indeed carried it up to a SOTA summit, but HF propagation conditions were poor and I was really struggling to make any contacts. Ended up resorting to activating on 2m with a tape measure Yagi. 😉
Because of the PALS webbing on the PRC-117G bag, this portable kit could be strapped to a larger backpack as needed, though typically I have just carried the kit inside my backpack, to keep the weight closer to my body. Perhaps more notably, additional accessory pouches could be attached, like a pouch for logbook/pencil/antennas/CW key etc.
Conclusion
So how is this kit to actually use? In a word, awesome. Drop it on the ground or on a table, deploy and attach an antenna, turn on the power. If I’m expecting to be on air for a long time, I can attach the solar charge controller and solar panel to keep the station running (though I have yet to do this while operating, since I completed this kit very recently). I can go out into the field and use this setup indefinitely, regardless of available electrical infrastructure.
For digital operations, I have a ToughBook CF-31 which is fully configured with all relevant software I’d typically use. This is great for tossing in the vehicle for a POTA activation, and even feasible for SOTA if you’re in great shape or willing to carry the extra weight. An alternative for digital ops could be a lightweight single-board-computer, tablet, or netbook, of course.
Just for fun, here’s a map of most of the QSOs I’ve made with this rig since putting it together. It’s not exhaustive, but what I could quickly gather up for this post. 133 contacts across 11 countries. The furthest contact thus far is with VK2WN on 30m FT8, at a nice 11965km (7435mi) distance, with just 5watts of output power on my side. Nice!
If you have any questions about this kit or would like additional details, please feel free to reach out. I’d also be curious to hear from anyone who follows this build and creates their own variation!
QRP radios, product announcements, reviews, news and more. Low power amateur radio fun!
Please support QRPer by adding us to your whitelist in your ad blocker. Ads are what helps us stay online. All of our ads are ham radio related--no junk, we promise! Thank you!

 Many thanks to Tom (WW8D) who writes: