Category Archives: Articles

In Pursuit of the Top Band: Brian describes how he built and tested a field-portable 160 meter EFRW antenna

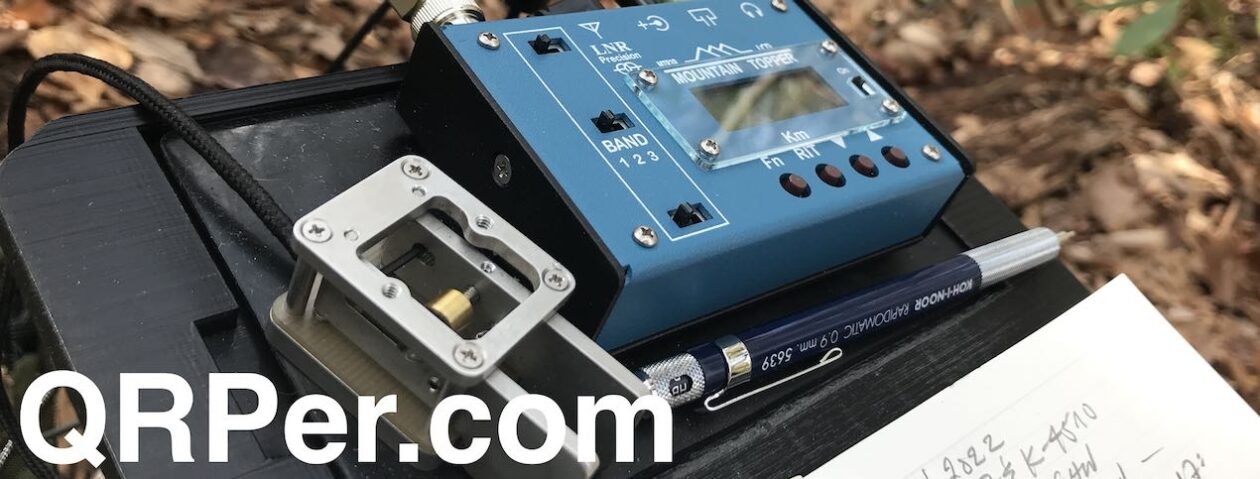
Many thanks to Brian (K3ES) who shares the following guest post:


The VK160 Antenna packed on its Winder/Feedpoint for storage, transport, and deployment.

Building and Testing the VK160 Antenna

by Brian (K3ES)

The ability to set and achieve long- and short-term goals keeps me interested and active in the Parks on the Air (POTA) program.  Often these goals are associated with POTA awards.  Currently, I am working slowly to complete the activator version of the James F. LaPorta N1CC award, which requires an activator to make QSOs on 10 amateur bands from 10 different parks.  With my operating style, I have found it achievable to make QSOs on the 9 available HF bands (80m, 60m, 40m, 30m, 20m, 17m, 15m, 12m, and 10m), and this has become easier with the rising solar cycle.  I have completed QSOs on non-HF bands using 2m and 70cm simplex.  The other options to pick up 10th band QSOs include the 6m band and the 160m band.

I have found it difficult to make unscheduled POTA contacts on 2m and 70cm, and scheduled contacts can be difficult to arrange in parks that are remote from population centers.  I have built a 6m antenna, but contacts are seasonal (and for me very elusive).  So I started looking for a way to add 160m capability to my portable station.  Ultimately that resulted in homebrewing a new antenna that I now call the VK160, and here is its story.

Objective

I needed a field-deployable 160m antenna.  My operating style requires that the antenna system be both light and compact.  QRP power levels are sufficient for my purposes.  I am very comfortable deploying wire antennas in the Pennsylvania woods, and QRP wire antennas can be both light and compact.  I have found that end-fed antennas are simpler to deploy in the field, because they can be configured as an inverted V or as a sloper, using only one point of support.

An end-fed half wave (EFHW) antenna would be naturally resonant, but would need to be over 250 ft (76m) long.  A wire antenna of that length would be challenging to deploy, even in more open areas.  So, I decided to pursue a 9:1 unun-based end-fed “random wire” (EFRW) antenna.  In fact, I have two commercial EFRW antennas available, but have never been successful in tuning them for 160m using the ZM-2 tuner in my field kit.  So, I concluded (probably incorrectly, but more on that later) that I needed to build a 9:1 random wire antenna with a longer radiating element than the 71 ft wire built into my largest existing EFRW.  I also wanted to build this antenna myself, using available components, so that it would be both inexpensive and customized to my needs.

I broke the task into four parts:

First, I needed to build a 9:1 unun suitable for use at QRP power levels.  The 9:1 unun is an autotransformer that reduces antenna feedpoint impedance by a factor of 9, hopefully a level that a wide-range tuner can match to the 50 ohm transceiver impedance.

Second, I had to design and build mechanical elements of the antenna system, incorporating the electrical components needed for the feedpoint.

Third, I needed to select a suitable non-resonant wire length for the radiator.

Finally, I needed to deploy and test the finished antenna on the air.  If successful, testing would culminate in completing an on-air QSO with the antenna being driven at 5 watts or less.

Building the 9:1 Unun

While I have built successful 49:1 ununs as the basis for EFHW antennas, I had no experience building 9:1 ununs.  Accordingly, I started with the ARRL Antenna Book, then a web search.  VK6YSF’s excellent web page provided very detailed instructions for 9:1 unun construction. His 9:1 Unun design was based on a FT140-43 toroid wrapped with heavy gauge magnet wire, with design power rating around 100 watts.  My application was focused on 10 watts maximum, and I wanted a lighter-weight solution to the unun design.

Looking at the components I had available, I found FT50-43 toroids and 24 AWG magnet wire in my inventory.  I had used those during construction of successful 49:1 EFHW antennas.  The VK6YSF design, built with the smaller toroids and lighter magnet wire, seemed to be a good (and cheap) starting point.

The “50” portion of the FT50-43 toroid designation specifies its 0.50 inch (1.27 cm) outside diameter.  The “43” portion designates nickel/zinc composition that is suitable for high frequency inductive applications.

The next problem that presented itself was a problem with translating the winding technique to smaller wire and a smaller toroid.  Put simply, my fingers do not have the dexterity to wrap three parallel 24 AWG wires around a ½ inch OD toroid without getting them crossed, twisted, or worse.  So, why not twist the three conductors from the start, and wrap the toroid with “trifilar” windings?  It would be simple enough to identify the mating wire ends after wrapping, just with a set of continuity tests.  That would facilitate proper connection of the wires to yield the final auto-transformer configuration.

FT50-43 toroid with three-10 inch (25.4 cm) segments of 24 AWG enameled magnet wire staged for construction of the 9:1 unun.

I posed the “trifilar” winding question to my friends over on the QRPer.net discussion board.  Nobody identified a significant flaw with the proposed method, but neither did anyone have experience that would assure success.  So, I decided to use the “trifilar” winding technique to construct my 9:1 unun, with the full recognition that its success would be uncertain, and only proven by testing the finished product. Continue reading In Pursuit of the Top Band: Brian describes how he built and tested a field-portable 160 meter EFRW antenna

Flying With Ham Gear and Navigating TSA

Many thanks to Michael (N7CCD) for sharing the following guest post:


Flying With Ham Gear

by Michael (N7CCD)

I often get asked “how hard is it to fly with ….”, or “what does TSA say about …” as my job has me flying a fair amount throughout the year. In fact, I’m writing this now while waiting to board my flight for a week in Georgia and Alabama, after having just gone through TSA.

In a recent QRPer post by Thomas, I posted a comment about my frequent travel with ham gear and Thomas gave me a gentle “hint hint” nudge to write up my experiences on the matter. I thought this trip would be a good time to share my experiences in traveling with ham gear in my check-on baggage, as well as my carry-on baggage and my process for each. I’m always interested in learning from other’s experiences, so if you have some ideas for the good of the community, please share them in the comments below!

Before starting this article, and out of curiosity, I checked my past calendar and figured out that I passed through TSA screening about 26 times in 2022. I would say that, since starting my current role four years ago, I have at a minimum hit that number each year.

To address the main question I get about ham gear (antennas, radios, batteries, etc.) and TSA, surprisingly TSA has very little interest in any of it.

In all of my trips through the x-ray machine, TSA has never once pulled my bag out to further investigate what was inside. They have asked about my thermal camera, but never my ham gear. Full disclosure, I am TSA Pre-Check which does exclude me from having to remove laptops, iPads, etc. However, on a recent non-business trip with my wife and kids to visit family in Mexico, I wasn’t pre-check and they still didn’t care about any of my radio gear.

Since I’m limited on the amount of stuff I can physically carry on the plane, and my work gear requires me to check a bag anyway, I have divided my radio gear between what I want with me on the plane, and what I’ll just pick up when I collect my bag at baggage claim.

I have settled on a hard sided suitcase after having to replace some of my work arc flash PPE (personal protective equipment) when baggage handlers cracked my arc flash face shield. After upgrading to a hard sided suitcase, I started adding more ham equipment I would otherwise worry about getting damaged. In the image below you can see what, at this point, I’ve included in my checked bag.

From top left to bottom right: Raspberry Pi kit (more photos on that below), CWMorse paddle in a dollar store container with cable, Buddipole PowerMini, charging cradle for HT, SignalStuff mag mount for HT in rental car, hand mic for HT for use in rental car, throw line and weight, AlexLoop w/ Amazon Basics tripod, US Road Atlas

The idea behind the Pi and AlexLoop antenna is I can work HF digital no matter where I am. This is more fun than watching TV in a hotel, but also gives me digital capabilities to send emails or texts over HF if I am stranded without service of any kind. The mag mount and HT hand mic allow me to use my HT in my rental car as a mobile radio. The same SignalStuff antenna on my HT can be transferred to the mag mount easily once I step into the car. Continue reading Flying With Ham Gear and Navigating TSA

Confession time: I bought a brand new Yaesu FT-818ND

I know what you’re thinking:

“But Thomas, don’t you already have two FT-817NDs–?!”

Why yes, I do!

Before you label me as a hopeless radio addict (I am, but let’s shelve that for a moment),  let me explain myself…

First off, why two FT-817s?

If you’ve been a reader for very long, you’ll already know that I’m a huge fan of the FT-817/818.

I won’t go into the reasons here because I published a very long-format article on this topic last year.

Suffice it to say: I believe the FT-817/818 an effective, durable, versatile, and frequency agile multimode radio.

I purchased my second FT-817ND because:

  1. I wanted it for full-duplex satellite work (funny: many satellite enthusiasts call a pair of 817s the “Yaesu FT-1634”)
  2. The unit I purchased was like-new with all original accessories and side rails for $350 shipped.

Although my first FT-817ND has a Collins narrow CW filter installed, I decided to build one for this second unit as well. That way, I could grab either radio on the way out the door to activate a park or summit.

So why the new FT-818ND?

It was always my plan to eventually replace out one of my FT-817NDs with an FT-818ND. Here are the reasons:

  1. I was having difficulty finding a TXCO. The  FT-818ND has a TCXO-9 high-stability oscillator built-in.
  2. I wanted one of my two radios to be a late model.

I had planned to buy a Yaesu FT-818ND sometime in 2023. Possibly at the 2023 Hamvention.

When Gavin (GM0WDD) informed me that Yaesu was discontinuing the FT-818ND on December 28, 2022–only moments after the announcement was made–I immediately hopped over to DX Engineering and purchased one. I realized that the remaining inventory of new radios would be depleted in short order and I was right. By the following day, all major US retailers were out of stock.

Are FT-818ND prices going to soar?

No. I don’t think so.

The FT-817 and FT-818 have been on the market since 2001. In that time, Yaesu has sold bazillions of them. Seriously. These pop up in the classifieds and at hamfests all the time because there are so many floating around out there in the wild.

The FT-818/817 is sort of the opposite of a rare, limited-production-run radio. If you’re looking for a used ‘818, I think you’ll find that the prices are relatively stable.

I would discourage you from paying a premium for an FT-818ND.

Next steps with my ‘818ND

I am going to set this unit up for POTA and SOTA activations; it can do double duty for satellite work.

I’ll remove the Portable Zero side rails from one of my other 817s and attach them to the FT-818.

I initially planned to yank the narrow CW filter out of my 2nd Yaesu FT-817, but that just seemed cruel. If/when I sell that radio, I would like to give the buyer a narrow CW filter option.

I decided, instead, to order a Collins filter from Japan and filter board from Artur in Poland and build yet another 500Hz filter.

I also purchased RT System’s programming software and cable for the FT-817/818. I’ve adopted RT systems for all of my other VHF/UHF radios, so it’ll be easy to load, change, and clone all of the frequency memories. I’ll be nice having both SOTA calling frequencies and repeaters pre-loaded on my radios.

I’ve thought about actually making a no-edit video of building/installing the CW filter and side rails.

Speaking of videos about building a narrow CW filter, though, check out this one Jonathan (KM4CFT) published only recently.

Zero buyer’s remorse

While the announcement by Yaesu may have prompted me to pull the ‘818 trigger a few months early, I have no regrets whatsoever.

The only challenge I’m going to face down the road is trying to sell the “extra” FT-817ND.

Then again, I’ve thought about keeping the third one decked out in the TPA-817 pack frame (see photo above) and lending it out to local POTA/SOTA newbies who want to test out the healing waters of QRP.

VE6LK’s #POTAThon1231: The RAC Portable Operating Challenge

Many thanks to Vince (VE6LK) who shares the following POTA field report:


Canmore Nordic Centre VE-1167, Alberta

#POTAThon1231 – The RAC Portable Operating Challenge

by Vince (VE6LK)

It’s the final day of December 2022 and I find myself, a non-hiking non-climbing city kid, trudging around in the snow on a nature preserve not far from my home. I’m in shape -round- and it’s not helping me much. I’m not really dressed for this but I’m not far from the warmth of my truck. My goal is to do an activation and move on, for I’m in the middle of the final day this month of a set of #POTAThons and I still have one more park to get to.

#POTAThon is what I call it when I plan on getting to more than one park in a day. Usually these things aren’t thought of for weeks in advance, they are more like a “tomorrow morning” kind of thing. Opportunistic, if you will. Please feel free to adopt the hashtag on social media as it is free from all royalties and encumbrances.

VE-3477, British Columbia

But, before I tell you the story of how I happened to be trudging through the snow, let me tell you that someone said something to me that set me off on the journey that had me trudging through snow on that day and hefting a wire into a tree.

Revelstoke National Park VE-0061, British Columbia

I do public service events throughout the year, and in December I travelled from my home in Alberta one province westwards to Kelowna B.C. to the Big White Winter Rally. RallySport is fun to get involved with as a ham radio operator, and is especially trying -for all the right reasons, as you’ll see in this clip from 2015– in Net Control where we run logistics for the event. You’ll be able to read that story in the March-April edition of The Canadian Amateur magazine.

In Net Control, set up and ready to run the race. 6 people will be in here. (Click to enlarge)

Anyway, I’m to the point in my life where a long one day drive is no longer enjoyable, thus along the way to BWWR, I planned to activate parks and take two days to make the trip each way. A week off to play radio sounds like a great vacation to me at any time! Thus, the plan was struck to do this and have fun. This means that multiple #POTAThons would be required! Continue reading VE6LK’s #POTAThon1231: The RAC Portable Operating Challenge

If Yaesu designed an FT-818 replacement…what would you like to see?

We hams can be quite opinionated when it comes to our radios.

After Yaesu announced last week that it was discontinuing production of the FT-818ND, hams across the globe expressed their opinions about this pint-sized rig.

It seemed to me that the majority who posted messages in email groups and on social media had high praise for the FT-817/818. Indeed, many of those same people purchased an FT-818ND the same day of the announcement. The rush of FT-818ND purchases wiped out new inventory at most US retailers overnight.

Not everyone had praise for the FT-817/818 series, though. Many felt the ‘818 was a relic of the past and irrelevant in 2023. Some even posted long “good riddance” rants about the FT-818.

Let’s face it…

Our love of radios is highly subjective

What one person loves, someone else might hate. This is especially the case in the incredibly diverse ham radio world where radios are used in different parts of the spectrum, with different modes, for different activities, and in different operating environments. Continue reading If Yaesu designed an FT-818 replacement…what would you like to see?

BBC Radio 4 – Lights Out: Call Signs


My dear friend, Volodymyr Gurtovy (US7IGN), has been featured in another brilliant documentary on BBC Radio 4 called Call Signs.

This documentary was produced by the talented Cicely Fell with Falling Tree productions for BBC Radio 4. Note that Cicely also produced a BBC Radio 4 Short Cuts earlier this year featuring Vlad as well. Enjoy:

BBC Radio 4 Lights Out: Call Signs

A man, a Mouse and a morse key: the story of a radio amateur in Kyiv as the Russian invasion unfolds.

When his wife and two children flee Kyiv to escape the war, Volodymyr Gurtovy (call sign US7IGN) stays behind in their apartment with only his radios and the family hamster, Mouse, for company.

Before the war, he used to go deep into the pine forests, spinning intricate webs of treetop antennas using a fishing rod, catching signals from radio amateurs in distant countries.

Prohibited by martial law from sending messages, he becomes a listener, intercepting conversations of Russian pilots and warning his neighbours to hide in shelters well before the sirens sound. After three months of silence, he begins transmitting again. Switching his lawyer’s suit for a soldering iron, he runs a radio surgery for his friends and neighbours, dusting off old shortwave receivers and bringing them back to life.

During air raids, he hides behind the thickest wall in his apartment, close to his radios, their flickering amber lights opening a window to another world. A story of sending and receiving signals from within the darkness of the Kyiv blackout.

Music: Ollie Chubb (8ctavius)
Producer: Cicely Fell
A Falling Tree production for BBC Radio 4

Listen to Call Signs on BBC Sounds by clicking here, or via the embedded player below:

Audio Player


The spirit of QRP

Here we are, on the morning of Christmas Eve, and I find this quote from Teddy Roosevelt  floating around in my head:


“Do what you can, with what you have, where you are.”

                                    –– Teddy Roosevelt


Perhaps I’m thinking about these words because they sort of fly in the face of all of the consumerism that often surrounds the holiday season…?

Well, I’m not sure of the reason.  What I do know is, I feel like this quote speaks to me as a QRPer. Part of the appeal of low-power operations is making do with less. With just a faint breath of power, I can reach across the globe to connect with others, and have just as much fun doing it as the guy with the tall backyard tower.  Yes, I have to admit, there’s a certain satisfaction in that.

You might not know this, reading QRPer.com, where we often talk gear, discussing its various shortcomings and merits, but I’m actually a fan of simplicity.  Outside of the world of radios and packs––and even in it, to a degree!––I try not to own too many things.

In my little QRP world I feel incredibly fortunate to be able to beta test, review, and evaluate a wide variety of radios and gear. Since I do purchase almost all of my review radios––except for the few that are loaned to me––I’ve accumulated a lot of them over time. I know I can sell the ones I don’t often use, and I frequently do, but it’s fun to take them out for a spin now and again; you may notice that I rotate them out regularly.

Yet because of this, I do worry that people read my posts (and those of others in the ham community) and reflect with despair along these lines: “I can’t activate in the field…I need a lot of new expensive gear to do that!”

But this couldn’t be further from the truth.

For four years, when I lived in Germany and the UK, I only owned one radio–a Yaesu FT-817. And, know what?  I had so much fun with that single radio and a limited number of home-brew antennas.

To which I might add, this past year, some of my most memorable activations have been with radios I purchased for under $200:

I could easily activate all of the parks and summits I wish, only using one of these little radios, coupled with a key, a home-brew wire antenna, and a battery.  That’s it~!

So, you really don’t need a lot of gear to enjoy field radio.  This is true especially if you’re a CW operator.  But even just starting out, you really can have fun with a simple field kit.

Even if you’re new to ham radio, don’t wait to hit the field until you’ve assembled the “perfect” or the largest, finest field radio kit. Instead, take Teddy Roosevelt’s advice,  and just do what you can with what you have…right where you are.  

Here’s wishing everyone

A Very Happy Holiday Season! 

A review of the LnR Precision Mountain Topper MTR-4B ultra-portable QRP transceiver

The following article originally appeared in the November  2022 issue of The Spectrum Monitor magazine:


A Review of the LnR Precision Mountain Topper MTR-4B V2

by Thomas (K4SWL)

I confess, there is something that I’ve come to believe is almost a rite of passage in the SOTA (Summits On The Air) community. And, no, I’m not talking about activating an All Time New One (ATNO) summit, or completing a particularly challenging activation on a snow-capped peak.

I’m talking about owning one of the iterations of the amazing “Mountain Topper” pocket-sized QRP CW transceivers designed by Steve Weber (KD1JV).

This little radio first caught my attention at a Four Days In May (FDIM) QRP conference over a decade ago: a ham friend in the SOTA community proudly showed me a very early version of the Mountain Topper that he built from a kit. The first thing that struck me was how impossibly small and extraordinarily lightweight it was. But when he showed me the 9-volt battery he used to power it––a power supply not only small, but convenient––I was mesmerized.

Over the years, the Mountain Topper has evolved.  There have been many models, ranging from two bands to five. To my knowledge, they’re no longer offered in kit form, but LnR Precision manufactures and tests these in North Carolina, and they’re better than ever in terms of features and performance.

At present, the MTR-4B V2––the second version of the four-band Mountain Topper––is the only model in production, and if you’re hoping to acquire one, due to supply chain issues (at time of publishing) there’s a rather long wait time. They retail new for $350 US, and frankly, the used ones I’ve seen posted in ham radio classifieds ads have been equal to, or even over, the listed price for a new rig.  Obviously, demand for these radios is much higher than supply.

So, how could it be that this minuscule QRP radio performs well enough to produce some serious DX from a remote summit…so well, in fact, that people are willing to wait in line for one?

Magic or method?

As any CW operator will tell you, the magic is in the mode. CW is such an efficacious mode that it cuts through the ether like a knife, even when conditions are less than favorable.

Obviously, pint-size radios like the Mountain Topper are QRP––low power––so designing them around such a simple mode is a very smart choice. CW transceivers are much less complex than a similar SSB transceiver, thus have less components, less mass, and are in general more affordable (when compared to those with similar receiver performance).

My comprehensive MTR-4B field kit (the MTR-4B is in the mesh pocket).

In addition, the Mountain Topper is designed with the field activator in mind:  specifically, SOTA activators, but of course, POTA (Parks On The Air), WWFF (World Wide Flora and Fauna), IOTA (Islands On The Air), or any other popular “-OTA” field activity. As a field activator in one of these programs, you are the DX. This means chasers and hunters are actively seeking your signal, and thus you are not competing with blowtorch stations to punch through a pileup.

I can also assure you that standing on a tall summit also gives you a brilliant starting point for your QRP signal. Some of the best DX I’ve ever worked has been from a summit.

So, for the average CW SOTA activator, QRP is preferred because QRO simply isn’t necessary––indeed,  in my opinion it’s a bit of an overkill. At least that’s been my experience now with my few hundred SOTA, POTA, NPOTA, SOTA, and even one Lighthouse On The Air activations.

So this brings us back to the wee Mountain Topper series and the model being reviewed here in the pages of TSM: The Mountain Topper MTR-4B. Continue reading A review of the LnR Precision Mountain Topper MTR-4B ultra-portable QRP transceiver

A Few Field Radio Gift Ideas for Less Than $100!

I received an email from a reader’s spouse asking about gift ideas for the holidays and beyond; ideas that could not only be used this month, but also tucked away for the future. They weren’t looking for the obvious things like a transceiver–they were looking for accessories that might enhance their significant others’ field radio fun.

Being the enabler I am, I was happy to oblige and, in fact, decided to turn my reply into a post (since it quickly turned into a very long email) with their permission. For obvious reasons, I’m keeping their ID secret! 🙂

Here’s a rather random sampling of things that came to mind. I tried to limit this to items that retail for less than $100 US. Note that some of these product links are affiliate links:

A quality LiFePO4 battery

Being a QRPer, I don’t need a large battery to enjoy hours of radio fun per charge. My favorite battery chemistry is LiFePO4 due to its weight, safety, shelf life, and recharge cycles (which is in the thousands as opposed to hundreds).

For me, a 3Ah battery is more than enough capacity to keep my QRP radios on the air for 3-5 activations per charge (depending on length of activation, etc.).

I’m a big fan of Bioenno batteries. Their customer support is excellent. You can purchase their 3Ah 12V battery for $64.99 US including the charger. If you already have a charger, the battery alone is $49.99. Click here to check it out.

If your significant other likes to push 100 watts, consider a larger capacity battery. I also have a 15Ah Bioenno battery for this purpose, though it exceeds the $100 gift price threshold). Click here to check it out.

A very affordable Li-Ion rechargeable battery


One of the most affordable rechargeable battery packs for the QRPer in your life is the TalentCell Rechargeable 12V 3000mAh Battery Pack. This pack typically costs around $30 US and is sometimes even less expensive.

This little pack is great because it will not only output 5V to recharge USB devices, but it also outputs 12 volts which is brilliant for QRP radios like the Elecraft KX series, TX-500, FT-817/818, Mountain Toppers, Penntek TR-35,  Venus SW-3B, and many others. I actually now pair this with my QCX-Mini. The battery comes with the charger and standard barrel connectors on the included DC cord which fits Elecraft and Penntek field radios among others.

This is a small battery, so can only be paired with efficient QRP radios.

While I don’t consider this a high-quality solution like a Bioenno battery, it is insanely useful and affordable. Click here to check it out.

Morse Code Keys!

I could easily write a series of articles about Morse Code keys. That’s not what you’re looking for, though, right? You want some quick suggestions. Here is a sampling of some of my sub $100 favorites listed in alphabetical order.

If your budget is flexible, you might also consider these paddles which are still less than $200:

Okay, so if you don’t mind pushing more than $200, I highly recommend any key made by the amazing Begali family. Their Simplex paddle was my first set of paddles and I still use them today. I plan to buy their Traveler next year. They’ve a massive selection of models and styles. Continue reading A Few Field Radio Gift Ideas for Less Than $100!

Dave sorts out vehicle-mounted antenna SWR issues

Photo by Katie Musial.

Many thanks to Dave (K1SWL) who writes:


Comments on vehicle-mounted antennas

by Dave Benson (K1SWL)

As with Rand’s recent post about his effective vehicle setup, I and others also use a small operating table inside the vehicle.  I’ve tried a number of approaches to antennas.  Without elaborating on those schemes, I’ll note that winter is now closing in here in NH. As a result, I’m now operating exclusively from my truck. My interest is now in minimizing setup and tear-down times.  Barry (WD4MSM)

also commented about the improvement in vehicle-mounted antennas with an added ground.  I’d like to quantify that.

I’d recently ordered a number of Hustler Mobile antenna components. They’re used as a stationary-portable setup using that company’s high-quality mag-mount. As I first evaluated the antenna, I was disappointed to find the minimum SWRs to be on the high side.

These results were related to the ‘floating’ coax shield, which serves as a counterpoise with the mag-mount setup.  Worse yet, these results were inconsistent. Touching the coax connector shell at the antenna analyzer caused the SWR to jump up, as did just changing the way I held the analyzer. Bad juju! It means RF inside the vehicle, with the potential for RF-‘hot’ symptoms at the rig..  Adding a 1:1 balun inline eliminated the stray RF at the rig, but didn’t do much for the SWR. It’s also just one more gadget to bring along.

A better fix was a custom bracket that bolted to the truck frame. I first confirmed that there was low-resistance continuity between a target location and the vehicle’s cigarette lighter shell.  This was something of a ‘comedy of errors’. I had a sheet-metal angle bracket on hand and went to work enlarging a hole in it. This had the usual outcome: a drill bit grabbed the workpiece and spun it. The bracket itself was buckled beyond redemption and my finger’s now healing well.  A length of 1-1/2 inch aluminum angle bracket was just the ticket.   Note that the mounting hole needs to be offset from the coax fitting mount. This avoids an interference between the mounting bolt and coax connector shell. Ask me how I know.  The bracket assembly uses a specialty coax fitting from DX Engineering. It’s their part number DXE-UHF-FDFB.

This bracket is bolted down on one of the corners of the Tacoma’s passenger seat assemblies.  It’s the closest location to the antenna I found without drilling holes and cutting the coax.  For this vehicle, it’s a 10mm bolt and was paint-coated for appearance reasons. I replaced it with a stainless-steel bolt from a hardware store. It’s important to include a split-lockwasher between the bolt and the bracket. This’ll keep the conductivity to the frame good over time. The bracket is deburred and its corners rounded to preclude injury to passengers.

In any event, it’s out of the way of the seat’s legroom space. A 3-foot coax cable assembly brings the coax nicely up behind the rig atop the operating surface.

So- how’d it work? It’s like the difference between night and day!  The broad SWR curves vanished – replaced by typical characteristics for monoband antennas. The sensitivity to handling the coax has vanished.  (A representative curve at right.) The curves are narrower, and that’s actually a good sign- it means that unwanted resistances have been reduced. 

With this fix in place, here are the SWR minima:

Frequency    SWR

14060        1.04:1

21060        1.05:1

28060        1.16:1

I took advantage of the CQ Worldwide CW Contest this past weekend. I was able to work 101 stations on 10M, 15M and 20M with this setup.  That was from a State Park 5 minutes away.  The attraction was a large and sunny parking lot, and solar gain was such that I needed to leave the truck door open several times.  This area is kept plowed out in winter, and I may try for the POTA ‘kilo’ award from there at the 1000-contact benchmark.  

We’ll see….   73, K1SWL