On Tuesday, May 6, 2025, I made a little time in my afternoon schedule to take my Venus SW-3B on a final POTA activation.
I might have mentioned in previous posts (and certainly on the Ham Radio Workbench) that starting in April, I’ve been trying to downsize the shack a bit. This is a process I go through at least annually. My shack/office is very small, so things pile up quickly—and I like to divest myself of gear as best I can.
During this process, one of my readers here on QRPer reached out and asked—on a whim—if I’d consider selling him my Venus SW-3B. I gave it some thought and decided to do so.
I love the SW-3B, but the truth is, I hadn’t used it in a long while. It’s been tucked away in my headrest kit for more than a year, and I just haven’t been reaching for it. That and, frankly, I’ve a couple of MTR-3B LCDs, an MTR-4B, and an MTR-3B Currahee model–I’m flush with super compact transceivers.
I agreed to sell him the SW-3B but told him I wanted to take it out on one final activation—and that’s exactly what I did!
Blue Ridge Parkway (US-3378)
I had to fit this activation into a one-hour window while my daughter was in a class. Fortunately, the class was no more than a mile from the Blue Ridge Parkway. Unfortunately, if I wanted a site with a picnic table for easy operation and setup, I wasn’t terribly close to one.
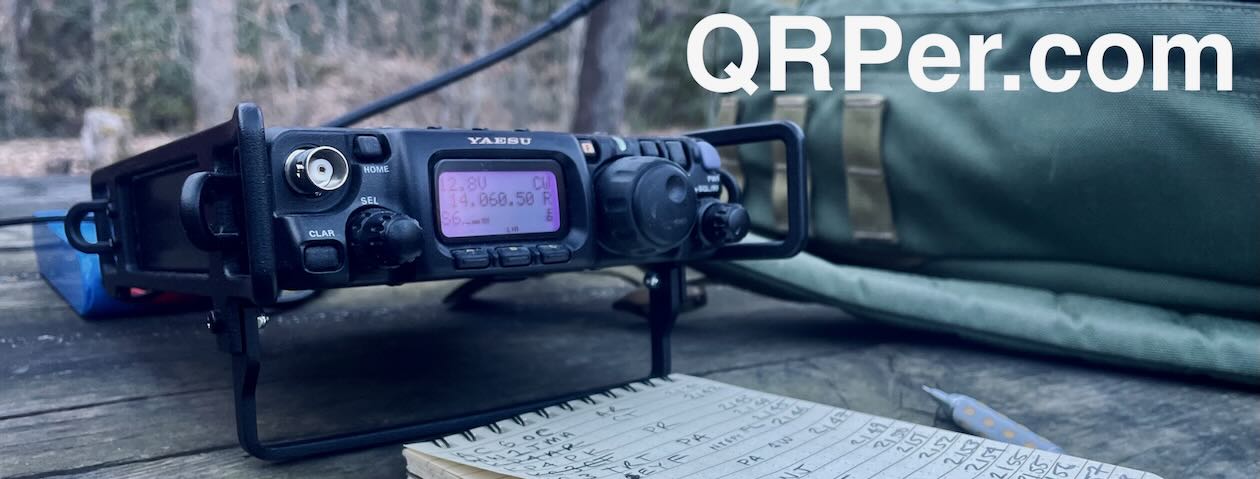
Luckily, I had my complete SOTA kit packed, including my Helinox chair and Tufteln knee board. With those two items—paired with the SW-3B—I could operate comfortably just about anywhere.
I picked a spot on the side of the road, very close to the parkway entrance from US-25. I knew the drive back to her class would take no more than three minutes.
I paired the SW-3B with my KM4CFT 30-meter end-fed half-wave, which includes a 40-meter linked extension. I figured with this antenna, I could operate on 40, 30, and 20 meters (by removing the link if necessary).
Lately, propagation has been flaky, so having a bit of frequency agility is key to a successful activation!
Gear:
Note: All Amazon, CW Morse, ABR, Chelegance, Spooltenna, eBay, and Radioddity links are affiliate links that support QRPer.com at no cost to you.
Many thanks to Jesse (VE6JTW) who shares the following article about his portable field radio kit which will be featured on our Field Kit Gallery page. If you would like to share your field kit with the QRPer community, read this post.
VE6JTW’s lightweight SOTA kit
Good Day Thomas & all readers of QRPer.com,
I was Licensed Late in 2020 and I have been actively doing Summits on the Air since early 2021 here in Alberta, Canada. I started out using a Xiegu G90 but realised very quickly that CW operations where much more efficient especially in VE6 land where our 4 point summits sometimes have 1000+ meters of gain (3280 feet), your knees get tired fast on those big descents with a pack that can easily start weighing in the 30lb range.
So I started teaching myself CW a few months into activating and also started looking into the QRP world. How awesome is it to make worldwide contacts with 5 watts and a wire from a mountain top, am I right?
VE6VID EFHW
I started activating CW that fall and I have gone through a couple of different radio setups. My first QRP rig was a QRP Labs QCX-mini for 20m which I did not use for long. Then my wife bought me a Venus SW-3B for Christmas and that little rig is excellent in my books; it is very basic but effective. I used that for quite a long time with a trapped EFHW Malen (VE6VID) made for me. It covers 40, 30 and 20m, along with the very last N0SA SOTA paddle ever made by Larry.
Venus SW-3B in a custom enclosure
Fast Forward to 2023 and My SOTA kit contains the LNR Precision MTR-4B. This radio is amazing as the receiver is strong and I can pull callsigns out from the noise very well. My antenna is still the trapped EFHW, and I now use the Bamakey TP-III paddle. For audio I have a set of JBL headphones for when it is super windy out and I also use an Amazon speaker as seen in the photo. Everything that fits in the bag weighs just 2 pounds and 4 ounces. The bag that holds all the gear is from Colonel Mustard.ca.
The whole kit in use on a summit
My mast is a fiberglass telescoping fishing pole from Amazon with a fishing eyelet at the peak to run the wire through. I lashed some line to the base of the mast with three loops then epoxied them to the fiberglas so they won’t move when guying the mast.
I carry two 1100 MAH 3s 11.1v LIPO batteries and get about 2 really good 30 min activations per battery, they are both from Amazon.
Many thanks to Evan (K2EJT) who shares the following article about his portable field radio kit which will be featured on our Field Kit Gallery page. If you would like to share your field kit with the QRPer community, read this post.
K2EJT’s Venus SW-3B Field Kit
by Evan (K2EJT)
I’m big on small. When it comes to field radios, especially ones I’m going to have to carry any distance, I prefer them to be small and light. I don’t mind lugging a big heavy rig around if I’m going to be 20 feet from my truck, but if I’m hiking five miles into the woods, I want to measure my kit weight in grams, not pounds. That’s where this little kit comes in. Weighing in at only 733g, this kit fits the bill perfectly:
The stuff sack is from Dutchwear Gear. It’s crazy light, and the entire kit fits in the palm of your hand. Inside you’ll find everything you need to do a field activation.
The rig is a Venus SW-3B. I really like this radio, especially for what it costs. While it’s not as nice a radio as say my MTR-4B, you can get two of them for the price of one LNR radio, and get them in half the time! The one thing that you need to be careful with on this radio are the rotary encoder and the gain knobs. They protrude from the face of the radio, and I’m not sure how robust they are. Because I was concerned about how much abuse they’d handle, I 3D printed a set of side rails and a cover for the radio to protect them.
The key is a cwmorse.us N0SA paddle. I have two of these keys. One lives in this kit, and the other lives with my KX1. They’re really nice keys for their size and weight. There are downsides (like the sides being open), but aside from that I really enjoy sending on them.
As for an antenna, I’m running a Spark Plug Antennas 64:1 EFHW. The wire is cut for 40, 20, 15, and 10, and is made of 24ga silicone jacketed wire with a tiny plastic clip on the end to attach to the throw line. I really like this antenna. It’s a great combination of small size, low weight, and good durability. It works very well. In fact, I like it so much I own two.
The coax is 15’ of RG316 from Amazon. I don’t generally like to drag expensive coax into the woods. I’ve killed enough of it to know it’s not worth spending a fortune on something that’s likely to get destroyed.
The throw bag and line are the same setup I run with my KX1. It consists of a ripstop nylon bag with a paracord loop sewn in at the open end, and velcro across the top to close it. Fill the bag with rocks, close the velcro, and you’re ready to go. The line is 65’ of high viz, reflective 1.8mm cord. The throw bag doubles as a stuff sack for the cord when not in use.
The headphones are a set of old Skullcandy earbuds I’ve had forever. The kit also includes a Rite in the Rain pad and a pencil for logging, the power cable for the rig, and the radio instruction manual.
Powering the whole thing is a set of four AA size LiFePO4 batteries in a 4 cell holder. The four batteries combined are a little over 13V fully charged, and are about 2600mAh. They can power this little radio for a LONG time. I get multiple activations out of a single charge. I threw a set of Anderson Powerpoles on it to connect to the power cable on the radio.
This is the kit I carry when I want to go light. As always, I could go lighter, but then I’d have to make compromises I’m not willing to make. I’ve done plenty of activations with this kit, and it never lets me down. You can see a description of the kit here:
Many thanks to Dugbo (KD7DUG) who shares the following article about his portable field radio kit which will be featured on our Field Kit Gallery page.
If you would like to share your field kit with the QRPer community, read this post. Check out Dugbo’s field kit below:
Heli Pro Backcountry pack with portable field kit
Dugbo’s MCHF compact field kit
by Dugbo (KD7DUG)
Intro
My field radio kit is not so different or unique that it stands out from the many other experienced ham radio operators that have assembled and shared their field kits with the ham radio community. I am new in this game and by no means an expert. However, my field radio kit was designed as a fit for purpose and tailored to my CW operating needs and especially the bank account. I wanted my portable field kit to be nimble and easy to deploy at a minute’s notice. With many of the popular QRP radios backordered and even not available at this time, I chose a different route with my choice of radio.
Radio
Currently my preferred radio is the very capable SDR mcHF-QRP HF transceiver created by Chris, M0NKA. The mcHF is a smaller designed portable radio that simultaneously packs a left hook, upper hook punch, it’s a real contender. The radio is standalone, and its compact design is in comparison to other transceiver competitors with transmit and receive on 60-10 meter amateur bands with 5W output power on CW and SSB.
Currently the mcHF by M0NKA is very difficult to obtain and currently the kits are not available to purchase. However, there are multiple clones of the radio being offered by Chinese manufacturers.
Radio Equipment
Radio Equipment Kit
Priority was to protect the radio while traveling in the field. Securing the radio in a case to prevent damage from the motions of backpacking up a summit while also protecting the rig from environmental factors, dreaded dust, dirt, and water.
The Evergreen 57 waterproof dry box was a perfect match with the mcHF and additional operating equipment. The radio slides perfectly into the rubber molding of the evergreen case and prevents the radio from moving around in the case during transport.
To power the radio, I need an efficient battery for my needs. Batteries are heavy and weight was one of my concerns. Also on my mind was which battery would provide enough amp hours for an activation? To minimize the weight and provide enough power for one to two POTA|SOTA activations, I finalized my decision on a 3Ah BioEnno LIPO4 battery to supply power the mcHF. To link the battery to the radio, I am using a 5.5 x 2.1mm with an Anderson Pole connectors.
For audio I am using an Anker IPX5 speaker for GoPro sound recording along with 3.5mm Ugreen Headphone splitter for an old pair of Iphone headphones. I prefer headphones for copying incoming callsigns, RST and QTH from hunters and chasers. The headphone splitter, headphones and two additional 3.5mm connectors for speaker connection and key are packed into the rubber mesh located in the upper lid of the Evergreen case.
I am using two highly regarded and engineered portable keys. The CW morse N0SA and the BaMaKeY TP-III, are very rugged and ultra-compact twin paddle keys for CW operations. For the BaMaKeY TP-III protection against the elements, it resides in a small waterproof case lined with foam. The N0SA paddle fits snuggly into the Evergreen case. I use a Sea to Summit bag to carry a smaller travel case that contains the Rite in the Rain pad with pens for logging, the Anker speaker, NY4G EFHW antenna, ABR316 coaxial cable and two 10’ pieces of paracord with two tent stakes for antenna deployment.
Radio setup on Summit W6/CS-445
Once on the summit, I set up my radio equipment onto the Sea to Summit bag for additional protection from the ground. For a backup HF radio, I carry the very reliable Venus SW-3B 5W CW radio in small fly fishing Yonah Pack attached to my backpack. A perfect fit and well protected.
Antenna
I am using a NY4G 64:1 balun EFHW QRP 40,20 and 15m with additional 17 and 30m bands with a maximum of 15W on CW.
To deploy the antenna in the field in an inverted V configuration, I am using a modified 4.5m light weight expandable carbon fiber fishing pole (99g).
25-inch Valkyrie archery carbon shaft
To keep the antenna and mast vertical, I modified a 25-inch Valkyrie archery carbon shaft at one end with a 200g target tip and the other end with a center pin sleeve. No need to carry a small hammer to pound in the arrow shaft into the ground, mother nature has me covered with plenty of small size rocks in the field. I am using 15ft of ABR316 coaxial cable.
25-inch Valkyrie archery carbon shaft supporting the 4.5m expandable fishing pole
SOTA Activation W6/CS-323 EFHW antenna in an inverted V configurationSOTA Activation W6/CS-445 EFHW antenna in an inverted V configuration
Navigation
I am using onX Off-Road GPS app on my mobile phone to download maps of selected activations. I also carry an inReach Mini Messenger satellite tracker and communicator for safe insurance. Unexpected situations can occur without warning, so I always like to be prepared than not to be.
Wrap Up
Heli Pro Backcountry pack with portable field kit
I am using a 20-year-old Dakine Heli Pro Backcountry pack to carry my compact field kit.
I used this pack for backcountry snowboarding in my early years. This pack is fantastic because of the extra compartments for carrying gear. It is also fitted with an ice axe strap that is perfect for carrying the expandable carbon fiber pole. The total weight of my portable field kit is 2.2 Kg or 4.9lbs. It might not be the lightest portable field kit setup, but it is definitely not the heaviest.
Yonahs Pack and the SW-3B
Overall, I am very satisfied with how my portable field kit came together as well as its performance in the field.
Many thanks to Skip (K4EAK) who shares the following article about his portable field radio kit which will be featured on our Field Kit Gallery page. If you would like to share your field kit with the QRPer community, check out this post.
[I]n my truck I carry a little field kit for impromptu POTA activations.
I also have an FT-891 to an ATAS-120 permanently installed in the truck, which is another possibility for impromptu activations, but that requires me sitting in the truck for the activation. Not my favorite way to activate …
Many thanks to Steve (MW0SAW) who shares the following field report:
Portable Ops in 9A Land
by Steve (MW0SAW)
Just back from a family holiday to Croatia and I was lucky enough to be able to take a QRP station with me on my travels. It’s always good to stop and review what you took and how it worked out, else you won’t be able to iterate and improve next time.
My wife and I have always been efficient minimalist travellers and even now with our daughter the traditional continues. And let’s face it, who doesn’t love to get their inner pack geek on when it comes to QRP ham radio and travel!
I’m very lucky to own several QRP radios, Elecraft KX2, FT-818, IC-705, but for minimalist ops they are all a/ too expensive and/or b/ too heavy & bulky. The choice naturally brought me to a CW rig and after some deliberating I chose my Venus SW-3B over my newly constructed QCX mini. The Venus is just more versatile having 3 bands and SSB RX.
So the item I spent weeks torturing myself about prior to the holiday was the antenna. You have to try to imagine from where you will operate. I don’t think you can beat a wire antenna like the K6ARK EFHW however you need trees or a mast, I thought I was most likely to operate from the hotel room balcony. I came to the conclusion, despite the extra bulk, that the Gabil 7350T and Tripod would be my companions.
And how did I get on? Well the first time I setup the station on the balcony the electrical interference was terrible, and I could not hear any signals. So I had to adapt and go for plan B. Which actually turned out to be a stunning spot.
Operating on a small jetty next to the salt water on the island of Sveti Nikola near the town of Porec in the early mornings, I deployed my station and called CQ. You can see from the RBN that my 5 watt signal was making a good impact, however only had a couple of European stations come back to me from my calls.
I decided to switch to hunt and pounce mode, and I was amazed to work several USA, VK and ZL stations over a few days. It’s such a great feeling to work DX with such a modest setup. The icing on the cake for an already special family holiday. I think you will agree such a beautiful place.
So overall I was very happy with my station choices.
Kit list:
(Note: Note that Amazon links are affiliate and support QRPer.com)
Until my next QRP adventure.
Best 73
Steve
9A/M0SAW (MW0SAW)
UPDATE:
I didn’t mention it in my report (above) as he hadn’t replied to my email, but I did work Peter Parker VK3YE (he has a good YouTube channel). I’m in his video about 10mins 45seconds in:
If you’ve read my “Anatomy of a Field Kit” series, you’ve likely gathered that field kits are a bit of an obsession. [Yeah, understatement alert!]
My field kits roughly fall into two main categories: modular and fully self-contained. My modular kits are ones where components like the battery, antenna, throw line, key, and radio are in separate pouches and can easily be combined to make a complete station before I leave for an activation.
My fully self-contained kits are ones that quite literally have everything needed to perform a park or summit activation in one pouch or box. A good example that I’ve documented here is my MTR-3B field kit.
If you’re a devoted park and/or summit activator, I think it’s important to keep a dedicated kit kit in your car at all times. Why?
It’s ready to grab for impromptu activations
It’s handy in case of road-side emergencies in remote areas
It’s always accessible to demonstrate amateur radio to those who are curious
It’s always always there for those times when you hadn’t planned to play radio, but the opportunity presents itself
I always have a full radio kit in my Subaru and over the years, I’ve changed and adapted it. For the most part, though, it’s been located in the trunk/boot and lives with anything and everything else I keep back there. Sometimes, it’s in the way when we need to fill that trunk space with family items for a trip or when we’re hauling things around town. Other times, it’s floating/sliding around freely in the back.
On long family trips, I’ve been known to store radios under the floor, but it’s a true hassle to remove them because I have to remove anything in the trunk before lifting the floor.
Contraband I hid in the car during our two month Canada trip last year.
I’ve always wanted a way to store my kit in the car in a dedicated space. In the past, I’ve tried to make a kit that could fit under the driver’s seat–thinking that might be ideal–but there’s very little clearance under it and it’s difficult to remove.
Enter the BROG Headrest Pouch Kit
Before I placed my initial order for the Blue Ridge Overland Gear (BROG) Gadget Bag, I checked out other items on their website. One that immediately caught my attention was their Headrest Kit.
It consists of a Velcro panel that fits around a vehicle headrest and a pouch (or pouches) attach to it.
BROG caters to Overlanders and vehicle storage/organization is huge in that community. The headrest kit makes a lot of sense: it’s using space that’s accessible, doesn’t interfere with any passengers, is off the floor, and is otherwise underutilized!
The big questions, of course:
would the pouch offer enough space to store an entire radio kit,
and would the kit weight too much for the Velcro back to hold it in place?
I asked for the Headrest Pouch Kit ($47.99) to be sent with my Gadget Bag order.
BTW: Big thanks to BROG for giving me flexibility with this order. Since I had no experience with their gear, I asked that they send me a list of items and allow me to evaluate them, then pay (full price) for what I decided to keep.
Would it work?
I knew I’d need to store a very small transceiver in this dedicated pack. A few could potentially fit the bill–namely the:
As I noted last week, I participated in the W4G SOTA campout at Lake Winfield-Scott Campground in the Chattahoochee-Oconee National Forest in north Georgia.
In short? It was amazing!
I thought I’d share a few photos and memories…
Campsite and friends
These SOTA campouts typically involve an announcement via the W4 SOTA group then we all make individual reservations at the chosen campground. Since we’re not reserving the whole campground as a block, we tend to share our individual camping sites with others who might not have been able to reserve a spot.
At Lake Windfield Scott campground, the SOTA group did reserve one large group campsite, but only a couple months ago it was canceled by the park service due to a trail maintenance group that needed it.
Typically, I camp with my friend Monty, but he had other family plans that weekend.
When I found out my buddy Joshua (KO4AWH)–the fellow behind Tufteln products–needed a spot to pitch his tent, I offered up my site.
As you can see in the photo above, both of our tents fit on the tent pad with absolutely no extra room to spare.
It was such a pleasure getting to know Joshua. What a kindred spirit and super nice fellow.
KO4AWH (left) and K4SWL (right) on the summit of Black Mountain.
We ended up doing all of our SOTA activations together as you will see in upcoming activation videos and field reports.
Joshua is as pack and organization obsessed as I am. A proper pack nerd! I really enjoyed checking out his bags, cases and all of the brilliant accessories that are a part of his field kits.
He brought both an IC-705 and TX-500 along for the ride. He logs in the field using the HAMRS app (same one I do) but on an iPad Mini (see photo above) and I must admit that the size of the iPad mini is nearly ideal–much better than a phone for logging.
He also used the SDR-Control app to connect wirelessly with his IC-705 and operate digital modes.
Summits
We activated a total of three summits during the weekend (Big Cedar,Black Mountain, and Yonah Mountain). It would have been easy to activate six or more if that was the goal–the area is chock full of accessible summits.
A question I’ve received several times since sharing my last field activation with the MTR-4B is “why do Mountain Topper radios have three individual band switches–?”
That’s a great question and the answer is actually in the product manual.
The following comes from the MTR-3B manual but also applies to the MTR-4B (save the 4B has four band positions instead of three):
The band is selected by three, three position slide switches. For proper operation, all three switches must be in the same column[…]. It’s easy to get into the habit of flipping each switch in sequence from the top down.
The top switch tells the processor which band to operate on and connects the Receiver input filter to the first mixer. The middle switch connects the transmitter low pass filter output to the antenna and connects the antenna to the receiver input filter. The bottom switch connects the output of the transmitter PA to the low pass filter.
The manual is correct: it’s easy to get in the habit of sliding all three switches with band changes. It becomes second nature in very short order.
It’s easy to tell that all of the switches are in the correct position as well because without all three switches selected, the receiver sounds deaf and audio muted. With them in position, the receiver sounds “alive.” (That said, the noise floor is so low on these radios, it’s quite possible you might think they’re not engaged properly if there aren’t many signals on the band!) Of course, it’s very easily to visually inspect the switches and confirm they’re in the correct position.
Side note: On the Mountain Topper series, each band switch is an independent mechanical switch. On the Venus SW-3B (which was no doubt inspired by the Mountain Topper) the two band switches are bound together as one:
You can’t tell from looking at the photo above, but if you slide the top switch, you’re also sliding the bottom switch: the two switches are only one mechanical piece. An interesting design choice!
Side Note: The (now discontinued) Mountain Topper MTR-5B had a more complex series of six switches. Here are the instructions for it along with a drawing from the MTR-5B manual:
I hope this helps clarify how/why the Mountain Topper series uses multiple switches for band changes!
Connecting an international community through low-power field radio adventures.
Please support QRPer by adding us to your whitelist in your ad blocker. Ads are what helps us stay online. All of our ads are ham radio related--no junk, we promise! Thank you!

 I had to fit this activation into a one-hour window while my daughter was in a class. Fortunately, the class was no more than a mile from the Blue Ridge Parkway. Unfortunately, if I wanted a site with a picnic table for easy operation and setup, I wasn’t terribly close to one.
 I picked a spot on the side of the road, very close to the parkway entrance from US-25. I knew the drive back to her class would take no more than three minutes.
 I paired the SW-3B with my KM4CFT 30-meter end-fed half-wave, which includes a 40-meter linked extension. I figured with this antenna, I could operate on 40, 30, and 20 meters (by removing the link if necessary).
 Note: All Amazon, CW Morse, ABR, Chelegance, Spooltenna, eBay, and Radioddity links are affiliate links that support QRPer.com at no cost to you.
 I hopped on the air and started on 20 meters by calling CQ POTA.
 Fortunately, 20 meters seemed to be in decent shape. Continue reading Parting Waves: My Last Activation with the Venus SW-3B


