A Review of the LnR Precision Mountain Topper MTR-4B V2
by Thomas (K4SWL)
I confess, there is something that I’ve come to believe is almost a rite of passage in the SOTA (Summits On The Air) community. And, no, I’m not talking about activating an All Time New One (ATNO) summit, or completing a particularly challenging activation on a snow-capped peak.
I’m talking about owning one of the iterations of the amazing “Mountain Topper” pocket-sized QRP CW transceivers designed by Steve Weber (KD1JV).
This little radio first caught my attention at a Four Days In May (FDIM) QRP conference over a decade ago: a ham friend in the SOTA community proudly showed me a very early version of the Mountain Topper that he built from a kit. The first thing that struck me was how impossibly small and extraordinarily lightweight it was. But when he showed me the 9-volt battery he used to power it––a power supply not only small, but convenient––I was mesmerized.
Over the years, the Mountain Topper has evolved. There have been many models, ranging from two bands to five. To my knowledge, they’re no longer offered in kit form, but LnR Precision manufactures and tests these in North Carolina, and they’re better than ever in terms of features and performance.
At present, the MTR-4B V2––the second version of the four-band Mountain Topper––is the only model in production, and if you’re hoping to acquire one, due to supply chain issues (at time of publishing) there’s a rather long wait time. They retail new for $350 US, and frankly, the used ones I’ve seen posted in ham radio classifieds ads have been equal to, or even over, the listed price for a new rig. Obviously, demand for these radios is much higher than supply.
So, how could it be that this minuscule QRP radio performs well enough to produce some serious DX from a remote summit…so well, in fact, that people are willing to wait in line for one?
Magic or method?
As any CW operator will tell you, the magic is in the mode. CW is such an efficacious mode that it cuts through the ether like a knife, even when conditions are less than favorable.
Obviously, pint-size radios like the Mountain Topper are QRP––low power––so designing them around such a simple mode is a very smart choice. CW transceivers are much less complex than a similar SSB transceiver, thus have less components, less mass, and are in general more affordable (when compared to those with similar receiver performance).
My comprehensive MTR-4B field kit (the MTR-4B is in the mesh pocket).
In addition, the Mountain Topper is designed with the field activator in mind: specifically, SOTA activators, but of course, POTA (Parks On The Air), WWFF (World Wide Flora and Fauna), IOTA (Islands On The Air), or any other popular “-OTA” field activity. As a field activator in one of these programs, you are the DX. This means chasers and hunters are actively seeking your signal, and thus you are not competing with blowtorch stations to punch through a pileup.
I can also assure you that standing on a tall summit also gives you a brilliant starting point for your QRP signal. Some of the best DX I’ve ever worked has been from a summit.
So, for the average CW SOTA activator, QRP is preferred because QRO simply isn’t necessary––indeed, in my opinion it’s a bit of an overkill. At least that’s been my experience now with my few hundred SOTA, POTA, NPOTA, SOTA, and even one Lighthouse On The Air activations.
This year, I’ve had a couple of readers very kindly offer to loan me their FX-4C transceivers to take to the field and review.
Those offers have been very temping because I’ve only heard positive comments from owners of this wee feature-packed SDR transceiver designed by Yu (BG2FX).
Earlier this year, I learned that Yu was retiring the FX-4C and would be introducing two new radios, so I decided to hold off on an FX-4C review for this reason.
My buddy, Don, informed me that the new radios were now available for pre-order, so I checked out the option on Yu’s website, and placed an order.
Details (features and specs) are still a little sparse because BG2FX is still finalizing the design and lining up production, but here’s a snapshot of the two models based on Yu’s preliminary info:
The FX-4CR can push 15-20 watts on most bands according to John, which is most impressive for a one pound radio that fits in the palm of your hand! It covers 80 – 6 meters, sports a color screen with a 48 kHz wide waterfall display, an internal sound card for digital modes, built-in speaker and microphone, 9 – 18 VDC input range, and even sports Bluetooth!
That’s an impressive array of features for $550 US (on pre-order).
The FX-4L
I pre-ordered the FX-4L and am told by Yu that it should ship by end of October or early November 2022. I wouldn’t be surprised if that’s an optimistic projection.
The FX-4L is essentially a more basic QRP version of the FX-4CR; it’s maximum output power is around 5 watts.
It’s very similar to the FX-4CR in many respects: it has the same display from what I can tell, covers 80 – 6 meters, has a wide voltage range 9 – 18 VDC, sports an internal sound card, and is super compact and lightweight.
The FX-4L doesn’t appear to have Bluetooth. Lu doesn’t mention a built-in speaker or microphone, but there’s an obvious speaker grill and even a small hole that might be a microphone. I’ll try to confirm this. Yu does note that there’s room in the chassis for the user to add a battery or ATU.
I’ve been more interested in the FX-4L because, as you likely know, it’s very rare for me top operate over 5 watts of power.
That said, I certainly see the appeal of a 15W+ radio like the FX-4CR.
(Many thanks to Yu for sharing all of the FX-4L photos above.)
Stay tuned!
I’m really looking forward to checking out the FX-4L and also reading AE5X’s assessment of the FX-4CR.
I’m curious if anyone else has pre-ordered one of these radios. Also, if you’re an FX-4C owner, I’d love to hear your comments!
I’ve now tested the uSDX at home for a couple weeks and decided to send it back to the eBay distributor.
I made a short video detailing the reasons why I’m sending it back (see blow), but in short there are two main reasons:
1.) The receiver and audio
I understand that quality control varies greatly with the various versions of the uSDX being manufactured in China.
With that in mind, I have to assume mine is one with an incredibly inadequate receiver.
My uSDX receiver overloaded when in the presence of pretty much any strong-ish signal.
As an example, one of the first signals I tuned to on the CW portion of the 20M band–K4NYM activating a park in Florida–had FT8 audio bleeding in from over 20 or 30 kHz away. K4NYM had an S9 signal, but he was very much a portable operator, not a blowtorch contest station. The uSDX should have easily been able to handle this situation.
A couple days ago I finally took delivery of the uSDX/uSDR transceiver I ordered in late October from this seller on eBay. I’ve been tinkering with it in the shack since then and have started to form some initial impressions.
The uSDX is a super cheap transceiver and, to be clear, my expectations were (spoiler: thankfully) very low.
If you’ve been here for long, you’ll know that I don’t normally test or review super cheap transceiver varieties found on eBay, AliExpress, etc. So many people asked me to check out the uSDX, however, that I decided I would try to give it a shake out.
I’ve yet to take this little radio to the field, but I have made a couple dozen contacts from the shack, all in CW and I’ve done a lot of listening. Yesterday afternoon, I even hooked it up to an oscilloscope.
It’s still early days and I’m sharing the following observations and notes with the hope that uSDX owners might be able to guide me if I need to make menu adjustments to sort out a few issues.
More specifically, there are two big cons with my uSDX:
Con #1: The Audio
Trying to be diplomatic and kind with my words here, but let’s just say the uSDX audio leaves much to be desired.
I think it’s great this little transceiver has a built-in top-mounted speaker, but it produces some of the harshest, most spluttery audio I’ve ever heard in a radio.
On top of this, the volume control (which requires going into an embedded menu item to adjust) is just…strange. It’s hard to explain, but the audio feedback isn’t what I would expect from a volume control or AF gain. It seems like each volume control step (starting at “-1” and going up to “+16”) is a mix of both AF and RF gain values. It doesn’t have a fluid amplification progression like I would normally expect.
In fact, I can’t really turn the volume up to +16 because on many bands around level +14 or +15, it starts to emit a really loud squeal.
Although very minor compared with the issues above, the audio amplification chain also has an ever-present hiss.
In addition, even with the volume turned to “-1” I can still hear splattering and even garbled whispers of CW signals if connected to an antenna.
I hope I’m missing something here and the audio can be tailored for better listening. Perhaps there’s a combination of adjustments I can make in the menu options to help?
Please comment if you own a uSDX and can provide some feedback.
Con #2: The Receiver
Again, unless there’s a magic combination of adjustments I can make in menu items, I find the receiver of the uSDX to be incredibly anemic.
I took the uSDX to my buddy Vlado (N3CZ) yesterday and we hooked it up to an analog oscilloscope and signal generator.
We concluded that the uSDX is very sensitive, but the front end seems to be as wide open as a barn door.
This confirmed my on-the-air observations made over the past two days: even with the 500 Hz DSP filter engaged, CW signals as far away as +1.7 kHz could easily bleed through. In fact, quite often when I tune to a POTA or SOTA station operating CW, I could even hear FT8/FT4 stations bleeding through from far across the band.
I couldn’t help but think if I had taken the uSDX on my recent Mt Mitchell SOTA activation instead of the QRP Labs QCX-Mini, there’s no possible way I could have handled the pileup. The uSDX receiver would have completely fallen apart because it shows no ability to handle tightly spaced signals.
Again, if you’re a uSDX owner and can provide some insight here, I would very much appreciate it.
Still testing the uSDX TX
One of my main goals with purchasing the uSDX was to test the transmit signal to see how clean it might be and if there were spurs in any harmonics.
Vlado hooked up the uSDX to his oscilloscope and we discovered that it did produce spurious emissions in harmonics of the 40M band. The spurs were negligible and we both assume it might possibly be within FCC guidelines.
With that said, Vlado didn’t completely trust this particular analog oscilloscope because there appeared to be a slight fault in its BNC input port. We ran enough tests–and even compared the uSDX to my KX2–to know that there are definitely faint spurious emissions and that the CW transmit signal isn’t nearly as clean as the KX2.
Here’s a 2 second video clip showing the uSDX transmitting CW on 7 MHz into the scope:
I plan to hook the uSDX to a digital oscilloscope to get more accurate results in the near future.
Not all cons
The uSDX does have some positive attributes.
For example, the QSK is quiet and even full break-in. This little radio is also chock-full of features. I’ve even found that though it’s advertised as an 8 band radio, mine will transmit on 10 bands; everything from 160-10 meters.
I think if I planned to operate the uSDX on SSB when the bands were relatively quiet, it might do quite well for casual contacts.
Time will tell…
To be clear, though, the issues above can be deal-killers for me.
I want my transmitted signal to be clean enough to at least meet FCC requirements–I like being a good neighbor on the bands. This might require some modifications on the output, but let’s see what a digital oscilloscope might reveal.
Of course, if the uSDX can’t handle multiple CW signals being thrown at me at once, I can’t see how this would possibly work as a SOTA or POTA field radio.
I can already tell that the ergonomics of the particular uSDX model I purchased will likely lead to–as Spock put it in Star Trek IV–some “colorful metaphors.” Especially when I reach for the volume control buried behind a menu item. (I mean, seriously?)
Again, if you own a similar uSDX, I’d love to hear your comments and suggestions!
This month, we’ll take a deeper dive into the types of radio kit you might choose to assemble based upon your activity goals. And finally, we’ll look at my “golden rules” of field kits, which I hope you’ll find useful.
Types of field radio kits
I configure and outfit my radio kits based on the environment in which I plan to deploy and operate, and which determines in no small way just what I need to pack besides the basics.
I roughly divide my field kit types as follows…
The Field Day or “Picnic Table” Kit
This is probably the most popular type of field kit in the world of amateur radio. Picnic table kits are designed with portability in mind, but not designed with distance hiking in mind. This is a very popular type of kit for Field Day or park activations through POTA or WWFF.
These kits are typically packed in a backpack, a Pelican-type utility case, or a self-contained and field-ready box.
My picnic table kit is packed in a large Red Oxx C-Ruck rucksack. If I haven’t already made it clear, I’m a self-professed pack geek and I love this Red Oxx Pack because it has large zippered pockets on the outside, a rain flap with storage on top, and one large compartment on the inside.
Most of my on-air time is in the field. While I enjoy operating from the shack, I’ve discovered I especially enjoy operating in the great outdoors.
Besides being a fan of hiking, camping, and the great outdoors generally, I also am particularly fond of radio field gear. I like portable transceivers, portable antennas, battery packs, and all of the accessories that make field operation efficient and enjoyable.
I appreciate the emergency communications skills I’ve developed in the field, too. Should the need (or opportunity) arise, I now keep a complete field kit packed and ready to go at all times, and can even deploy all of it within just ten minutes. In my early days of ham radio operation, I might have easily spent thirty minutes setting the antenna, alone…especially on Field Day, with folks watching me struggle to untangle wires and cables, followed by the undoubtedly entertaining attempts I made to put a line into a tree to deploy the antenna. But after deploying a variety of antennas hundreds of times now, I find that––while I’m still not perfect––I finally have a bit of skill and the process of tossing up a line is becoming much swifter and smoother.
Confessions of a pack geek
The Red Oxx C-Ruck loaded and ready for the field!
If I’m being honest with myself, I admit: I also simply get a thrill out of kitting out my field packs, as well as organizing and tweaking them over time. Yes, (don’t judge me!) I actually like packing up my field gear.
I think my passion for organizing and packing gear goes back to a former career when I lived in the UK, Germany, and France, and was required to travel throughout Europe frequently. Originally inspired by travel guru Rick Steves, I’ve always appreciated the footloose feeling of having all of my travel gear in one lightweight pack. I don’t like checking in luggage, but love the freedom of grabbing my backpack and skipping the baggage claim carousels. And I also like knowing that, even though my gear is compact, it contains everything I need.
I’ve become something of a “less-is-more” traveller. Two years ago, for example, I traveled for one week using what Frontier Airlines classifies as a “personal carry-on.” My Tom Bihn Stowaway pack, which only measures 14.0″ (w) x 9.4″ (h) x 8.1″ (d), carried everything I needed for a conference, including my own presentation gear.
My Tom Bihn Stowaway personal carry on convertible pack with everything I needed for a one week trip including a conference.
Packing for that trip was great fun as it really challenged me to decide what was essential and what was not. My iPad doubled a computing and presentation device, for example, but I also packed a small flashlight and a mini first aid kit, which I felt were important. Of course, I also carried a small portable Shortwave/AM/FM radio and my Yaesu VX-3R handheld…also vital, as I can’t leave home without radios!
Getting started with a field kit
Putting together a field radio kit is so similar to packing for travel: you must first do an assessment of what you need, starting with the basics––then organize it, pack it, and test it.
In my world, this is a very deep topic. We’re going to break down this topic into two parts.
This article, Part 1, we’ll dive in:
first, going over the obvious components of a basic field radio kit;
second, discussing the benefits of going low-power (QRP) if that appeals
In Part 2, we will:
look at variations of kits based on activity, and finally
review what I consider the “golden rules” of a good field radio kit
The basics of a field radio kit
First, let’s go over the basics of your field kit, considering that that these primary components will dictate your bag, pack, or case size.
A transceiver
The lab599 Discovery TX-500
Since I’m a bit radio obsessed, I have a number of QRP transceivers I like to take to the field. But if you have selected one transceiver you plan to dedicate to field work, or simply have only one transceiver, period, you can build a kit around it (and see my note below about “modular” kits). If budget allows, you might consider buying a radio specifically for field use, so it can always be packed and ready to go.
There are a number of transceivers on the market that are designed with field use in mind. Some are compact, power-stingy CW-only QRP transceivers that might only operate on three ham radio bands, while others are 100-watt general coverage transceivers that even have built-in antenna tuners––there’s a wide range of options.
Look for field-friendly, built-in options like:
CW and voice-memory keying;
SWR and power meter readings;
a battery voltage indicator;
low current consumption;
the ability to lower power to at least one watt;
an internal battery option; and
an internal antenna tuner option
And the more such options are already built into your field rig, obviously, the less separate accessories you’ll need to pack and keep track of in the field, which is a good thing.
The Elecraft KX2 has a built-in ATU, battery pack, and even attachable CW paddles!
Some of my favorite field-ready general-coverage transceivers currently in production are:
The Elecraft KX2 A full-featured, inclusive, and compact 80-10 meter transceiver that’s truly a “Swiss-army knife” of field operation (see November 2016 TSM review)
The Elecraft KX3 Benchmark performance, wide array of features, and compact design
The lab599 Discovery TX-500 Military-grade engineering, weatherproof, spectrum display, and benchmark current consumption for a general-coverage radio (see October 2020 TSM review)
Mission RGO One Top-notch performance, 50-watts out, and excellent audio (see November 2020 TSM review)
The Yaesu FT-817/818 Rugged chassis, 160-6 meters, VHF and UHF multi-mode, both BNC and PL-259 antenna inputs
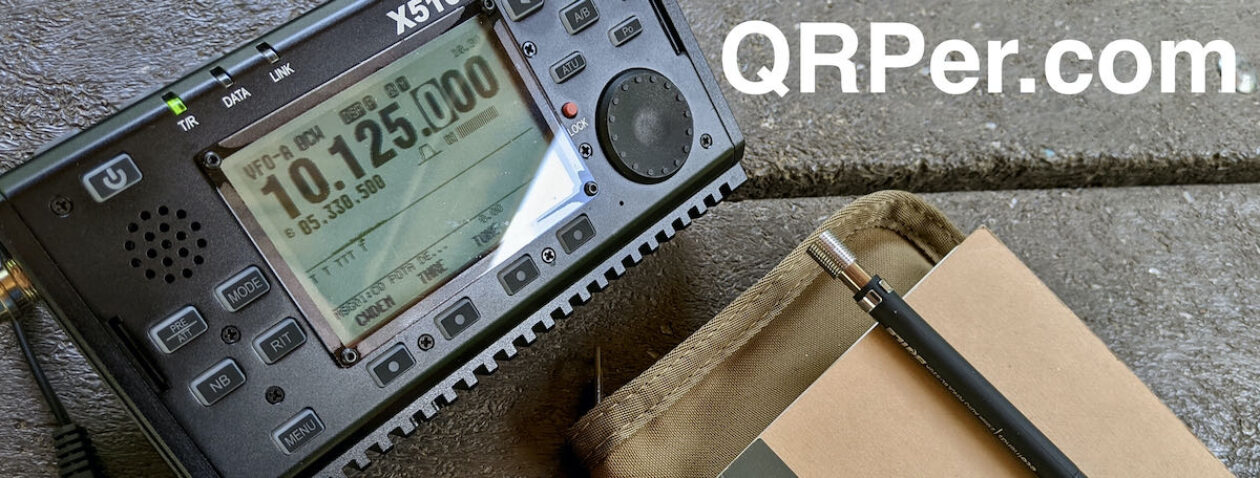
The Xiegu X5105 Affordable, 160-6 meters, 5 watts output, built-in ATU, and built in rechargeable batttey
The Xiegu G90 Affordable, relatively compact rig with built-in ATU, color screen with spectrum/watefall, good audio, and 20 watts of output power (see August 2020 TSM review)
The Icom IC-705 Benchmark performance, a multitude of features, exchangeable battery packs, 160-6 meters, VHF and UHF multi-mode, D-Star, GPS, WiFi, Bluetooth (see February 2021 TSM review)
The Yaesu FT-891: Affordable relatively compact radio with detachable faceplate, 100 watts output, and excellent audio (see November 2017 TSM review)
An important side note for field contests: if you plan to use a field transceiver in an event like the ARRL Field Day and/or another popular radio contest, make sure you choose a transceiver that can handle tightly spaced signals in an RF-dense environment. This is not the time to pull out a lower-end radio with poor receiver specifications. Use Rob Sherwood’s receiver test data table as a guide.
An antenna––and a means to deploy/support it
The CHA LEFS sloper
This particular topic, alone, might warrant a three-part series of articles. So, to keep the scope of this article realistic, let’s just say that you should build or buy an antenna that can comfortably handle the wattage you’re pushing into itin all the modes that you operate, considering that some 100-watt SSB-rated antennas might melt or arc if you run 100 watts CW or FT8.
I would suggest you consider having at least one resonant antenna, like an end-fed half-wave (EFHW) that might cover 40 and 20 meters without the need of an antenna tuner to match the antenna impedance to your rig.
Some of my favorite portable antenna systems?
I’m a big fan of Chameleon Antennafor their ease of deployment and benchmark build quality. Their prices range from $145 for the Emcomm III random wire, to $550 for their MPAS 2.0 vertical antenna system. These prices are near the top of the market, but Chameleon antennas are all machined and produced in the US and the quality is second to none. These are antennas you might well pass along to the next generation, meaning, really heirloom-worthy kit!
The PackTenna 9:1 UNUN
PackTennas, likewise, are pricey for such a compact product, but they are also beautifully engineered, lightweight, and designed for heavy field use. PackTenna produces an EFHW, 9:1 UNUN random wire, and linked dipole models. They’re some of the most compact field antennas on the market that can still handle as much as 100 watts of power output.
My Wolf River Coils “TIA” vertical antenna
Wolf River Coils verticals are affordable, compact, and resonant––thus an ATU isn’t needed. It will take some time to learn how to adjust the coil during frequency changes, but they work amazingly well. I have the WRC Take It Along (TIA). Their antennas are designed to handle 100 watts SSB, 50 watts CW, or 20 watts digital.
The EFT Trail-Friendly
Vibroplexsells a number of compact field portable antennas and is the manufacturer of Par End Fedz offerings. I’m very fond of the EFT Trail-Friendly and the EFT-MTR.
The MFJ-1984LP EFHW packs a lot of performance for the price
MFJ Enterprisesalso has a few portable antennas in their catalog, and it’s very difficult to beat the price and performance of their antenna gear. I have their $50 EFHW antenna (the MFJ-1982LP) and love it.
The Elecraft AX1 attaches directly to the BNC port on the KX3 and KX2.
I’ve also had tremendous fun with the uber-compact Elecraft AX1 antenna. Unquestionably, it’s the most compact and quickest-to-deploy antenna I own. It’s designed to pair with the Elecraft KX2 and KX3 using the optional internal antenna tuner.
There are a number of other antenna manufacturers who cater to portable operators. For example––although I’ve not yet had the opportunity of testing their antennas––SOTAbeams is highly regarded among SOTA enthusiasts.
Short on cash? No worries; you can build your own! In fact, until 2016, I had never purchased a field antenna; I built all my own. EFHW antennas and random-wire antennas are no more than a carefully-wound coil, a female antenna connector, an enclosure or mounting plate, and some wire. Some of the most active field operators I know homebrew all of their antennas. It’s easy, affordable, and fun!
Make sure you choose a battery that is sized appropriately for your transceiver power output. I will say that I’m a huge fan of LiFePo4 rechargeable batteries for their voltage range, lightweight design, and longevity. Being primarily a QRPer, I typically use 3 to 4.5 amp hour batteries as they’ll carry me through as many as three or four activations without needing to be recharged. For longer field deployments, or when I’m powering my 100W KXPA100 amplifier, I’ll use my 15 aH Bioenno LiFePo4 pack.
I use my 15Ah Bioenno LiFePo4 pack for QRO transceivers
It should go without saying that you need to pack these, but I have gone to the field with operators who forgot their key or mic and asked if I had a spare.
Keys are fairly universal, but keep in mind legacy transceivers often want a ¼” plug while newer rigs typically accept an ⅛” plug. Microphones, however, vary in port type and pin configuration based on the manufacturer and model. You could damage your mic or rig if you plug in a multi-pin mic that was designed for a different transceiver. Most mics that use a ⅛” plug are universal. Still, check before you plug it in if using an after-market or non-OEM mic.
Of course, choose a key, microphone, or boom headset that’s compact and rugged so that’ll be easy to pack and will stand the test of time.
I also always pack a set of inexpensive in-ear earphones. These can dramatically help with weak-signal interpretation.
Also, if you plan to operate a digital mode, you’ll likely need some sort of computing device. Even though I rarely operate digital modes in the field, I often pack my Microsoft Surface Go tablet in case I change my mind.
My Microsoft Surface Go tablet
In addition, I like logging directly to N3FJP’s Amateur Contact Log application directly in the field to save time submitting my logs later. Soon, I’ll be using the new HAMRS field log on my iPhone.
Speaking of logging…
A means of logging
I like compact notepads like Muji and Rite In The Rain for field use.
As simple as it is, it’s very important to take at least some paper and a pencil for logging your contacts. I like using small, pocket-sized Muji notebooks (affiliate link) for logging, and if the weather is even a little questionable, I’m a huge fan of getting my contacts down in Rite In The Rain mini notebooks (affiliate link) or notepads using a good old-fashioned pencil.
I like logging to paper and sometimes simultaneously logging to my Microsoft Surface Go. I have completed phone-only field activations where I only logged to my Surface Go tablet: in those cases, I snap a photo of my N3FJP call log, just in case something happens to my tablet between the field and the shack! Having endured enough technology failures, it gives me peace of mind to have at least one other backup.
Keep in mind that when you’re activating a park or summit, the folks calling you are relying on you to submit your logs to the appropriate programs so that they can get credit for working you. Many times, this might also help their awards for a state, county, or grid square. Always submit your logs after an activation even if you didn’t make enough contacts to validate the activation (POTA requires 10 contacts, SOTA requires 4 logged). It helps other folks out.
A pack or case
If you have a field radio kit, you’re going to need a means to organize and contain it for transport. There are at least three types of systems used for field kits.
A backpack or soft-sided case
My GoRuck BulletRuck is a brilliant SOTA pack
Since I enjoy the option of hiking with my radio gear, I love using backpacks. Although I’ll speak to this more next month in “Part 2,”, I choose quality packs that have at least one waterproof compartment and are comfortable to carry on long hikes. I also try to look for packs with Molle or some sort of external strapping so that I can attach portable antenna masts or even my hiking poles to the exterior of the pack.
A waterproof case or flight case
Ruggedized, weatherproof cases come in all sizes. This Pelican 1060 can house my entire KX1 radio kit.
Many field operators who want extra protection for their gear––especially when they don’t plan to hike or carry their gear long distances to the operating site––like hard-sided cases. I have built field radio kits in waterproof Pelican cases and appreciate knowing that I could drop my kit in a whitewater river, and it would likely survive the adventure unscathed. If you are one of these operators, look for quality watertight cases from brands like Pelican and Nanuk with interiors lined in pick foam padding that allows you to perfectly accommodate and safely protect your radio and accessories.
Portable ready-to-deploy cases
Although this option is almost outside the scope of this article, many emergency communications enthusiasts love having their gear loaded in rugged, portable––often rack-mounted and hard-sided––cases that they can simply open, hook to an antenna, and get right on the air. These systems are often the heaviest, least “portable,” and less suited for long distance hikes, but they’re often completely self-contained, with all of the components, including the power, hooked up and ready to go on a moment’s notice. While a system like this would be impractical for many Summits On The Air sites, it could be ideal for a park or island activation where you’re never that far from your vehicle.
Optional: Antenna cable
An ABR Industries RG-316 cable assembly
This doesn’t sound like an option, but it’s true. I’ve often operated my Elecraft KX3, KX2, and KX1 without a feedline at all: I simply attached two wires to a BNC binding post, and connected that to the radio. It makes for a super-compact setup.
Even an 8-12 foot feedline can make it easier to configure your operating position in the field. If you want to keep the feedline as low-profile as possible, especially if you’re operating QRP, consider investing in a quality RG-316 feedline terminated with the connector that fits your radio and antenna.
Optional: Antenna Tuner/Transmatch
A portable ATU with RF-sensing like the Elecraft T1 will give you an amazing amount of frequency agility. I’ve been known to use the T1 to tune my CHA Emcomm III random wire antenna on 160 meters..
Again, this topic could easily warrant a multi-part series of articles, but I’ll sum this one up in a nutshell: while I love (and even prefer) using resonant antennas that require no antenna tuner, I almost always carry a radio with a built-in ATU or an external portable ATU like the Elecraft T1 or ZM-2.
Why? Because an ATU will give you a certain amount of frequency agility or freedom. If I’m using an antenna that’s resonant on 40, 20, and 10 meters, but there’s a contest that day and the bands are incredibly crowded, I might use the ATU to find a match on 30 meters or 17 meters, thus finding a little refuge and space to operate. Also, sometimes antenna deployments aren’t ideal––due, for example, to site limitations such as dense vegetation that may alter the antenna deployment and thus its resonance. An ATU can at least keep your transceiver happy with the SWR when your resonant antenna might not be perfectly resonant.
But the main reason I carry it? A portable ATU gives you operational flexibility.
QRP or QRO?
I have operated QRO in the field with my KXPA100 amplifier on Field Day.
Its good to keep in mind that many of the station accessories listed above need to be matched to the output power of your transceiver and modes you use.
Many ham radio friendships have been placed in jeopardy over the question of either using QRP (low power) or QRO (high power) for field operations. This is a shame. Some operators have very strong opinions, but the truth is, there is no right or wrong answer.
In the spirit of full disclosure, I operate 97% of the time at QRP power levels––in my world, this means five watts or less. Personally, I enjoy the challenge of low-power operating. But I also appreciate the portability QRP gear offers.
The wee Mountain Topper MTR-3B
Speaking pragmatically––and this fact really isn’t open to debate––QRP and lower-power transceivers and accessories tend to be more efficient, more compact, and lighter than their higher-power siblings.
Most of my QRP transceivers weigh anywhere from two to five times less than their 100-watt equivalents. If you’re operating mobile (from a vehicle or camper/caravan, for example), an eight to twelve pound difference might not be a big deal. But the moment you’re hiking several miles to a mountain summit, weight becomes an important factor.
QRP transceivers have modest power requirements: everything from battery, to antenna, and even to tuners, are smaller, lighter, and more compact.
When operating QRP, you don’t have to worry as much about RF coming back to the radio from, say, an end-fed antenna. If I’m pushing over 20 watts into an end-fed half wave or end-fed random wire, I’ll likely want an in-line RF choke to keep some of that energy from affecting my transceiver or giving me an RF “tingle” when I touch the radio chassis or my key. Too much RF coming back to the transceiver can also affect things like electronic CW keying. But at five watts? I don’t worry. This is almost a non-issue, unless your transceiver happens to be very RF-sensitive indeed.
And even though I’m predominantly a QRPer, I definitely do pack radios like the 50-watt Mission RGO One and occasionally my Elecraft KX3 and KXPA100 100-watt amplifier, especially for an event like Field Day where my club is operating at higher power. I simply size up my gear appropriately. Again, this is especially important with your antenna, feed line, ATU, and battery selections.
If you primarily activate parks and are never far from your vehicle, it’s quite easy to accommodate a 100 watt transceiver like an FT-891, for example. Of course, if you wish to operate low-power and save your battery, simply turn down the output power. If you plan to hike a lot with your gear, then get your mind around QRP!
Stay tuned for Part 2!
In Part 2 we’ll dig into some of the details, looking at different approaches to field radio kits and some guidance and suggestions based on my real-life experience (read: operating mistakes).
The seller, who lives about 2 hours from my QTH, described his KX1 as the full package: a complete 3 band (40/30/20M) KX1 with all of the items needed to get on the air (save batteries) in a Pelican 1060 Micro Case.
The KX1 I owned in the past was a four bander (80/40/30/20M) and I already double checked to make sure Elecraft still had a few of their 80/30 module kits available (they do!). I do operate 80M in the field on occasion, but I really wanted the 80/30 module to get full use of the expanded HF receiver range which allows me to zero-beat broadcast stations and do a little SWLing while in the field.
The seller shipped the radio that same afternoon and I purchased it for $300 (plus shipping) based purely on his good word.
The KX1 package
I’ll admit, I was a bit nervous: I hadn’t asked all of the typical questions about dents/dings, if it smelled of cigarette smoke, and hadn’t even asked for photos. I just had a feeling it would all be good (but please, never follow my example here–I was drunk with excitement).
Here’s the photo I took after removing the Pelican case from the shipping box and opening it for the first time:
My jaw dropped.
The seller was right: everything I needed (and more!) was in the Pelican case with the KX1. Not only that, everything was labeled. An indication that the previous owner took pride in this little radio.
I don’t think the seller actually put this kit together. He bought it this way two years ago and I don’t think he ever even put it on the air based on his note to me. He sold the KX1 because he wasn’t using it.
I don’t know who the original owner was, but they did a fabulous job not only putting this field kit together, but also soldering/building the KX1. I hope the original owner reads this article sometime and steps forward.
You might note in the photo that there’s even a quick reference sheet, Morse Code reference sheet and QRP calling frequencies list attached to the Pelican’s lid inside. How clever!
I plan to replace the Morse Code sheet with a list of POTA and SOTA park/summit references and re-print the QRP calling frequencies sheet. But other than that, I’m leaving it all as-is. This might be the only time I’ve ever purchased a “package” transceiver and not modified it in some significant way.
Speaking of modifying: that 80/30 meter module? Glad I didn’t purchase one.
After putting the KX1 on a dummy load, I checked each band for output power. Band changes are made on the KX1 by pressing the “Band” button which cycles through the bands one-way. It started on 40 meters, then on to 30 meters, and 20 meters. All tested fine. Then I pressed the band button to return to 40 meters and the KX1 dived down to the 80 meter band!
Turns out, this is a four band KX1! Woo hoo! That saved me from having to purchase the $90 30/80M kit (although admittedly, I was looking forward to building it).
Photos
The only issue with the KX1 was that its paddles would only send “dit dah” from either side. I was able to fix this, though, by disassembling the paddles and fixing a short.
Although I’m currently in the process of testing the Icom IC-705, I’ve taken the KX1 along on a number of my park adventures and switched it out during band changes.
Indeed, my first two contacts were made using some nearly-depleted AA rechargeables on 30 meters: I worked a station in Iowa and one in Kansas with perhaps 1.5 watts of output power.
I’m super pleased to have the KX1 back in my field radio arsenal.
I name radios I plan to keep for the long-haul, so I dubbed this little KX1 “Ruby” after one of my favorite actresses, Barbara Stanwyck.
Look for Ruby and me on the air at a park or summit near you!
Many thanks to Steve (KZ4TN) who shares the following guest post:
DC30B QRP Transceiver Project
by Steve Allen, KZ4TN
I wanted to build a lightweight backpackable transceiver I could take hiking and camping. I chose the 30 meter band as it is specific to CW and the digital modes. I am also in the process of building Dave Benson’s (K1SWL) Phaser Digital Mode QRP Transceiver kit for the 30 meter band. Also, a 30 meter antenna is a bit smaller than one for 40 meters and the band is open most anytime of the day.
I sourced the DC30B transceiver kit, designed by Steve Weber KD1JV, from Pacific Antennas, http://www.qrpkits.com. It appears that they are now (10-11-20) only offering the kit for the 40 meter band. The following information can be used for the assembly of most any kit that lacks an enclosure.
Lately I have been finding extruded aluminum enclosures on Amazon.com and eBay.com. They come in many sizes and configurations. I like to use the versions with the split case which allows you to access the internal enclosure with the front and rear panels attached to the lower half of the enclosure. Most of these enclosures have a slot cut into the sides that allow a PCB to slide into the slots keeping it above the bottom of the enclosure without having to use standoffs. The one requirement for assembly is that the PCB needs to be attached to either the front or rear panel to hold it in place.
As the enclosure is anodized, I didn’t want to rely on the enclosure for common ground. I used a piece of copper clad board that I cut to fit the slot width of the enclosure and attached it to the back panel. I was then able to mount the transceiver PCB to the copper clad board with standoffs. This basic platform of the enclosure with the copper clad PCB provides a good foundation for any number of projects. All you have to do is mount the wired PCB on the board, install the components on the front and rear panel, then wire it up.
I wanted to have the choice of a few frequencies to operate on so I searched eBay for 30 meter crystals and found a source for 4 different popular frequencies. I installed a rotary switch on the front panel and added a small auxiliary PCB with two, 4 pin machined IC sockets. This allowed me to plug the crystals into the sockets. I wired the bottom of the socket PCB first using wire pairs stripped from computer ribbon cable leaving extra length. I marked the wires with dots to indicate which sockets each wire pair went to so I could solder them onto the rotary switch in the correct order. It was tight but I always work with optical magnification so I can see exactly what I’m doing. I have used this crystal switching method in the past with good success.
The rest of the assembly was straight forward. I find that most kits are well designed and documented, and if you take your time and follow the directions carefully all should go well. The two most common speed bumps seem to be soldering in the wrong component or bad soldering technique. I double check all component values and placements prior to soldering, and I always use optical magnification while working. I inspect each solder joint and look for good flow through in the plated through holes, and make sure there are no solder bridges.
The finished product. I bought a Dymo label maker and it works very well for projects like this. I love using these enclosures and they are a leap forward from the old folded aluminum clam shells I used in the past. I could stand on this without causing any damage. Power out is 1-3 watts depending on the DC power in. The receiver is sensitive and the ability to choose from four frequencies is a real plus.
73 de KZ4TN
Steve Allen
Elizabethton, TN
Wow, Steve! What a top-shelf job on this build! I’ll have to look for those aluminum enclosures as well. Beautiful little rig you’ve made there and I think it’s fantastic you’ve a few crystal frequency options! Thank you for sharing!
I’ve been a ham radio operator since 1997. In the first decade of my amateur radio life, I only owned three HF radios (Icom IC-735, Yaesu FT-817, and a Ten-Tec OMNI VI+).
As I got into writing, blogging, and evaluating/testing radios, that number increased. Quite often, radios are only in my shack for a short period of time as I alpha/beta test and/or review production run units.
I try not to get attached to radios because I know they’re often only temporarily in the shack.
Over the years, there have been a few radios I’ve sold for…let’s say “pragmatic” reasons. It’s very rare that I purchase a radio with the intention of keeping it only to find that I want to sell it shortly thereafter. More likely than not, I sell because the radio is redundant (how many field radios does one need–?) or because I’m raising money to make a larger purchase.
Here’s a short list of transceivers I regret selling/trading:
Elecraft KX1
I sold my Elecraft KX1 in 2016 in order to help purchase my Elecraft KX2. It was a solid decision. The KX2 has become my favorite field radio (here’s my review) and was SO much more versatile than the KX1. Still: I really miss the KX1. I loved how bare-bones it was, I loved the top-mounted controls and the fact I often operated it while simply holding it in my hands. The controls were super easy to use even with gloves on in the winter. Plus, it was “cute” in a boxy Elecraft sort of way. If I ever find a deal on another one, I might grab it!
Elecraft K2
I’ve owned both the Elecraft K2/10 and K2/100. Funny story: I acquired a K2/10 in 2008 or so and absolutely loved the radio. After I purchased my KX3 in 2013, however, it was rarely used and sat on my shelf as a “back-up” radio. Eventually, I decided to sell it and did so with ease. Within a week of selling it, a local ham posted on our club email list that he was selling a K2/100 in an SK sale. He wasn’t sure of all of the upgrades, but knew it was a K2/100. The price was very low, but there were no takers after a few days, so I bought it. I used the K2/100 for a few years and it served as a back-up 100 watt radio. I eventually sold it, though, to purchase a KXPA100 used. Now, of course, I do miss that radio. In truth, I’ll likely never purchase one again, because I own so many other transceivers–and the KXPA100 is truly a genius compliment to the KX2 and KX3–but I do have an affinity for that fine rig.
Index Labs QRP++
QRP+ ad from the Dec 1995 issue of QST. Source: WD8RIF
My buddy Eric (WD8RIF) is to blame for this radio. He owned an Index Labs QRP+ for years. He loved operating it in the field and at home. It was the first QRP radio I ever saw in action (at this particular field event). More than 10 years ago, I happened upon a great deal on a QRP++ and instantly bought it. It was SO much fun to operate—super simple, yet had pretty much every feature you’d want in a basic transceiver. I sold it because, frankly, performance was sub-par especially if you ever planned to use it in an RF-dense environment. The receiver front end would simply fall apart, for example, during contests or events like Field Day. Otherwise, it was a pretty sensitive radio. It was incredibly portable and had that awfully “cute” cube form factor. Another fear I had was availability of replacement parts. Index Labs was no longer in business and there were quite a few obsolete parts in the radio. Perhaps it’s a stretch to say I “regret” selling it because, in truth I don’t. But when I see them at hamfests, I’m still tempted to grab one if for no other reasons than nostalgia.
Yaesu FT-817
I purchased an ‘817 shortly after they were introduced in…what…2000? At the time, there wasn’t a radio like it on the market: it was the most compact full-featured HF/VHF/UHF radio in the amateur radio world. Back then, I was living in the UK and travelling all over Europe. I purchased the FT-817 with the idea that I could play radio while, say, working in Hagen, Munich, Chartres, Berlin, Torino, Pescara, or any of the other fabulous sites I regularly visited. I did pack the FT-817 on a number of occasions but since I’m a one-bag traveller, it was scrutinized to some degree at most airports—especially post-9/11. Also, my first production run model blew its finals within the first two years of ownership (a common problem that was addressed by Yaesu shortly after that production run).
I had the finals replaced by Burghardt Amateur Center but rarely used the FT-817 after that. Truth was, I found the radio’s front panel to be too compact and the embedded menus really frustrated me. But back then, I wasn’t as much of a field op as I am now and I could really appreciate a compact, affordable radio that also sports VHF/UHF operation—especially for SOTA activations. Plus, few transceivers have enjoyed a product life like the FT-817/818 which is now pushing 20 years on the market. While the 817/818 lacks a number of features I’ve grown to love (like memory keying) I do believe I may purchase an FT-818 next time they go on sale. In the end, I miss the rig.
How about you? Any regrets?
Please feel free to comment with any radios you regret selling, trading, or giving away over the years and tell us why you miss it! Inquiring minds want to know!
Many thanks to Pete (WB9FLW) who shares the following article by Bob (KD8CGH) regarding the uSDX transceiver kit.
I reached out to Bob who has kindly given me permission to share his article on QRPer:
An Introduction to the uSDX
by Bob Benedict (KD8CGH)
There is a new open source, home brew multi band, multi mode QRP transceiver that grew out of the QRP Labs QCX. Through some serious wizardry it retains an efficient class E RF amplifier for SSB and digital modes. It crams impressive SDR capabilities into an Arduino.
This has an interesting international development process conducted on https://groups.io/g/ucx/topics with contributions by many, including the usual gang of suspects: Hans Summers G0UPL, Guido Ten Dolle PE1NN, Barbaros Asuroglu WB2CBA , Manuel Klaerig DL2MAN, Kees Talen K5BCQ, Allison Parent KB1GMX, Jean-Marie T’Jaeckx ON7EN, Ashhar Farhan VU2ESE, and Miguel Angelo Bartie PY2OHH. I apologize to the many others whose names I didn’t list. A summary is in the WIKI https://groups.io/g/ucx/wiki.
The basic work uSDX appears to have been accomplished by Guido Ten Dolle PE1NNZ. It uses pulse width modulation of the PA supply voltage to transmit modes other than CW while retaining class E efficiency and uses a direct conversion SDR receiver.
The basic idea behind Class E nonlinear amplifiers is that transistors have little loss when they are switched fully on or off. The losses occur when devices are limiting power flow in linear amplifiers. The idea behind a Class E amplifier is to use transistors in a switching mode to generate a square wave to drive a resonant circuit to generate RF power.
This method is used in the popular QCX QRP CW transceiver kit line developed by Hans Summers and sold through QRP Labs https://qrp-labs.com/. More than 10,000 of these great transceiver kits have been sold (I built one). There is a good discussion of the circuit and particularly of the class E amplifier in the excellent QCX documentation https://www.qrp-labs.com/images/qcx/assembly_A4-Rev-5e.pdf.
The QCX was the base for the QCX-SSB which starts with a QCX and modified the circuit and software to add SSB capabilities. The wizardry that Guido accomplished uses pulse width modulation of the PA supply voltage to control the amplifier in an Envelope Elimination and Restoration (EER) technique https://core.ac.uk/download/pdf/148657773.pdf. To generate SSB a DSP algorithm samples the audio input and performs a Hilbert transformation to determine the phase and amplitude of the complex signal. The phase changes are transformed into temporary frequency changes which are sent to the clock generator. This result in phase changes on the SSB carrier signal and delivers a SSB-signal with the opposite side-band components is attenuated.
On the receive side a direct conversion SDR receiver is used with the I and Q signal digitized and all further processing carrying out digitally. Attenuators are included to help not overload the ADC range. Documentation is at https://github.com/threeme3/QCX-SSB . In addition to a good description of the theory and hardware mod there is also a good description of the software command menu.
From there development took off in several directions. One is by Barbaros Asuroglu WB2CBA and Antrak that uses through hole components (mostly) and replaceable band boards that hold the low pass filter and band dependent class E amplifier components (an inductor and capacitor). Barb also includes boards designed to be a case top and bottom, battery pack and a PA.
I built the variant designed by Barbaros Asuroglu WB2CBA and I’m pleased with it’s performance. I ordered 10 main boards and 40 LP filter band boards PCBs from PCBWAY, but now you can also purchase single boards sets from https://shop.offline.systems/.
In an example of hams collaborating at its finest, Hans Summers announced on 9/11/2020 that his new QCX mini product, a QCX in a smaller package, will include a daughter board that can be used to give the QCX mini a uSDX like SSB capability. The QCX mini has the same circuit as the QCX but uses SMD components packaged it into a two board stack that is less than half the volume of the original QCX. The mod is unsupported by QRP-LABS but may be supported by the uSDX group.
QRP radios, product announcements, reviews, news and more. Low power amateur radio fun!
Please support QRPer by adding us to your whitelist in your ad blocker. Ads are what helps us stay online. All of our ads are ham radio related--no junk, we promise! Thank you!


 As any CW operator will tell you, the magic is in the mode. CW is such an efficacious mode that it cuts through the ether like a knife, even when conditions are less than favorable.


