 Last week, I had a hankering to visit a site I hadn’t activated in a few months: South Mountains Game Land.
This game land is pretty vast and has a number of entry points, almost all of which are very accessible. When I re-visit a site multiple times, I like to try different entrances when I can because it gives me a chance to check out a site better and, frankly, even enjoy a little light off-roading.
I found a western road leading deep into South Mountains from the Wildlife Resource Commission map and decided to explore it and do a quick activation.
South Mountains Game Land (K-6952)
 I avoid activating Game Lands on days when I suspect there will be a lot of hunting. Tuesday afternoon was *not* ideal for hunters. Besides being the middle of a work day, it was cold and very gusty.
As I drove about 4 miles into the site, I didn’t see a single car or truck parked in any of the parking areas. I could tell I had the place to myself.
A Few Precautions

It goes without saying that if you’re doing a POTA or SOTA activation in a rural/remote area that has no mobile phone coverage (quite common at the ones I activate), you really need to take a few precautions.
First of all, let someone else know where you’ll be and how long you plan to be there. I always let a couple radio friends know where I’ll be so if I don’t show up on the air or they don’t hear from me, they could contact authorities to look for me.
Secondly, always take a proper first aid kit. If you get hurt, you need a way to apply first aid until you can get help.
Take a handheld radio with local repeater frequencies pre-loaded. Even though I might not have cell phone coverage, I can almost always hit at least one repeater.
Of course, carry a little food and water with you and make sure your vehicle has fuel as well.
Always wear a high-visibility vest, jacket, and/or cap. Many game lands require these. Besides, would you rather perform and activation or get shot? I don’t like getting shot. I also don’t like the idea of being bear food, so at least pack a little bear mace if you’re in bear country.
When I’m activating a game land I don’t hike deep into the woods. In fact, I try to stay on or very close to a parking area. Even though POTA is becoming a very popular radio activity, I can promise that you’ll likely be the first POTA activator most hunters will see. It’s a good idea to be near areas of activity like a parking spot or road where they’re much less likely to be hunting.
Finally, as I mentioned before, I personally do not activate game lands on busy hunting days.
Of course, check the weather forecast in advance.
On The Air

I found a great spot to set up my station near a ridge line deep in the game lands.
Normally, I’d set up right next to my car, but Tuesday the winds were very gusty so I found a semi-protected area maybe 10 yards off the road. I located a spot with the least amount of overhanging branches (always check for widowmakers and dead trees!).
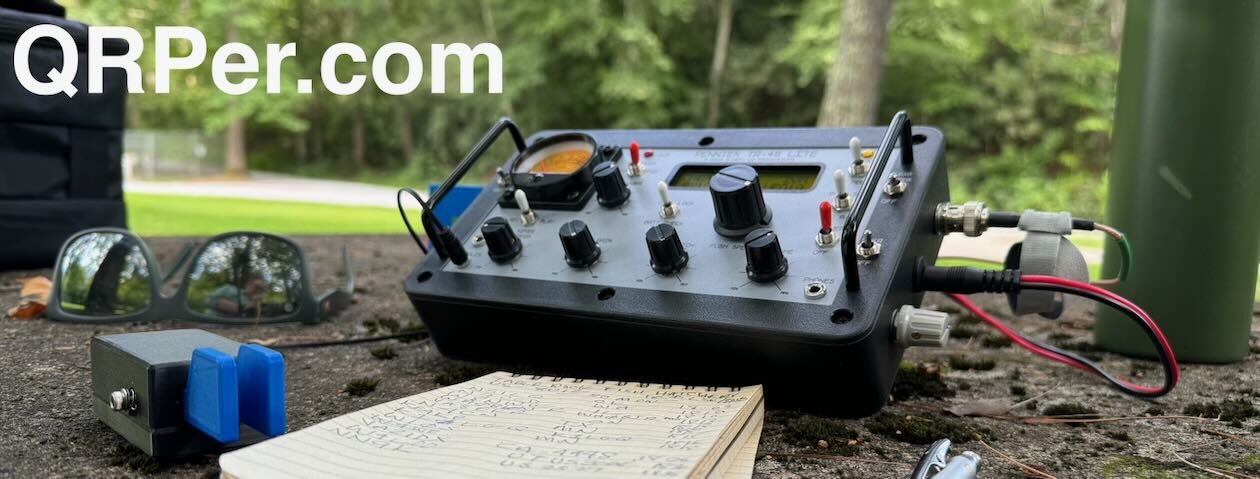
Gear:
- Icom IC-705
- Mat-Tuner mAT-705Plus
- Chameleon Emcomm III Portable random wire antenna
- CW Morse “Pocket Paddle”
- Red Oxx C-Ruck
- Arborist throw line
- Tom Bihn Large Travel Tray

It only took me five minutes to deploy the Chameleon Emcomm III Portable random wire antenna with my arborist throw line.
Random wire antennas require tuners, so I employed the Mat-Tuner mAT-705 Plus.
 This site has no mobile phone coverage, so I had no easy way to spot myself to the POTA spots page had I decided to do a little phone/SSB operating. I decided to stick with CW as the POTA spots page will auto-spot me using my information from the Reverse Beacon Network (as long as that system is working).
It’s so rare that I do activations around noon or early in the afternoon, so I decided to start on 20 meters just to see if I could snag a European station.
I felt pretty chuffed to quickly snag the Azores (CU3BL) and a few west coast stations with my 5 watts and a wire. QRP rocks!
I then moved to 40 meters where I worked a number of stations in succession and topped off the activation with one 30 meter contact.
Here’s a QSOmap of this activation:
 Not bad for about 40 minutes on the air.
Video
I also made one of my real-time, real-life videos of the activation. Note that my camera died on me perhaps five minutes before I completed the activation, so it will end abruptly. Sorry about that!
My ankle is healing nicely so I’m feeling more comfortable with the idea of hiking again. I’m plotting a SOTA activation with my daughter in the coming weeks.