Tag Archives: Lake Norman State Park (US-2740)

Morning on the Trail and On the Air: A Relaxing K2 QRP POTA Activation from the Campsite

I woke up around 6:45 on Saturday, August 24, 2024. That’s late for me, but I tend to sleep well when camping and it must have helped that the previous evening POTA activation by the campfire was pure bliss.

There were some noises in the campground that woke me up during the night (probably other campers scaring off raccoons), but aside from that, I slept peacefully in my rooftop tent.

As I lay there Saturday morning, I couldn’t decide whether to make breakfast and hit the air for an early morning POTA activation, or to take a nice hike before everyone else in the campground woke up.

I chose the latter option!

At 7:00 AM, I headed to the nearby trailhead for the Lake Shore trail. It was a very pleasant and quiet hike—roughly 5 miles in total.

Afterwards, I made some blueberry oatmeal and a cup of French-pressed coffee. It really hit the spot!

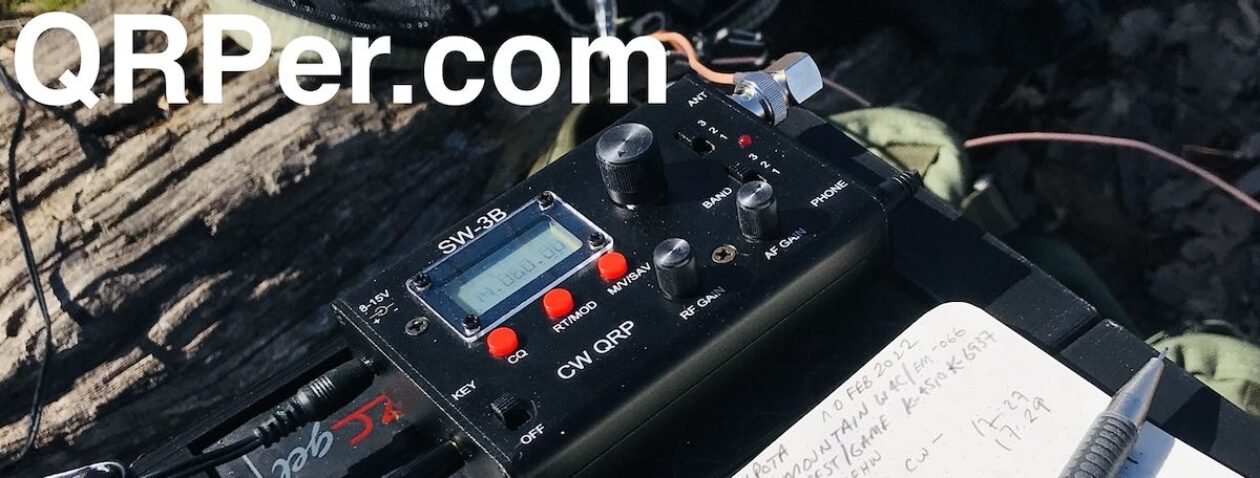
Next, I grabbed my Elecraft K2 and connected it to the MM0OPX 40M EFHW that I had set up the previous evening.

I realized it had been a while since I’d taken the K2 out into the field, which was why I packed it for this trip. I use the K2 quite often in the shack, but it needed some outdoor time. All radios (and their operators!) need outdoor therapy!

New Tufteln TP-III Protective Cover

My friend Joshua (N5FY) at Tufteln sent me this protective cover, at no cost to me, for the BamaKey TP-III.  Joshua has almost become a specialist in making bespoke protective covers for radios and accessories.

This cover is great. You insert four rare earth magnets (included) into four holes in the bottom of the cover. These work with the rare earth magnets on the TP-III to mag-lock the cover in place.

If you buy one of these for your TP-III, I would advice that you check the polarity of the magnets on the TP-III before inserting the magnets in the cover’s holes. I didn’t do this and found that I’d aligned a couple of the magnets in opposition, thus they repelled the magnets in the case. I had to dig the magnets out and reverse them–not a complicated procedure, but one I could have avoided had I simply thought about this in advance!

Anyway, I do like this cover! Thanks, Joshua!

Gear

Note: All Amazon, CW Morse, ABR, Chelegance, eBay, and Radioddity links are affiliate links that support QRPer.com at no cost to you.

On The Air

I hopped on the air and started calling CQ POTA on the 40-meter band. I figured that at this time of morning, 40 meters should be in decent shape.

I was right! Continue reading Morning on the Trail and On the Air: A Relaxing K2 QRP POTA Activation from the Campsite

Testing My C6 Rooftop Tent During an Overnight POTA Camping Trip!

Friday, August 23, 2024, was packed with activities, but I was looking forward to the evening to wind down and relax.

That morning and afternoon, my wife and I ran numerous errands around town. I played chauffeur to my daughters, taking them to their volunteer jobs and Shakespeare classes.

The day wrapped up around 5:00 PM when I returned to the QTH, dropped off one set of car keys, and grabbed the other!

I had pre-packed the Subaru for a trip to the Lake Norman State Park campground!

Overnight camping trip

I may have mentioned in previous posts—and I know I certainly have on the Ham Radio Workbench podcast—that I purchased a rooftop tent system last year for my Subaru.

I had hoped that my maiden voyage in it would be the 2023 W4G SOTA campout in North Georgia, but the actual tent platform didn’t ship until a couple of months after the campout.

2024 has been a crazy year—and the summer, especially, has been hot and humid—so I haven’t gone camping even once so far. This is very much not the norm, but there you go.

This summer, I’d been waiting for a little relief from the heat to at least fit in an overnight trip and give the rooftop tent a good shake-out before the fall and winter camping trips I have planned. In mid-August, that relief arrived as a front moved into the area, bringing cooler temperatures and lower humidity.

I planned to spend Saturday with my father in Hickory, NC, so I decided that a trip to Lake Norman State Park Campground for Friday night was in order! I made a reservation a couple of days prior to secure a nice, level site.

Lake Norman State Park (US-2740)

I arrived on site and checked in around 18:45 local time (22:45 UTC).

Part of me considered making POTA a priority to fit in an activation during the August 23 UTC day, but the primary goal of this camping trip was to see how long it would take to deploy my C6 tent.

I didn’t want to do this in the dark and, frankly, I was looking forward to making an evening meal before hitting the airwaves.

The C6 Rev Tent

Since elementary school, I’ve always loved camping and over the years have owned a variety of tents—most of which were on the affordable end of the scale.

As I’ve gotten older, I’ve moved away from sleeping on the ground. In the past few years, I’ve used either a full-size cot in our family tent or a backpackable cot for my two-person tent. I find I sleep much better when off the ground.

I always thought a rooftop tent would make impromptu camping trips much easier, but such tents are often insanely expensive. Plus, some weigh over 100 or 200 lbs, which is why some of my friends who have them never remove them from their vehicles—it’s just too much of a hassle.

I discovered the Rev Tent by C6 Outdoors a couple years ago. Although still pricey (by my standards), it was at least half the price of other quality rooftop tent options.

Last year, my wife and daughters encouraged me to order one as a birthday gift from them. I bought the tent portion of the setup during a sale and got it for about 20% off. The platform (that attaches to my Subaru’s roof bars) wasn’t in stock because C6 was redesigning it and it wasn’t available yet.

In November, they started shipping the new platforms and offered those of us who had already purchased the tent an excellent discount for being patient.

While the Rev tent requires more time to set up compared to clamshell rooftop tents, it offers a level of flexibility they don’t. The tent portion of the system weighs only 20 lbs and is designed to be completely self-supporting. You can use it on the roof rack, put it in the bed of a truck, or set it up on the ground like a normal tent.

The Rev tent has thick but lightweight foam padding in the floor, acting as a permanent mattress. It’s super comfortable—no need for additional padding.

Deploying the Rev tent at Lake Norman involved detaching it and removing it from the roof rack, unzipping and setting up the tent on the ground, opening the tent platform, then placing the tent back on top and attaching it at the four corners.

I timed myself, and the whole process on my first attempt took 15 minutes from start to finish. The part that takes the most time is simply attaching and detaching the tent via the four bolts. I’m confident I can cut this time nearly in half with a bit of practice.

I plan to do a full review of the Rev tent in a future video, as there aren’t many reviews out there. This tent isn’t for everyone, but I like it. I’ll want a few more camping trips under my belt before considering making a review, though!

Fireside POTA

After dinner, I started a fire and set up my MM0OPX 40-meter end-fed half-wave.

I then grabbed my KX2 and, using my Tufteln/N0RNM kneeboard, sat comfortably as I prepared to hit the air.

Gear

Note: All Amazon, CW Morse, ABR, Chelegance, eBay, and Radioddity links are affiliate links that support QRPer.com at no cost to you.

On The Air

I’ll admit, it was incredibly comfortable sitting back and playing POTA by the campfire.

I engaged the KX2’s internal ATU, then used it to find a match on 80 meters. I believe it achieved a 1:1 SWR.

I started calling CQ, and the contacts began rolling in at a relaxed pace. Continue reading Testing My C6 Rooftop Tent During an Overnight POTA Camping Trip!

Testing the Ionosphere: A 100 milliwatt to 1 watt POTA Activation During a CME? Why not!?

Sometimes, I like the odd “exercise in futility.”

I enjoy shaking up routine and since POTA and SOTA activations are my routine, they end up being the shakers.

On Monday, September 18, 2023, I found out that our planet was rotating into a large CME (Coronal Mass Ejection). This CME made all of the space weather news and we planned for either some potential radio blackouts or at least very unstable conditions.

As I’ve said many times before, I never let the potential for poor propagation stop me from hitting the field. Don’t let it stop you either.

Lake Norman State Park (K-2740)

I had a full afternoon to play radio, so I made my way to Lake Norman State Park.

En route, I tried to think of a way to shake up the activation a bit. I planned to activate at the same spot I had during my last visit because I knew the park’s main trail system was still closed and, frankly, I wanted to take advantage of the EV charger at the visitor’s center again!

I’d packed MW0SAW’s End-Fed Half-Wave (the gift that keeps on giving, Steve) and I did have one new radio toy (more on that later).

I also had a lot of time–at least, more than I normally do during a POTA activation–so I thought it might be fun taking my KX2 down to the lowest power setting it has: 100 milliwatts.

I’ve activated parks with 100mw before, but never intentionally on a day when I knew propagation would be poor.

I figured with enough time, maybe I would get the ten contacts needed for a valid POTA activation.

If not, it would be fun trying!

Why Milliwatting?

At the end of the day, I think taking our radios and antennas to their low-power extremes gives us a taste of what we can actually do with so little signal.

I remember shortly after I bought my first Elecraft KX1 in 2008, I was speaking with a local ham and he told me that a maximum output of three watts was pretty useless and that I really needed a minimum of five watts if I expected to make any contacts.

Part of me did feel like perhaps I’d bought something more akin to a toy–fun to look at and hold, but not terribly practical.

Then I started using that KX1 to make contacts and even carry on extended rag chews. Turns out, three watts gets a lot done!

Today, I’ll often run my MTR-3B with three watts or even less when activating a summit and the results are simply outstanding–fabulous DX and contacts galore.

I know 100mw is a proper compromise, but I like knowing what I can achieve with so little. Tinkering with it in the field and listening to signal reports (also reading RBN stats) gives me a good idea.

In an emergency situation? If I could only push 100mw into a decent antenna, I know it wouldn’t be ideal, but I know it wouldn’t be futile either.

Begali Adventure Dual

Another activation motivation was the opportunity to test my new-to-me Begali Adventure Dual paddles. Continue reading Testing the Ionosphere: A 100 milliwatt to 1 watt POTA Activation During a CME? Why not!?

POTA at Lake Norman: Beautiful day for a TR-45L trailside activation (and hunting VE6LK)!

I’m getting used to having an electric vehicle for my weekly travels including POTA and SOTA excursions.

My Volvo C40 has a published range of about 226 miles on a 90% charge, but I find that I actually get more than that. I almost never need to recharge from a public charger–I just plug it in at home.

At least once a week, I visit my parents in Hickory, NC and that round trip (including errand running in town) logs a good +/- 200 miles. By the time I return to the QTH, I typically have a comfortable 20% charge left on the battery.

Many of the parks I activate in that travel corridor are 20-30 minute detours off of Interstate 40 (for example: Lake James SP, South Mountains SP, Tuttle Educational SF). They have no negative impact on my ability to make it back to the QTH with battery capacity to spare.

Parks, however, that are still close to Hickory, but in the opposite direction of home, may necessitate a quick charge at one of the many public charging stations along the road. Not a big deal, but it’s kind of fun when I can do a full trip on one charge.

Flag at half staff in memory of September 11, 2021

On Monday, September 11, 2023, I had a full afternoon open and really wanted to fit in a proper hike. One of my favorite easy six mile loop trails–the Lakeshore Trail– is at Lake Norman State Park.

Lake Norman, however, is in the opposite direction of the QTH and is about an 80 minute round trip. I fit in errands along the way, but going there means I’ll need a bit of a charge to get back home the following day.

After a little research, though, I discovered that Lake Norman (much like Lake James) has free EV charging at their visitor’s center! Woo hoo!

Lake Norman State Park (K-2740)

I arrived at the park in the early afternoon and–whew!–both of the EV charging stations were free. In fact, the visitors’ center parking lot was almost empty–I would have expected a few more cars. I found that curious.

I plugged in my car, put on my hiking boots, grabbed my hiking sticks, then made my way to the spur trail that connects the visitors’ center parking lot to the Lakeshore loop.

Only, when I reached the trailhead, there was a notice stating that all of the trails were temporarily closed. Wait…what?

This may explain the lack of visitors.

I was bummed to say the least. My backup plan would be to hike the road at Lake Norman, but that’s not nearly as fun as a proper trail.

I then walked to the visitors’ center and asked the staff inside about the trail closures. They pointed out that there was one small loop trail–next to the visitors’ center–that was still open.

I was pleased to hear that and decided that instead of hiking one long loop, I could simply hike the same small loop several times.

I thanked them then gave them a donation (which I was going to do anyway) especially since I was getting free EV charge!

I walked out the side entrance of the building and onto the Alder Trail.It was a very nice little loop trail and long enough that I didn’t feel like I was walking in circles. Continue reading POTA at Lake Norman: Beautiful day for a TR-45L trailside activation (and hunting VE6LK)!

Lake Norman: An amazing hike followed by a POTA activation with the TEN-TEC R4020

Somedays, I just need to stretch my legs with a good hike and Tuesday (June 6, 2023) was one of those days!

I had the afternoon wide open to do a POTA activation or two and since I was visiting my folks in Catawba County, I thought about hitting Fort Dobbs State Park and Lake Norman State Park. It would make for a fun two-park rove and would be very doable that afternoon.

Then it hit me that what I really wanted to do that afternoon was to take a nice, long, leisurely hike–fitting in both parks wouldn’t allow enough time for a proper hike.Thus, I ditched the idea of hitting both parks and chose to activate only Lake Norman because it has an amazing six mile “Lakeshore” loop trail that I love.

I arrived at the park a little after noon, parked at the spot where I planned to do my activation later, then walked to the trailhead and started my hike.

It was a gorgeous day–fairly hot and humid (we’re talking June in the Piedmont of NC) but still perfect for a hike.

The trail follows the winding lake shore and is a very easy hike. I’m used to taking more mountainous trails, so to hike along a lakeshore is just pure fun.

I hiked at a decent clip and by the time I made it back to my car, I was pretty darn sweaty. The humidity made sure of that!


Still: the hike was just what the doctor ordered!

Lake Norman State Park (K-2740)

I grabbed my radio gear from the car and found a picnic table under the shade of trees. Continue reading Lake Norman: An amazing hike followed by a POTA activation with the TEN-TEC R4020

Rainy Day POTA: Setting up the Chelegance MC-750 Vertical Antenna Inside a Picnic Shelter?

On Thursday, April 27, 2023, it was pouring rain, so the perfect time for a little POTA, right–?

Right!

Actually, I had an idea: in the past, I’ve been known to play POTA under the roof of a picnic shelter on rainy days. I’ve even been known to use my AX1 antenna inside the shelter, under a metal roof. Quite a few times, actually.

Of course, it’s not optimal to operate with your antenna under a metal roof, but with POTA? Let’s just say that you can get away with a lot of less-than-optimal antenna deployments.

That’s the benefit of being the DX!

The MC-750 Tripod

An in-the-shelter activation was also the perfect opportunity to test the new Chelegance tripod that fits both the MC-750 and the JPC-12.

A number of readers have reached out asking about this tripod, so when Jesse at Chelegance asked if I’d like to test it, I agreed to do so.

To be clear, he sent this to me at no cost for evaluation. It’s actually quite affordable ($30 on the Chelegance website, $40 at DX Engineering, for example) so purchasing it would have been easy enough, but Jesse also wanted me to evaluate their new FT-818 ATU, so he sent both at the same time (you’ll see the ATU in a future field report).

The tripod feels very sturdy and is simple to deploy. It’s also a little heavy, so keep that in mind if you plan to pack it in for a long SOTA hike.

A number of you have purchased this tripod and have only had positive comments. I now see why.

I speak about this in more detail in the activation video below.

Lake Norman State Park (K-2740)

I decided that it had been too long since I had activated Lake Norman State Park, so I hopped in the car and headed to Troutman, NC! Lake Norman has a number of picnic shelters and covered areas thus a very safe bet.

It was a rainy day so, of course, I pulled into the Lake Norman picnic area only to find one other car there. In fact, by the time I had taken my backpack to the picnic shelter, that other park visitor appeared at a trailhead, hopped in her car, and left.

The picnic shelter sign wasn’t set to “reserved” either, so it looked like I had a green light to claim it for POTA! Continue reading Rainy Day POTA: Setting up the Chelegance MC-750 Vertical Antenna Inside a Picnic Shelter?

Pairing my new Xiegu X6100 with a 31 foot speaker wire antenna (and avoiding RX overload)

Regular readers of QRPer.com might question the wording in my title since I’ve already posted several field reports and even a full review of the Xiegu X6100. So why would this X6100 be considered a “new” radio–?

Since I go over this in more detail in the activation video (linked and embedded below), I’ll give you the nutshell version here:

My activations with the X6100 early this year (2022) were all performed using a loaner unit sent to me by Radioddity. I kept that unit for a few weeks, shipped it on, and purchased one of my own.

In February, when I received the X6100 I purchased, I immediately noticed a small mechanical issue with the encoder.

This is the X6100 open. You can see the back of the encoder to the right of the ribbon cable.

I tried fixing it (with instructions received from Xiegu) but in the end had to return the transceiver for replacement.

The X6100 unit in this field report is my replacement–technically, the third X6100 I’ve had in my hands, and this was my first activation using it.

Many of you have asked why I haven’t taken the X6100 to the field more often this year and this is why. I basically didn’t have a functioning unit for most of February, March, and April. Radioddity was quite responsive to my issues with the X6100, but frankly I had a lot going on during that time frame so it took longer than normal to troubleshoot, modify, test, and send back the faulty unit.

Fortunately, the replacement X6100 has no encoder issues other than the brake is very tight. I’m not willing to break the warranty seal on this unit to adjust it, so I’ll just live with a much-tighter-than-I’d-like encoder.

[Update: Bob (W0BNC) points out that the tight brake is due to friction caused by a felt pad under the X6100 encoder knob. The remedy is to pull off the rubber ring around the encoder knob, loosen the set screw, lift the knob slightly off the body, and retighten. I’ll do this when I’m back with the X6100 after summer travels. Thanks, Bob!]

X6100 field kit test

This activation was also the perfect opportunity to test all of the components of a dedicated field kit I’m building around the X6100.

The kit consists of:

  • The Xiegu X6100 QRP transceiver,
  • a BNC binding post adapter,
  • paddles,
  • the X6100 battery charger,
  • a 31′ speaker wire antenna
  • 25 meters of 2mm throw line,
  • a weaver 8oz weight, and a
  • logging pad and pencil.

Everything, save the antenna, fits in my Red Oxx Hound EDC pack.

Eventually, I’ll replace the speaker wire with some thinner Wireman stuff and it should all fit in the Hound pack, albeit snuggly!

I’ve decided that the X6100 will live at my parents’ home in the NC foothills, so I’ll always have a field radio kit available while staying there overnight.

Lake Norman State Park (K-2740)

On May 9, 2002, an opportunity opened up in the afternoon to finally take my new X6100 to the field! Continue reading Pairing my new Xiegu X6100 with a 31 foot speaker wire antenna (and avoiding RX overload)

Field Activation Antenna Challenge #1: Military Fixture Homemade Multi-band Doublet!

I mentioned in a previous post that my personal “Activation Challenge” for 2022 was “to build a new antenna each month and deploy it at least once that month during a field activation.”

On Thursday, January 27, 2022 I took my first antenna–the military fixture doublet–to Lake Norman State Park for a Parks On The Air activation!

For more information about this doublet and how it was constructed, check out this post.

Lake Norman State Park (K-2740)

I picked Lake Norman knowing that it had numerous spots to set up a doublet.

Unlike an end-fed wire antenna, doublets need a little more clear space to deploy both legs; the idea is to avoid as many low tree branches and other obstacles as possible.

Many (if not most) of the operators I know who regularly deploy field doublets actually use a telescoping mast for the center support to make the whole process easier.  I didn’t take either of my fiberglass masts on this outing because, frankly, the winding fixture on this doublet acts as the center insulator, and is “heavy” compared to most of my field antennas. Continue reading Field Activation Antenna Challenge #1: Military Fixture Homemade Multi-band Doublet!

POTA Field Report: Tinkering with the MPAS Lite at Lake Norman State Park

After completing a successful activation at Fort Dobbs State Historic Site on Wednesday, August 25, 2021, I decided to fit in one more activation that day. I thought about heading out to one of the game lands I hadn’t hit in a while, but frankly, I needed a park a little closer to home due to my time constraints that day, so Lake Norman State Park it was!

Lake Norman State Park (K-2740)

Lake Norman is such an effortless park to activate. Their main picnic area has numerous tables (including two large covered areas), and tall trees providing support for antennas and much needed shade from the NC summer sun!

One thing I had not decided upon was what antenna I’d use at Lake Norman. Earlier, I used my trusty speaker wire antenna at Fort Dobbs, but I like to shake things up. I checked the trunk of my car and found the Chameleon MPAS Lite. Seeing how propagation plummeted after my previous activation, I decided that I wanted a large wire antenna deployed rather than a vertical.

The MPAS Lite can be configured as a wire antenna, of course: instead of attaching the 17′ whip to the “Hybrid Micro” transformer, you attach the 60′ wire that might normally be used as a counterpoise.

Setting it up was quite easy, in fact. I used my arborist throw line to snag a tree branch about 45′ high, then attached the throw line to the floating dielectric ring on the Chameleon wire spool. I stretched the entire length of wire out, attached the end to a tree, then hoisted up the center, forming an inverted vee shape.

Wire antennas are so low-profile and simply disappear in trees.

Even thought the 50′ coax shield would act as a counterpoise, I really wanted another ground wire attached, so I pulled one of the wires off of my speaker wire antenna and attached it to the grounding post of the MPAS Lite’s stainless spike. I figured a little extra counterpoise wouldn’t hurt.

Gear:

On the air

Although I’d never used the CHA MPAS Lite quite like this, I was pretty confident my Elecraft T1 would find a match. The Chameleon transformer (the Hybrid Micro) brings most any (but not all) lengths of wire within reasonable matching range of an ATU.

I started on 40 meters and found that, without employing the ATU, I had a match that was slightly below 2:1. Not terribly surprising since I had a good 60′ of wire in the tree. Still, I hit the tune button on the T1 and easily achieved a 1:1 match.

I will add here, though, that perfect 1:1 matches are not that important–especially at QRP levels. I’m certain the TX-500 would plug along with a match of 2.5:1 or higher and still radiate perfectly fine. I’ve known hams that truly equate that 1:1 match with an antenna that’s performing efficiently, but that’s not always the case. Keep in mind a dummy load will give you a 1:1 match but is hardly efficient. The ATU’s job isn’t to make the antenna radiate better–it’s to match impedance.

The CHA MPAS Lite will get you within matching range across the HF bands and, many times, it’s close enough that an ATU isn’t really needed.

I started calling CQ POTA on 40 meters and within 28 minutes had logged the ten contacts needed for a valid park activation–all with 5 watts, of course. I was very pleased with these results because, as I had suspected, the bands were still pretty darn rough.

I then moved up to the 30 meter band where I worked a couple of stations and then, for fun, found a match on 80 meters and worked one NC station (possibly on ground wave!).

Here’s a screenshot of my logs from the POTA website:

I must say that I do love using the Discovery TX-500. It’s such a brilliant little field radio. I’m just itching to take it on another SOTA activation soon!

I’m also loving the TX-500 field kit that I built around a Red Oxx Micro Manager pack.

I used the same bag (different color) for my KX2 NPOTA field kit in 2016. It’s such a great size and can even easily hold my arborist throw line along with all of the station accessories and rig, of course. I’ve made a short video showing how I pack it and will upload that video when I have a little bandwidth!

Video

I did make a real-time, no-edit video of my entire Lake Norman activation. Feel free to check it out below or via this YouTube link. No need to worry about ads popping up–my videos have no YouTube ads!

A Brief Public Service Announcement…

If I have a little advice for you this week, it’s this: don’t wait to play radio because someone says you don’t have the right gear for the job.

I received an email this morning from a ham that’s new to field operation and just received an antenna he had ordered. He was upset because a YouTuber claimed his antenna was basically a dummy load. To add insult to injury, he also found a blogger or YouTuber was also highly critical of his recently-acquired Yaesu FT-818. [Note that the FT-817ND–the 818’s predecessor–is one of my favorite field rigs.]

Keep in mind that many of these YouTubers are trying to produce “click bait” videos that will stir up a reaction and, thus, increase their readership numbers which will have a direct and positive impact on their ad revenue.  It’s a red flag when someone doesn’t have real-world examples and comparisons proving their points and typically a sign that they’ve never even used the products in question.

I’ve been told antennas I use don’t work, yet I’ve snagged some incredible QRP DX with them. I’ve been told that some radios I use are junk, yet I’ve hundreds of successful field activations with them. And funniest of all are those who tell me that QRP is ineffective and–quoting from an actual message recently–“a complete waste of time.

My advice is to simply ignore these folks. The proof is in the pudding! Get out there and play radio!  In the words of Admiral Farragut, “Damn the torpedoes. Full speed ahead!” 🙂

Thank you!

As always, thank you for reading this field report and a special thanks to those of you who are supporting the site and channel through Patreon and the Coffee Fund. While certainly not a requirement–my content is always free–I really appreciate the support.

Cheers & 73,

Thomas (K4SWL)

Pairing the Mission RGO One with the CHA LEFS at Lake Norman State Park

As I mentioned in a previous post, I do love rotating out radios I take to the field. Shuffling radios not only helps me remember a radio’s features and menu system, but it helps me understand any advantages one radio might have over another.

One radio I use at the QTH a lot is the Mission RGO One. I reviewed this radio for The Spectrum Monitor magazine, and later posted the review on The SWLing Post. It has been a few months since I posted a field report and video using this rig yet it’s one readers ask about all the time because this is a small production run radio.

Before heading out to Lake Norman State Park on August 9, 2021, I grabbed the Mission RGO One, the Chameleon CHA LEFS sloper, and my 15Ah Bioenno LiFePo4 battery. I knew this combo would serve me well as propagation that day was in the dumps!

Lake Norman State Park (K-2740)

Lake Norman is such an effortless park to activate. They’ve a huge picnic area, large trees (for both antenna support and shade!), and are typically not incredibly busy during the week. I love Lake Norman because they also have a very nice Lake Shore Trail I enjoy hiking post-activation.

That Monday morning, as I drove to the park, it was approaching lunch time and I did worry that some of my favorite picnic spots might be taken, but when I arrived, I was happy to see I pretty much had the place to myself!

Gear

Setting up the CHA LEFS sloper antenna takes a couple minutes longer than a standard end fed antenna only because the feed point is elevated and the radiator slopes down from the feed point. Since I typically do activations on my own (with no extra hands to help), I find that a little extra antenna prep equates to a quicker overall deployment.

My procedure for deploying the CHA LEFS

The CHA LEFS sloper

First thing I do is identify a good tree limb at least 45′ or so high and also identify an unobstructed path for the sloping radiator to travel.

Prior to hoisting the antenna, I stretch out the radiator and attach it to a tree or support (using the supplied paracord) in the direction I want the slope to follow.

I then use my arborist throw line to snag the desired tree limb and I connect the end of the throw line directly to the CHA LEFS’ feed point. Chameleon provides Paracord for hoisting the antenna, but the great thing about the arborist throw line is that it’s more than strong enough to handle this job. It saves the extra step of pulling paracord through the tree.

Next, I attach a 50′ length of coax (PL-259s on both ends) and stretch the coax out in the opposite direction of the CHA LEFS radiator. Doing this keeps the antenna from spinning and tangling the radiator and coax as it’s hoisted into the tree.

Finally, I simply pull the throw line and raise the antenna feedpoint to the desired height. Again, I like a height of at least 40-45′, but lower will still work. As I raise the antenna, I do put a little tension on the coax feedline just to keep it from swinging around the throw line or radiator.

Of course, if you have two people, one person can simply stretch the coax as you’re raising the antenna feedpoint which will also keep it from tangling.

That’s all!

In truth, the amount of extra time to deploy the CHA LEFS as opposed to, say, an end-fed half wave is maybe three minutes.

I picked the CHA LEFS for this particular activation because it’s resonant on my favorite bands, it’s efficient, and it was so effective the last time I performed an activation during poor/unstable propagation.

I picked the Mission RGO One because it has an amazingly quiet receiver and handles QRN like a champ. Plus, being a tabletop radio, it also sports a proper speaker, large controls, and up to 50 watts of output power if needed.

Although I’m a QRPer, on days with horrible propagation, I have been known to increase the power beyond 5 watts if operating SSB especially. This year, I set out to validate all of my park and summit activations with 5 watts or less, so at least my first ten contacts at a park will be QRP.

Before starting this particular activation, I took a few moments to record a video and answer a reader question.

On the Air

I thought I’d start by calling CQ on the 40 meter band in CW. Within 15 minutes, I snagged the ten contacts needed for a valid POTA activation. I was very pleased with this.

Since I had mobile phone service, I checked the POTA spots and worked AA3K (Park To Park) then moved to the phone portion of the 40 meter band.

During the exchange with AA3K, I did pump the power up to a cloud-scorching 20 watts! A proper rarity for me.

I then worked an additional five contacts in about 8 minutes in SSB. Very satisfying!

QSO Map

Here’s my QSO map of the entire activation. The red polylines represent SSB contact, the green are CW:

I was very pleased with the results especially after reading reports from other activators that same day who really struggled to get their ten.

Video

Of course, I made one of my real-time, real-life, no-edit videos of the entire activation. If you’ve never seen one of my videos before and have a strong dislike of professional, well-polished YouTube channels, you’re in for a treat! 🙂

Click here to view on YouTube.

Lake Shore Trail

Post-activation–and despite the heat and humidity–I hiked the length of the Lake Shore Trail; roughly six miles. I highly recommend this trail if you can fit it into your schedule.

Thank you!

As always, thank you for reading this report and thank you to those who are supporting the site and channel through Patreon and the Coffee Fund. While certainly not a requirement–my content is always free–I really appreciate the support.

Here’s wishing everyone a little radio fun this week!

Cheers & 73,

Thomas (K4SWL)