As I mentioned in a previous post, I do love rotating out radios I take to the field. Shuffling radios not only helps me remember a radio’s features and menu system, but it helps me understand any advantages one radio might have over another.
One radio I use at the QTH a lot is the Mission RGO One. I reviewed this radio for The Spectrum Monitor magazine, and later posted the review on The SWLing Post. It has been a few months since I posted a field report and video using this rig yet it’s one readers ask about all the time because this is a small production run radio.
Before heading out to Lake Norman State Park on August 9, 2021, I grabbed the Mission RGO One, the Chameleon CHA LEFS sloper, and my 15Ah Bioenno LiFePo4 battery. I knew this combo would serve me well as propagation that day was in the dumps!
Lake Norman State Park (K-2740)
Lake Norman is such an effortless park to activate. They’ve a huge picnic area, large trees (for both antenna support and shade!), and are typically not incredibly busy during the week. I love Lake Norman because they also have a very nice Lake Shore Trail I enjoy hiking post-activation.
That Monday morning, as I drove to the park, it was approaching lunch time and I did worry that some of my favorite picnic spots might be taken, but when I arrived, I was happy to see I pretty much had the place to myself!
Setting up the CHA LEFS sloper antenna takes a couple minutes longer than a standard end fed antenna only because the feed point is elevated and the radiator slopes down from the feed point. Since I typically do activations on my own (with no extra hands to help), I find that a little extra antenna prep equates to a quicker overall deployment.
My procedure for deploying the CHA LEFS
The CHA LEFS sloper
First thing I do is identify a good tree limb at least 45′ or so high and also identify an unobstructed path for the sloping radiator to travel.
Prior to hoisting the antenna, I stretch out the radiator and attach it to a tree or support (using the supplied paracord) in the direction I want the slope to follow.
I then use my arborist throw line to snag the desired tree limb and I connect the end of the throw line directly to the CHA LEFS’ feed point. Chameleon provides Paracord for hoisting the antenna, but the great thing about the arborist throw line is that it’s more than strong enough to handle this job. It saves the extra step of pulling paracord through the tree.
Next, I attach a 50′ length of coax (PL-259s on both ends) and stretch the coax out in the opposite direction of the CHA LEFS radiator. Doing this keeps the antenna from spinning and tangling the radiator and coax as it’s hoisted into the tree.
Finally, I simply pull the throw line and raise the antenna feedpoint to the desired height. Again, I like a height of at least 40-45′, but lower will still work. As I raise the antenna, I do put a little tension on the coax feedline just to keep it from swinging around the throw line or radiator.
Of course, if you have two people, one person can simply stretch the coax as you’re raising the antenna feedpoint which will also keep it from tangling.
That’s all!
In truth, the amount of extra time to deploy the CHA LEFS as opposed to, say, an end-fed half wave is maybe three minutes.
I picked the Mission RGO One because it has an amazingly quiet receiver and handles QRN like a champ. Plus, being a tabletop radio, it also sports a proper speaker, large controls, and up to 50 watts of output power if needed.
Although I’m a QRPer, on days with horrible propagation, I have been known to increase the power beyond 5 watts if operating SSB especially. This year, I set out to validate all of my park and summit activations with 5 watts or less, so at least my first ten contacts at a park will be QRP.
I thought I’d start by calling CQ on the 40 meter band in CW. Within 15 minutes, I snagged the ten contacts needed for a valid POTA activation. I was very pleased with this.
Since I had mobile phone service, I checked the POTA spots and worked AA3K (Park To Park) then moved to the phone portion of the 40 meter band.
During the exchange with AA3K, I did pump the power up to a cloud-scorching 20 watts! A proper rarity for me.
I then worked an additional five contacts in about 8 minutes in SSB. Very satisfying!
QSO Map
Here’s my QSO map of the entire activation. The red polylines represent SSB contact, the green are CW:
I was very pleased with the results especially after reading reports from other activators that same day who really struggled to get their ten.
Video
Of course, I made one of my real-time, real-life, no-edit videos of the entire activation. If you’ve never seen one of my videos before and have a strong dislike of professional, well-polished YouTube channels, you’re in for a treat!
Post-activation–and despite the heat and humidity–I hiked the length of the Lake Shore Trail; roughly six miles. I highly recommend this trail if you can fit it into your schedule.
Thank you!
As always, thank you for reading this report and thank you to those who are supporting the site and channel through Patreon and the Coffee Fund. While certainly not a requirement–my content is always free–I really appreciate the support.
Here’s wishing everyone a little radio fun this week!
With so many great radios in your livery, how do you decide which one to take with you on an activation? I mean, outings other than when you are reviewing a particular radio.
Do you just grab them in a rotation to keep operating features fresh in your mind? Or do the radios have “personalities” that you match to the type of trip you are taking them on?
Thank you for your question, Greg, because I’ll admit, this is a decision I make each and every time I go on an activation run. I’m absolutely spoiled by having access to some of (what I consider) to be the best portable transceivers out there. I’ve acquired the bulk of these in the past four years.
You essentially answered your question for me.
Rotation
The Mission RGO One pairs nicely with a Nacho Salad
I enjoy rotating through my transceivers, ATUs, and antennas because I love trying different pairings. Sometimes, I decide what radio to take on an activation by looking at previous field reports and then pick one I haven’t used recently.
This post reminds me that I need to take the IC-703 Plus out soon.
I love using gear in rotation because, as you suggest, it keeps their operating features fresh in my mind. It’s nice to be actively working stations in the field and not struggle with the rig to find filter adjustments, memory keying, keying speed, mic gain, RF gain, etc. With so many small radios having nested menus, using radios in rotation helps my rig feature “muscle memory.”
Site pairing
With that said, I will ignore rotation if I’m going to a site and know that one model of radio might give me an advantage over another.
If I’m going to a park and plan to do a picnic table activation, for example, any of my radios will work. These tend to be the times I try new antennas and new accessories because I can bring spare gear if something doesn’t work properly.
My KX2 often gets picked when I know I might be sitting on the ground for an activation. It allows me to have an entire radio shack on the end of my clipboard.
But, if I’m taking a long hike to my activations site–say for SOTA–I will grab a rig that’s more portable, with more built-in features, and pair it with antennas I know I can deploy on the summit.
Personalities
You’re right, I do believe each radio has a personality and this will sometimes influence my choice. I’ve been known to anthropomorphize my radios and, yes, even name them. Don’t judge me!
Here’s how I would describe the personalities of some of my favorites:
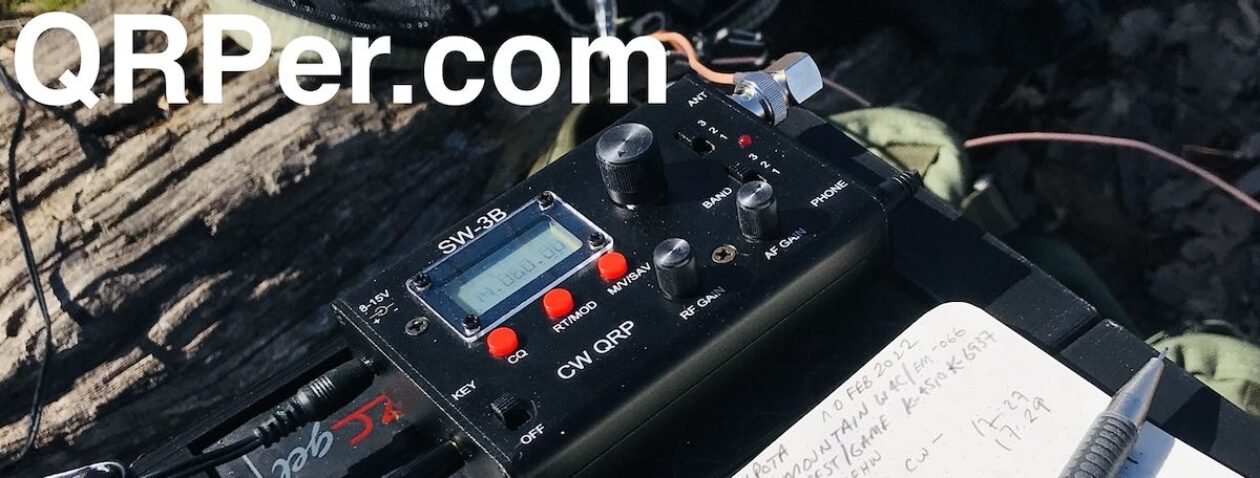
Mountain Topper MTR-3B: Wee, fun, effective, and bare-bones yet nearly custom for CW field activations.
Elecraft KX1: An effective, impressively portable, and reliable CW companion.
Elecraft KX2: The bees knees for a portable HF operator. Always ready-to-go, never intimidated by site conditions, a proper super compact HF Swiss Army Knife.
Discovery TX-500: If Jeep or Land Rover made an HF rig, it would be the TX-500. It’s ready for any weather, packs great performance, and is incredibly fun to operate.
Icom IC-705: All the comforts of a shack-grade, wide range, multi-mode transceiver, packed into a QRP brick.
Yaesu FT-817ND: The Toyota sedan of portable transceivers. Super reliable, rugged, and capable.
Xiegu X5105: An unrefined, competent, and rugged field performer. It’s a lot like one of those dogs that’s so ugly, it’s kind of cute.
Mission RGO One: A low-noise champion that has contest-grade receiver characteristics. I love this performer’s unassuming, simple design.
Elecraft KX3: An HF portable champion. The KX3 will handle the roughest, densest RF environment you can encounter with the optional roofing filter. Possibly the best performing CW rig I own.
So there you go.
I do go through a bit of a selection process prior to each outing and, honestly, it has become part of the fun for me.
Less is more, too
“I might not be a ‘pretty’ radio, Thomas, but I’ve been snagging parks and summits as well as the others!”
With that said, I could easily get away with only owning one or two of the radios listed above. Indeed, for most of my ham radio life, I’ve only owned one or two HF radios.
I actually enjoy being “stuck” with one radio, in fact.
During a normal year, my family will often travel to Canada for the better part of two months. Before leaving, I try to choose only one radio to go with me and it must double as a ham radio transceiver and shortwave listening receiver. It’s fun spending so much time with only one radio and getting to know its features, nuances, and personality.
How about you?
How do you choose radios? Do you feel like your radios have personalities? Do you name your radios? Inquiring minds want to know–please comment!
Most of my on-air time is in the field. While I enjoy operating from the shack, I’ve discovered I especially enjoy operating in the great outdoors.
Besides being a fan of hiking, camping, and the great outdoors generally, I also am particularly fond of radio field gear. I like portable transceivers, portable antennas, battery packs, and all of the accessories that make field operation efficient and enjoyable.
I appreciate the emergency communications skills I’ve developed in the field, too. Should the need (or opportunity) arise, I now keep a complete field kit packed and ready to go at all times, and can even deploy all of it within just ten minutes. In my early days of ham radio operation, I might have easily spent thirty minutes setting the antenna, alone…especially on Field Day, with folks watching me struggle to untangle wires and cables, followed by the undoubtedly entertaining attempts I made to put a line into a tree to deploy the antenna. But after deploying a variety of antennas hundreds of times now, I find that––while I’m still not perfect––I finally have a bit of skill and the process of tossing up a line is becoming much swifter and smoother.
Confessions of a pack geek
The Red Oxx C-Ruck loaded and ready for the field!
If I’m being honest with myself, I admit: I also simply get a thrill out of kitting out my field packs, as well as organizing and tweaking them over time. Yes, (don’t judge me!) I actually like packing up my field gear.
I think my passion for organizing and packing gear goes back to a former career when I lived in the UK, Germany, and France, and was required to travel throughout Europe frequently. Originally inspired by travel guru Rick Steves, I’ve always appreciated the footloose feeling of having all of my travel gear in one lightweight pack. I don’t like checking in luggage, but love the freedom of grabbing my backpack and skipping the baggage claim carousels. And I also like knowing that, even though my gear is compact, it contains everything I need.
I’ve become something of a “less-is-more” traveller. Two years ago, for example, I traveled for one week using what Frontier Airlines classifies as a “personal carry-on.” My Tom Bihn Stowaway pack, which only measures 14.0″ (w) x 9.4″ (h) x 8.1″ (d), carried everything I needed for a conference, including my own presentation gear.
My Tom Bihn Stowaway personal carry on convertible pack with everything I needed for a one week trip including a conference.
Packing for that trip was great fun as it really challenged me to decide what was essential and what was not. My iPad doubled a computing and presentation device, for example, but I also packed a small flashlight and a mini first aid kit, which I felt were important. Of course, I also carried a small portable Shortwave/AM/FM radio and my Yaesu VX-3R handheld…also vital, as I can’t leave home without radios!
Getting started with a field kit
Putting together a field radio kit is so similar to packing for travel: you must first do an assessment of what you need, starting with the basics––then organize it, pack it, and test it.
In my world, this is a very deep topic. We’re going to break down this topic into two parts.
This article, Part 1, we’ll dive in:
first, going over the obvious components of a basic field radio kit;
second, discussing the benefits of going low-power (QRP) if that appeals
In Part 2, we will:
look at variations of kits based on activity, and finally
review what I consider the “golden rules” of a good field radio kit
The basics of a field radio kit
First, let’s go over the basics of your field kit, considering that that these primary components will dictate your bag, pack, or case size.
A transceiver
The lab599 Discovery TX-500
Since I’m a bit radio obsessed, I have a number of QRP transceivers I like to take to the field. But if you have selected one transceiver you plan to dedicate to field work, or simply have only one transceiver, period, you can build a kit around it (and see my note below about “modular” kits). If budget allows, you might consider buying a radio specifically for field use, so it can always be packed and ready to go.
There are a number of transceivers on the market that are designed with field use in mind. Some are compact, power-stingy CW-only QRP transceivers that might only operate on three ham radio bands, while others are 100-watt general coverage transceivers that even have built-in antenna tuners––there’s a wide range of options.
Look for field-friendly, built-in options like:
CW and voice-memory keying;
SWR and power meter readings;
a battery voltage indicator;
low current consumption;
the ability to lower power to at least one watt;
an internal battery option; and
an internal antenna tuner option
And the more such options are already built into your field rig, obviously, the less separate accessories you’ll need to pack and keep track of in the field, which is a good thing.
The Elecraft KX2 has a built-in ATU, battery pack, and even attachable CW paddles!
Some of my favorite field-ready general-coverage transceivers currently in production are:
The Elecraft KX2 A full-featured, inclusive, and compact 80-10 meter transceiver that’s truly a “Swiss-army knife” of field operation (see November 2016 TSM review)
The Elecraft KX3 Benchmark performance, wide array of features, and compact design
The lab599 Discovery TX-500 Military-grade engineering, weatherproof, spectrum display, and benchmark current consumption for a general-coverage radio (see October 2020 TSM review)
Mission RGO One Top-notch performance, 50-watts out, and excellent audio (see November 2020 TSM review)
The Yaesu FT-817/818 Rugged chassis, 160-6 meters, VHF and UHF multi-mode, both BNC and PL-259 antenna inputs
The Xiegu X5105 Affordable, 160-6 meters, 5 watts output, built-in ATU, and built in rechargeable batttey
The Xiegu G90 Affordable, relatively compact rig with built-in ATU, color screen with spectrum/watefall, good audio, and 20 watts of output power (see August 2020 TSM review)
The Icom IC-705 Benchmark performance, a multitude of features, exchangeable battery packs, 160-6 meters, VHF and UHF multi-mode, D-Star, GPS, WiFi, Bluetooth (see February 2021 TSM review)
The Yaesu FT-891: Affordable relatively compact radio with detachable faceplate, 100 watts output, and excellent audio (see November 2017 TSM review)
An important side note for field contests: if you plan to use a field transceiver in an event like the ARRL Field Day and/or another popular radio contest, make sure you choose a transceiver that can handle tightly spaced signals in an RF-dense environment. This is not the time to pull out a lower-end radio with poor receiver specifications. Use Rob Sherwood’s receiver test data table as a guide.
An antenna––and a means to deploy/support it
The CHA LEFS sloper
This particular topic, alone, might warrant a three-part series of articles. So, to keep the scope of this article realistic, let’s just say that you should build or buy an antenna that can comfortably handle the wattage you’re pushing into itin all the modes that you operate, considering that some 100-watt SSB-rated antennas might melt or arc if you run 100 watts CW or FT8.
I would suggest you consider having at least one resonant antenna, like an end-fed half-wave (EFHW) that might cover 40 and 20 meters without the need of an antenna tuner to match the antenna impedance to your rig.
Some of my favorite portable antenna systems?
I’m a big fan of Chameleon Antennafor their ease of deployment and benchmark build quality. Their prices range from $145 for the Emcomm III random wire, to $550 for their MPAS 2.0 vertical antenna system. These prices are near the top of the market, but Chameleon antennas are all machined and produced in the US and the quality is second to none. These are antennas you might well pass along to the next generation, meaning, really heirloom-worthy kit!
The PackTenna 9:1 UNUN
PackTennas, likewise, are pricey for such a compact product, but they are also beautifully engineered, lightweight, and designed for heavy field use. PackTenna produces an EFHW, 9:1 UNUN random wire, and linked dipole models. They’re some of the most compact field antennas on the market that can still handle as much as 100 watts of power output.
My Wolf River Coils “TIA” vertical antenna
Wolf River Coils verticals are affordable, compact, and resonant––thus an ATU isn’t needed. It will take some time to learn how to adjust the coil during frequency changes, but they work amazingly well. I have the WRC Take It Along (TIA). Their antennas are designed to handle 100 watts SSB, 50 watts CW, or 20 watts digital.
The EFT Trail-Friendly
Vibroplexsells a number of compact field portable antennas and is the manufacturer of Par End Fedz offerings. I’m very fond of the EFT Trail-Friendly and the EFT-MTR.
The MFJ-1984LP EFHW packs a lot of performance for the price
MFJ Enterprisesalso has a few portable antennas in their catalog, and it’s very difficult to beat the price and performance of their antenna gear. I have their $50 EFHW antenna (the MFJ-1982LP) and love it.
The Elecraft AX1 attaches directly to the BNC port on the KX3 and KX2.
I’ve also had tremendous fun with the uber-compact Elecraft AX1 antenna. Unquestionably, it’s the most compact and quickest-to-deploy antenna I own. It’s designed to pair with the Elecraft KX2 and KX3 using the optional internal antenna tuner.
There are a number of other antenna manufacturers who cater to portable operators. For example––although I’ve not yet had the opportunity of testing their antennas––SOTAbeams is highly regarded among SOTA enthusiasts.
Short on cash? No worries; you can build your own! In fact, until 2016, I had never purchased a field antenna; I built all my own. EFHW antennas and random-wire antennas are no more than a carefully-wound coil, a female antenna connector, an enclosure or mounting plate, and some wire. Some of the most active field operators I know homebrew all of their antennas. It’s easy, affordable, and fun!
Make sure you choose a battery that is sized appropriately for your transceiver power output. I will say that I’m a huge fan of LiFePo4 rechargeable batteries for their voltage range, lightweight design, and longevity. Being primarily a QRPer, I typically use 3 to 4.5 amp hour batteries as they’ll carry me through as many as three or four activations without needing to be recharged. For longer field deployments, or when I’m powering my 100W KXPA100 amplifier, I’ll use my 15 aH Bioenno LiFePo4 pack.
I use my 15Ah Bioenno LiFePo4 pack for QRO transceivers
It should go without saying that you need to pack these, but I have gone to the field with operators who forgot their key or mic and asked if I had a spare.
Keys are fairly universal, but keep in mind legacy transceivers often want a ¼” plug while newer rigs typically accept an ⅛” plug. Microphones, however, vary in port type and pin configuration based on the manufacturer and model. You could damage your mic or rig if you plug in a multi-pin mic that was designed for a different transceiver. Most mics that use a ⅛” plug are universal. Still, check before you plug it in if using an after-market or non-OEM mic.
Of course, choose a key, microphone, or boom headset that’s compact and rugged so that’ll be easy to pack and will stand the test of time.
I also always pack a set of inexpensive in-ear earphones. These can dramatically help with weak-signal interpretation.
Also, if you plan to operate a digital mode, you’ll likely need some sort of computing device. Even though I rarely operate digital modes in the field, I often pack my Microsoft Surface Go tablet in case I change my mind.
My Microsoft Surface Go tablet
In addition, I like logging directly to N3FJP’s Amateur Contact Log application directly in the field to save time submitting my logs later. Soon, I’ll be using the new HAMRS field log on my iPhone.
Speaking of logging…
A means of logging
I like compact notepads like Muji and Rite In The Rain for field use.
As simple as it is, it’s very important to take at least some paper and a pencil for logging your contacts. I like using small, pocket-sized Muji notebooks (affiliate link) for logging, and if the weather is even a little questionable, I’m a huge fan of getting my contacts down in Rite In The Rain mini notebooks (affiliate link) or notepads using a good old-fashioned pencil.
I like logging to paper and sometimes simultaneously logging to my Microsoft Surface Go. I have completed phone-only field activations where I only logged to my Surface Go tablet: in those cases, I snap a photo of my N3FJP call log, just in case something happens to my tablet between the field and the shack! Having endured enough technology failures, it gives me peace of mind to have at least one other backup.
Keep in mind that when you’re activating a park or summit, the folks calling you are relying on you to submit your logs to the appropriate programs so that they can get credit for working you. Many times, this might also help their awards for a state, county, or grid square. Always submit your logs after an activation even if you didn’t make enough contacts to validate the activation (POTA requires 10 contacts, SOTA requires 4 logged). It helps other folks out.
A pack or case
If you have a field radio kit, you’re going to need a means to organize and contain it for transport. There are at least three types of systems used for field kits.
A backpack or soft-sided case
My GoRuck BulletRuck is a brilliant SOTA pack
Since I enjoy the option of hiking with my radio gear, I love using backpacks. Although I’ll speak to this more next month in “Part 2,”, I choose quality packs that have at least one waterproof compartment and are comfortable to carry on long hikes. I also try to look for packs with Molle or some sort of external strapping so that I can attach portable antenna masts or even my hiking poles to the exterior of the pack.
A waterproof case or flight case
Ruggedized, weatherproof cases come in all sizes. This Pelican 1060 can house my entire KX1 radio kit.
Many field operators who want extra protection for their gear––especially when they don’t plan to hike or carry their gear long distances to the operating site––like hard-sided cases. I have built field radio kits in waterproof Pelican cases and appreciate knowing that I could drop my kit in a whitewater river, and it would likely survive the adventure unscathed. If you are one of these operators, look for quality watertight cases from brands like Pelican and Nanuk with interiors lined in pick foam padding that allows you to perfectly accommodate and safely protect your radio and accessories.
Portable ready-to-deploy cases
Although this option is almost outside the scope of this article, many emergency communications enthusiasts love having their gear loaded in rugged, portable––often rack-mounted and hard-sided––cases that they can simply open, hook to an antenna, and get right on the air. These systems are often the heaviest, least “portable,” and less suited for long distance hikes, but they’re often completely self-contained, with all of the components, including the power, hooked up and ready to go on a moment’s notice. While a system like this would be impractical for many Summits On The Air sites, it could be ideal for a park or island activation where you’re never that far from your vehicle.
Optional: Antenna cable
An ABR Industries RG-316 cable assembly
This doesn’t sound like an option, but it’s true. I’ve often operated my Elecraft KX3, KX2, and KX1 without a feedline at all: I simply attached two wires to a BNC binding post, and connected that to the radio. It makes for a super-compact setup.
Even an 8-12 foot feedline can make it easier to configure your operating position in the field. If you want to keep the feedline as low-profile as possible, especially if you’re operating QRP, consider investing in a quality RG-316 feedline terminated with the connector that fits your radio and antenna.
Optional: Antenna Tuner/Transmatch
A portable ATU with RF-sensing like the Elecraft T1 will give you an amazing amount of frequency agility. I’ve been known to use the T1 to tune my CHA Emcomm III random wire antenna on 160 meters..
Again, this topic could easily warrant a multi-part series of articles, but I’ll sum this one up in a nutshell: while I love (and even prefer) using resonant antennas that require no antenna tuner, I almost always carry a radio with a built-in ATU or an external portable ATU like the Elecraft T1 or ZM-2.
Why? Because an ATU will give you a certain amount of frequency agility or freedom. If I’m using an antenna that’s resonant on 40, 20, and 10 meters, but there’s a contest that day and the bands are incredibly crowded, I might use the ATU to find a match on 30 meters or 17 meters, thus finding a little refuge and space to operate. Also, sometimes antenna deployments aren’t ideal––due, for example, to site limitations such as dense vegetation that may alter the antenna deployment and thus its resonance. An ATU can at least keep your transceiver happy with the SWR when your resonant antenna might not be perfectly resonant.
But the main reason I carry it? A portable ATU gives you operational flexibility.
QRP or QRO?
I have operated QRO in the field with my KXPA100 amplifier on Field Day.
Its good to keep in mind that many of the station accessories listed above need to be matched to the output power of your transceiver and modes you use.
Many ham radio friendships have been placed in jeopardy over the question of either using QRP (low power) or QRO (high power) for field operations. This is a shame. Some operators have very strong opinions, but the truth is, there is no right or wrong answer.
In the spirit of full disclosure, I operate 97% of the time at QRP power levels––in my world, this means five watts or less. Personally, I enjoy the challenge of low-power operating. But I also appreciate the portability QRP gear offers.
The wee Mountain Topper MTR-3B
Speaking pragmatically––and this fact really isn’t open to debate––QRP and lower-power transceivers and accessories tend to be more efficient, more compact, and lighter than their higher-power siblings.
Most of my QRP transceivers weigh anywhere from two to five times less than their 100-watt equivalents. If you’re operating mobile (from a vehicle or camper/caravan, for example), an eight to twelve pound difference might not be a big deal. But the moment you’re hiking several miles to a mountain summit, weight becomes an important factor.
QRP transceivers have modest power requirements: everything from battery, to antenna, and even to tuners, are smaller, lighter, and more compact.
When operating QRP, you don’t have to worry as much about RF coming back to the radio from, say, an end-fed antenna. If I’m pushing over 20 watts into an end-fed half wave or end-fed random wire, I’ll likely want an in-line RF choke to keep some of that energy from affecting my transceiver or giving me an RF “tingle” when I touch the radio chassis or my key. Too much RF coming back to the transceiver can also affect things like electronic CW keying. But at five watts? I don’t worry. This is almost a non-issue, unless your transceiver happens to be very RF-sensitive indeed.
And even though I’m predominantly a QRPer, I definitely do pack radios like the 50-watt Mission RGO One and occasionally my Elecraft KX3 and KXPA100 100-watt amplifier, especially for an event like Field Day where my club is operating at higher power. I simply size up my gear appropriately. Again, this is especially important with your antenna, feed line, ATU, and battery selections.
If you primarily activate parks and are never far from your vehicle, it’s quite easy to accommodate a 100 watt transceiver like an FT-891, for example. Of course, if you wish to operate low-power and save your battery, simply turn down the output power. If you plan to hike a lot with your gear, then get your mind around QRP!
Stay tuned for Part 2!
In Part 2 we’ll dig into some of the details, looking at different approaches to field radio kits and some guidance and suggestions based on my real-life experience (read: operating mistakes).
A few weeks ago–on July 12, 2021–I popped by Lake James State Park to do a quick activation with the Icom IC-705. It had been a while since I’d used the ‘705 in the field and the little rig was begging to go outdoors.
Here’s the funny part: I completely forgot about that activation! Two days ago, while browsing my photo archive, I noticed the video I made of the activation and, of course, the memory came flooding back.
In my defense, it has been a crazy summer and the weeks/days seem to all blend together in my head.
Thing is, this activation was memorable for a bad reason: QRM (human-made radio noise). It was also memorable for some of the folks I worked on the air.
Lake James State Park (K-2739)
I arrived at Lake James and was a bit surprised to practically have the place to myself.
I found a picnic table with a view of the water, deployed my speaker wire antenna, and set up the IC-705. As with all of my activations, I was only running 5 watts.
I attached the speaker wire antenna’s BNC binding post adapter directly to the mAT-705 Plus ATU.
Propagation was–you guessed it–forecast as very poor.
It felt that way when I hopped on 40 meters at first as the band was pretty quiet..
Still, I managed to log 5 contacts on 40 meters (two in SSB, three in CW) before moving up to 20 meters which served me well.
I worked a total of eight stations in nine minutes on 20 meters.
QRM
Check out the noise level on the waterfall display!
If you watch the video, you’ll hear how nasty the QRM was at times.
I keep forgetting that there’s a source of intermittent radio interference at the Lake James visitors center. The spot where I set up the station was only 25 meters or so from that building. I believe the center was responsible for the QRM I first experienced during the activation. Whatever the device is generating the QRM, it doesn’t last for long periods of time–it cycles.
The second batch of QRM was emanating from a small boat that pulled up to the dock in front of my site. It was nasty and completely wiped out the 20 meter band. When the owners turned off the boat and stepped onto the dock, the noise stopped completely. Later, when they got back into the boat, the noise started again. I have to assume it was something in their motor causing the QRM. I suspect they may have been using a DC trolling motor.
Memorable contacts
POTA activations often feel like a gathering of friends. I often see many of the same callsigns in my logs and it’s a lot of fun working them each time.
Also, it’s a lot of fun to work stations further afield. At Lake James, I was very pleased to work NK7L in Washington State, IK4IDF in Italy, and HA9RE in Hungary. My back of the envelope calculations tell me that I was pushing 1,000 miles per watt when I worked Elemer (HA9RE). To be clear, all of the work was done on his end as he has some world-class ears; just check out his QRZ page!
For some reason when I logged HA9RE, I copied VA4RE. I’m not sure why, but after packing up it hit me that I had logged him incorrectly (funny how brains work!). I reviewed the video on-site and confirmed it was indeed HA9RE.
Here’s my QSO Map:
I was also very pleased to finally work Dave Benson (K1SWL). He’s very well-known in QRP circles for his amazing Small Wonder Labs kits. Dave’s a great guy and, of course, loves playing radio in the field.
Video
Here’s my real-time, real-life, unedited video of the entire activation. Apologies in advance as I really needed a wind screen over my microphone that day–I had the mic and camera a little too close.
Loop next time!
The next time I hit Lake James, I plan to deploy a Chameleon loop antenna. I think it will have a significant impact on the QRM levels at that particular part of the park. Of course, I could easily move further away from the noise source (that’s the easiest solution) but I’d like to see how effectively a loop might mitigate the QRM. That and it’s been years since I last used a compact mag loop antenna in the field.
Thank you
Again, thank you for reading this report and thank you to those who are supporting the site and channel through Patreon and the Coffee Fund. While certainly not a requirement–never feel an obligation to do so (especially if you’re investing in your first station, for example)–I really appreciate the support.
Here’s wishing you some outdoor radio fun in the near future!
An easily accessible, multi-function button on the IC-705’s “back rim” gives a great improvement over the stock noise reduction. (ICOM, with all your resources, why can’t you design a DSP NR circuit that works as well as BHI’s? )
I admit it! I’m in love with BHI Ltd.’s DSP noise reduction accessories. I’ve owned most of their popular models like the DSP Desktop Speaker, and have installed BHI low-level audio modules in six different receivers and transceivers.
How is it that an audio-based DSP noise reduction accessory can be so effective? Only BHI knows, but they clearly have top-notch algorithms that rival the best of noise reduction circuits in contemporary Yaesu transceivers. (Personal bias alert: I find Yaesu’s approach to noise reduction (“DNR” in Yaesu-speak) to be quite superior to ICOM’s, and this is what got me thinking about improving the transceiver with an internal BHI NEDSP1901-KBD module in the first place.)
The noise reduction feature in the IC-705 and its IC-7300 base station counterpart is merely “OK” in my opinion, but the addition of BHI’s NR makes a significant difference in S/N and intelligibility of signals. It’s simple enough to use an external BHI product and connect it to your rig’s speaker or headphone’s audio path, but it adds wiring and complexity. The ICOM IC-705 modification described in this article is a neat, clean, internal solution needing no external wiring or power supply.
I’m not a summer-heat-loving guy. Quite the opposite, in fact. Give me cold weather and I can hike and camp forever.
On Tuesday, July 13, 2021, it wasn’t cold outside, of course, but I still wanted to fit in a park activation and hike. Despite the forecast highs of 90F/32C. I had almost the entire day to play radio, too–a rarity.
When I have an entire day to devote to radio, I can either hit the road and try to hit multiple parks–perhaps as many as 5 or 6–or I can choose to venture further afield and hit a new-to-me park.
I tend to choose the latter and that Tuesday was no exception.
North and north by NW of Winston Salem, NC, are two parks I’ve always wanted to visit: Hanging Rock State Park and Pilot Mountain State Park.
I devised a plan to first visit Hanging Rock, then Pilot Mountain. Both parks are close together geographically, but a good 30 minutes drive apart.
A quick check of the SOTA database and I discovered that there are actually two summits on Hanging Rock State Park’s grounds. One is off the beaten path a bit and would require some light map work, and the other–Moore’s Knob–is on one of the park’s main trails. Since I was putting this whole plan together morning of, I opted for the “easy” summit as I didn’t have time to double-check topo maps, parking areas, etc.
Hanging Rock State Park (K-2735)
Travel time to Hanging Rock was about 1 hour 45 minutes. Once I arrived on site, I discovered that, like many state parks, the main visitor’s center is being renovated.
I easily found the parking area for the Moore’s Knob loop. It being a Tuesday, the parking lot only had a few cars.
Pro tip: with the visitor’s center out of commission, stop by the swimming area pavilion for some proper restrooms/washrooms!
I planned to take the full trail loop in a counter-clockwise direction.
I’m glad I did, too, as the bulk of the ascent was a long series of steps. I’m not a fan of steps, but I much prefer using them heading up a mountain rather than down.
Near the summit, there’s a very short spur trail to Balanced Rock which is worth a visit not only for the rock, but also the views.
It being a North Carolina state park, there are some obligatory warning signs about how falling off of cliffs can lead to injury or death. These warning signs aren’t as prominent as those at Crowders Mountain State Park, though!
Moores Knob (W4C/EP-001)
You can see my MPAS Lite vertical poking out of my pack. I brought it along in case I had no good tree options. In this case, I didn’t use it.
There’s no mistaking the summit as there’s a large observation tower on top that affords some spectacular views of the Blue Ridge Escarpment, the foothills, and Pilot Mountain (my next stop). There were a number of hikers on the summit of Moore’s Knob and it was actually pretty gusty up there, too. I searched and found a nice little spot to set up that was sheltered from the wind, shaded, and even had trees tall enough to hang my Packtenna 9:1 UNUN random wire antenna!
Note: I brought the CHA MPAS Lite in case there were no good tree options on the summit.
Set up was quick and easy on the radio side of things, but as with most SOTA activations, positioning my tripod to make a video was the tricky part. Since I’m sitting on the ground, it can be difficult to find the right angle so that the radio, key, and notepad are all in the frame. (See my video below).
I started calling CQ at 16:00 UTC on 20 meters. I had a reasonable cell phone signal on the summit, so I was able to spot myself. Problem was, though, my hiking app seemed to be draining my iPhone’s battery very rapidly (that and my aging iPhone 7 probably needs a new battery at this point). After spotting myself, I shut down the phone to save power. I forgot to contact my buddy Mike (K8RAT) with a frequency, but he eventually saw me on the SOTA spots.
In a period of 29 minutes, I worked 20 stations on 20 meters.
Next, I moved up to 17 meters where I worked eight more stations in seven minutes.
I love effortless activations like this and part of me wanted to continue operating–even switching to SSB–but looking at the time, I knew I needed to hit the trail, make my way back to the car, and drive to Pilot Mountain.
I called QRT around 16:42 UTC and packed up my gear.
QSO Map
Not bad for 5 watts and a 31′ wire!
One highlight of this activation was meeting Jim (NA4J) who heard my CW from the summit and popped by to introduce himself. Although I trimmed out our conversation in the video (I’m not entirely sure he knew I was recording the activation), you’ll hear him in the first half of the activation.
Video
Here’s my real-time, real-life video of the entire activation:
The hike back to the car was very pleasant. It was a bit longer than the path I took to the summit, but the descent had no steps which made it a breeze.
I had a radio topic on my mind during that hike and actually pulled out the OSMO Action camera and made a bit of a “hike and talk” video. It’s on the topic of ATUs and resonant vs non-resonant antennas. I haven’t yet decided if I’ll post it–the shaky camera might make some viewers sea sick! We’ll see–maybe I’ll brave up and post it anyway…
Next, I drove to Pilot Mountain State Park for a quick afternoon activation. Although Pilot Mountain is a SOTA summit, too, it’s yet to be activated because the actual summit would require proper rock climbing, I believe.
Thank you
As always, thank you for reading this field report! And thank you to everyone who has supported me through Patreon and the Coffee Fund. I truly appreciate it.
I hope you find time this week to take your radios outdoors to play, or to hunt some parks and summits from your shack, backyard or vacation spot!
And for those of you working on your CW skills, don’t give up and don’t stress about it. Take your time and allow your brain to absorb code by simply listening. When you feel you’re able to copy even some of the contacts in the videos of my activations, you’re ready to start hunting CW activators!
Of course, the benefit of camping at a state park is being able to play radio pretty much anytime while on the park grounds. For a few days, it’s like you’re living in a park activation and can actually set up an antenna and use it over the course of multiple days.
It’s such a big departure from my typically short (45-90 minute) park activations.
When we first arrived at the New River State Park campground, I deployed my PackTenna 9:1 UNUN random wire antenna.
I brought two transceivers with me: the Xeigu X5105 and the Discovery TX-500–I pretty much split my operating the time equally between the two radios.
New River State Park (K-2748)
Although I spent much more time on the air than I normally do, I didn’t make videos of each session. One reason is I wanted to operate with earphones–especially since some of my sessions were later in the evening or early in the morning. I didn’t want to disturb my neighbors at the campground.
That and, especially with the X5105, I wanted to see what it would be like to operate with earphones for extended sessions. Prior to making videos of my activations, I almost exclusively used earphones in the field. I appreciate the sound isolation earphones offer–I also find they help tremendously with weak signal work. When I make videos, however, I don’t want to go through the hassle of recording the line-out audio separately in order to use headphones, so I use an external speaker.
I decided to record my Wednesday, June 23, 2021 evening session with the Discovery TX-500.
This session started only a few minutes prior to the end of the UTC day which meant I had to watch the clock very carefully and clear my logs at the beginning of the UTC day (20:00 EDT).
In POTA and other field activities, if your activation straddles the UTC day change, you must keep in mind that any contacts made after 0:00 UTC can only be counted on the next day’s logs. This was not a problem for me because I had logged dozens of stations earlier in the day, but if you ever start an activation close to the UTC day change, you need to make sure you log your 10 contacts for a valid activation prior to 0:00 UTC.
Auto-spotting help
Another thing complicating my sessions at New River State Park was that I chose not to schedule my activation via the POTA website prior to our trip.
If you schedule your activation via the POTA website, anytime the Reverse Beacon Network picks up your CQ calls (in CW), the POTA spots website will scrape that information and auto-spot you. It’s an amazing convenience for those of us who operate CW.
I chose not to schedule my activation days at New River because I had also planned to operate at another nearby park during my stay and I didn’t want the system to spot me incorrectly. That, and I thought I would have mobile phone coverage to self-spot.
It turned out that–contrary to my mobile phone company’s coverage maps–I had no internet service at the park. None.
In order to get spotted, I relied on my Garmin InReach GPS/satellite device to send short text messages to my buddies Mike (K8RAT) and Eric (WD8RIF). My pre-formatted message would prompt them to check the RBN for my frequency, then spot me to the POTA site manually.
I’m incredibly grateful to have had them helping me in the background. Everyone should have a Mike and Eric as friends!
Video
I made a real-time, real-life, no-edit video of the entire activation. Note that it took a while to get spotted, so the first ten minutes are simply me talking (it’s alright to skip that bit…it won’t hurt my feelings!).
Also, here’s a QSO map of that day’s contacts. Note that this includes stations I logged later in the UTC day (i.e. the following morning/day.
Due to some unexpected conflicts, our camping trip was shorter than we would have liked. We plan to visit New River later this year and spend much more time there. It’s a beautiful park!
Thanks for reading this short field report and here’s hoping you get a chance to play radio in the field soon!
To quote the W4C association manager Pat, KI4SVM, “Anderson is a drive-up with no other redeeming qualities.” This perfectly describes the mountain. It is easy to get to, at the top of Tower Road, right off of Route 16. The road to the top get a bit rough in places, but is passable in any car.
He had me at “no other redeeming qualities”–!
I must admit that all of the summits I’ve activated so far have been pretty amazing: offering up spectacular views, wildlife, and wonderful hiking opportunities. All of them were also on protected public lands like state/national/county parks.
Anderson Mountain (W4C/WP-012)
Earlier this year, I made a spreadsheet of summits I planned to activate. Anderson Mountain was one of them because of its convenient location in my travels to visit family each week. I had also been saving it for the day that I planned to activate a nearby park–Tuesday, July 6, 2021 was that day!
The mountain is directly off of US 16–the main highway between Newton/Conover and Charlotte.
You turn off of the highway onto a dead end road that leads to the summit. About halfway up, it turns into a single lane privately-maintained road that, as AA6XA noted above, is rough but passable in any car (well, save a Lamborghini but I’m guessing most SOTA ops don’t own one of those!).
The road to the summit is a straight–there’re no confusing forks in the road and it’s impossible to get lost.
Once on top, you’re greeted by a few clusters of communications towers. This is actually pretty common sight with smaller one point summits because they typically have superb line-of-sight to populated areas and are easily accessible by vehicle.
When you look around, you can understand why Pat would say it has no redeeming qualities: towers, rusty transmitter buildings, razor wire on chain link fences, and litter all over the place.
Not the sort of spot that would inspire Ansel Adams.
Judgement call
It’s worth noting here that, unlike POTA, you’re not allowed to operate from a vehicle during a SOTA activation–even at a “drive-up” summit. There’s no such thing as a mobile SOTA activation.
Indeed, you’re not supposed to operate in “the vicinity” of your vehicle either (although, there’s no distance noted and I’m guessing this is on purpose to allow leeway and the op to make a judgement call).
I set up in a little island of trees in the middle of a road loop on the summit. While I wouldn’t call it a hike, I did walk the entire summit after arriving to check for other operating spots, but decided to set up near where I parked the car. In fact, it’s really the only safe spot I noted in the activation zone to park since the road is single lane and you would otherwise block access to one of the transmitter sites. I thought about parking further down the road next to one of the transmitter fences, but I felt like that would have been on private property.
Side note: SOTA forbids operators from trespassing on private property without the owner’s permission. I checked the road very carefully for “no trespassing” signs, but the only ones I found were to keep people out of and away from the fenced-in transmitter sites.
I also thought about trying to operate in a spot on that little island where I couldn’t see my car as easily in the cluster of trees–to remove myself from the “vicinity” of the car–but that would have been awkward, too and only separated me an additional 10-15 meters or so. I chose the option where others could see me and I could see them if, for example, a Duke Energy service vehicle approached.
I was fully outside of my car, though, and not using it to support my antenna or any equipment–another important factor.
Sometimes as an operator you have to make a judgement call when you arrive at a site to stay within the rules and the spirit of the program. I’ve never had a SOTA or POTA activation where I felt I was splitting hairs until this one. I decided that this was the best scenario to activate Anderson Mountain in a way that wouldn’t inconvenience other property owners, nor cause suspicion that might lead to a future no trespassing sign on the road. It was the safest set up and I’m willing to bet most previous activators did exactly the same thing. I felt it was within the spirit of the program.
Since I used the speaker wire antenna at Mountain Island, I used it on Anderson Mountain as well. I deployed the entire station within 5 minutes max: herein lies the advantage of using an arborist throw line, a shack-in-a-box transceiver like the KX2, and a simple wire antenna.
I first hopped on 20 meters CW, spotted myself to the SOTA network (mobile phone reception was superb, by the way) and started calling CQ SOTA.
Within three minutes I logged K6YK, KT5X, W5GDW, and K0LAF which already validated this SOTA activation.
Wow–validating this activation was, as my daughters used to say, “easy peasy lemon squeezy.”
I added WB6POT and N0RZ for a total of six stations on 20 meters within five minutes.
I then moved to 40 meters SSB and worked K8RAT, W4NA, and WN4AT all within about three minutes.
Finally, I moved up to the 17 meter band and worked F4WBN (our well-known French SOTA chaser) and K2LT.
Packing up my gear was as quick as setting it up.
Video
I did make one of my real-time, real-life videos of the entire Anderson Mountain activation with no edits. If you need a cure for insomnia, I encourage you to watch or listen to it:
At least one redeeming quality…
I mention in the video that some readers and subscribers have confessed that they feel SOTA is less accessible to them than POTA or WWFF. I would have to agree that summit activations are much less accessible than park activations.
For one thing, there are flat regions on our planet that lack prominences that qualify for the SOTA program. If you live in the middle of a prairie state, you may have to drive a great distance to reach the closest qualifying summit (although you might have a number of POTA and WWFF parks nearby).
In addition, summit activating generally involves hiking–which is actually the motivating factor for many of us (certainly for me as I love hiking).
Some would-be SOTA activators have mobility issues, however, and simply can’t hike great distances with gear on their backs.
This is where “drive-up” summits like Anderson Mountain come in: they’re much more accessible for those with health considerations.
If you live in an area with SOTA summits, but haven’t attempted an activation because you can’t do strenuous hikes, connect with local SOTA activators and ask for a list of “drive-up” summits. There are many of these around–some, like Anderson, are accessible because there are radio towers on top, other are accessible because they’re on a park with accessible vistas, or some are even in a mountaintop neighborhood.
Thank you
I’d like to thank all of you for reading this field report and I’d especially like to thank those of you who contribute to QRPer.com via Patreon and our Coffee Fund. While my content will always be free and QRPer is very much a labor of love, your support helps me purchase gear and supports my radio travels. With that said, if you’re saving up for your first radio or need to invest in your own kit, I’d rather you support yourself!
My goal with QRPer is to champion field radio operations and encourage others to discover the benefits of playing radio outdoors!
If you’d like to participate in a contest that balances the playing field between fixed, high-power stations and QRP portable stations, you might take a look at the 2nd annual Portable Operations Challenge.
The POC will take place September 4-5 during three, 4 hour periods. The exchange is very simple: your 4 character Maidenhead Grid Square. You can even combine this event with a scheduled summit or park activation.
This contest even includes prizes for the winners.
The Fox Mike Hotel Portable Operations Challenge is designed to optimize equal operating conditions for portable operating during a contest involving non-portable stations. The scoring allows and encourages regular home-based station operations to take part while offering a handicap-style scoring algorithm to be more equalized for portable stations. The approach is akin to the handicap index in the sport of golf. More difficult courses are scored with a higher slope value, indicating a greater challenge to achieve a normal par score of 72 on that course with a handicap of subtracting strokes for golfers who do not typically shoot as low a score as other golfers. A number of factors go into deriving the slope rating for a golf course but they represent the challenge that the course presents to each participant golfer and the golfer’s capability for playing the course.
The POC aims to make portable operations “on par” with more typical fixed-based operations while preserving the enjoyment of being in a new operating environment. Moreover, fixed-based operators can also easily participate in the action, challenging the handicapped-scoring for portable ops. Can the Super Station contester best the Little Pistol portable operation? If we use a scoring metric that reduces the advantages of fixed stations to that of pure radio sport operating, is there a chance that an efficient portable operator or team can come out ahead of the current winning contest station operators? That’s why this is called the Portable Operations Challenge!
Frank K4FMH
THEORY OF THE CONTEST SCORING FACTORS
Several aspects of fixed (permanent)-station contesting can be stacked in the operator(s) favor when compared to most portable operations. One is the use of greater RF power output. Another is a permanent tower with directional, gain producing beams. A third is that it is easier to have multiple transceivers and operators, allowing for a “per-transmitter production” that yields superior scores. A fourth is the mutual attractiveness for fixed-station ops to work other fixed-station ops and ignore the weaker (especially QRP) signals. The addition of having the full force of Internet communications (when allowed), spotting sources, better ergonomics for operating positions, food/drink conveniences, and climate-controlled shelter all add-up to give “course advantages.”
While some portable operations (an example can be some large Field Day teams) can meet or exceed the advantages to contesting identified above, the vast majority do not.
Our scoring metric equalizes some of these advantages. Four factors are used in scoring each contest operation submission. These are the same regardless of whether it is a single operator or a team of operators, unassisted or assisted through the use of operation spotting. These include:
a. Kilometers-per-watt (KPW). Using the Maidenhead Grid Square, the distance in miles divided by the reported power output in watts for the reporting contest participant.
b. Fixed (permanent) vs Portable operation (favoring portable).
c. Mode of contact: Phone vs. CW vs. Digital (favoring phone over CW over digital)
d. Number of transmitters in use (points X 1/t where t = # transmitters)
The logic underlying this metric is as follows:
The KPW metric will tend to equalize power used as well as antenna gain. The km-per-watt is computed per-contact using the centroid lat-lon of the Maidenhead grid square exchanged during the contact. Favor goes to the greater miles-per-watt which equalizes to some degree the antenna gain, power, and point-to-point propagation conditions. The MPW is the basic contact score. Fixed (permanent) station operators have their resident setup which gives an advantage over portable ops, although a team could replicate a Field Day setting with portable crank-up towers, amps, generators, and so forth. Favor goes to the portable operator. The amount of this multiplier can be adjusted much as a competitive “tuning parameter” in future contests.
All things being equal in a QSO, phone is most challenging, followed by CW and then digital (especially weak signal modes like FT8). Favor goes to phone first, CW second, and digital third.
The more transmitters shape the number of contacts so more transmitters get increasing decrements in the points awarded, regardless of the number of ops. This emphasizes the per-transmitter production rather than just the amount of equipment and number of operators. We are experimenting with what seems appropriate discounts for the number of transmitters in simultaneous so as to render a more equitable competition, favoring sport over equipment.
POC DATES
SEPTEMBER 4-5, 2021
CONTEST OBJECTIVE:
For portable and fixed stations to work as many other portable and fixed stations as possible during the contest
period.
CONTEST PERIOD:
The contest consists of three individual and separate 4-hour periods on September 4 & 5, 2021 UTC.
The sessions are:
Session 1: 0800 – 1159 September 4, 2021 UTC
Session 2: 1600 – 1959 September 4, 2021 UTC
Session 3: 0000 – 0359 September 5, 2021 UTC
Stations may be worked once per band and mode by session for a maximum of 15 contacts between stations per session. Duplicate contacts will be removed without penalty. Scoring will be done by each individual session. Participants may operate one, two or all three sessions. Overall champion will be determined by aggregating scores from the three separate sessions. The Individual with the highest aggregated score will be crowned Grand Champion. The single station with the longest distance in KM per watt will be the Distance Champion.
BANDS:
80, 40, 20, 15 and 10 meters
MODES:
CW, Phone (SSB), and Digital
Digital mode is any data mode that can transmit the required contest exchange. Cross mode contacts are not permitted.
EXCHANGE:
4-character Maidenhead grid square
SCORING:
Total score for the session is the sum of all QSO Values.
When it comes to parks, I haven’t picked up many new-to-me “uniques” lately.
In truth, though, I’ve put more effort into activating unique summits which takes more time to plan, plot, and activate. SOTA has taken a bite out of my park uniques, but I’m good with that because to me it’s less about my park/summit numbers and more about the exploration and outdoor radio time.
On Tuesday (July 6, 2021) however, I added one more unique to my 2021 park count: Mountain Island Educational State Forest (K-4858).
This park is actually a modest detour during my weekly travels, but I’ve never popped by for an activation. You see, unlike other state parks I visit, Mountain Island isn’t yet open to the public on a daily basis. On their website, they state that visits must be arranged in advance, so I reached out to them the morning of July 6 and they promptly replied, welcoming me for a visit and activation that very same day!
Off the beaten path
Since this state park isn’t yet open to the public, I didn’t see the typical brown highway signs pointing me to the park entrance, but Google Maps steered me right to the front gate where there’s a sign.
The gates were unlocked and open, so I pulled into the property and met with two of the park staff who were incredibly kind and accommodating. They were both familiar with the Parks On The Air (POTA) program which made it much easier for me to ask about spots where I could set up my station.
First, though, I wanted to know more about Mountain Island Educational State Forest so I asked ranger Laura about the history of the site.
Turns out, Mountain Island is the newest Educational State Forest in North Carolina and has been in the works for more than 20 years.
The Forest is a vast conservation area that protects 12 miles of shoreline on Mountain Island Lake in the Catawba River Basin. This lake is the primary drinking water supply area for Charlotte, Mecklenburg and Gaston Counties. She told me that one in 23 North Carolinians rely on this area for their source of water.
Much of the land was originally owned by Duke Power who put it up for sale in 1998. Conservation groups purchased the land from Duke’s real estate agency in 1998 and put it into a conservation easement. The land is actually in two counties (Gaston and Lincoln) and a portion in the city limits of Gastonia.
The NC Forest Service now manages the forest and supports the public-private partnership with the counties, municipalities, and conservation groups.
Mountain Island has been actively educating school groups and the public about the river basin and local flora/fauna for many years by appointment. Currently, a new education center is being built on the property and will soon be open to the public with regular business hours. Being so close to population centers, I imagine they’ll stay busy!
Shade
Park ranger Laura was kind enough to allow me to set up under a huge tree in front of their ranger station.
I was grateful for the shade: it was 92F (33.3C) and humid.
There were no picnic tables under the tree, but I happened to have two folding chairs in my car. I used one as a table and the other as a chair. I flipped over my GoRuck GR1 backpack to make a stable base for the Yaesu FT-817ND.
I was super pleased to put the Yaesu FT-817ND back on the air. It’s been a while since I’d used it in the field because my review radios (TX-500, X5105, etc.) have taken priority.
I love the FT-817ND and believe it’s actually an exceptional transceiver for CW and SSB ops. The CW full break-in QSK is wonderful and I actually like the mechanical sound of the T/R relay switching (if you like pin diode switching, you should look the other way, though!). With the 500Hz CW filter installed, the front end is pretty bullet-proof, too!
This was the first time I had paired the FT-817ND with my 28.5 foot speaker wire antenna. The random wire antenna needs a good ATU to match impedance, so I employed the Elecraft T1 this time (soon I’ll also try the LDG Z-100A).
I had planned to do a little SSB work, but quickly realized I’d forgotten the FT-817ND microphone. A shame because this site actually has excellent mobile phone service so I could have spotted myself to the network. Next time–!
I started on 40 meters CW and worked ten stations in 21 minutes. That’s a perfect pace for me!
Next, I moved to 20 meters where I worked six more in 9 minutes.
I was incredibly pleased with how well the speaker wire antenna performed–especially on 20 meters.
From the Piedmont of North Carolina, I worked Montana, Texas, New Hampshire, and Italy with 5 watts into $4 worth of speaker wire.
I did a quick back-of-the-envelop calculation and discovered that I yielded about 943 miles per watt!
To be clear, IK4IDF did all of the heavy lifting in our contact with his 9 element Yagi, but still it’s awfully exciting to put DX in the logs with only fair propagation.
Video
Of course, I made a real-time, real-life video of the entire activation (save the set-up and take-down):
I packed up quickly because I had a SOTA activation planned that afternoon on Anderson Mountain. I’ll post a field report and video of that activation soon.
Rev 4 FT-817 Buddy Board
Also, I’m about to start soldering together G7UHN’s new Rev 4 FT-817 Buddy Board! Revision 2 worked wonderfully, but revision 4 now includes a CW memory keyer among other upgrades! (Woo hoo!) All of the components are now in the shack–just a matter of soldering them together and programing the Arduino Nano. Andy, if you’re reading this, expect a call from me soon, OM!
Thank you!
I’d like to thank all of you for reading this field report and I’d especially like to thank those of you who contribute to QRPer.com via Patreon and our Coffee Fund. While my content will always be free and QRPer is very much a labor of love, your support helps me purchase gear and supports my radio travels. With that said, if you’re saving up for your first radio or need to invest in your own kit, I’d rather you support yourself.
My goal with QRPer is to champion field radio operations and encourage others to discover the benefits of playing radio outdoors!
Connecting an international community through low-power field radio adventures.
Please support QRPer by adding us to your whitelist in your ad blocker. Ads are what helps us stay online. All of our ads are ham radio related--no junk, we promise! Thank you!
 As I mentioned in a previous post, I do love rotating out radios I take to the field. Shuffling radios not only helps me remember a radio’s features and menu system, but it helps me understand any advantages one radio might have over another.
 Lake Norman is such an effortless park to activate. They’ve a huge picnic area, large trees (for both antenna support and shade!), and are typically not incredibly busy during the week. I love Lake Norman because they also have a very nice Lake Shore Trail I enjoy hiking post-activation.
 I picked the CHA LEFS for this particular activation because it’s resonant on my favorite bands, it’s efficient, and it was so effective the last time I performed an activation during poor/unstable propagation.
 I thought I’d start by calling CQ on the 40 meter band in CW. Within 15 minutes, I snagged the ten contacts needed for a valid POTA activation. I was very pleased with this.


 Post-activation–and despite the heat and humidity–I hiked the length of the Lake Shore Trail; roughly six miles. I highly recommend this trail if you can fit it into your schedule.


