The SP4 POTA/SOTA CW Morse Magnetic Iambic Double Paddle – Designed By N0SA.
Super Lightweight, Portable Compact Paddle With An Attached 3.5mm Cable.
Uses Magnetic Tension And Easily Adjustable With Stainless Steel Contacts.
Great for portable operations, and supplied with 3M Dual Lock Velcro for easy mounting and removal of the paddle from base or anything of your choosing.
FEATURES: Small and light weight – only 1.7ozs. WITH BASE: Small and removable from base – 1.25 lbs.
Measures 2.5″ x 1.1″ x 1″
Frame and finger pieces are 3D printed with carbon fiber reinforced PETG.
Levers are solid CNC Machined 6061 aluminum.
3 foot flexible cloth covered cord with molded 1/8” plug stays flexible down to 0 Deg F.
All fasteners used are Stainless Steel.
Allen wrench that is needed for spacing adjustment is also included with the key.
Adjustments stay put when set, so adjust once and forget about it! 🙂
This paddle is available with or without a steel base.
I have not tried this new paddle yet, but I did know it was in the works. I’m so glad it’s now being offered because I’m a huge fan of both N0SA and CW Morse (disclaimer: CW Morse is a proud sponsor and affiliate of QRPer.com).
The price for the new key is $82.95 without a base or $109.95 with base.
UPDATE 09 (Oct 2021): Larry (N0SA) informs me that he sold all of his SOTA Paddle inventory as of last night. In other words, very quickly. If he produces another run of them, I’ll post it here on QRPer.com!
A couple weeks ago, Larry (N0SA) reached out to me and asked if I’d like to evaluate a new set of precision field paddles he’s designed. Having purchased a set of 3D-printed paddles from N0SA last year, I didn’t hesitate.
Larry simply calls this model the SOTA Paddle. An appropriate name because this paddles is incredibly compact, lightweight, and perfect for hiking and backpacking. They also have a short Allen wrench cleverly stowed within the paddle body for any adjustments in the field. The Allen wrench is locked in in such a way, there’s no possibility it’ll fall out either. Clever!
They come with a high quality three foot cloth braid cord with molded 1/8” plug.
Over the past week, I’ve taken these paddles to two different park activations with the Elecraft KX2 and AX1 antenna.
My activation videos and field reports are perhaps a week down the road yet, but I couldn’t help but post my initial impressions.
So how would I describe N0SA’s new SOTA Paddles–?
The Bee’s Knees!
I love them.
These truly feel like precision paddles. They’re entirely constructed of aluminum and stainless steel parts.
Although the body/frame of the paddles are open, they feel incredibly sturdy. No doubt, they’ll survive the environment inside a backpack or field kit.
They’re very compact, yet feel perfect in the hand.
Larry also includes 6 pieces of 3M dual lock for mounting the paddles on a clipboard, radio, or any other surface.
As readers know, I love my CW Morse Paddles–they represent an amazing amount of quality at such an affordable price.
If you’re in the market for a compact precision aluminum key, however, I can recommend these without hesitation.
Here’s the deal as I understand it: Larry may only make a couple small production runs of these. He does this as a fun side hibby, not for scaled-up production and distribution. I believe he may have as many as 20 units available soon.
Again, you’ll see the SOTA Paddles in action in upcoming videos, but I wanted to mention it here on QRPer so that–if this sort of thing interests you–you might have a chance to place an order before the first and/or second production runs are spoken for.
The price is $125.00 US (each) plus $15.00 for priority mail shipping. You’ll have to inquire if located outside the US (I’m not certain if he ships internationally).
Payment can be made via PayPal to his email address which is his callsign @att.net. (You can also check out his contact details on QRZ.com.)
Email him with questions and to check availability in advance.
Larry is a long-time reader of QRPer.com, so he might add notes in the comments section.
Speaking of which, thank you so much, Larry, for sending me these paddles. They are simply amazing.
I’m not a summer-heat-loving guy. Quite the opposite, in fact. Give me cold weather and I can hike and camp forever.
On Tuesday, July 13, 2021, it wasn’t cold outside, of course, but I still wanted to fit in a park activation and hike. Despite the forecast highs of 90F/32C. I had almost the entire day to play radio, too–a rarity.
When I have an entire day to devote to radio, I can either hit the road and try to hit multiple parks–perhaps as many as 5 or 6–or I can choose to venture further afield and hit a new-to-me park.
I tend to choose the latter and that Tuesday was no exception.
North and north by NW of Winston Salem, NC, are two parks I’ve always wanted to visit: Hanging Rock State Park and Pilot Mountain State Park.
I devised a plan to first visit Hanging Rock, then Pilot Mountain. Both parks are close together geographically, but a good 30 minutes drive apart.
A quick check of the SOTA database and I discovered that there are actually two summits on Hanging Rock State Park’s grounds. One is off the beaten path a bit and would require some light map work, and the other–Moore’s Knob–is on one of the park’s main trails. Since I was putting this whole plan together morning of, I opted for the “easy” summit as I didn’t have time to double-check topo maps, parking areas, etc.
Hanging Rock State Park (K-2735)
Travel time to Hanging Rock was about 1 hour 45 minutes. Once I arrived on site, I discovered that, like many state parks, the main visitor’s center is being renovated.
I easily found the parking area for the Moore’s Knob loop. It being a Tuesday, the parking lot only had a few cars.
Pro tip: with the visitor’s center out of commission, stop by the swimming area pavilion for some proper restrooms/washrooms!
I planned to take the full trail loop in a counter-clockwise direction.
I’m glad I did, too, as the bulk of the ascent was a long series of steps. I’m not a fan of steps, but I much prefer using them heading up a mountain rather than down.
Near the summit, there’s a very short spur trail to Balanced Rock which is worth a visit not only for the rock, but also the views.
It being a North Carolina state park, there are some obligatory warning signs about how falling off of cliffs can lead to injury or death. These warning signs aren’t as prominent as those at Crowders Mountain State Park, though!
Moores Knob (W4C/EP-001)
You can see my MPAS Lite vertical poking out of my pack. I brought it along in case I had no good tree options. In this case, I didn’t use it.
There’s no mistaking the summit as there’s a large observation tower on top that affords some spectacular views of the Blue Ridge Escarpment, the foothills, and Pilot Mountain (my next stop). There were a number of hikers on the summit of Moore’s Knob and it was actually pretty gusty up there, too. I searched and found a nice little spot to set up that was sheltered from the wind, shaded, and even had trees tall enough to hang my Packtenna 9:1 UNUN random wire antenna!
Note: I brought the CHA MPAS Lite in case there were no good tree options on the summit.
Set up was quick and easy on the radio side of things, but as with most SOTA activations, positioning my tripod to make a video was the tricky part. Since I’m sitting on the ground, it can be difficult to find the right angle so that the radio, key, and notepad are all in the frame. (See my video below).
I started calling CQ at 16:00 UTC on 20 meters. I had a reasonable cell phone signal on the summit, so I was able to spot myself. Problem was, though, my hiking app seemed to be draining my iPhone’s battery very rapidly (that and my aging iPhone 7 probably needs a new battery at this point). After spotting myself, I shut down the phone to save power. I forgot to contact my buddy Mike (K8RAT) with a frequency, but he eventually saw me on the SOTA spots.
In a period of 29 minutes, I worked 20 stations on 20 meters.
Next, I moved up to 17 meters where I worked eight more stations in seven minutes.
I love effortless activations like this and part of me wanted to continue operating–even switching to SSB–but looking at the time, I knew I needed to hit the trail, make my way back to the car, and drive to Pilot Mountain.
I called QRT around 16:42 UTC and packed up my gear.
QSO Map
Not bad for 5 watts and a 31′ wire!
One highlight of this activation was meeting Jim (NA4J) who heard my CW from the summit and popped by to introduce himself. Although I trimmed out our conversation in the video (I’m not entirely sure he knew I was recording the activation), you’ll hear him in the first half of the activation.
Video
Here’s my real-time, real-life video of the entire activation:
The hike back to the car was very pleasant. It was a bit longer than the path I took to the summit, but the descent had no steps which made it a breeze.
I had a radio topic on my mind during that hike and actually pulled out the OSMO Action camera and made a bit of a “hike and talk” video. It’s on the topic of ATUs and resonant vs non-resonant antennas. I haven’t yet decided if I’ll post it–the shaky camera might make some viewers sea sick! 🙂 We’ll see–maybe I’ll brave up and post it anyway…
Next, I drove to Pilot Mountain State Park for a quick afternoon activation. Although Pilot Mountain is a SOTA summit, too, it’s yet to be activated because the actual summit would require proper rock climbing, I believe.
Thank you
As always, thank you for reading this field report! And thank you to everyone who has supported me through Patreon and the Coffee Fund. I truly appreciate it.
I hope you find time this week to take your radios outdoors to play, or to hunt some parks and summits from your shack, backyard or vacation spot!
And for those of you working on your CW skills, don’t give up and don’t stress about it. Take your time and allow your brain to absorb code by simply listening. When you feel you’re able to copy even some of the contacts in the videos of my activations, you’re ready to start hunting CW activators!
I received my Mountain Topper MTR-3B last week, and I’ve already taken it on a POTA activation.
Last weekend, I decided to break it in on a POTA “two-fer” site: Hampton Creek Cove State Natural Area (K-6246) and The Overmountain Victory Trail (K-4577) in Tennessee. Hampton Creek Cove was actually an ATNO (all time new one) so it was a trial by fire!
In short, the MTR-3B was marvelous. I’m so impressed.
As I mentioned in a previous post, I’m building a full SOTA/POTA activation kit for the MTR-3B. I already have a kit built around my KX2 and I don’t want to “borrow” any items from it (so I’m not surprised later in the field when an item is missing).
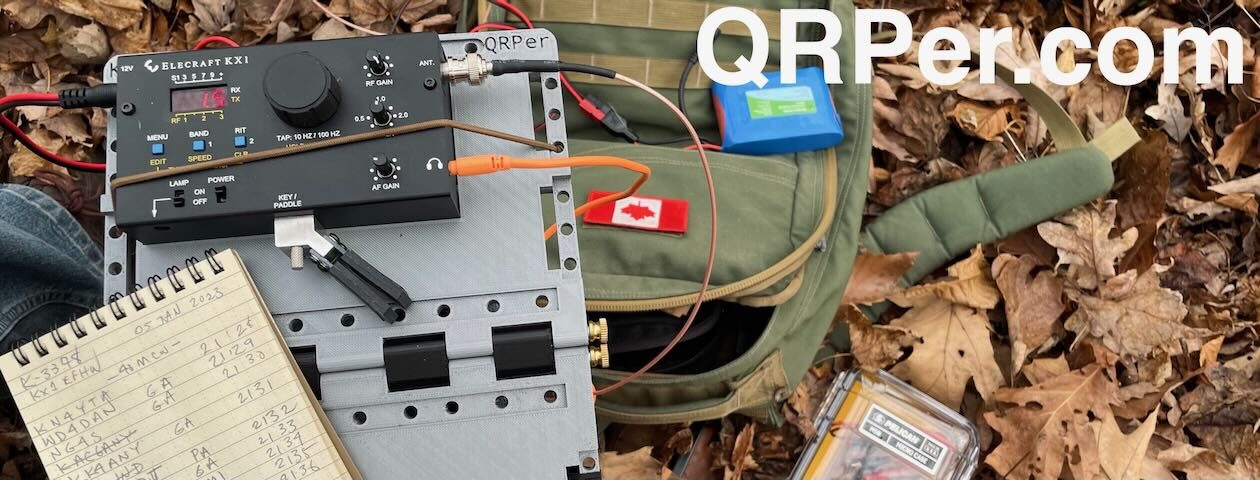
The TalentCell Rechargeable 12V 3000mAh Lithium Ion Battery Pack is the little black box.
I also used my Whiterook paddle (which needs new paddle arms at this point) but that will soon be replaced with a set of N0SA portable paddles I recently ordered.
Since the MTR-3B has no volume control, I used a pair of 20 year old Sennheiser earphones I bought when I lived in Munich. These have been in a drawer for ages because I now prefer using in-ear earphones with silicon earpieces for better comfort and sound isolation. But the Sennheisers have one thing none of my other earphones sport: in-line volume control.
While the earphones worked well for this activation, I’d still prefer a set of in-ear earphones with in-line volume control. Any suggestions from MTR-3B owners? Also, I’d like a compact amplified speaker with volume control to carry as an option when needed. If you can recommend one, please comment!
I’m writing an article for The Spectrum Monitor magazine about portable power later this year. I noticed that a number of MTR-3B owners swear by 11V rechargeable cells that are used in the RC and drone markets. Many have a similar compact form-factor as the common 9V battery. I understand, however, some of these cells need special chargers and equipment to balance them.
I would appreciate any and all information about these batteries.
In the meantime, Rich (N8TGQ), recently shared a pic of his Mountain Topper portable pack. Check it out:
I think it’s brilliant how he’s mounted everything on a compact plastic cutting board inside the case. Rich says that what he loves about this set-up is that everything is there, ready to go–simply plug in the antenna!
I love seeing how others build out their field kits! Please comment or contact me if you’d like to share yours here on QRPer.com!
QRP radios, product announcements, reviews, news and more. Low power amateur radio fun!
Please support QRPer by adding us to your whitelist in your ad blocker. Ads are what helps us stay online. All of our ads are ham radio related--no junk, we promise! Thank you!
 Update: This post was originally posted a few days ago which turned out to be prior to this paddle being in-stock in any quantity. CW Morse has some of these online and available for order at time of posting this morning (14 Nov 2022) and will have many more later this week. We’ll post an update on QRPer when their main production run is available.


