Last week, we had a glorious break in the weather–it felt almost spring-like.
On my way back home after visiting my parents, I decided I would take in a quick afternoon hike. I originally planned to go to one of my favorite county parks, but I also had a hankering to get on the air and that park wasn’t a part of the POTA network.
Tuttle Educational State Forest (K-4861)
I decided to stop by Tuttle Educational State Forest (K-4861) instead and make February 19, 2021 not only a hiking day, but a Parks On The Air day. Tuttle sports both excellent sites for POTA and a nice little trail system.
I decided to play radio first then go on a hike, so I pulled out an antenna that I thought would give me quick deployment and pack-up: the CHA MPAS Lite.
I also remembered that a reader recently asked if I would include the deployment of the CHA MPAS Lite in one of my real-time, real-life activation videos. So I did just that!
Deployment was quick and the mAT-705 Plus ATU did a fine job finding matches on the CHA MPAS Lite.
I started calling CQ on 40 meters and worked quite a few stations in short order. When the first batch of eight chasers was worked, I moved up to the 20 meter band and started calling CQ. My hope was that I could work at least a couple of stations on 20 meters then pack up and go for a hike.
I started calling CQ on 20 meters and was quickly rewarded six additional contacts.
Without a doubt–if this wasn’t completely obvious in my video–the highlight was working my friend John Harper (AE5X) in Texas. I’ve known John for years now and have followed his excellent blog but we’ve never managed to catch each other on the air!
Turns out, John was using his recently unboxed Icom IC-705 as well. Click here to check out his post which includes a mention of this very activation. In addition, check out his thoughts after taking the IC-705 (all amped-up with the KPA-500) on the ARRL CW contest that weekend.
Another highlight was logging CU3BL in the Azores again. To me, it’s still mind blowing that 5 watts can reach out that far. Here’s a QSOmap of the activation (click to enlarge):
In total, I logged 14 stations with 5 watts and a vertical in very short order, leaving me a full hour of hiking time! Mission accomplished!
Video
Here’s a real-time, real-life video of the entire activation:
The hike afterwards was just what the doctor ordered, too. I’ve mentioned before that my ankle has been healing nicely after twisting it badly in December. This hike was an easy one and gave me a chance to properly test my ankle before the (epic-to-me) SOTA activation I planned with my daughter, K4TLI the following week. (More on that in a future post!)
Here are a few photos from the Tuttle hike:
If you ever find yourself at Tuttle Educational State Forest doing a POTA activation, make time to take in a hike as well. It’s a gentle hike and even the long loop can be completed within an hour at a very leisurely pace.
Thanks for reading this field report and please comment with your experiences on the air and in the great outdoors!
Last week, I had a hankering to visit a site I hadn’t activated in a few months: South Mountains Game Land.
This game land is pretty vast and has a number of entry points, almost all of which are very accessible. When I re-visit a site multiple times, I like to try different entrances when I can because it gives me a chance to check out a site better and, frankly, even enjoy a little light off-roading.
I found a western road leading deep into South Mountains from the Wildlife Resource Commission map and decided to explore it and do a quick activation.
South Mountains Game Land (K-6952)
I avoid activating Game Lands on days when I suspect there will be a lot of hunting. Tuesday afternoon was *not* ideal for hunters. Besides being the middle of a work day, it was cold and very gusty.
As I drove about 4 miles into the site, I didn’t see a single car or truck parked in any of the parking areas. I could tell I had the place to myself.
A Few Precautions
It goes without saying that if you’re doing a POTA or SOTA activation in a rural/remote area that has no mobile phone coverage (quite common at the ones I activate), you really need to take a few precautions.
First of all, let someone else know where you’ll be and how long you plan to be there. I always let a couple radio friends know where I’ll be so if I don’t show up on the air or they don’t hear from me, they could contact authorities to look for me.
Secondly, always take a proper first aid kit. If you get hurt, you need a way to apply first aid until you can get help.
Take a handheld radio with local repeater frequencies pre-loaded. Even though I might not have cell phone coverage, I can almost always hit at least one repeater.
Of course, carry a little food and water with you and make sure your vehicle has fuel as well.
Always wear a high-visibility vest, jacket, and/or cap. Many game lands require these. Besides, would you rather perform and activation or get shot? I don’t like getting shot. I also don’t like the idea of being bear food, so at least pack a little bear mace if you’re in bear country.
When I’m activating a game land I don’t hike deep into the woods. In fact, I try to stay on or very close to a parking area. Even though POTA is becoming a very popular radio activity, I can promise that you’ll likely be the first POTA activator most hunters will see. It’s a good idea to be near areas of activity like a parking spot or road where they’re much less likely to be hunting.
Finally, as I mentioned before, I personally do not activate game lands on busy hunting days.
Of course, check the weather forecast in advance.
On The Air
I found a great spot to set up my station near a ridge line deep in the game lands.
Normally, I’d set up right next to my car, but Tuesday the winds were very gusty so I found a semi-protected area maybe 10 yards off the road. I located a spot with the least amount of overhanging branches (always check for widowmakers and dead trees!).
It only took me five minutes to deploy the Chameleon Emcomm III Portable random wire antenna with my arborist throw line.
Random wire antennas require tuners, so I employed the Mat-Tuner mAT-705 Plus.
This site has no mobile phone coverage, so I had no easy way to spot myself to the POTA spots page had I decided to do a little phone/SSB operating. I decided to stick with CW as the POTA spots page will auto-spot me using my information from the Reverse Beacon Network (as long as that system is working).
It’s so rare that I do activations around noon or early in the afternoon, so I decided to start on 20 meters just to see if I could snag a European station.
I felt pretty chuffed to quickly snag the Azores (CU3BL) and a few west coast stations with my 5 watts and a wire. QRP rocks!
I then moved to 40 meters where I worked a number of stations in succession and topped off the activation with one 30 meter contact.
Here’s a QSOmap of this activation:
Not bad for about 40 minutes on the air.
Video
I also made one of my real-time, real-life videos of the activation. Note that my camera died on me perhaps five minutes before I completed the activation, so it will end abruptly. Sorry about that!
My ankle is healing nicely so I’m feeling more comfortable with the idea of hiking again. I’m plotting a SOTA activation with my daughter in the coming weeks.
This Saturday (Jan 30, 2021), I had a small window of opportunity to perform a Parks On The Air (POTA) activation. My park options were limited because I needed to stay near my home and a store where I was scheduled to do a curbside pickup.
The only viable option–since time was a factor–was my reliable quick hit park.
The Blue Ridge Parkway (K-3378)
I plotted a quick trip to the Blue Ridge Parkway Folk Art Center which is centrally-located and, this time of year, there are few visitors.
But what radio take? It had been a couple of weeks since I used the IC-705 in the field, so I decided to take it and rely only on its supplied BP-272 battery pack.
My buddy Mike (K8RAT) had warned me only a few minutes before my departure that propagation was pretty much in the dumps. I’d also read numerous posts from QRPers trying to participate in the Winter Field Day event and finding conditions quite challenging.
Saturday was the sort of day that I should’ve deployed a resonant wire antenna and made the most of my meager five watts thus collect my required 10 contacts in short order.
And that’s exactly what I didn’tdo.
You see, a really bad idea popped into my head that morning: I had a hankering to pair the IC-705 with my Elecraft AX1 super compact vertical antenna.
This made absolutely no sense.
I tried to get the idea out of my head, but the idea won. I suppose, at the end of the day, I’m not about taking the easy path (and I’m obviously a glutton for punishment).
I was also very curious if the mAT-705 Plus external ATU could tune the AX1 on 40 meters. More on that later…
I arrived on site a few minutes before noon. Setup was fast–that’s the big positive about using the AX1.
Normally, I deploy the AX1 antenna with my KX2 or KX3 and simply attach it to the BNC connector on the side of the transceiver. The AX1 Bipod gives the antenna acceptable stability during operation.
The IC-705 also has a side-mounted BNC connector, but it’s much higher than that of the KX3 or KX2. I’m not entirely sure I could manipulate the Bipod legs to support the antenna without modification.
That and the AX1 needs an ATU to match 40 meters (where I planned to spend most of the activation). Since the IC-705 doesn’t have an internal ATU, mounting it to the side of the transceiver really wasn’t an option.
I employed my AX1 tripod mount for the first time. On the way out the door, I grabbed an old (heavy) tripod my father-in-law gave me some time ago and knew it would easily accommodate the super lightweight AX1.
On The Air
I first tried using the Mat-Tuner mAT-705 Plus ATU to tune the AX1 on 40 meters.
No go.
I tried both the phone and CW portions of the 40 meter band, but the mAT-705 Plus simply couldn’t find a match. SWR was north of 7:1 – 9:1.
Instead of grabbing the Chameleon MPAS Lite or 2.0 from the car, I decided instead to see if the Elecraft T1 ATU could tune 40 meters.
It did.
In short, I logged my ten contacts to have a valid activation, but it was slow-going. All but two of my contacts were on 40 meters CW. The last two logged were on 20 meters CW.
It was a challenge, but I really enjoyed it! And, frankly, considering the propagation, 5 watts of power only using the IC-705 battery pack, and the inherent inefficiencies using a loaded compact vertical antenna and ATU? I was impressed.
Here’s a QSOmap of my 10 contacts:
I bet my effective radiated power was closer to 2-3 watts.
Typically, the AX1 antenna acts almost like an NVIS antenna on 40 meters, but Saturday it favored Mid-Atlantic and the states of IN, OH, and PA. Normally, I would expect more of a showing from the states surrounding North Carolina.
My last two contacts on 20 meters were with KE5XV in Texas and KB0VXN in Minnesota. Not a bad hop!
It took longer to collect my ten contacts than I had hoped and I ran nearly 25 minutes late to my curbside appointment. I’m a punctual guy, but there was no way I was leaving without my ten! 🙂
Here’s a video of the entire activation. Hint: it’s the perfect remedy for insomnia:
Next time I try to pair the IC-705 with the AX1 antenna, I think I’ll try adding a couple more ground radials and see if the mAT-705 Plus can more easily find a match.
One thing I know for sure: the T1 is a brilliant little ATU. While the mAT-705 Plus was never designed to do this sort of match, it’s comforting to know the T1 can.
I’m very curious if anyone else has paired the Elecraft AX1 with the Icom IC-705 or other QRP transceivers. If so, what was your experience? Please comment!
I’ve received no less than three inquiries this weekend from readers who are seeking advice about purchasing a portable external ATU to pair with their Icom IC-705 transceiver.
Fortunately, there are few options on the market and I believe there is no “right” one because choices are really based on operator preferences.
I’ll do my best to sum up my thoughts below based on the three ATUs I regularly employ and what we know so far about the AH-705 ATU from Icom.
Keep in mind this list will not include some excellent options from LDG, MFJ, and other companies simply because I haven’t used them in the field. Please feel free to add your comments if you have experience with other good options.
Mat-Tuner mAT-705 Plus
The Mat-Tuner mAT-705 Plus is the first external ATU on the market that directly pairs with the Icom IC-705 via a control cable.
The latest iteration–the mAT-705 Plus–is the ATU I can recommend.
Be careful if purchasing an mAT-705 used as you’ll want to make sure you’re getting the Plus version. The Plus version has a USB-C charging port on the front panel (seen in the photo above)–the original mAT-705 does not (it uses replaceable 9V cells).
Pros:
Perfectly pairs with the IC-705 for full CAT control
Wide tuning range
Tuning is fast and relatively quiet
Numerous memories making repeat matching rapid
Internal rechargeable battery
Rugged chassis
Cons:
Cannot be paired with other radios without modification (not recommended by the manufacturer)
At $220 US, it’s not the cheapest option
Because the IC-705 relies on CAT control for operation, if you leave the control cable at home or on a park bench, you will not be able to operate the ATU. (Pro)Fortunately, the CAT cable is a simple 3 conductor 1/8″ stereo patch cable.
Summary: If you’re looking for an ATU to take full advantage of IC-705 CAT control, the mAT-705 Plus is a great option. The only significant disadvantage of this ATU is the fact that it only pairs with the IC-705 (or possibly other Icom transceivers with similar CAT control). In other words, you can’t pair it with other QRP transceivers you might own.
The Elecraft T1 has been on the market for at least 16 years and is one of the most popular portable antenna tuners on the market.
Elecraft offers the T1 in kit form ($159.95) and factory assembled/tested ($189.95).
The Elecraft T1 has a CAT control port that has been used with the FT-817 in the past. Elecraft recently announced that they will also produce an IC-705 CAT cable that will allow full pairing with the IC-705 transceiver (much like the mAT-705 Plus above).
To be clear, though, the T1 doesn’t need a control cable to function: simply press the TUNEe button for one second, then key your transceiver.
Pros:
Very wide tuning range
Soon it will have an IC-705 CAT connection cable option
Uses common 9V battery that is easy to replace in the field. (Con) Not internally-rechargeable like the mAT-705 Plus.
One of the most compact automatic ATUs on the market
Pairs with any 0.5-W to 20-W transceiver covering the 160-6 meter bands
FT-817 Remote-Control Option
Cons:
Front panel buttons need protection while in your pack to prevent accidental pressing that will deplete the battery. I 3D-printed this simple cover that works brilliantly.
Not weather-proof
Summary: The Elecraft T1 is my personal favorite. Since the T1 pairs with any QRP transceiver, I love the flexibility. The T1 has also been on the market for ages and is a solid, safe choice–we know longevity is benchmark. I’ve never been in a situation where the T1 couldn’t find a reasonable match.
I will certainly test the new IC-705 control cable option when it is released in the near future–stay tuned.
The AH-705 is Icom’s custom ATU designed to perfectly pair with the Icom IC-705 via control cable. If you want an all-Icom setup, this is it.
Pricing in US dollars is TBD at time of posting, but the announced retail price is $350 .
Pros:
Perfectly pairs with the IC-705
Wide tuning range
2-way power sources using alkaline batteries (2 x AA cells) or external 13.8 V DC
IP54 dust-protection and water resistance construction
Could (potentially–?) be permanently mounted outdoors at the antenna feed point as a dedicated remote tuner
Cons:
In terms of overall size, the AH-705 appears to be the largest of the portable ATUs mentioned here
It doesn’t appear AA batteries can be recharged internally
The AH-705 may (we don’t know yet) only work with the IC-705 and possibly similar Icom models
The maximum power handling of the AH-705 is 10 watts–if you use other transceivers (if that is even possible) you would have to be extremely careful with power settings.
The AH-705 is pricey if the actual retail price ends up being near the projected $350 mark. Hopefully, it’ll be much less than this.
Like the mAT-705 Plus, the AH-705 will require a control cable for operation. (Pro) Of course this means it pairs perfectly with the IC-705 and can follow frequency changes without RF sensing.
Summary: Keep in mind, I have not tested the AH-705 yet, so this is only based on announced specifications.
The strongest selling point for the AH-705? Since the AH-705 is designed to be dust and weather resistant, it could be mounted at the antenna feed point. At home, perhaps it could act like an externally-mounted, remotely-controlled antenna tuner. I’m not sure what the maximum length of the control cable could be, but Icom Japan even lists a 16 foot control cable as an accessory. Of course, you would still need to follow Icom’s guidance about protecting the antenna, transmitter and control cable connection points.
The biggest negative to me is the size. Just check out how large it is compared to the IC-705 in this video. It’s still very portable, but the other ATU options above are much smaller.
Still: if the AH-705 is great at matching antennas and the price ends up falling below the $300 point, I’m sure it’ll be a very popular ATU.
Another option often overlooked are portable manual antenna tuners. I’m a big fan of the Emtech ZM-2 which is offered both in kit ($62.50) and factory assembled/tested form ($87.50).
It is a manual tuner, so requires manual input to find a match. While it’s not as easy as push-button tuning, it isn’t complicated either.
Here’s my routine:
I set the top right switch to “GROUND” if using coax feed line and “LINK” if using a balanced line.
Set the added capacitance switch “ADD” to “0”
Set the TUNE/OPERATE switch to OPERATE
I set both capacitors to middle positions (6 on the scale)
Tune to AM or SSB and listen to the noise floor as I tune the variable capacitors to maximize the noise level. I typically start with the left capacitor, maximize it, then maximize the right capacitor
If the antenna is particularly challenging, I might add 250 or 500PF via the ADD switch
Set the TUNE/OPERATE switch to TUNE
In CW mode, I key down and make fine tuning adjustments with the variable capacitors to make the red tuning LED turn off (high SWR makes the red LED illuminate)
Set the TUNE/OPERATE switch to OPERATE and hop on the air! (Often, I’ll double-check the SWR on my transceiver).
This sounds complicated, but once you’ve done it even two or three times, it becomes routine. I’ve yet to find a wire antenna the ZM-2 can’t match–it’s a very capable tuner.
Pros:
The most affordable option listed here
Very wide matching range
Portable and very lightweight
Requires no batteries for operation
Mechanically simple
Reliable
Cons:
Although not complicated, there is a small learning curve involved
Each time you change bands, you will need to manually re-tune the ZM-2
Not as fast and hassle-free as an automatic ATU
Not weather-proof
Summary: I carry the ZM-2 with me even if I plan to use an automatic portable antenna tuner. If my auto ATU loses power for some reason, the ZM-2 will always rescue me. Plus, it’s just as capable of making tough matches as the ATUs above.
I also love using the ZM-2 to match antennas for shortwave broadcast listening outside the ham bands.
Even if you buy an automatic ATU, I would still encourage you to buy a ZM-2 as a backup. It’s affordable, reliable, and very handy.
As I mentioned above, these choices are just a small selection of what’s actually available on the market. Please share your favorite portable ATUs and experience by leaving a comment!
Smoother FT8 Mode Operation with Constantly Evolving Firmware (IC-705/IC-7300/IC-9700)
Firmware update for the IC-705, IC-7300 and IC-9700* offers smoother FT8 operation. One touch FT8 mode preset, Scroll mode and other updates for each model will be available.
Preset menu screen
* Firmware update for the IC-705 is around late in January, and for the IC-7300 and IC-9700 will be in near feature.
Yesterday, I started the day hoping I might fit in one afternoon activation at a local park. In the morning, however, my schedule opened up and I found I actually had a window of about six hours to play radio!
Instead of hitting a local park, I considered driving to parks I’d been planning to activate for months.
I may have mentioned before that, earlier this year, I created a spreadsheet where I listed of all of the parks I planned to activate in 2020.
From earlier this year–many of the parks listed as “rare” are much less so now!
Each park entry had the park name, POTA designator, priority (high/medium/low), difficulty level for access, and a link to the geo coordinates of where I could park and possibly hike to the site. I spent hours putting that list together as finding park access–especially for game lands–isn’t always easy.
Yesterday morning, I looked at that sheet and decided to knock two, or possibly three off the list.
I had already plotted the park run, driving to Perkins State Game Land (K-6935) near Mocksville, then to the NC Transportation Museum State Historic Site (K-6847) in Spencer, and finally Second Creek Game Land (K-6950) in Mt Ulla.
The circuit required about three hours of driving. Here’s the map: When I plan an activation run, I factor in the travel time, add ten minutes extra if it’s my first time at the site (assuming I’ll need to find a spot to operate) and then assume at least one hour to deploy my gear, work at least ten stations, and pack up.
Using this formula, I’d need to allow three hours for driving, plus an additional three hours of operating time, plus a few minutes to sort out an operating spot at Perkins Game Land. That would total six hours and some change.
Knowing things don’t always go to plan, I decided I’d quickly omit the NC Transportation museum if I was running behind after the Perkins activation. In fact, I felt like the NC Transportation Museum might be out of reach, so I didn’t even schedule the activation on the POTA site.
Perkins State Game Land (K-6935)
I arrived at K-6935 a little before noon (EST).
Since this is the week after Christmas, I had a hunch game lands could be quite busy with folks trying out their new hunting gear and I was correct. I passed by the first small parking area and it was packed with vehicles, so I drove on to the second parking area I identified via Google Maps satellite view.
The second parking area was also busy, but was larger. There was just enough room for my car to park between two trucks.
I donned my blaze orange vest–a necessity at any game land–and walked outside to asses the site. In short? It was a tough one. There were no easy trees to use for antenna support and I simply didn’t have the space. I knew folks would walk through the area where I set up my antenna so a wire antenna would have acted a lot like a spider’s web.
I pulled out my trust Chameleon MPAS Lite vertical antenna and deployed it next to the car. I rolled out the counterpoise into the woods paralleling a footpath so no one would trip on it.
Since I had no room to set up outside, I operated from the backseat of my car–it was actually very comfortable.
I pulled out the Elecraft KX3 and hooked it directly to the MPAS Lite–it easily tuned the antenna on both 40 meters, where I started, then later 20 meters.
I very quickly logged 13 stations on 40 and 20 meters.
While on the air, a number of other hunters discovered the parking area was nearly full–some turned around and left. I decided to cut the activation with 13 logged and skipped doing any SSB work. I accomplished what I set out to do here, was short on time, and I wasn’t actually using the game land for its intended purpose. Better to give others the parking space!
I quickly packed up and started the 30 minute drive to my next site.
NC Transportation Museum State Historic Site (K-6847)
The Cameleon MPAS Lite
I knew what to expect at the NC Transportation Museum because I’ve visited the museum in the past and, earlier this year, scoped out a spot to activate the park in their overflow parking area.
The museum is closed on Mondays. In general, I avoid activating parks and sites that are closed. I never want to give anyone at the park a bad impression of POTA activators.
In this case, however, the overflow parking area is wide open even when the park is closed and there was no one at the site. I felt very comfortable setting up the CHA MPAS Lite which is a pretty stealthy antenna. Indeed, as I was setting up, I’m guessing it was a museum employee that passed by in their car and waved–no doubt, POTA activators are a familiar site!
I set up my portable table behind the car under the hatchback so I took up the least amount of space.
I used the table primarily so I could shoot one of my real-time, real-life videos of a park activation. Readers have been asking for more of these and I’m happy to make them if they’re helpful to even one new ham.
In the end, I logged 13 stations and didn’t try to work more because I was still on track to activate one more park. I didn’t feel bad about only working 13 stations, because this site has been activated many times in the past–in other words, it wasn’t exactly rare.
Again, since I planned to make a video of the activation, I set up my portable table.
I decided en route to the site, that I’d use the Chameleon MPAS 2.0 vertical at Second Creek. Although I’ve used the more compact Chameleon MPAS Lite at a number of parks–including the two previous parks–I had a great spot to deploy the taller MPAS 2.0.
As with the MPAS Lite, deployment was very quick. the MPAS 2.0 vertical is made up of folding pole sections–much like tent poles. As with all Chameleon gear I’ve ever used, the quality is military grade. Full stop.
I started calling CQ on the 20 meter band in CW this time. Within a minute or so I logged my first contact, followed by five more.
I then moved to the 40 meter band and logged twelve more stations in twelve minutes.
I decided to then give SSB a go as well and logged two more stations for a total of twenty stations logged.
I would like to have stayed longer at Second Creek and even used the MPAS 2.0 on 80 meters, but frankly I was pushing my time limit to the edge.
All in all, it was a brilliant three park run!
These days, it’s difficult to pack more than three parks in my available time–in fact, I think this was the first three park run I’d done in months. During National Parks On The Air (NPOTA) in 2016, I’d been known to pack four or five parks in a day–it was so much fun.
Here’s my QSOmap for the day (click to enlarge):
Getting outside on such a beautiful day, driving through some picturesque rural parts of my home state, and playing radio? Yeah, that’s always going to be a formula for some amazing fun!
Many thanks to Rob Sherwood (NC0B) who notes that Icom has published details regarding their new AH-705 antenna tuner which is designed to pair directly with the Icom IC-705 QRP transceiver.
Many Icom IC-705 owners have been waiting to learn more about the AH-705 before purchasing a dedicated portable ATU for their IC-705. Some of these details may help potential customers make a purchase decision.
Key specifications and features per Icom:
Covers the 1.8 MHz to 50 MHz bands
30 m, 98.4 ft or longer antenna: 1.8 – 54 MHz, 7 m,23 ft or longer antenna: 3.5 – 54 MHz * Depending on operating conditions or environments, the tuner may not be able to tune the antenna.
SO-239 antenna connector for 50 Ω antenna such as dipole or Yagi
“Terminal connector”, binding post socket adapter supplied for a long wire antenna
2-way power sources using alkaline batteries (2 x AA cells) or external 13.8 V DC* * 13.8 V DC should be taken directly from an external power supply, not through the IC-705.
IP54 dust-protection and water resistance construction*
* The connectors should be covered with an adhesive tape or a jack cover to prevent water seeping into the connection.
Full automatic tuning, just push the [TUNER] button on the IC-705
Latching relays used for saving power consumption
190 × 105 × 40 mm; 7.5 × 4.1 × 1.6 in, 450 g; 15.8 oz* compact design
* Battery cells are not included.
45 tuner memories
Of course, I don’t have an AH-705 in hand to test yet, so there’s no way I can comment on performance.
Still, I can’t turn of the reviewer inside so I feel I can make some superficial comments assuming the specs don’t change.
Potential positives?
Complete integration with the IC-705
Could (potentially–?) be permanently mounted outdoors at the antenna feed point as a dedicated remote tuner
IP54 dust and water resistant
Power from internal batteries and an external DC source
It’s an Icom product, so I would expect excellent overall quality
Potential negatives?
Maximum wattage is only 10W, which I suppose is okay if you never put an amplifier between the IC-705 and the AH-705
Based on Icom specs, the AH-705 is larger than other portable ATUs at 7.5 × 4.1 × 1.6 inches. For example:
Some have noted pricing around $350 US price–that’s a premium for a portable ATU considering the Elecraft T1 is $180 assembled and many LDG models are less than $200. Of course, none of those ATUs have an IP54 rating, either.
Speculation here, but the AH-705 might only work with the IC-705 or Icom radios with similar ATU commands. One original pre-production prototype image of the AH-705 shows a power switch; the latest images do not. Like the mAT-705Plus, I’m not sure if the AH-705 can be turned on in order to tune only via RF sensing without essentially modifying a control cable to trick the ATU into powering up.
I was a little surprised to see that the AH-705 “only” has 45 tuner memories. In truth, I never really pay attention to this spec because I’m primarily a field operator. My radio sessions are only an hour or two long and I routinely pair my transceivers with a wide variety of antennas, so a portable ATU never has a chance to develop a complex tuner memory map for any given antenna. But as a reviewer, I try to step in other operators’ shoes so I see where this could be a slight negative for those who plan to use the AH-705 at home and connected to only one antenna. As a point of comparison, the mAT-705Plus has 16,000 tuner memories. Still, memories only help shave off a bit of the auto-tuning time. This would never have an impact on my purchase decision.
Biggest positive for me? IP54 rating
Since the AH-705 is designed to be dust and weather resistant, it could be mounted at the antenna feed point. At home, perhaps it could act like an externally-mounted, remotely-controlled antenna tuner. I’m not sure what the maximum length of the control cable could be, but Icom Japan even lists a 16 foot control cable as an accessory. Of course, you would still need to follow Icom’s guidance about protecting the antenna, transmitter and control cable connection points.
Biggest negative for me? The size.
If the AH-705 specs are correct, it’s a little surprising Icom designed a portable ATU that’s this large. As you can see in the image above, it easily fits in the LC-192, but frankly since I’ve been an Elecraft T1 tuner user, I’ll notice that the AH-705 is 3.1″ longer, 1.6″ wider, and .7″ taller than the T1. It will certainly take up more backpack space.
Of course, unless I build an IC-705 control interface for the Elecraft T1, I can’t directly pair it with the IC-705 like I could with the AH-705. That said? I personally prefer pressing a tune button on the T1 and sending “QRL?” instead of hitting the PTT or CW key and allowing the IC-705 to kick in a continuous tune cycle for a few seconds. You might have noticed in some of my videos that when I tune to a new CW frequency, I’ll listen for activity, then tap the TUNE button on the T1 and send “QRL?” or “QRL de K4SWL”. By the time I’ve sent that string, the T1 has typically already found a match.
How will it perform?
I’ve got to assume the AH-705 will perform well. Icom tends to give their products thorough QC before shipping them to customers. I don’t anticipate any issues with the AH-705 as I did with the original maT-705, for example.
I’ll plan to test the AH-705 after it’s available.
Back in the days of the National Parks On The Air (NPOTA) program in 2016, I made it a habit of doing multiple park activations in a morning, afternoon, or evening. I’ve done less of this in Parks On The Air (POTA) this year only because my time is more limited. Still, I love doing multiples because it gives me an opportunity to set up, play radio, achieve a valid activation, pack up, move on and repeat. Makes me feel like the only member of a pit stop crew. I love it!
Some call this RaDAR (Rapid Deployment Amateur Radio).
Monday (December 21, 2020) I had a block of time in the early afternoon to fit in up to two activations, en route to the QTH if all went well. While it wasn’t three, four, or five activations in an afternoon, I knew it would be a challenge to fit both in my tight schedule. If an activation took much longer than 30-40 minutes, I wouldn’t be able to complete both.
Since my goal was a quick activation, I reached for the Chameleon MPAS Lite vertical antenna which is so easy to deploy. I paired it with the Icom IC-705 and new mAT-705Plus ATU.
My first stop was Johns River Game Land. During hunting season, I spend less time in game lands because parking areas are full and even though I wear a blaze orange vest, I’d rather not be shot if I venture into the forest to set up. 🙂
Johns River has a very accessible large parking area off of a highway near Morganton, NC and I’ve never seen more than two vehicles there at a time.
I arrived on site just before noon on Monday and set up at the edge of the parking area. Unfortunately, this parking area is less than bucolic. Those who use this game land access point leave trash everywhere. You can tell groups gather with pickup trucks, make fire pits, drink beer, break bottles and throw their trash in the woods. Being a firm believer in Leave No Trace, this really, really gripes me.
I found a spot with the least amount of trash and set up in the gravel portion of the parking area so I didn’t drive over sharp objects or step on broken glass.
This is where the Chameleon MPAS Lite came in handy: I plunged its spike in the ground, unrolled the counterpoise, extended the antenna, and I was on the air in perhaps three minutes. No need to walk into the weeds and trees to hang an antenna.
I made a real-time, no-edit video of the entire activation with my iPhone. Since the iPhone was in use, I didn’t take a single photo at Johns River. That’s okay, though, because–as I mentioned–there wasn’t a lot there in terms of scenery. 🙂
All in all, I worked 11 stations in short order. The video above approaches 30 minutes, but much of that time is dialog before the activation started. Toward the end, I also have the Mat-Tuner mAT-705Plus tune from 160-6 meters with the CHA MPAS Lite. If you’d like to skip directly to that bit, here’s the link.
I quickly packed my gear and set my sites on the next activation.
Lake James State Park (K-2739)
I arrived at Lake James State Park around 19:00 UTC and was on the air ten minutes later with the same equipment I used at Johns River.
I love Lake James because there are so many picnic sites and all have tall trees (for wire antennas) and gorgeous views. It doesn’t get any better for a POTA activator. Also, it’s a very short walk to the picnic spots. Since I recently sprained my ankle and can’t hike at present, this is a major plus. Like Johns River, I also have mobile internet access at Lake James which was a huge plus since the POTA spotting page wasn’t pulling spots from the Reverse Beacon Network like it normally does.
The Chameleon MPAS Lite 17′ vertical (above) served me well once again.
I worked 11 stations in short order.
Even though a vertical antenna isn’t optimal in the foothills of western North Carolina (due to poor ground conductivity), it had no problem sending my 10 watts across the US into California and up to Alaska. I still get a major thrill out of MPW (mileage per watt) like this!
I also made a short video at Lake James where I primarily talk about the trade off between convenience and performance with regards to field antennas. I also work a few stations on 30 meters:
Here’s a QSOMap of all of my contact from both Johns River and Lake James on Monday December 21, 2020:
Happy Holidays!
Today is Christmas Eve and I’ve no plans to do an activation (torrential rain, if I’m being honest, is dissuading me).
Instead, I’ll spend quality time with my family here at home. Same for Christmas Day. This evening, we’ll watch some our favorite Christmas shows/episodes: The Good Life (a.k.a. Good Neighbors), The Grinch Who Stole Christmas, and of course a Charlie Brown Christmas to cap off the evening.
I know 2020 has put a damper on gatherings with family and friends–our family has certainly felt it this year. With that said, I think the amazing thing about ham radio is the community we build over the air–it’s certainly been an important community for me, this year especially.
Thank you, radio family!
Here’s wishing you, your family, and your friends the very best of the season!
Monday afternoon (December 14, 2020), after completing a long to-do list of errands, I found myself with a chunk of free time in the late afternoon. Of course, I like to fill free time with radio time, so I packed the car and headed to one of my favorite spots: Lake Norman State Park (K-2740).
I love Lake Norman because it’s only a 35 minute drive from my parents’ house (where I was that Monday) and it’s nearly ideal for POTA because they’ve a number of picnic tables widely spaced, and lots of tall trees–a perfect spot for wire antennas. It’s also a quiet location and has good “POTA Mojo”–meaning, I’ve never had difficulty racking up contacts there.
I was the only person at the picnic area of Lake Norman that afternoon. No surprise as it was after 3:00 PM local and temps were on a fast downward trend after a front moved through earlier in the day.
You may be able to see the Emcomm III hanging in the tree.
I used my arborist throw line and deployed the Emcomm III Portable antenna with ease.
On the Air
I hopped on the air around 21:30 UTC and started calling CQ POTA. The Reverse Beacon Network (RBN) spotted me and the POTA website auto-spotted me under a minute. Within ten minutes, I logged 8 contacts on 40M.
I then moved to 20 meters and worked an additional 5 contacts within 15 minutes.
Since I had worked a total of 13 stations, I had three more than needed for a valid POTA activation.
Since I was using the amazing Emcomm III Portable random wire antenna, I decided to move to 160M just to see if anyone work work me on the “top band.”
To be clear, 160 is one of the least active bands in POTA for obvious reasons: few ops care to deploy an antenna that can tune up on 160M, and few POTA hunters have an antenna at home to work the Top Band. Although it’s not as efficient as a resonant 160M antenna, the Elecraft T1 and mAT-705 easily tune it and get a great match.
I called CQ for a few minutes on 1810 kHz in CW and N4EX replied. Woo hoo! My first 160M POTA contact as an activator.
I then moved up to the phone QRP calling frequency of 1910 kHz and called CQ for about 10 minutes. No dice. Since I spotted myself, about two stations attempted to make contact, but unfortunately, my five watts just couldn’t be heard.
I checked the time at this point and it was 22:30 UTC. The sun was setting over Lake Norman, so I started packing up.
It was then received a text from my buddy Mike (K8RAT). The message read, “80M?”
I thought it might be fun to work Mike on 80M, so I re-connected the antenna and tuned up on 3538 kHz.
I think I called CQ once, and Mike replied with a strong signal. We had a nice exchange and when we sent our 73s, I heard a few stations calling me. Of course…the RBN picked up my CQ for Mike and the POTA site spotted me.
To be clear: it’s next to impossible for me to cut an activation short when I have hunters actively calling me, so I started replying.
Getting late…
Turns out, 80 meters was on fire. In 15 minutes, I logged 17 more stations–from Florida to Ontario–with 5 watts.
Next thing I know, it’s dark. Like, pitch dark…
My iPhone struggled to make this photo look brighter without the flash engaged.
Side note: someday, remind me to write a post about how one of my earliest National Parks On The Air (NPOTA) activations carried on until it was pitch dark outside and how that one activation forever changed how I pack my gear. In short: if you’re in the field and you aren’t intimately familiar with your gear and how its packed–even if you have a headlamp–there’s a good likelihood you’ll leave something behind.
It then hit me that Lake Norman State Park closes at sunset in the winter. Doh!
Friendly park rangers
I finished my last exchange (with W3KC) and sent QRT despite a few others still calling me.
As I quickly powered down the IC-705, I noticed a truck pass by slowly on the road behind me. He drove to the end of the road then turned around and stopped behind me. I knew it was a park ranger doing final rounds.
He walked down to my table with flashlight in hand and I greeted him with an apology as I quickly packed up my gear. He was incredibly kind and encouraged me to take my time. He also saved me a trip to the car to grab my headlamp by illuminating the area with his Maglite flashlight/torch.
The park ranger asked a number of questions about ham radio, POTA, and the equipment I was using as I packed up. He told me he’s always found it fascinating and had met other radio amateurs at the park doing activations. I gave him my contact info and I hope he considers checking out the world of radio.
Because I’m meticulous about how I pack (again, lessons learned from the past) I had no issues in low light and left nothing behind.
I drove out of the park at exactly 6:00PM which is the park’s closing time. I was happy, at least, that I hadn’t delayed their closing!
All-in-all, it was a very fun activation–so much fun, I lost track of time. I logged 30 stations all over North America on four bands with 5 watts.
Have you ever found yourself operating and packing up in the dark? Any stories to share or advice? Please comment!
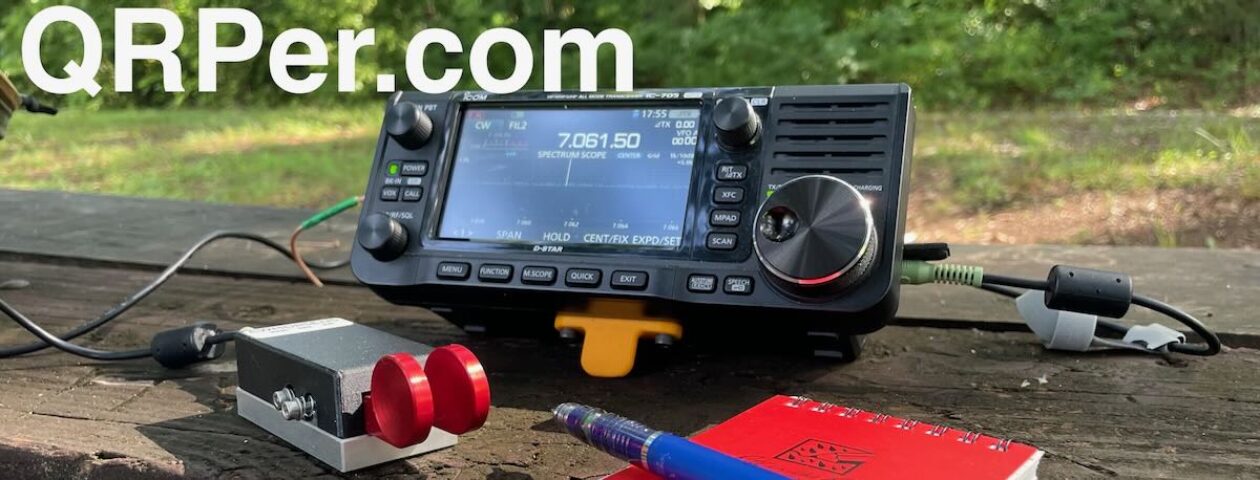
A number of readers have asked about the small foot under my IC-705 in recent POTA field reports.
One of my biggest criticisms of the IC-705 is that it has no built-in foot to tilt the radio for an optimal operating position. On the other hand, it does have a number of attachment points on the bottom including a standard tripod mounting point and several 4mm points.
Shortly after I received my IC-705, I checked Thingiverse knowing a clever ham would have designed some sort of leg or tilt stand.
It prints quickly and uses very little material (no support structure). Mine is made of orange PLA (because that’s what my daughters had been using), but I’m sure ABS would be a better choice.
You’ll need two M4 x 10mm screws to attach the foot to the bottom of the IC-705; mine have hex socket caps.
I’ve found that the foot is small enough that I never need to detach it even in transport.
QRP radios, product announcements, reviews, news and more. Low power amateur radio fun!
Please support QRPer by adding us to your whitelist in your ad blocker. Ads are what helps us stay online. All of our ads are ham radio related--no junk, we promise! Thank you!
 Last week, we had a glorious break in the weather–it felt almost spring-like.


