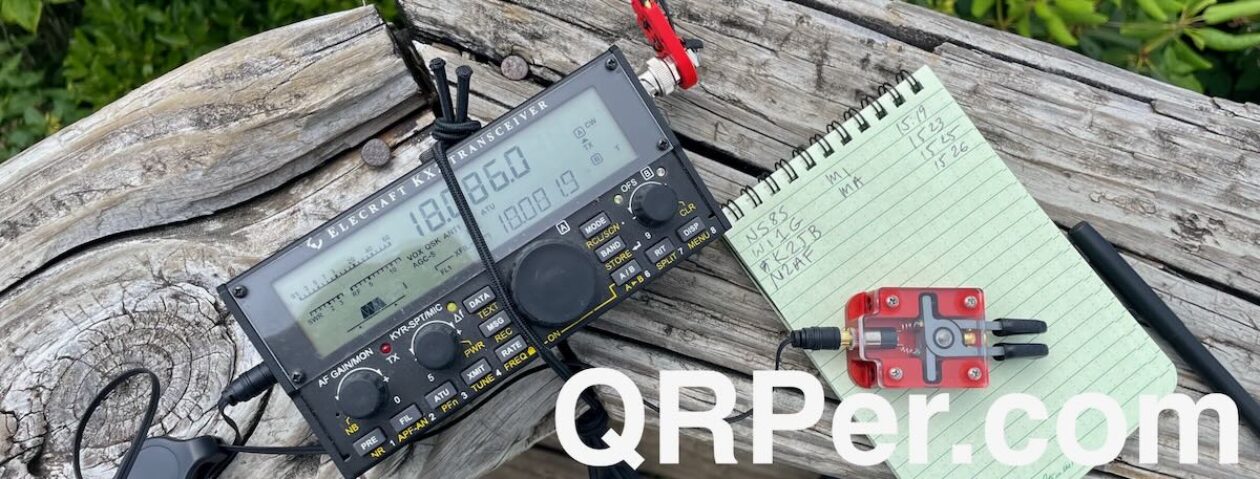
Many thanks to Rich (KQ9L) for sharing the following field report:
Activating K-7839 with lessons learned from my last portable POTA activation
by Rich (KQ9L)
Here in Chicago, we have been blessed with unseasonably warm weather these past two days. I decided to build on my last successful POTA activation and apply some of the lessons I learned from that activation while working this one.
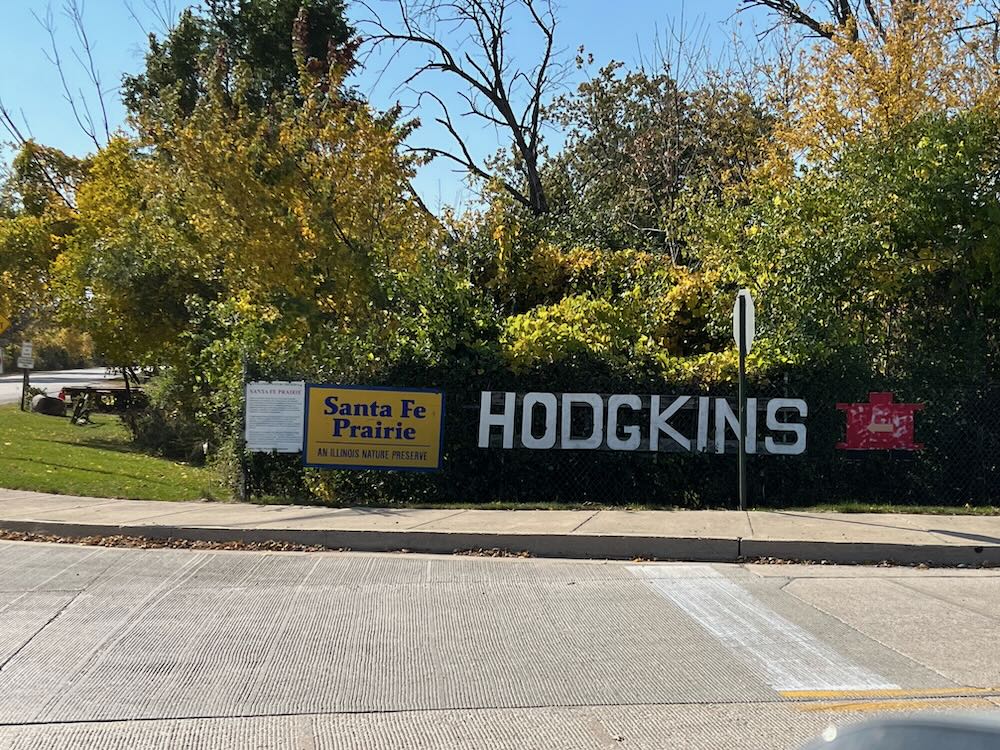
Close to my home is Park K-7839, the Santa Fe Prairie State Nature Preserve (K-7839) in Cook County, IL.
The preserve was established in 1997 and is staffed and maintained solely by volunteers. The park’s mission is to preserve a section of land for people to observe and admire the natural Illinois Prairie Landscape before it was altered by man.
The park itself is a thin sliver of land west of Chicago and is boarded by the Des Plaines River to the south and the rail yard / industrial park on the other there sides. If you look carefully in the second picture below, you can see some Sante Fe trains in the distance.
The park is easy to reach by car and right off the main park road are several picnic tables which I’m sure a ham in a wheel chair can easily access.
There are a number of features of the park which facilitate a POTA activation.
For example, in the picnic area, a Boy Scout Eagle Scout project resulted in the building of a 22ft flagpole. The flags are long gone, but the sturdy pole has been made available to hams for the hoisting of antennas. There are pulleys and easy tie down points to erect and inverted vee antenna.
Many thanks to Scott (KK4Z) who shares the following post from his blog KK4Z.com:
ZN-Lite II Update
by Scott (KK4Z)
I’ve had these paddles for about a year now but I haven’t used them much. Here is a link to my original review: https://kk4z.com/2021/11/24/n3zn-zn-lite-ii/. The reason is rather complex. they are small but because of their design, they can’t be held in the hand like some other paddles. If you put them on a table with the included Lexan base, they are so light, you have to use both hands to operate them. To me, it was a conundrum. These are very well-built, precision paddles and as smooth as any well-made paddle out there. My original thought was to use them for POTA. I was a little discouraged with their functionality, and even offered to sell them at one point — but I didn’t.
Here lately, I have been pairing my paddles with my various radios. My Begali Signature with my IC-7610, Begali Traveler Light with my IC-7300, Begali Adventure with my IC-705, and my N0SA SOTA paddle with my TX-500. I have a Penntek TR-45L on order. It is a CW-only radio that has a nice retro look. I thought these paddles would be a great match for this radio. What I want for this radio is a set of paddles that can be operated with one hand. The TR-45L is a tabletop radio https://www.wa3rnc.com/store/penntek-tr-45l-qrp-transceiver. I envision its use at a park during a POTA activation. I decided what my ZN-Lite II paddles needed was a heavier base. I ordered from Amazon a 3″ diameter, 1/2″ thick piece of steel.
I drilled a hole to mount the paddle and 4 smaller holes to mount the rubber feet. The paddle hole is countersunk on the bottom so the screw head is below (or above) the surface of the base. That way it can be used without the feet.
The holes for the feet were drilled and tapped for 8-32 thread. I had to drill the hole all the way through because I didn’t have a bottom tap. Without a bottom tap, there would not have been enough threads in the hole if I didn’t drill all the way through. When I do these projects, I basically use hand tools and in this case, I used a cheap drill press I bought from Home Depot.
Many thanks to Rich (KQ9L) for sharing the following field report:
Field Report and Lessons from Torrey Pines State Beach (K-3580)
by Rich (KQ9L)
As you can tell from my call sign, I am a W9er, but recently had the opportunity to travel to California and specifically to the San Diego area. I thought it would be fun to try to activate a park near my hotel. I consulted the POTA website and found one park which was within 5 miles of my hotel, perfect!
While planning for the trip, I carefully chose and packed my gear to minimize added weight and bulk of my carry-on luggage. Because on this requirement, I chose my Elecraft KX2 with built in battery, my KXPD3 paddles, a K6ARK end-fed half-wave and the telescoping fishing pole from the PackTenna portable mast system.
Everything fit perfectly into a Lowepro CS40 case and Tom Bihn HLT. I did not bring the tripod from the PackTenna system to cut down on weight and bulk.
The hardest part of traveling with this setup was the fishing pole as I could not fit it diagonally in my carry-on legal luggage and I ended up having it sticking out the top of my soft side Patagonia MLC carryon backpack / travel luggage.
I received a few odd looks from passengers and airline personal but to my relief I did not get hassled for the odd looking thing sticking out of my luggage. To minimize the space my luggage occupied in the overhead storage, I simply pulled the pole out of the luggage and stowed it in the bottom of the overhead bin. Easy! Everything made it safely to my destination and no the got destroyed.
This morning [October 15, 2022] I decided to go out early to activate Torrey Pines K-3580 which is just north of San Diego.
I ran into a problem which I guess I should’ve anticipated. Being from the central time zone and normally a 5 AM riser, I found myself ready to go by 3 AM Pacific time. I dillydallied for a few hours and watched a few of your YouTube videos to get me psyched up and ready for the activation.
Many thanks to Sam (WN5C) for sharing the following guest post:
A Compact CW Filter and Speaker Build for the TR-35
by Sam Duwe, WN5C
I recently built a Penntek TR-35 and, like seemingly everyone, I love it.
Once the rig passed the smoke test I was having too much fun and wasn’t quite ready to put away the soldering station. I had two non-essential wants for this project: a narrower CW filter for listening comfort, and an external speaker. Here’s a quick description of how I crammed both of those into an Altoids tin. Nothing is new or groundbreaking here, but it has been a fun and useful project for me and hopefully will give some inspiration for others.
The Hi-Per-Mite
The heart of the project is a Hi-Per-Mite 200 Hz CW filter, designed by David Cripe NM0S, and sold as a nice kit for $28 by Four State QRP Group. Hans Summers G0UPL uses the circuit in the QCX so many will be familiar with the filter’s sound. It’s nice and narrow with no ringing, and makes using my base station (a Kenwood TS-520 with the 500 Hz crystal filter) a joy.
To be clear, the existing narrow filter in the TR-35 is great, but I like the option of going narrow(er). It’s a Pixie-level build difficulty so it should come together in an easy couple of hours. I originally built mine in an Altoids tin using inspiration from Phillip Cala-Lazar K9PL’s review and it worked very well. It sips current and is powered by a 9-volt battery. With a DPDT throw switch connected to both the audio path and the power you can easily switch the filter on and off.
The Speaker
A neat aspect of the TR-35 is that there is a lot of audio gain so you can drive a non-amplified speaker. I have a little Bluetooth speaker that does this trick when I want to use CW to annoy people, but I figured if I’m already hauling an Altoids tin to the field maybe I could get it to talk, too. I looked around my junk box and found a broken Baofeng speaker mic and salvaged the speaker. It works really well: a robust but comfortable volume.
I’m sure any little speaker would do the trick… nothing fancy here, it gets hot glued it to the lid of a mint tin after all.
The Build
After I built the Hi-Per-Mite here’s what I did: first I ate a tin of Altoids and felt a little sick. Then I drilled some holes. The one on the left is for the audio input, the one on the bottom for the headphones (both of these are 1/8” stereo jacks), and two on the right for two mini DPDT switches. I also drilled holes in the lid for the speaker sound to come through. I gave the tin a good sanding and tried to remove sharp edges, and then sprayed the lot with black primer and spray paint.
Many thanks to Jonathan (KN6LFB) who shares the following guest review:
A review of the EGV+ QRP Transceiver Kit
by Jonathan (KN6LFB)
Introduction
The EGV+ is a QRP CW-only transceiver that covers the 40-, 30-, and 20-meter HAM bands. Designed by Javier Solans, EA3GCY, it is sold in kit form from his website, qrphamradiokits.com.
Javier designed the EGV+ in honor of his friend and co-founder of the EA-QRP Club, Miguel Montilla, EA3EGV. The first page of the instruction manual dedicates the radio to Miguel with this tribute:
This EGV+ transceiver is probably the kit that I have produced with more care and illusion in my life. It is a great honor to name this kit “EGV”, the callsign suffix of the late Miguel Montilla, EA3EGV (SK). With no doubt, this is the kind of kit he liked most. It was my privilege to establish and share with him the first years of the EA-QRP Club. He has always been a referent in my life; when I remember those wonderful years his humbleness, work capacity and generosity are the virtues which shine his image.
How lucky I was to be able to share the path with you, Miguel. Thanks!
Javier Solans, ea3gcy
Specifications
Frequency Coverage: 40m, 30m, 20m
Modes: CW
Power Requirements: 12–14VDC, 1–2A transmit, 0.14–0.25A receive.
Transmitter:
RF Output: 5W @ 13.8V
Harmonics Output: -45dBc or better below fundamental
AGC: acts on the receive path according to the received audio.
Audio Output: 250mW, 4-8 ohms.
Ordering
I purchased my EGV+ kit with the optional enclosure from qrphamradiokits.com. Javier requests that US customers email him using the contact form on his website for the current pricing in USD prior to ordering. At the time of my order (February 2022), the cost with the optional enclosure was $203.37.
Assembly
The EGV+ is a single large (180x140mm) PCB, with separate modules for the OLED display, processor, and Si-5351 frequency generator. All components are through-hole and placed on the top of the PCB. The kit arrived well packaged and well organized. There were no missing or mislabeled parts in my kit, which is impressive considering the high number of components. There are 53 100nF capacitors alone!
The manual contains detailed lists of the components by value/quantity and individually. One of my favorite features of the manual, and something I wish was more common, is a grid-based layout map of the entire PCB [see above], with the grid position called out in the list of individual components. This greatly speeds assembly and diagnosis as you can find component positions more easily.
Many thanks to Brian (K3ES) who shares the following field report:
Field Report: Reflections on a Kilo at Cook Forest State Park
by Brian (K3ES)
Contemplating my favorite antenna tower during the Kilo activation.
Cook Forest State Park in northwest Pennsylvania has always been a special place for me. It abounds in trees (including some of the last virgin timber around), wildlife (deer, turkeys, song birds, squirrels, and the occasional bear), and also includes the scenic Clarion River. When I found out about Parks on the Air (POTA) after getting licensed in 2020, I knew that I had to put POTA entity K-1345 on the air.
Our family cabin; which has been central to all of the phases of my life – including milestones, joys, sorrows, and unadulterated wonder – is located on a plot of land bordered on two sides by the park. It just seemed natural and right for me to do my first-ever POTA activation under an ancient hemlock tree just a few steps over the line from the back corner of our property. That mostly-SSB activation happened in May 2021 with my TX-500 pushing 10 watts into a homebrew dipole suspended from a dead branch up 30 ft in the hemlock.
An early activation of K-1345 from beneath the ancient Eastern Hemlock Tree
Last weekend, I reached a meaningful personal goal by completing my 1000th activator contact from K-1345. After the first activation I never again operated mostly-SSB, and I never increased radiated power. Nearly all of my contacts since have used CW, and many were completed at 5 watts. The added challenge of QRP CW undoubtedly made the Kilo more difficult, but it was also much more fulfilling. It has taken me 28 successful activations, a lot of work to improve my CW skills, and a lot of patient support from the hunters who have shared this journey with me.
My activations at K-1345 tell the story of my journey as a CW operator. I took my first steps on that journey in late 2020, months before I had a portable radio or a plan for my first activation. I started with an Android app, V-Band, and listening to CW exchanges on webSDR. Eventually that progressed to CW Academy basic, intermediate, and advanced classes. The classes really upped my CW game, but what helped even more was using CW on the air. I finally got my HF station on the air in March 2021 and started hunting parks, SSB at first, then increasingly CW. During my first mostly-SSB activation I did manage to hunt down three park-to-park contacts using CW. I started my second activation by calling CQ using CW, and I have not looked back. Wow, those hunters were patient during that first first CW activation! My skills have improved greatly since then, but I’m still not where I want to be. The next goal for me is to gain confidence and proficiency in less-structured QSOs.
I want to thank Thomas – K4SWL, whose real time, real life activation videos challenged, motivated, and inspired me to learn and use CW. I greatly appreciate the work of the CW Academy advisors who guided me through some of the hard work needed for improvement. I also need to thank the hundreds of hunters who have patiently endured my developing CW skill set. Finally, my hat is off for the dedicated POTA volunteers, who continue to improve and expand this amazing activity to the benefit of radio amateurs around the world.
Completing the Kilo activation would have taken me longer if it were not for the tremendous encouragement provided by my gracious, intelligent, and beautiful XYL. As I was contemplating indoor chores on a Friday morning, she pointed out the opportunity to go out and activate during the best weather of the weekend, and save the chores for a rainy day. Who am I to argue with such impeccable logic? Off to the woods we went!!!
I made a point of using the TX-500 with the homebrew dipole suspended in that ancient hemlock tree to complete the Kilo activation, going back toward the starting point, as it were. Of course I did finish with CW mode and 5 watts to commemorate my personal growth during the journey, too. I was set up to go by mid-afternoon. Needing 57 contacts to complete the Kilo, I decided to get some contacts on 20m, then move to 40m a bit later.
Getting started on 20m.
After calling CQ for almost half an hour to get two contacts, I decided to move to 40m a bit sooner than planned…
With the antenna lowered, I am reconnecting the links for 40m.
40m was hot! I completed the eight additional contacts needed for a successful activation in less than 15 minutes. By the 2 hour mark, I had racked up a total of 69 contacts and finished the Kilo.
As a final note, I picked up 55 more contacts on Saturday, bringing my total CW mode contacts over 1000. The rain started early Sunday morning, and I got my indoor chores finished after all.
An arborist throw line works great for setting up the antenna here!Almost any weather is great when you are doing a POTA activation!But sometimes cold fingers limit your endurance…My starting kit for the TX-500.Antennas and accessories for the TX-500 kit. Home-brew linked dipole is on the right.Arborist throw line for the TX-500 kit.TX-500 kit packed for POTA!
A SOTA road trip from Berlin to Tuscany via the Alps and back
On the summit of Kellerjoch OE/TI-311
by Leo (DL2COM)
Flashback March 2021: I am sitting on a couch in the countryside 2h north of Berlin, Germany. It’s a rainy day and my 1-year-old kid just fell asleep on my chest. I am watching Youtube and enjoying the feeling of just having maintained the chainsaw after a productive run preparing firewood.
Then suddenly something special got washed into my feed: Adam K6ARK activating a summit in CW somewhere on the U.S. West Coast. I thought: I have no idea what this wizardry is but this is exactly what I want to do. Right here, right now. Well I have a child to take care of, the next mountain with a prominence of >150m (~500 feet, min. requirement to be a valid SOTA summit) is 3h away, I don’t know what ham radio is, I have no license and what the heck is CW.
Complete SOTA kit incl. 6m mast
Jump to July 2022: I am sitting in my car commencing a vacation road trip to the south of Tuscany, Italy. Due to the chaotic luggage situation at EU airports and unreal prices for rental cars my family and I had decided that we would be better off if I drove down while my wife and kids took the plane without having to check in any bags (btw: best decision ever).
Innsbruck embedded in the Inn valley
Our schedule allowed for me to leave a few days early so I could make room to do a little bit of hiking and throw in a few casual SOTA activations because why not. On top I saw that there were a few never activated summits in close proximity to where we planned to stay. I could feel my heart pumping already followed by a strong reassuring feeling radiating from the well-thought-through contents of my backpack in the trunk. Am I ready? Who cares. I am on my own now. I had completed a quick 1-pointer activation in May and a few POTAs but what was planned now was a different level.
From Berlin to Cortona (Tuscany) via Brenner pass (Alps) (Source: Sotl.as)
Going into detail about every summit would go beyond the scope of this article so here are just a few highlights: The first leg down to the Garmisch-Partenkirchen area went by in a wink (7h drive). I passed most of the time rehearsing CW by singing license plates out loud. The fun peaked with plates along the lines of M-OT-9990 or E-SI-5545. It’s all about melody and timing, remember. I met up with my buddy Chris whom I hadn’t seen in a long time and who agreed to join me on the first hike up Zirbelkopf (8-points summit) to witness the cult activity I had tried and failed to explain to him beforehand.
Many thanks to my buddy Andrea (IW0HK) who posted the following field report to the SOTA reflector and has kindly allowed me to re-post it here on QRPer.com:
IW0HK and IZ0FYL: A climbing route to Gran Sasso (2912 mt.) I/AB-301
by Andrea (IW0HK)
Today I am very happy to be able to share with you a splendid and incredible day in the mountains and radio: together with Luca Iz0Fyl we have decided to activate the western peak of Corno Grande I/AB-301 2912 mt. the highest peak of the Central Apennines, the most important mountain for us enthusiasts who live in central Italy. The choice was not to climb the classic “normal” route but think of a climbing route with passages of 1, 2 and 3 degrees called “direttissima” which allows you to reach the summit through a very steep channel.
Today was with variable weather, rain was expected but in the afternoon, so we left early from Rome and went to Abruzzo. In two hours by car we reached Campo Imperatore where the path towards the Gran Sasso begins. In about 2 hours and 20 minutes we reached the top, making several mountaineering passages but without encountering great difficulties. Continue reading IW0HK and IZ0FYL activate Gran Sasso (I/AB-301)→
Many thanks to Steve (KM4FLF/VA3FLF) for sharing the following guest post:
A Great Homebrew Vertical Antenna
by Steve (KM4FLF/VA3FLF)
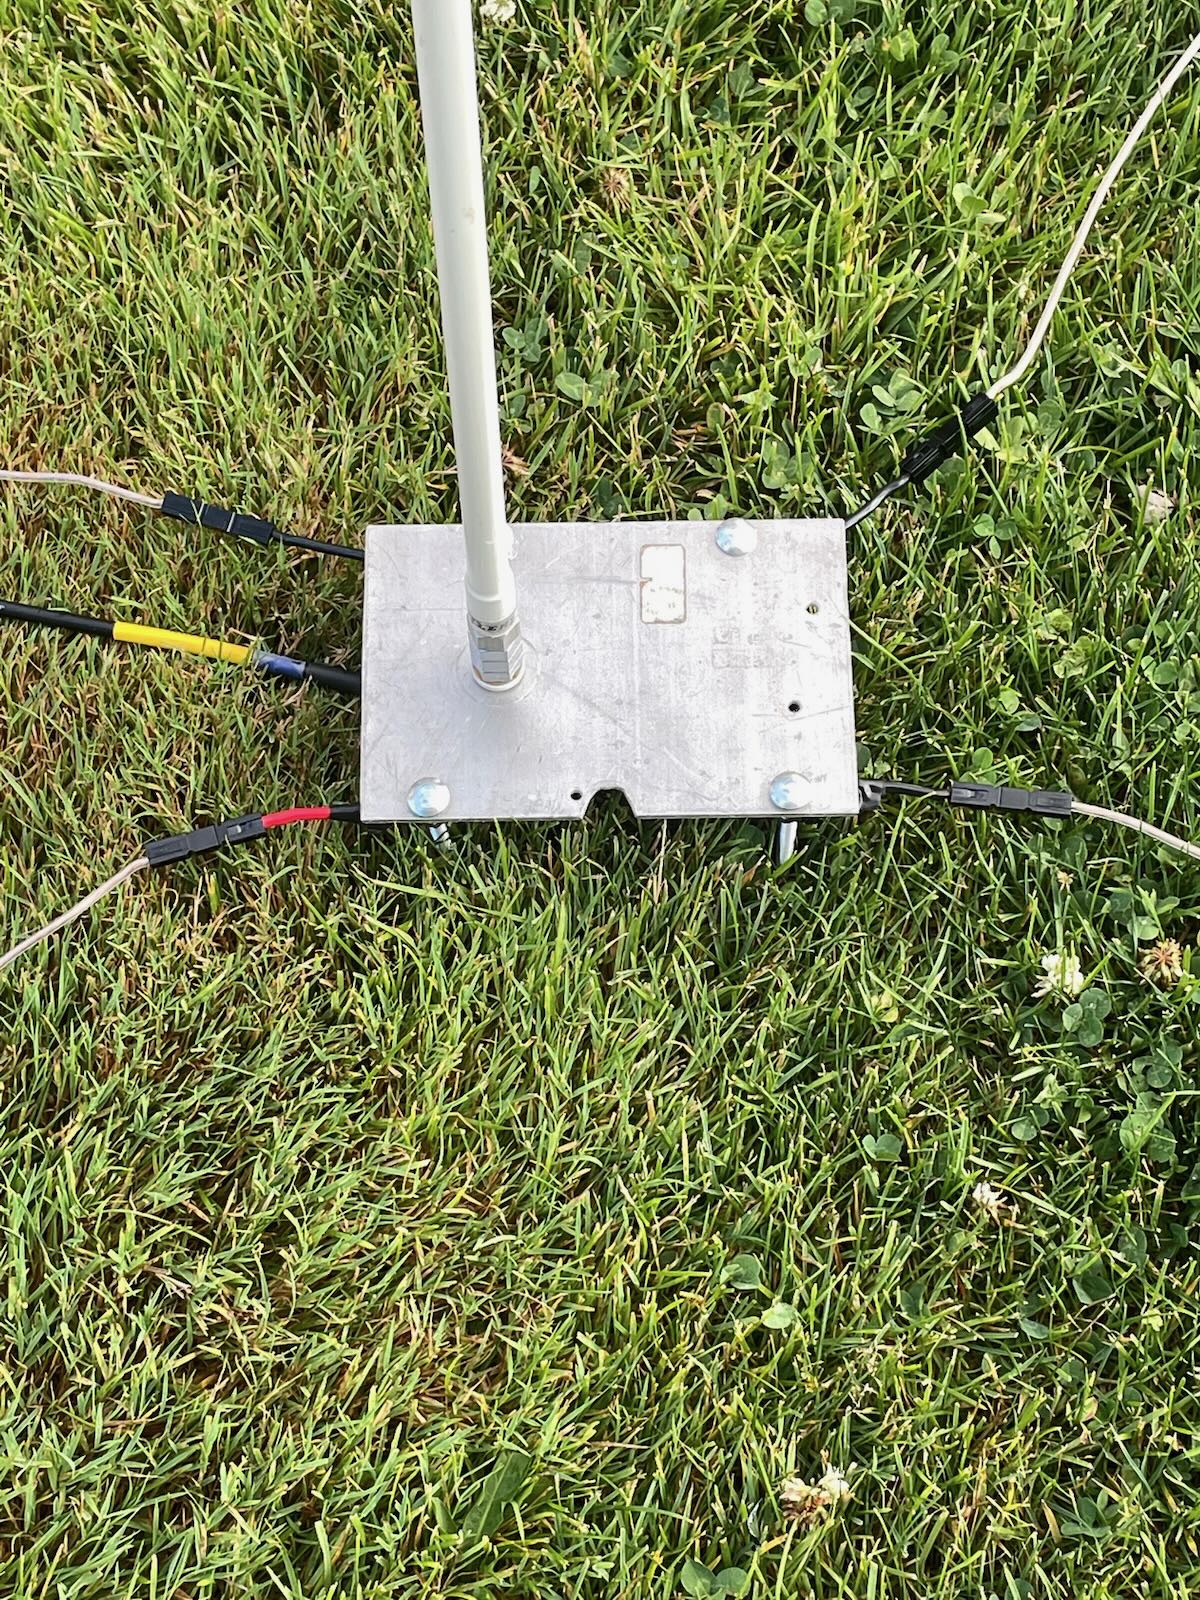
Last spring, I was going through my many boxes of ham “stuff” looking for items to sell at our club tail gate sale. I came across a couple of Hustler SM Series Resonators (20 /40 Meters) that I had acquired. I am not sure where I obtained them, but I decided they were keepers. That decision turned out to be the first step in a year long process that has given me an awesome homebrew vertical antenna.
After doing a little research I found the resonators and accessories at most of the online ham dealers. They are used primarily as mobile and marine antennas. I had seen where a ham had used these on a ground stake as a portable antenna as well. I ordered a Hustler MO1 mast which is 54 inches tall and thought I would attempt to make a portable POTA antenna.
Antenna base
I had a couple of small aluminum plates that I drilled out a few holes. I cut out a notch to put a SO-239 Stud Mount on the plate as my antenna base. I now had a ground plate, connector, and antenna with resonator. By putting a stake in the bottom of the plate, I was able to get the antenna to stand up. The Hustler resonators have a hex screw for tuning that can be loosened. The antenna can be adjusted for resonance by lengthening or shortening the radiator length. After adjusting the radiator my SWR was still horrible on the two bands.
Antenna base close-up
I had some 14-gauge wire laying around and attached it to the plate using carriage bolts and nuts for my ground radials. I didn’t think about the length of the wires at this point but went with three or four lines around 20 to 30 ft. I was able to use my vertical a few times with moderate success. My SWR on 20 and 40 Meters was around 2:0 to 1 at best. It was bulky and very delicate. Sometimes screwing in or unscrewing the MO1 the SO239 would slide off the edge of the aluminum plate. I put away my contraption for the winter and decided to move on to something else.
QRP radios, product announcements, reviews, news and more. Low power amateur radio fun!
Please support QRPer by adding us to your whitelist in your ad blocker. Ads are what helps us stay online. All of our ads are ham radio related--no junk, we promise! Thank you!