Tag Archives: EFHW

Postcard POTA Field Report: Pairing the KH1 with an EFHW at Pisgah National Forest

Welcome to another Postcard Field Report!

If you’ve been following QRPer.com and my YouTube channel for long, you’ll notice that I typically post two field reports with videos per week when my free time allows. Each report takes about four hours to produce along with a video. I’ve got a busy day ahead on the road (including a POTA activation), so in order to squeeze this field report into my schedule, I’m going to use my more abbreviated field report format: a “postcard” format!

Speaking of which….

Pisgah National Forest (K-4510)

On the morning of Friday, November 10, 2023, I had a couple hours to fit in some POTA time.

All morning, we had been receiving some much-needed rain in the form of scattered showers in a constant heavy mist.

I decided to explore picnic areas I hadn’t yet visited in Pisgah National Forest along the Pisgah Highway near Brevard, North Carolina.

I was curious if I might find a small shelter at one of the roadside sites. Unfortunately, I did not; however, I did find quite a few sites that were ideal for POTA with tall trees, space between picnic tables, etc. I decided to pick one at random that had no other park visitors.

I did have a small rainfly in the car I could set up, but I decided to simply risk it. The goal was to pair the new Elecraft KH1 with my (MW0SAW) End-Fed Half-Wave antenna.

I wanted to see if the KH1 ATU could match the EFHW on 30 and 17 meters (outside of its resonant bands of 40, 20, and 15 meters).

Setup

Since I wasn’t using the KH1 pedestrian mobile, I connected my N0SA (“SOTA paddle”) and my Anker Soundcore Mini portable speaker.

Antenna deployment was easy enough (though I did take a few tries to hit *the* tree branch I wanted)!

In no time, I had the KH1 on the air and ready to start calling CQ! Continue reading Postcard POTA Field Report: Pairing the KH1 with an EFHW at Pisgah National Forest

The Best Mountain Topper Antenna: How to build lightweight, in-line links

Many thanks to Dick (K7ULM) who shares the following guest post:


The Best Mountain Topper Antenna

(And a modification that makes it a little better)

by Dick (K7ULM)

When I decided to pursue HF radio, I had already decided to learn Morse Code.  Since learning code on my own wasn’t working, I enrolled in CW Academy classes.   Nearly everyone that I met in the CW Academy classes, plus my Elmer, were all involved in QRP portable ops as well.  A common theme among them all was using efficient, lightweight, easy to deploy antennas.

New to ham radio, QRP, and antennas.  I started to research antennas that fit that set of criteria.  Of course, I stumbled onto K6ARK, Adam Kimmerly’s YouTube video on building an ultralight 40m EFHW.  I accumulated the parts and built an EFHW for 40m.  After tuning the antenna for the lowest SWR, I connected it to a KX3 and contacted hams in Long Island, NY and Atlanta, GA with 12watts using SSB.  I was hooked on QRP and Adam’s antenna design.

When the instructor in my CW Academy class asked what goals each of us had for ham radio, I realized that I had no real goals.  So, I told the group that I wanted to assemble a portable QRP kit that weighed under one pound, and I wanted to operate portable CW from my elk hunting camp in the fall.  The sub-one pound HF kit was inspired by SOTA guru and legend, Fred Mass, KT5X.   I ordered an MTR-3B (Mountain Topper 3b – a QRP CW transceiver), which arrived 2 days before I left for elk camp.  The sub one pound HF kit had become reality.

At elk camp, I was a little distressed that I couldn’t work 30m with the EFHW, but 20m and 40m were a great combination.  Three nights later I was laying on a cot in a canvas wall tent in elk camp scanning the bands and trying to decode signals as I found them.  I heard one signal calling CQ for a long time and decided to try to answer him with my very limited CW skills.  I was able to get the minimum information to make an official QSO.  Looking up the contact’s information on QRZ, I found that it was Lloyd, KH6LC in Keaau, HI, 3000+ miles from elk camp.  Hawaii worked on 5 watts.  I was totally hooked on QRP and CW.

The only problem with the 40m EFHW, is that it doesn’t tune up easily on 30m.  Adam’s 40m EFHW design is excellent, and I wanted to stay with his build design, so I concluded that I needed to put a 30m link in mine EFHW to cover 40m, 30m and 20m without the use of a tuner.   My first effort on building a 30m link worked well but it was heavy and rigid which made it hard to store.  Eventually I created a design for the link that met my goals.

How to build lightweight links

My goals for a link on a lightweight EFHW are that it needs to be lightweight and flexible for easy storage.  It should also be relatively clean in design to minimize the chance of hanging up in trees and bushes while deploying and retrieving the antenna.

The materials for the link design that are currently working the best for me are as follows:

  • Attwood 3/32” tactical cord.
  • Heat shrink tube.
  • Superglue.  Gel type is the least messy.

2mm bullet connectors, or a more solid connection, red knife disconnects from Aircraft Spruce and Specialties Co. https://www.aircraftspruce.com/catalog/elpages/knifedisc.php

The knife disconnects idea is from Charlie Brown of Red Summit RF.  They are worth looking into.  They are my current choice of connector although the bullet connectors are working OK.

The installation of this link is fairly simple.

The first step is to tune a 30m section of wire on your preferred transformer.  The narrow 30m band will normally be well below 1.5:1 across the entire band, which is awesome.  I have found that it is about 32’ 7” of wire for my deployment style and soil conditions.  Your mileage will vary.  You can cut this into an existing antenna but, plan on adding a piece of wire to the end of the antenna to retune it for 20m and 40m.  For an existing antenna, measure the overall length from the transformer to the end of the antenna prior to cutting in the link.  You will use this measurement to restore the overall length of the antenna for the 40m EFHW.

Step two is to cut two pieces of heat shrink tube that will fit over your selected antenna wire and the 3/32” cord.  Slide one piece of tube onto the newly tuned 30m wire and the other onto the wire that will be tuned for the final 40m EFHW.  I use 26ga Polysteath wire.

Step three, cut two pieces of shrink tube to cover the solder joint of the wire connectors and slide one piece of tubing on both wires.

Step four, solder the connectors onto the 30m and 40m wire sections.  When cool, slide the shrink tube onto the solder joint and shrink.

Step five, cut about 6.5” of cord and melt the ends of the cord.  Mark the center of the cord so you can center it on the connectors.  Center the cord on the connectors and slide the shrink tube over one end of the cord.  Leave the final location of the shrink tube exposed for glue.  Put a couple of drops of superglue on that area, slide the shrink tube into its final placement and shrink in place.

Step six, slide the shrink tube onto the other side of the cord and leave a little room to put glue on the cord as was done on the first end.  For strain relief on the connection, it is best to put some slack in the wire, so the full load of the antenna is placed on the cord and not on the connection.  The easiest way I have found to do this is to disconnect the connectors and overlap them by ¼” or so prior to shrinking the second shrink tube into place.  Once everything is ready, put a couple of drops of superglue on the cord, slide the tube into place and shrink.

When you reconnect the connectors, there should be a bit of slack in the wire that prevents any pull on the connectors while the antenna is deployed.  At this point restore the full original length of your antenna for add a new section of wire and tune for 40m and 20m as desired.

With K6ARK’s ingenious EFHW design and a 30m link, you can have a fantastic antenna matched to the MTR3B that is, tuned for resonance on 40m, 30m, and 20m, easy to deploy and weights under 2oz.  If you add one of Adam’s 3D printed paddles, a couple of 500mAHr LiPo batteries, and earphones your complete HF kit will be about 12oz.  Add a Carbon 6 mast and your total kit come in at a mere 23.7oz.  WINNING! 

For those operators who are fortunate enough to own an MTR4B, an 80m removable extension can be added to the 40m EFHW using a similar technique.  On the 40m EFHW, prior to installing the connector, a piece of the cordage can be folded back on itself to create a loop and slid through a piece of shrink tube.  This loop works as a good connection point for your guy lines while deploying the 40m antenna by itself and a place to tie on the 80m extension when needed.

For the 80m section, a single 5” length of cord will be connected to the wire to tie with superglue and shrink tube.  Solder the connector onto the 80m section before securing the cord.  The cord on the 80m extension is to tie the antenna sections together in a manner to provide strain relief for the couplers.  A cord loop can be put on the far end of the 80m section using this technique after it is tuned.

This is my vote for the best Mountain Topper portable easy to deploy antenna, or for any QRP radio without an ATU.  IMHO.

The prettiest activation ever – Spray Valley Provincial Park

As always there are lots of links within the article. Click one! Click them all! Learn all the things! ?

Ahhh .. few things in life compare to the view one sees while lakeside in the mountains. The flat water is a stark contrast to the towering mountains nearby. There is at least a 4000′ difference in height between the two at my destination in this story. For me, nothing so succinctly tells me where I fit in the world as when I stand among these giants.

So It was with that big goal in mind that a drive through the mountains of Alberta’s Kananaskis Country region was called for. The drive would take me through sweeping vistas, over high mountain road passes, along nearly 100km of gravel roads in no-cell-service backcountry while racking up nearly 400km of travel in one day.

Along the way I activated two never-before done parks in the POTA system and scouted out one more to be done at a future date. This is the story of the lakeside activation… but first, watch the short video to understand why I’m gushing on the beauty of this particular spot and written this atypical (for me) article about the activation itself.

The Drive to the activation

Overview of the trip. Darker lines indicate gravel roads. First activation is along the westernmost gravel road along the lakeshore.

For those of you that want to replicate this trip, here’s the route I took shown on the map above.

From just before when I turned north off Highway 541 to Highway 40, and until I reached Canmore, there is zero cell service. Same again turning onto Highway 68 from 40 until Bragg Creek.

Alberta has much backcountry that is well beyond cellular range. Working at The Candy Store(tm) as I do, I have access to items like the Zoleo Satellite Communicator to give me text messaging and SOS capabilities should I need them. Before I discovered SOTAmat, I used the Zoleo for all of my spotting in backcountry.

Continue reading The prettiest activation ever – Spray Valley Provincial Park

Testing the Ionosphere: A 100 milliwatt to 1 watt POTA Activation During a CME? Why not!?

Sometimes, I like the odd “exercise in futility.”

I enjoy shaking up routine and since POTA and SOTA activations are my routine, they end up being the shakers.

On Monday, September 18, 2023, I found out that our planet was rotating into a large CME (Coronal Mass Ejection). This CME made all of the space weather news and we planned for either some potential radio blackouts or at least very unstable conditions.

As I’ve said many times before, I never let the potential for poor propagation stop me from hitting the field. Don’t let it stop you either.

Lake Norman State Park (K-2740)

I had a full afternoon to play radio, so I made my way to Lake Norman State Park.

En route, I tried to think of a way to shake up the activation a bit. I planned to activate at the same spot I had during my last visit because I knew the park’s main trail system was still closed and, frankly, I wanted to take advantage of the EV charger at the visitor’s center again!

I’d packed MW0SAW’s End-Fed Half-Wave (the gift that keeps on giving, Steve) and I did have one new radio toy (more on that later).

I also had a lot of time–at least, more than I normally do during a POTA activation–so I thought it might be fun taking my KX2 down to the lowest power setting it has: 100 milliwatts.

I’ve activated parks with 100mw before, but never intentionally on a day when I knew propagation would be poor.

I figured with enough time, maybe I would get the ten contacts needed for a valid POTA activation.

If not, it would be fun trying!

Why Milliwatting?

At the end of the day, I think taking our radios and antennas to their low-power extremes gives us a taste of what we can actually do with so little signal.

I remember shortly after I bought my first Elecraft KX1 in 2008, I was speaking with a local ham and he told me that a maximum output of three watts was pretty useless and that I really needed a minimum of five watts if I expected to make any contacts.

Part of me did feel like perhaps I’d bought something more akin to a toy–fun to look at and hold, but not terribly practical.

Then I started using that KX1 to make contacts and even carry on extended rag chews. Turns out, three watts gets a lot done!

Today, I’ll often run my MTR-3B with three watts or even less when activating a summit and the results are simply outstanding–fabulous DX and contacts galore.

I know 100mw is a proper compromise, but I like knowing what I can achieve with so little. Tinkering with it in the field and listening to signal reports (also reading RBN stats) gives me a good idea.

In an emergency situation? If I could only push 100mw into a decent antenna, I know it wouldn’t be ideal, but I know it wouldn’t be futile either.

Begali Adventure Dual

Another activation motivation was the opportunity to test my new-to-me Begali Adventure Dual paddles. Continue reading Testing the Ionosphere: A 100 milliwatt to 1 watt POTA Activation During a CME? Why not!?

QRP SOTA: Beautiful day for a hike to the summit of Bakers Mountain!

Sometimes, I crave a nice summit hike but don’t have enough time in the schedule to fit in a long one.

When I’m doing overnight trips to my hometown of Hickory, NC, my go-to spot for a proper hike is Bakers Mountain Park. The icing on the cake is that Bakers Mountain is also a SOTA summit (W4C/WP-007).

I wish Bakers Mountain Park was a POTA site as well, but at present the US POTA administrators aren’t including county and municipal parks–only state and national parks.

For more information about Bakers Mountain, check out this field report in the archives.

On Tuesday, August 1, 2023, I only had about 2.5 hours to fit in a hike and SOTA activation. That was plenty of time to hit Bakers Mountain!

Bakers Mountain Park has a nice long-ish loop around the perimeter of the park called the “Bakers Mountain Loop”; it’s about 2.75 miles long and has a reasonable amount of elevation change over the topography.

Adding in the spur trail to the true summit of Bakers Mountain, I’d say my total hike is about 3.25 miles or so.

Lookout platform on the Bakers Mountain Loop Trail.

Note that I actually include a bit of my hike to and off of the summit in the activation video below.

Setting up

Can you spot the MW0SAW EFHW hanging in the tree?

Once on the summit, I chose a spot to set up. Since I planned to deploy my 40 meter end-fed half-wave, I looked for a branch overhanging the summit perimeter trail.

Next, I deployed my trusty 40 meter EFHW that Steve (MW0SAW) made.

I also forgot my Tufteln/N0RNM knee board, so used my GoRuck GR1 backpack as a field desk. It worked pretty brilliantly, actually. Continue reading QRP SOTA: Beautiful day for a hike to the summit of Bakers Mountain!

The Beauty and the Boring: Two SOTA Summits in Southern Germany

Kreuzschnabel, CC BY-SA 3.0, via Wikimedia Commons
by Thomas (DM1TBE)

As you probably know, SOTA, unlike POTA, provides little to no motivation to activate a place more than once during a calendar year. However, I still activate nearby summits multiple times because I enjoy the location and the activity, even though the activations, or better the points are greyed out.

Therefore, as the calendar year progresses, the travel time to reach a SOTA mountain keeps increasing. When the travel time exceeds one hour one-way, I typically try to schedule two activations on the same day. This is what I did last weekend.

SUMMIT IPF

My first summit was called Ipf (DM/BW-131). The Ipf is a treeless free standing mountain with an elevation of 668 metres / 2,192 ft. At its peak, there is a prehistoric hill fort.

Reconstruction by Geak, CC BY-SA 4.0, via Wikimedia Commons

The flattened top of about 180 m / 590 ft shows evidence of settlement and fortification spanning almost a thousand years from 1200 BC – 300 BC. During its existence, the “princely seat” served as an important regional center of power and aristocratic residence with trade connections to Greece and Italy.

The oval summit plateau was once surrounded by a perimeter wall, which supported a wooden-reinforced wall about 5 m / 16ft wide. There is an information center at the foot of the mountain, where a part of the wall has been reconstructed.

On the flat eastern side, there is an additional intermediate wall trench that extends about 150 m / 490 ft from the main wall. Approximately 60 m / 197 ft to the east, a third fortified line features a wooden-reinforced stone wall. Below the summit plateau by 50-60 m / 164-197 ft, a fourth wall surrounds the south, east, and north sides, shielded by steep slopes on the west. This wall, along with a trench, extends northward to the mountain’s base, safeguarding three preserved well shafts. The ancient castle entrance led from the southeast to the elevated plateau. The old path remains the easiest route, providing scenic views of the trench system. Continue reading The Beauty and the Boring: Two SOTA Summits in Southern Germany

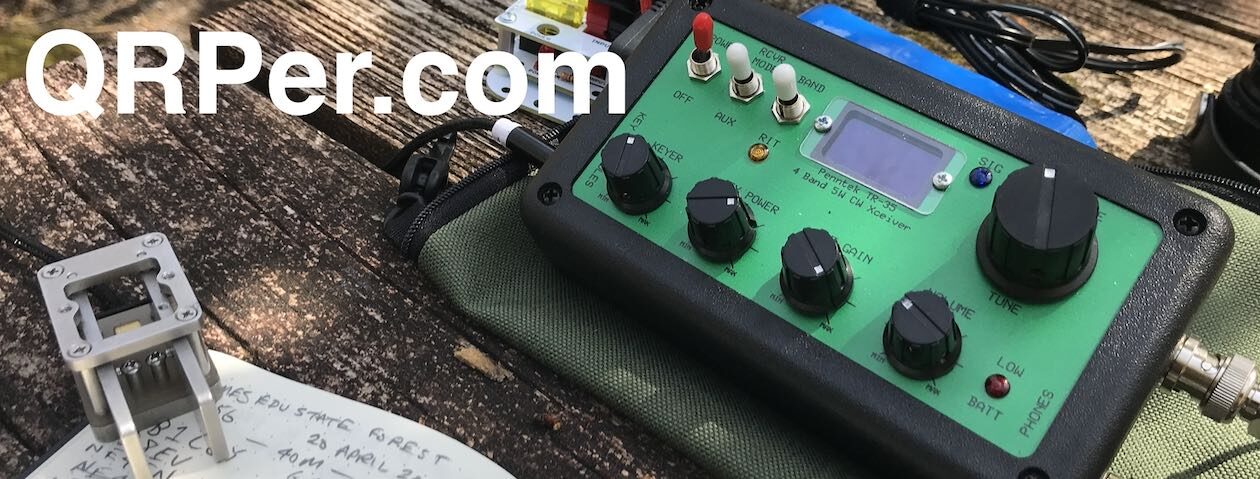
POTA with the Penntek TR-45L and importance of quality cable assemblies!

On the morning of Wednesday, June 14, 2023, I left the QTH with a goal in mind: fit in a POTA activation before taking my sweet mom to an appointment that afternoon. As I’ve mentioned in the past, there are about four park options that are easy detours off the 1.5 hour drive to my parents’ home, so it was very much doable.

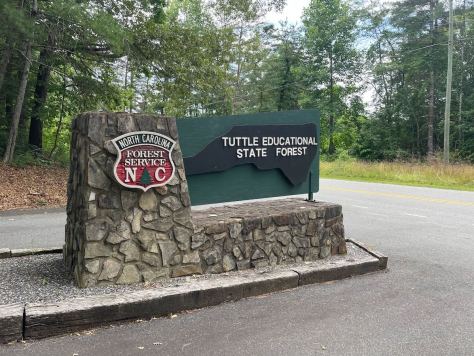
I decided to go to Tuttle (K-4861) since it would be very close to one of my favorite lunch spots (Food Matters in Morganton). I figured I could fit in an activation, then grab lunch after, and still make the appointment with time to spare.

In almost every case, this is how I do POTA these days: it’s all about fitting in activations with weekly travels and errands. It’s rare that I simply plot out an activation or two the day before. More often than not, I schedule my activation a max of 30 minutes before I arrive at the park.

I arrived at Tuttle around 11:30 AM and had the park to myself. There were no other guests there, just park rangers. And lots of birds.

PSA: Buy/Build quality cable assemblies!

A couple days prior, I received a cable assembly sample in the post: a 25 foot RG-316 cable with BNCs on both ends and three series 31 in-line ferrites from ABR Industries. These slim in-line chokes are a new option ABR is offering, hence the reason they send me the assembly.

I speak about this at length in my video below, but I’ve been a customer of ABR Industries for well over a decade now. ABR is a USA supplier of high quality cable, cable assemblies, and other cable components. I’m a huge fan. In fact, I wrote about them separately on the SWLing Post a couple years ago.

Full disclosure: ABR Industries sent me this cable assembly (and one other I’ll feature in a future report) free of charge. They are not a sponsor (although I’d love for them to be) and I’ve no other relationship with them other than being a customer.

I go into greater detail in my video, but I learned a while back just how important it is to use high-quality cable assemblies, adapters, and connectors in the field and at the QTH.

As a field operator, I know my cable assemblies are essentially consumables. With all of the winding, deployments, packing, being outdoors, rough handling, etc. they will eventually fail. (In fact, Alan made a point of this in his latest field report when a mishap in the field broke a good assembly.)

High quality cable assemblies will not only provide better longevity and better durability, but also less loss and overall higher performance. It’s worth the cost because when I hike to a summit, the last think I want to discover is that my cable assembly has failed.

Note that I also build my own cable assemblies (indeed, I feel like all radio ops should learn this simple skill) and try to use quality components and best practices to make the best assemblies I can.

Take-away is: don’t skimp on your cable assemblies. I no longer buy my cable assemblies from random suppliers on eBay or Amazon, I buy them from companies that build and test their assemblies within our hobby; companies like PackTenna, Tufteln, Messi & Paoloni, and ABR Industries.

Here ends my PSA…let’s get on with the activation!

Tuttle Educational State Forest (K-4861)

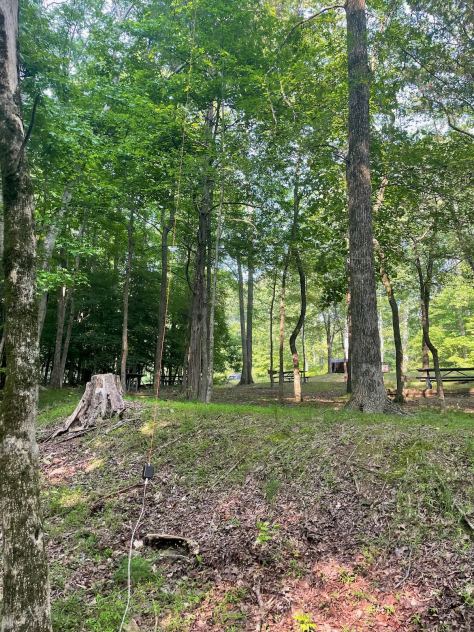
I spent quite a bit of time talking about cable assemblies, then I moved straight into setting up my field gear. I launched a line and deployed my cannibalized 40m EFHW again and connected it to the Penntek TR-45L. Continue reading POTA with the Penntek TR-45L and importance of quality cable assemblies!

Lake Norman: An amazing hike followed by a POTA activation with the TEN-TEC R4020

Somedays, I just need to stretch my legs with a good hike and Tuesday (June 6, 2023) was one of those days!

I had the afternoon wide open to do a POTA activation or two and since I was visiting my folks in Catawba County, I thought about hitting Fort Dobbs State Park and Lake Norman State Park. It would make for a fun two-park rove and would be very doable that afternoon.

Then it hit me that what I really wanted to do that afternoon was to take a nice, long, leisurely hike–fitting in both parks wouldn’t allow enough time for a proper hike.Thus, I ditched the idea of hitting both parks and chose to activate only Lake Norman because it has an amazing six mile “Lakeshore” loop trail that I love.

I arrived at the park a little after noon, parked at the spot where I planned to do my activation later, then walked to the trailhead and started my hike.

It was a gorgeous day–fairly hot and humid (we’re talking June in the Piedmont of NC) but still perfect for a hike.

The trail follows the winding lake shore and is a very easy hike. I’m used to taking more mountainous trails, so to hike along a lakeshore is just pure fun.

I hiked at a decent clip and by the time I made it back to my car, I was pretty darn sweaty. The humidity made sure of that!


Still: the hike was just what the doctor ordered!

Lake Norman State Park (K-2740)

I grabbed my radio gear from the car and found a picnic table under the shade of trees. Continue reading Lake Norman: An amazing hike followed by a POTA activation with the TEN-TEC R4020

This seven hour road trip calls for a QRP POTA break at Yatesville Lake State Park!

On Tuesday, May 23, 2023, I had one main goal in mind: drive from my buddy Eric’s QTH in Athens, Ohio, back to my QTH in Swannanoa, NC.

This was the final leg of my one week Hamvention journey and I was ready to get back home and rest up before yet another road and camping trip only a few days later.

Before leaving WD8RIF’s QTH that morning, I consulted him about possible POTA sites I could easily activate on my journey.

On the return trip, I chose to drive through Ohio, West Virginia, Kentucky, Virginia, Tennessee, then North Carolina.

Eric knows regional parks very well because he’s activated nearly all of them. He suggested Yatesville Lake State Park as it was an easy detour off of Highway 23 in Louisa, Kentucky.

Before leaving Eric’s house, I scheduled the activation and put the address in my car’s GPS/Sat Nav.

Yatesville Lake State Park (K-1272)

I arrived at the Yatesville Lake around 10:45 AM EDT and drove to the campground entrance where I met the campground host. I introduced myself and told her I was looking for a picnic spot to do a POTA activation (explaining to her, of course, what POTA is).

She couldn’t have been more helpful. She pointed out a roadside picnic spot beside us at the campground entrance, she also noted some covered picnic shelters nearby (that seemed to be in use), and even told me I could drive into the campground, find an empty camping spot and just set up there! A very generous offer, but I opted for the roadside picnic table next to me at the campground entrance since I was already parked in the right spot.

There wasn’t much to this particular site; just a picnic table and corn hole game next to the road in full sun. I had my sun gear on (wide brimmed hat and long sleeve lightweight hiking shirt) so the lack of shade wasn’t an issue.

There were plenty of trees on the perimeter of the site, but none would be an easy snag for my throw line because there were no branches overhanging the perimeter. Still, I knew if I launched the throw weight as close as I could to the tree line, I should be able to snag a small branch without having to search in the woods for the end of the line.

As long as I could suspend my mostly homemade 40 meter end-fed half-wave, I’d be a happy activator. Continue reading This seven hour road trip calls for a QRP POTA break at Yatesville Lake State Park!

The joy of a low-slung wire

(As is my usual, this article has a bunch of links – click on as many as you wish to receive the full experience)

by Vince (VE6LK)

In May of 2023 I embarked on a two week vacation to Hamilton Ontario that co-incidentally happened to include a side trip to Hamvention just outside of Dayton, Ohio.

For a guy living in Alberta, Canada, this would prove to be quite the trip and it created memories to last a lifetime. I also was told that I could play radio during the trip provided my wife would get to see some of the many waterfalls in the City of Hamilton, the area we’d call home for our two week trip.

At Niagara Falls

Yes, I did take a brief detour to Niagara Falls while on the trip as it is only an hour from Hamilton.

And thus the planning began. I started overlaying POTA entities that overlapped on waterfalls so we both could visit and enjoy in our own way. It also meant I had to figure out what radio gear and, most importantly antennas, to bring along.

I landed up mostly running with low-slung antennas. By this I mean something between 4 and 10′ off the ground and horizontal in orientation. But it’s what I discovered about this simple approach that made it appear like pure magic to me – I made great contacts at what I would consider to be beyond NVIS distances including one from OH to UT!

Continue reading The joy of a low-slung wire