
The more I use my Penntek TR-45L “Skinny” the more I love it.
Although, in truth, I loved it from day one because it’s just a flatter, more portable version of my original TR-45L.
The audio is wonderful, the controls are simple, and the receiver is top-shelf. Any excuse to take it to the field!

On Sunday, April 28, 2024, I made a quick trip to visit my father in Hickory. He was still in the hospital at that point and I wanted to spend the morning with him and get updates from his specialists and doctor. He was improving which was a very good thing indeed.

After spending a few hours with my dad, I could tell he wanted to take a nap, so I thought it a good time to head back home, with a short detour at Lake James.
Lake James State Park (US-2739)
 It was an absolutely beautiful day to be outdoors. I expected Lake James to be packed on a Sunday, but the Catawba River Access wasn’t too terribly busy. I imagine the more popular Paddy’s Creek Access was much busier.
I decided to set up at a picnic table close to the parking area–one I’ve used before and one that makes it easy to deploy an end-fed half-wave without creating a tripping hazard for others.

I deployed the 40 meter EFHW that Steve (MW0SAW) made for me a couple years ago.

Setting up the TR-45L was easy enough especially since the padded bag Penntek sells so easily accommodates all of the items needed for an activation. In fact, it is spacious enough I could easily put an antenna and feed line inside, too, but I opt to simply carry those in my backpack.

With everything set up, it was time to hit the air!
Gear:
 Note: All Amazon, CW Morse, ABR, Chelegance, eBay, and Radioddity links are affiliate links that support QRPer.com at no cost to you.
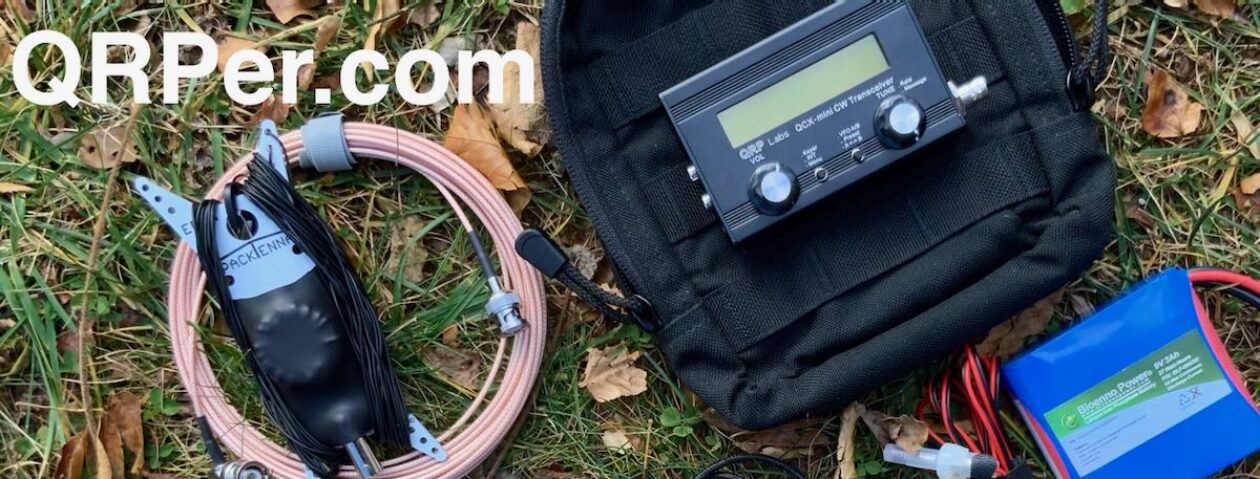
- Penntek TR-45L Skinny
- ABR Industries 25’ RG-316 cable assembly with three in-line ferrites (Use Coupon Code ABR10QRPER for 10% Discount!)
- MW0SAW end-fed half-wave
- Key cable: Cable Matters 2-Pack Gold-Plated Retractable Aux Cable – 2.5 Feet
- CW Morse Outdoor Double Paddle With Steel Base
- GoRuck GR1 USA
- Bioenno 3 Ah LiFePo Battery (Model BLF-1203AB)
- Weaver arborist throw line/weight and storage bag
- GraphGear 0.9mm 1000 Automatic Drafting Pencil
- Rite In The Rain Top Spiral Notebook
- Camera: DJI OSMO 4 action camera with Sensyne Phone Tripod
- DJI Wireless Microphones
On The Air

With band conditions having been so unpredictable lately, I wasn’t sure what to expect. My schedule only allowed for a short activation, so I hoped to wrap things up within 30 minutes.
 Twenty meters seemed like the most promising band, and thankfully, it was in decent shape. I started calling CQ POTA, and to my delight, the first ten stations were logged in a mere ten minutes! It doesn’t get much better than that.
 I continued making contacts for a few more minutes, logging four additional stations. Then, with the band quieting down, I decided to call it a day.
 I would have loved to spend more time on the air, but I was also eager to get back home to my wife and daughters. Sometimes, a short activation is all you need.

QSO Map
Here’s what this five-watt activation looked like when plotted out on a QSO Map:

Activation Video
Here’s my real-time, real-life video of the entire activation. As with all of my videos, I don’t edit out any parts of the on-air activation time. In addition, I have monetization turned off on YouTube, although that doesn’t stop them from inserting ads before and after my videos.
Note that Patreon supporters can watch and even download this video 100% ad-free through Vimeo on my Patreon page:
Click here to view on YouTube.
Penntek radios
 On a bittersweet note, I mentioned previously that John (WA3RNC) is closing down the Penntek shop this year and will no longer manufacture transceivers. If you haven’t already placed an order for a Penntek transceiver, you might not be able to snag one at this point. I would check the updates on the Penntek site for more information. I felt John’s radios were so unique and packed with proper field performance.

Then again, at 77 years old, John deserves to enjoy his retirement to the max, so I’m happy for him.

I know I’ll never sell my Penntek radios and I’ll do all I can to take care of them so they serve me over the long haul! I’ve no doubt that they will.
Thank you
 Thank you for joining me during this short POTA activation!
I hope you enjoyed the field report and my activation video as much as I enjoyed creating them!
 Of course, I’d also like to send a special thanks to those of you who have been supporting the site and channel through Patreon, and the Coffee Fund. While not a requirement, as my content will always be free, I really appreciate the support.
As I mentioned before, the Patreon platform connected to Vimeo makes it possible for me to share videos that are not only 100% ad-free but also downloadable for offline viewing. The Vimeo account also serves as a third backup for my video files.
Thanks for spending part of your day with me! Have an amazing Memorial Day weekend!
Cheers & 72,
Thomas (K4SWL)


