Last week, I thoroughly enjoyed taking the Yaesu FT-817ND to the field.
While the ‘817 lacks features I’ve come to appreciate during field activations like voice and CW memory keying, it’s still an incredibly fun and capable radio.
Last Monday (January 18, 2021), I had an opportunity to visit Lake Norman State Park (K-2740) and perform an activation around lunchtime. Lake Norman is convenient to my hometown of Hickory, NC and these days I typically spend at least a couple nights there doing a little caregiving for my parents. It’s rare my schedule is clear at lunchtime to fit in an activation–typically it’s later in the afternoon.
As with my recent activation at Lake Jame State Park, I paired the Yaesu FT-817ND with my Par End-Fedz EFT Trail-Friendly 40/20/10 meter resonant antenna.
It was an incredibly fun activation and one of the few recently where I racked up some great QRP contacts across the 20 meter band before moving to 40 meters.
Here’s my QSOMap of the activation (red lines are phone, green are CW):
As with most of my activations, this one was relatively short. Rarely do I have more than 45-60 minutes of on-air time during a POTA sortie.
I also made another real-life, real-time, no-edit video of the entire activation. If interested, you can view it via the embedded player below or on YouTube:
I’m long overdue a multiple park run, so will start strategizing soon! The Parks On The Air program has also added a few new park in North Carolina, but none appear to be in the western part of the state.
Oh, and Phillip, thanks for prompting me to take the ‘817 to the field again. It is a gem of a rig and I think it might suit your needs very well!
One question that often faces newcomers to the hobby is: “Should I buy a QRP or a 100W transceiver as my first rig?”
That is a very deep topic, actually, and one to explore in a future post. A 100 watt transceiver will certainly give you more options as they can often pump out 100W or be turned down to 1 watt. If you’re a phone operator only, that’s got some serious appeal. Then again, if you’re operating POTA or SOTA where you are the DX, power–while still important–is much less so than, say, if you were at home trying to work DX.
Again, a deep topic for another post because there is no right or wrong answer.
One of our readers (Phillip) reached out to me a couple weeks ago and asked if the Yaesu FT-818 would make for a good first HF rig. He liked the portability factor, the build quality, the HF/VHF/UHF multi-mode coverage, and the overall flexibility of the rig as a field radio. His goal was to do POTA activations.
We had quite a few emails back and forth about the pros and cons and I decided it might make more sense to simply take my Yaesu FT-817ND (which is nearly identical to the FT-818) to the field and activate a park in both SSB and CW. Since I knew he wouldn’t necessarily have an external antenna tuner from day one, I paired the FT-817 with my resonant 40/20/10 meter end-fed antenna.
Lake James State Park (K-2739)
On January 17, 2021, I pulled into my favorite part of Lake James State park and quickly set up my station. I only had about one hour to complete my activation, so knew this would be a very brief excursion. Since I actually had a minimal amount of gear, it was a quick setup.
Since I deployed a resonant antenna, there was no tuning or matching involved which not only makes the most of your 5 watts (in that it’s more efficient), but also saves a bit of time in set up and tuning up.
I’m testing this prototype at the moment, but didn’t need to employ it at Lake James since it’s really useful when the rig is on your lap or on on the ground. It essentially gives you top-mounted controls and a larger display to read front panel information from above–incredibly useful for SOTA and proper in-the-field activations. Andy’s v3 board will include a memory keyer–I can’t wait for that one!
Since I had Internet access at this park, I used my Microsoft Surface Go logging tablet to spot myself to the POTA network. I started calling CQ on 40 meters phone (SSB) and within six minutes logged eight stations. Not bad for 5 watts and a wire!
Next, I moved to CW on 40 meters and started calling CQ POTA. The POTA spots page auto-spotted me via the Reverse Beacon Network in short order. In eight minutes, I worked six more stations.
I then moved to twenty meters which was essentially dead, so I called it quits a bit early. I needed to pack up and head to my next destination.
Here’s a QSOMap of this short activation (red polylines are SSB and green CW):
Truth is, each time I use the FT-817, I love it more. Sure it’s only 5 watts, has no ATU, has a small display, a clicky T/R relay, and questionable ergonomics, but it is a keeper for sure. Even after 20 years of being in production, it still holds its own and is an incredibly popular radio for good reason.
As I told Phillip, the 817/818 is the Toyota Corolla of the QRP radio world.
Note that this post was originally published on theSWLing Post, but I feel like quality cable is especially important for those of us who are into field activities like Parks On The Air (POTA) and Summits On The Air (SOTA) where our gear gets a lot of handling and outdoor time.
Two radio accessories I often forget to mention in my posts and reviews are cable and connectors. When a cable functions well, it’s taken for granted and easily overlooked.
You’ll hear me say that a radio is only as good as its antenna and while that’s true, the important link in the system is your antenna cable and connectors. If you have a fabulous antenna and a benchmark radio, but you connect the two with substandard cables, it will create unnecessary losses and even shorts if you’re not careful.
But let’s be honest: it’s easy to cheap out on cables.
When I first started using tabletop receivers and transceivers in my youth, I had a tight budget. When I would go to a local hamfest where I’d find excellent prices on cable assemblies from those accessory retailers who sell a little bit of everything. You know…the tables with everything from $10 multimeters to $5 blinking lights–? I’d find their prices for cable assemblies too attractive and would grab them.
No more.
Back when I owned my original Yaesu FT-817, I used one of these cables on Field Day and blew my finals due to a small short ono a connector end (if memory serves, braiding was touching the conductor). From that point forward, I decided I’d invest in quality cables.
ABR Industries
At the Hamvention in 2010, I found ABR Industries’ table. The only thing they had on display were cable assemblies and a handful of cable accessories. I picked one cable up and inspected it–I could tell it was good quality. Although I know how to make my own cable assemblies (with PL-259s, at least) I appreciate professionally-built assemblies.
I spoke with the representative that day and learned about their company and how they go about making standard and custom cable assemblies in the USA for the consumer, commercial, and government markets.
Although the price was at least double what I would have paid at one of the discount retailers, I never looked back.
From that point forward, I’ve only purchased ABR cables typically at Hamvention, Universal Radio, or even directly from ABR’s website (when I ordered custom assemblies).
The quality of ABR cables is second to none. I have never had one fail at home or (especially) in the field.
For my QRP POTA activations, I started investing in ABR316 and ABR100 BNC to BNC assemblies. I’m especially fond of the ABR316 assemblies (above) because they’re so resistant to memory when I coil them.
You pay for what you get
I suppose this is on my mind because I’m about to do an assessment and make another ABR order so that my new field radio kits have their own dedicated cable assemblies with correct ends (so I’m also not forced to use BNC or PL adapters for matching).
I’m also replacing some of my 3 foot cable assemblies with SMA connectors to PL-259 for my bank of SDRs. This is a part of achieving one of my goals for 2021. I’ll know then that each receiver will have a quality link to my antenna splitter and antenna.
My point here is don’t skimp on your cable, adapters, or cable assemblies.
If you have the skill to build your own, buy quality components and take your time building them.
If you prefer purchasing pre-made cable assemblies, talk with your local ham radio retailer, or seek out cable assembly houses like ABR Industries. I’d avoid purchasing cheap cables you may find on eBay or Amazon.com, for example. That’s not to say that there aren’t quality discount assemblies out there, I just prefer buying from a company that takes pride in their work and stands behind the quality.
ABR Industries isn’t a sponsor of the QRPer (although I’d love to add them!)–I’m just a long-time customer who is happy to plug their products. I can recommend them without reservation.
I’ve also bought numerous long cable runs, wire, DC cable, ladder line, paracord, and sealant from The Wireman. I also highly recommend them.
ABR isn’t the only quality cable assembly house–there are many others throughout the world. Who do you recommend? Please leave a comment and links to your picks!
Last week, I activated Pisgah Game Land and Pisgah National Forest (K-6937 & K-4510)–things didn’t exactly go according to plan. I still achieved a valid activations–meaning, I logged ten contacts–but I cut my antenna too short.
In short: I cut my wire antenna too short and my KX1 and KX2 ATUs couldn’t find an acceptable impedance match on the 40 meter band. This pretty much forced me to make do with 30 meters and above unless I modified or switched antennas.
The 40 meter band tends to be my most productive band, particularly on days like last Saturday when I’m operating in the latter part of the afternoon.
Maybe it was stubbornness, but I was determined to make a valid activation with that four-feet-too-short antenna.
I first hopped on the air with my Elecraft KX1 (above) and logged a few contacts on 30 meters. I then tried 20 meters, but the band was dead.
Eventually, I pulled the Elecraft KX2 out of the bag with the hope it might actually find a match on 40 meters, but as I said in my previous post, that darn physics stuff got in the way.
That’s okay, though. Although the sun was starting to set and I didn’t want to pack up in the dark, I took my time and eventually logged ten contacts for a valid activation. I actually enjoyed the challenge.
I complain about my wire antenna, but in the end, it made the most of my three watts by snagging stations from New Hampshire, Ontario, Illinois, Arkansas and several states in between.
Against my better judgement, I made a video of this activation. As with all of my videos, they’re real-time, real-life, and have no edits. (They also have no ads.)
A few readers and subscribers had asked me to include the odd video where I actually do a full station set up including the installation of a wire antenna–that’s what you’ll see in this video:
At the end of the day, this was still an incredibly fun activation.
This was the first time I’ve ever completed a valid activation only using the 30 meter band.
Next time, though, you’d better believe I’ll cut my antenna to be the ideal length for 40 meters and above!
How long?
If you use a similar antenna with your KX1, KX2, KX3, or other transceiver, I’m curious what lengths you find work best for 40 meters an above. Bonus points for 80 meters. Please comment!
When my buddy Don told me he was selling his Icom IC-703 Plus a few weeks ago, he caught me in a (multi-year long) moment of weakness. I asked his price and followed up with a PayPal transaction without giving it a lot of thought. It was a bit of an impulse purchase, if I’m being completely honest, but he definitely gave me a “friends and family” discount. (FYI: Don is the same enabler that made this purchase happen.)
I’m thinking the IC-703 Plus might be a good first HF rig for my daughter (K4TLI) and, of course, it’ll be fun to take it to the field from time to time.
Of course, the best way to get to know a radio, in my opinion, is to take it to the field. So that’s exactly what I did last week (January 13, 2021).
Blue Ridge Parkway K-3378
Against my better judgement, I decided to make a video of the activation. I mean, what could possibly go wrong operating a radio for the first time in the field? Right–?
I picked out an “easy” park for this activation: the Blue Ridge Parkway.
Although most of the parkway around Asheville, NC, is closed to vehicle traffic, the Folk Art Center is open year round and a very convenient spot for POTA.
I paired the IC-703 Plus with my Chameleon MPAS 2.0 vertical antenna. I was curious how easily the IC-703’s internal ATU could match the MPAS 2.0: turns out, pretty darn well!
I started the activation on 40 meters phone (SSB).
Almost immediately, I logged a few contacts and that quickly built my confidence that even the default voice settings were working well on the IC-703 Plus.
I then moved to 40 meters CW and used the CW memory keyer to call CQ (I pre-programmed this before leaving the QTH that day).
Then I experienced a problem: when someone answered my call, my keyer didn’t work properly. For some reason, it was sending “dit dash” strings from both sides of the paddle. I’m not entirely sure what happened but assume there was either a radio glitch or a small short in my paddle cable. After fiddling with the IC-703 for a bit, I pulled out my Elecraft KX2 and finished the CW portion of my activation. (Always carry a spare radio, I say!)
Actually, I assumed since I was using the IC-703 for the first time, there could be hiccups as I did not do a full rig reset prior to putting it on the air–settings were essentially what they were when Don had the radio.
Here’s one of my real-time, real-life no edit videos of the entire activation, if you’re interested:
Back home, I connected my CW Morse paddles up to the IC-703 and it worked perfectly. Even though I checked the connections in the field, I must assume one of the plugs simply wasn’t fully-inserted. It hasn’t repeated this since.
Despite the CW snafu, I’m very pleased with the IC-703 Plus so far. I like the size for tabletop operating and it’s actually surprisingly lightweight.
If you own or have owned the IC-703, please comment!
I don’t know about you, but part of the fun of playing radio in the field are the inevitable frustrations.
It might not feel like it in the moment, but when I eventually overcome the challenges of a mistake, I feel like I’ve truly accomplished something.
That was my little epiphany this morning: making mistakes has perhaps made me a better radio operator. Less-than-efficient field deployments have honed my skills and had a major influence on the gear I pack.
If you’ve read some of my (rather rambling) field reports in the past, you’ll note that I rarely do field activations with the exact same gear combinations each time. I feel fortunate enough that I can pair different radios with different antennas and different accessories. I get a small thrill out of not knowing exactly how well a combination will work, especially if I’m not activating a rare all-time new park or tough summit for that matter. In cases where getting to the site is a challenge in and of itself, I want to use a trusted combo of gear.
It’s that wee bit of mystery that attracts me to the field.
If I approached POTA more like a contest–where activation and contact numbers were my focus–I would have installed a mobile HF rig in my car a long time ago. I could rack up way more parks and contacts that way. It especially simplifies multi-site activation days since it effectively eliminates the time involved in setting up and later packing up gear. Mobile operating is the most efficient way to hit number goals: drive up to a site, start calling CQ, work your stations, then move on.
K-6937 & K-4510
(Photo credit: K4TLI)
Yesterday, I did a last minute “two-fer” activation of Pisgah National Forest and Pisgah Game Land. I had not planned to do an activation that day–temps never rose above 29F (-2C) at the QTH day and it also snowed and flurried all day long. Winds were very gusty as well, so it effectively felt much colder on the skin.
I wanted to hike up to the ridge line behind my QTH and do the activation but I knew up there temps would be lower and (worse) winds much stronger. Cold doesn’t really bother me, but strong winds do. This was also the first weekend my ankle felt almost normal after twisting it badly last month. It’s healing and I hope will be in shape for a long hike from my QTH to a six point SOTA summit next weekend with my daughter (K4TLI).
All of those factors combined pointed toward simply staying at home, drinking coffee, and reading a book.
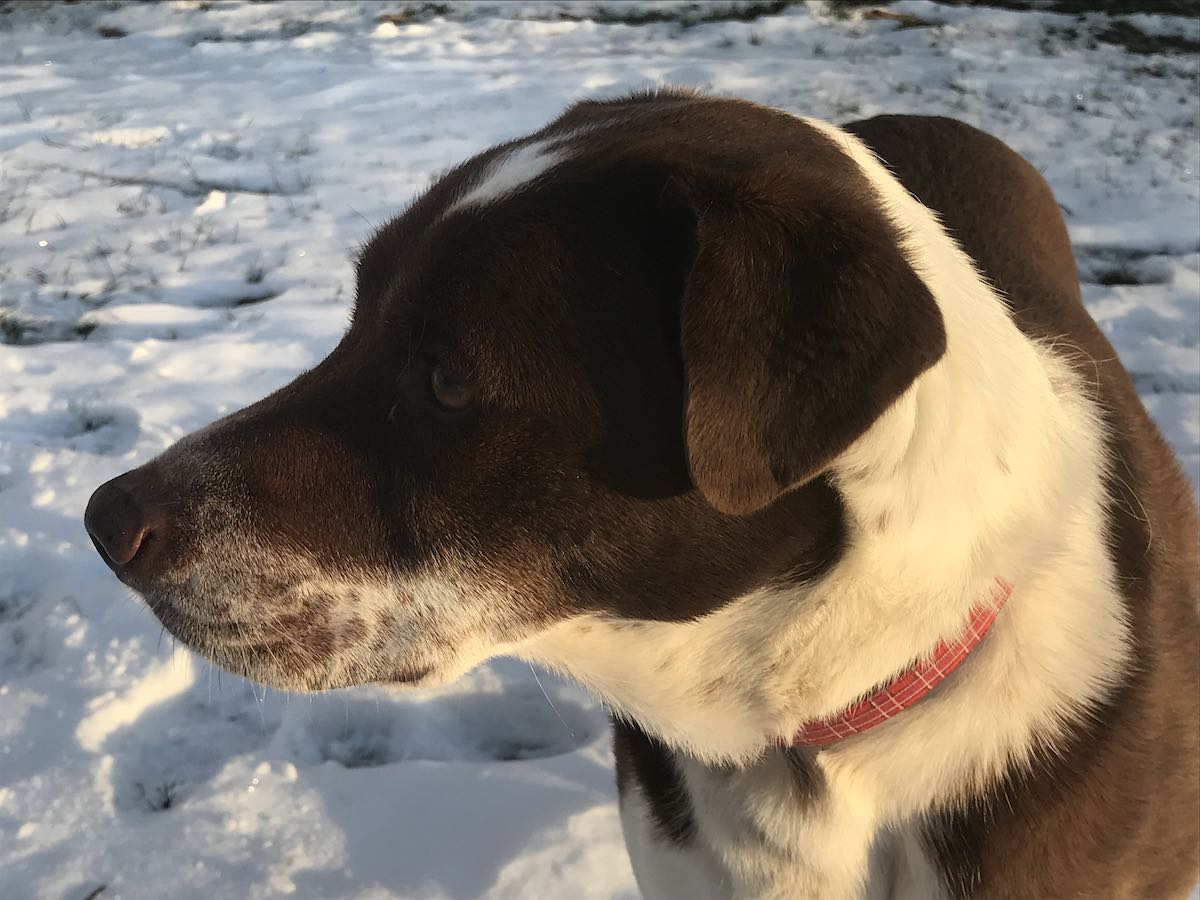
Hazel was ready for some field radio fun, though. (Photo credit: K4TLI)
But I really wanted some outdoor time. And I really wanted to make an activation with my Elecraft KX1, so I decided that instead of hiking up in elevation 800 feet, I’d drive down about 900-1,000 feet to a forest trailhead. That would get me on the air in a protected valley with less wind, less snow, possibly warmer temps, and much less hiking which would be easier on my ankle.
The Last-Minute Antenna
When I use the KX1 in the field, I typically pack a very simple antenna: one length of radiator wire and one length of counterpoise wire–connected to a BNC binding post adapter, I let the built-in ATU sort out the match.
When I owned my first KX1, I had a magic length of radiator wire (the length of which I can no longer remember) that seemed to work amazingly well on 40, 30, and 20 meters.
My new-to-me KX1 came with two lengths of wire: one 23′ and one about 20′. Although I made a fun and successful activation with this setup, the radiator was simply too short for the KX1 to find a decent match on 40M.
On the way out the door, I decided to cut a new radiator and counterpoise out of scrap wire I use for antenna experiments.
Being a bit stubborn and also in a hurry to beat sunset, I did no Internet research to sort out the ideal lengths for 40 meters. I simply cut a 17′ length for the counterpoise and about 27.5′ for the radiator.
In the Field
After arriving on site, I deployed the antenna and tried finding a match on 40 meters with the KX1’s internal ATU.
No go.
I tried a few times hoping maybe the ATU would find something even semi-reasonable in terms of a match, but there simply wasn’t enough radiator to make it work. That was a shame because forty meters would have been the ideal band for yielding quick contacts this time of the afternoon.
I had options, but I wanted to make what I had work.
The activation took time and patience. The 30 meter band was now my best bet and it’s where I logged all ten contacts for a valid activation. I tried 20 meters where I had a 1:1 match, but the band was dead.
At one point, I switched out the KX1 with my KX2 that I also packed. I tried to find a 40 meter match with the superior KX2 ATU, but physics got in the way again. 🙂
40 meters was an option
Let’s be clear here: I could have easily cut 4′ off of the counterpoise and attached it to the radiator and I bet I would have gotten a match on 40M. Since the counterpoise was lying on the ground, its length was less crucial.
The EFT Trail-Friendly end fed antenna was also in my pack.
I also had a perfectly capable 40/20/10 en-fed antenna in my pack. Switching out the antenna would have only taken four minutes.
I bet I could have easily yielded 20 additional contacts on 40 meters because the band was in great shape. Almost without fail, 40 meters is my most productive band.
Working with limitations
Thing is, I’m starting to understand that I like working with self-imposed limitations.
Perhaps this is why I love QRP and low-power radio so much: I get a little thrill out of doing more with less.
Yesterday, even after I realized it would be a struggle to log my final three contacts on 30 meters, I persisted. One motivation was I’ve never completed a full activation using only 30 meters. With a little patience, I knew I could snag my ten contacts.
The only things making it a challenge were the facts that temps were dropping rapidly, winds were picking up, and the sun was setting. Hazel (the POTA dog) who so eagerly jumped in the car when she saw me put on my hiking boots earlier, was also starting to shiver.
Fortunately, after trying another short stint on 20 meters, I returned to 30 and worked two more stations in quick succession giving me a total of nine contacts.
It started to get darker, so I hunted and found an operator calling CQ on 30 and simply made contact with him. He wasn’t a POTA station, just a general CQ call. He kindly gave me his details for the logs.
Lessons learned
I made a video of most of this activation and will upload it when I have a little bandwidth to do so. I’ll embed it in a shorter field report here on QRPer since I’ve described so much already.
Even though it was a challenge making ten contacts to accomplish a valid field activation with my time constraints, I’ll admit that I really enjoyed the challenge.
Next time I head to the field with the KX1, I’ll actually test the antenna prior to leaving the QTH.
In fact, I’m planning to make two radiators: one at an ideal length for 40 meters and above, and another–much longer–for 80 meters and above. Any advice and personal experience from KX1 owners would be much appreciated.
Perhaps most importantly, it’s only now dawned on me how much I enjoy making the most with self-imposed limitations or “trying to make lemonade with lemons.”
Do you feel the same? I’d love to hear your comments.
Smoother FT8 Mode Operation with Constantly Evolving Firmware (IC-705/IC-7300/IC-9700)
Firmware update for the IC-705, IC-7300 and IC-9700* offers smoother FT8 operation. One touch FT8 mode preset, Scroll mode and other updates for each model will be available.
Preset menu screen
* Firmware update for the IC-705 is around late in January, and for the IC-7300 and IC-9700 will be in near feature.
I’ve been a massive fan of RadCom since I lived in the UK. I’ve always felt this RSGB publication strikes the right balance of technical information and human interest.
A few years ago, at Hamvention, an RSGB representative encouraged me to write a review for RadCom. Even though I feel pretty fortunate to write for the likes of The Spectrum Monitor magazine, the World Radio TV Handbook, and others, I was honored to even be asked.
With RadCom, I focus on gear that’s readily available in the UK and Europe (meaning, not North American versions of gear–yes, there are differences).
My first review–of the Aerial-51 ALT-512 QRP Transceiver–was published in the March 2020 issue.
This week, I received the December 2020 issue of RadCom. Typically, I receive my RadCom issues a week or so after the beginning of the subscription month due to normal international post times. These aren’t normal times, though, so it took 6 weeks longer than normal to be delivered.
I’ll admit that I’m chuffed to see my review in RadCom especially since my daughters (now K4TLI and K4GRL) were an integral part of it! My daughters are trying to sort out whose hands are in the photo above. They assembled the uBITX V6 by themselves.
If you’d like to learn more about RadCom and the Radio Society of Great Britain, I would encourage you to check out the RSGB website. I’m a proud member and a big fan of RadCom even though they had the poor judgement to ask me to write for them! 🙂
Unfortunately, several setbacks in the recovery from the COVID-19 pandemic make necessary the difficult decision to cancel Hamvention 2021. Hundreds of volunteers have been working to do everything necessary to bring this Hamvention to the many amateur radio enthusiasts and vendors who support the Dayton Hamvention.
Vaccine distribution both in the United States and around the world is lagging behind what was planned. In addition, the emergence of a more communicable form of the COVID-19 virus increases the potential for further public health problems in the next few months. We make this difficult decision for the safety of our guests and vendors.
Those who had their tickets, inside booths or flea market spaces deferred last year will be deferred again. Those who purchased 2021 tickets, inside booths or flea market spaces will also be deferred. If you desire a refund instead please email [email protected] and we will contact you.
Stay tuned for information about a QSO party for the 2021 Hamvention weekend. We are looking forward to the 2022 Hamvention!!!
QRP radios, product announcements, reviews, news and more. Low power amateur radio fun!
Please support QRPer by adding us to your whitelist in your ad blocker. Ads are what helps us stay online. All of our ads are ham radio related--no junk, we promise! Thank you!
 I just discovered the following video by VUJ Lab. on YouTube showing the AH-705 ATU being unboxed, connected to the IC-705 and even operated a bit.