Category Archives: Antennas

Pairing the Elecraft KX2 and AX1 with a little QRP Coffee for some proper portable POTA fun!

Driving home on Thursday, December 8, 2022, I popped by Food Matters in Morganton, NC and grabbed one of their amazing curried chicken salad wraps.

I sat in the car and listened to a podcast as I ate a late-ish lunch. I looked at my watch and sorted out what time I needed to be back at my home in the mountains. After a little mental math, I realized I had about 90 minutes to fit in a little radio fun.

Where to go on a rainy day?

Tuttle Educational State Forest (K-4861)

Since it was a Thursday and I knew Tuttle would be open, it was really a no-brainer. Tuttle is only an 8 minute drive from the parking lot at Food Matters, so I made my way to Playmore Beach Road!

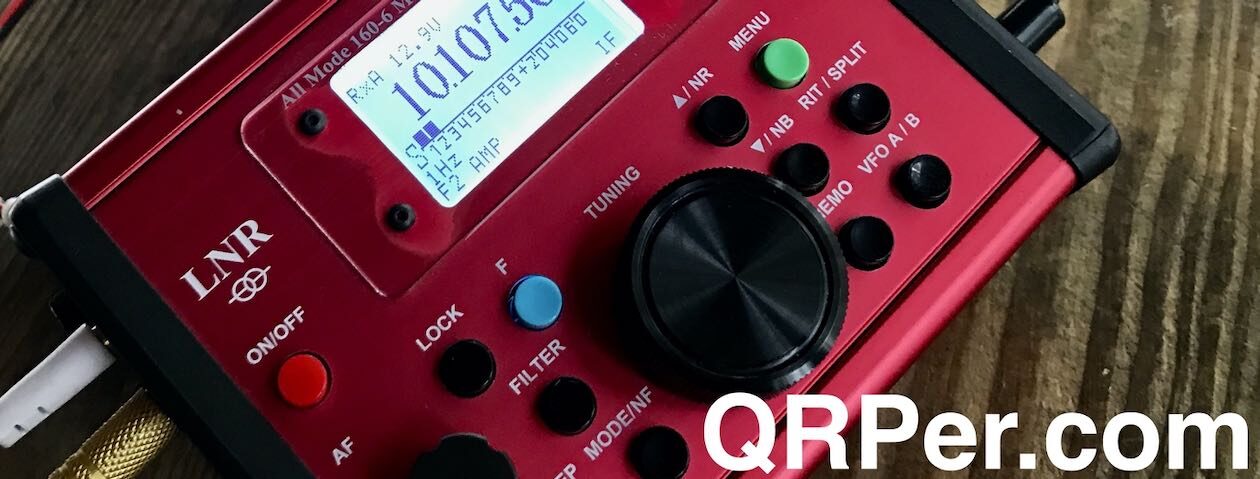
En route, I made a mental inventory of what radios and antennas I had packed in the car. I knew I had my KX2 and although its internal battery had already powered me through three or four activations already, I knew there’d be enough charge for one or two more.

Also, since it was raining, I thought it would be the perfect day to set up under Tuttle’s excellent picnic shelter.

As for an antenna, I remembered putting the AX1 in my antenna box, so why not pair the two and operate in the dry?

Coffee Time

Funny, but after I started recording the activation video (below), I convinced myself that I needed to make some coffee. I pulled out my field coffee kit and set it up for a quick brew.

The park had completely shut off all water fountains and closed the rest room area, so there was no place to get fresh water. Fortunately, I had *just* enough water left in my water bottle after lunch. Almost the perfect amount for a cup of coffee but no more.

This wasn’t a planned cuppa’ so I used one of my last Starbucks Via coffee packs. Had I planned this in advance, I would have ground some beans at home and made a pour-over coffee.

That’s okay, though. The Starbucks packs are better than no coffee at all.

Field Coffee Kit

If you’re curious about the contents of my field coffee kit, here’s the list:

Continue reading Pairing the Elecraft KX2 and AX1 with a little QRP Coffee for some proper portable POTA fun!

Charles’ simple solution to protect the MC-750 ground spike tip

Many thanks to Charles (KW6G) who writes:

Thomas:

I purchased an MC-750 from DXE last week…It arrived Monday….Great antenna; very nice workmanship….I have not yet deployed it, but that will be in the near future….

After reading your emails/posts and viewing the videos, I got to thinking…The real oversight in this antenna design is the fact that the manufacturer has provided no protection for the tip of the ground spike….I can see where it would not be long until it worked its way through one of the ends of the carrying pouch…

So with this in mind, I went off to the hardware store where I found a 3/8″ ID X 1 inch long nylon spacer which fit over the end of the spike perfectly — problem solved for all of 58 cents…

Here are a couple photos:

73’s de Charles, KW6G

What a great, affordable solution! Thank you for sharing this, Charles!

Testing a new Tufteln knee board and antenna during this beautiful SOTA activation on Mount Mitchell

On the morning of November 4th, I woke up with one thought on my mind: “I need to activate Mount Mitchell before it’s too late!”

It’s not like Mount Mitchell was going to disappear, but I knew I was already on borrowed time since the long section of the Blue Ridge Parkway I use to drive to Mount Mitchell from Asheville typically closes in the early part of November for weeks at a time. The park itself will close to guests too–in fact, last year, it closed its gates as I drove out of the park! There are often other roads open to Mitchell in the winter, but they’re very much out of the way for me and frankly, weather can shift and the park close at the drop of a hat.

As the crow flies, Mount Mitchell is actually very close to my QTH. If I wanted, I could hike there directly from my home. I’ve yet to do this, however, because with the 3,000′ elevation change and the anything-but-direct trails that skirt the Asheville watershed, I’d need a full day or more to hike it one way. I will for sure do this sometime, but only when I can pack appropriately and reserve a campsite.

Morning drive

As soon as I surfaced that morning, I check the weather map. I noticed that the temp at Mount Mitchell was actually slightly higher than at my QTH. I looked out the kitchen window and could see fog in the valley. This meant one thing: inversion!

When we have inversion, the cold air is pushed down into the valley and warmer air can be found at higher elevations. The flip opposite of what you’d typically expect.

I ate a quick bite, grabbed come coffee, and hit the road.

As I drove past Warren Wilson College’s farm, it was absolutely gorgeous. I had to stop and take a photo or two [click images to enlarge].

The drive up to Mount Mitchell on the BRP was ideal: clear skies and quite warm!

Mount Mitchell State Park (W4C/CM-001 and K-2747)

In fact, I felt like I really struck it lucky that day. I didn’t even need a heavy jacket or gloves. Continue reading Testing a new Tufteln knee board and antenna during this beautiful SOTA activation on Mount Mitchell

Pairing the Elecraft KX2 and Chelegance MC-750 for a quick QRP POTA activation

After a fun “discovery” activation with the TEN-TEN R4020 on the morning of November 12, 2022–click here to check out that report and video–I realized I had just enough time to squeeze in another activation on my way back to the QTH.

I picked Lake James State Park (K-2739) because it was the most conveniently located; only a 20 minute detour.

When I arrived, the park was very quiet even though it was a Saturday no doubt because the ground was still saturated after the two days of rains we received from the remnants of Hurricane Nicole.

I grabbed my radio gear: the Elecraft KX2 and the new MC-750 vertical antenna sent to me (at no charge) by Jesse at Chelegance. This was only the second time I’d used the antenna–the first time was with the X5105.

I knew the MC-750 would be quick to set up and that was a good thing because I only had a max of about 45 minutes for the entire activation including set-up and take-down.

I walked down to a picnic table by the lake and deployed the station.

The MC-750 took me all of three (casual) minutes to set up.

Next, I set up the Elecraft KX2 and my CW Morse Outdoor Paddle with Steel Base for one-handed picnic table operating.

Of course, I also needed to prepare a log sheet even though I planned to live log everything in the HAMRS app on my phone. Continue reading Pairing the Elecraft KX2 and Chelegance MC-750 for a quick QRP POTA activation

How to tune: Pairing the Emtech ZM-2 manual ATU with the Mountain Topper MTR-4B on the Blue Ridge Parkway

You’ve no doubt heard me brag about the Emtech ZM-2 ATU in previous field reports. I think it’s an accessory every field operator should have.

The ZM-2 is a very capable manual transmatch/ATU and is also one of the more affordable tuners on the market. It’s available as both a kit and a fully-assembled unit. Both well under $100.

I do believe the “manual” part of the ZM-2 scares off some and it really shouldn’t. We are used to simply pressing a button these days and allowing our automatic ATUs to do all of the matching work for us.

Manual ATUs do require some amount of skill, but truth is, the learning curve is very modest and intuitive.

Manual ATUs require no power source in order to operate–you adjust the L and C values by hand–thus there’s never a worry about the ATU’s battery being depleted. They also are easy to manipulate outside the ham bands because they require no RF in order to read the SWR–you simply make adjustments to the L and C until you hear the noise peak.   This is why many shortwave broadcast listeners love the ZM-2 so much. It’ll match most any antenna you hook up to it!

I also argue that everyone should have a portable ATU even if you operate resonant antennas. Think of an ATU as a First Aid Kit for your antenna: if the deployment is less than ideal, or if you damage it in the field, an ATU can help you find an impedance match your radio can live with. ATUs have saved several of my activations.

Mountain Topper MTR-4B V2

I’ve also mentioned that I’ve had an MTR-4B on loan from a very kind and generous reader for most of the year. He was in no particular hurry for me to send it back to him, but I wrote him in early November and said, “I’m doing one more activation with this little rig, then I’m shipping it to its rightful owner!”

He had a request, and it was a good one:

I think it would be a good little twist to the usual YouTube if you paired a random wire with the ZM-2 and the MTR-4B…showing how to tune the ZM-2 with a Mountain Topper…

I really liked this idea, so I made plans to to hit the Blue Ridge Parkway nearby and give it a go.

The first time I tried this in the field, I paired the MTR-4B with one of my Sony amplified speakers because the MTR-4B 1.) has no internal speaker and 2.) has no volume control. During the video, however, I realized that there simply wasn’t enough audio amplification so that the viewer would be able to hear a noise peak as I manually tuned the ATU. I decided to scratch that video and just do the activation on my own. I really wanted to show how the tuning process worked in the video.

I went back to the field the next week–on November 10, 2022–with my Sony in-line digital recorder knowing it would be much easier to hear how the L/C changes affected the band noise. Continue reading How to tune: Pairing the Emtech ZM-2 manual ATU with the Mountain Topper MTR-4B on the Blue Ridge Parkway

A Few Field Radio Gift Ideas for Less Than $100!

I received an email from a reader’s spouse asking about gift ideas for the holidays and beyond; ideas that could not only be used this month, but also tucked away for the future. They weren’t looking for the obvious things like a transceiver–they were looking for accessories that might enhance their significant others’ field radio fun.

Being the enabler I am, I was happy to oblige and, in fact, decided to turn my reply into a post (since it quickly turned into a very long email) with their permission. For obvious reasons, I’m keeping their ID secret! 🙂

Here’s a rather random sampling of things that came to mind. I tried to limit this to items that retail for less than $100 US. Note that some of these product links are affiliate links:

A quality LiFePO4 battery

Being a QRPer, I don’t need a large battery to enjoy hours of radio fun per charge. My favorite battery chemistry is LiFePO4 due to its weight, safety, shelf life, and recharge cycles (which is in the thousands as opposed to hundreds).

For me, a 3Ah battery is more than enough capacity to keep my QRP radios on the air for 3-5 activations per charge (depending on length of activation, etc.).

I’m a big fan of Bioenno batteries. Their customer support is excellent. You can purchase their 3Ah 12V battery for $64.99 US including the charger. If you already have a charger, the battery alone is $49.99. Click here to check it out.

If your significant other likes to push 100 watts, consider a larger capacity battery. I also have a 15Ah Bioenno battery for this purpose, though it exceeds the $100 gift price threshold). Click here to check it out.

A very affordable Li-Ion rechargeable battery


One of the most affordable rechargeable battery packs for the QRPer in your life is the TalentCell Rechargeable 12V 3000mAh Battery Pack. This pack typically costs around $30 US and is sometimes even less expensive.

This little pack is great because it will not only output 5V to recharge USB devices, but it also outputs 12 volts which is brilliant for QRP radios like the Elecraft KX series, TX-500, FT-817/818, Mountain Toppers, Penntek TR-35,  Venus SW-3B, and many others. I actually now pair this with my QCX-Mini. The battery comes with the charger and standard barrel connectors on the included DC cord which fits Elecraft and Penntek field radios among others.

This is a small battery, so can only be paired with efficient QRP radios.

While I don’t consider this a high-quality solution like a Bioenno battery, it is insanely useful and affordable. Click here to check it out.

Morse Code Keys!

I could easily write a series of articles about Morse Code keys. That’s not what you’re looking for, though, right? You want some quick suggestions. Here is a sampling of some of my sub $100 favorites listed in alphabetical order.

If your budget is flexible, you might also consider these paddles which are still less than $200:

Okay, so if you don’t mind pushing more than $200, I highly recommend any key made by the amazing Begali family. Their Simplex paddle was my first set of paddles and I still use them today. I plan to buy their Traveler next year. They’ve a massive selection of models and styles. Continue reading A Few Field Radio Gift Ideas for Less Than $100!

Taking the new Chelegance MC-750 vertical on a POTA activation at Lake James State Park

Back in September, I was contacted by Jesse Chen (BD7LLY) who has been a long-time reader of QRPer.com. Jesse is also the founder of Chelegance (a.k.a. JNCRadio): a company that has been producing ham radio gear and accessories since 2020.

Jesse reached out and asked if I would consider evaluating a couple of the field portable antennas he designs and produces in China.

In truth, I get a lot–and I do mean loads–of requests to evaluate products and I pass on 97% of them. I only have so much time and I simply don’t bother with gear I think is unnecessary or that could be cheaply made.

Before replying to Jesse, I did a little research on Chelegance and discovered that DX Engineering now distributes their products. I decided that if DX Engineering liked the quality well enough to add Chelegance products to their catalog, then it must be up to a decent standard. I’ve never purchased anything sub-quality from DX Engineering.

I also like the fact that Jesse is a real amateur radio operator.

After checking back in with Jesse, he decided to send me two of his portable HF antennas: the M-104 and the MC-750. In full disclosure, he sent these to me at no charge–i.e. free–with the idea I could do a proper evaluation and share my thoughts both with him and with my readers.

He knew that both of these antennas had the potential to compliment my style of portable operating. I also told Jesse not to rush ship them to me as I was quite busy. I received both antennas at the end of October.

The first antenna I wanted to try was the MC-750.

The Chelegance MC-750

When I received the parcel from Jesse, I was very impressed with the MC-750’s custom soft-sided case. The stitching and quality of it are much better than I would have expected. The interior is custom designed to hold all of the MC-750 antenna components. There’s enough extra space in it, in fact, that I can also carry a 40′ RG-316 feedline inside.

Product Photo by Chelegance

The antenna basically consists of the following components in the supplied padded bag:

  • A heavy stainless steel ground spike and matching unit
  • 40 meter coil
  • 50 cm antenna arm/extension
  • 5.2 meter telescoping whip
  • 4 yellow counterpoise wires with a wire winder board

The price for the antenna system is $250 via DX Engineering and 219€ via WIMO. Moonraker in the UK is also a Chelegance distributor, but doesn’t seem to have the MC-750 listed in their inventory at time of posting (Dec 5, 2022).

The only antenna I have that might compare with the MC-750 is the Chameleon CHA MPAS Lite which is one of my favorite portable HF antennas for its quick deployment, and overall quality. For reference, the CHA MPAS Lite retails for about $360.

I thought the best way to test the MC-750 would be to take it on a POTA activation. Continue reading Taking the new Chelegance MC-750 vertical on a POTA activation at Lake James State Park

Dave sorts out vehicle-mounted antenna SWR issues

Photo by Katie Musial.

Many thanks to Dave (K1SWL) who writes:


Comments on vehicle-mounted antennas

by Dave Benson (K1SWL)

As with Rand’s recent post about his effective vehicle setup, I and others also use a small operating table inside the vehicle.  I’ve tried a number of approaches to antennas.  Without elaborating on those schemes, I’ll note that winter is now closing in here in NH. As a result, I’m now operating exclusively from my truck. My interest is now in minimizing setup and tear-down times.  Barry (WD4MSM)

also commented about the improvement in vehicle-mounted antennas with an added ground.  I’d like to quantify that.

I’d recently ordered a number of Hustler Mobile antenna components. They’re used as a stationary-portable setup using that company’s high-quality mag-mount. As I first evaluated the antenna, I was disappointed to find the minimum SWRs to be on the high side.

These results were related to the ‘floating’ coax shield, which serves as a counterpoise with the mag-mount setup.  Worse yet, these results were inconsistent. Touching the coax connector shell at the antenna analyzer caused the SWR to jump up, as did just changing the way I held the analyzer. Bad juju! It means RF inside the vehicle, with the potential for RF-‘hot’ symptoms at the rig..  Adding a 1:1 balun inline eliminated the stray RF at the rig, but didn’t do much for the SWR. It’s also just one more gadget to bring along.

A better fix was a custom bracket that bolted to the truck frame. I first confirmed that there was low-resistance continuity between a target location and the vehicle’s cigarette lighter shell.  This was something of a ‘comedy of errors’. I had a sheet-metal angle bracket on hand and went to work enlarging a hole in it. This had the usual outcome: a drill bit grabbed the workpiece and spun it. The bracket itself was buckled beyond redemption and my finger’s now healing well.  A length of 1-1/2 inch aluminum angle bracket was just the ticket.   Note that the mounting hole needs to be offset from the coax fitting mount. This avoids an interference between the mounting bolt and coax connector shell. Ask me how I know.  The bracket assembly uses a specialty coax fitting from DX Engineering. It’s their part number DXE-UHF-FDFB.

This bracket is bolted down on one of the corners of the Tacoma’s passenger seat assemblies.  It’s the closest location to the antenna I found without drilling holes and cutting the coax.  For this vehicle, it’s a 10mm bolt and was paint-coated for appearance reasons. I replaced it with a stainless-steel bolt from a hardware store. It’s important to include a split-lockwasher between the bolt and the bracket. This’ll keep the conductivity to the frame good over time. The bracket is deburred and its corners rounded to preclude injury to passengers.

In any event, it’s out of the way of the seat’s legroom space. A 3-foot coax cable assembly brings the coax nicely up behind the rig atop the operating surface.

So- how’d it work? It’s like the difference between night and day!  The broad SWR curves vanished – replaced by typical characteristics for monoband antennas. The sensitivity to handling the coax has vanished.  (A representative curve at right.) The curves are narrower, and that’s actually a good sign- it means that unwanted resistances have been reduced. 

With this fix in place, here are the SWR minima:

Frequency    SWR

14060        1.04:1

21060        1.05:1

28060        1.16:1

I took advantage of the CQ Worldwide CW Contest this past weekend. I was able to work 101 stations on 10M, 15M and 20M with this setup.  That was from a State Park 5 minutes away.  The attraction was a large and sunny parking lot, and solar gain was such that I needed to leave the truck door open several times.  This area is kept plowed out in winter, and I may try for the POTA ‘kilo’ award from there at the 1000-contact benchmark.  

We’ll see….   73, K1SWL

Mike turns a trailer wiring harness into ready-made ground radials

Many thanks to Mike (KE8PTX) who shares the following tip:

[Recently, I walked into a] big box store and this caught my eye:

When separated, they have very little memory.

So now we have four 25 foot radials. Bonus was all were different colors. Easy to untangle.

Performance, so far, is good. Total price with clip: 12 bucks.

That’s a brilliant tip, Mike! Thank you for sharing. Like you, I’m always on the look out for products that could serve double duty in the world of amateur radio. While one can find less expensive sources of wire, for 100% copper wire pre-cut to a standard radial lengths, this is a pretty good deal!

I did some searching and pricing varies between various suppliers. 


Sample Retailers:

Thanks for the tip!

QRPer Notes: HA8SA’s Homebrew Transceiver, BuddiHex Review, and “Marine Mobile” in Iowa?

Because I receive so many tips from readers here on QRPer, I wanted way to share them in a concise newsletter format.  To that end, welcome to QRPer Notes, a collection of links to interesting stories and tips making waves in the world of radio!


HA8SA Stay At Home Transceiver

Many thanks to Pete (WB9FLW) who shares a link to HA8SA’s compact homebrew transceiver. As Pete notes, it’s a “very simple design but with a load of features!”

Click here to check out details on HA8SA’s website.


Buddihex review

Many thanks to John (VE3IPS) who writes:

I think the QRPers will be happy see the BuddiHex review:

https://ve3ips.wordpress.com/2022/11/10/buddipole-buddihex-deployment/

John VE3IPS


“Marine Mobile” in Iowa?

Many thanks to Rand (W7UDT) who shares this brilliant little video from K0KLB’s YouTube channel:

Had a lot of fun experimenting RMOOTA (Random Metal Objects On The Air) with the boat today.. The winds were so strong (sorry about the annoying wind/mic noise) and the noise of the engine kept us from actually driving while making QSO’s.. It was a challenge just the same being stationary in one location.

It was a big contest weekend and the QRM and Pileups were massive.. With my 5w and Random Metal Object as an antenna, it was difficult to get contacts.. I was able to catch them when they were short on business and looking for calls, lol..

We only achieved 4 QSO’s out of the 10 we wanted.. (40%) but, I’m happy with that.. I felt lucky to get one call, LOL..

Thanks for watching everyone.. We (the Skipper and Mate) hope you enjoyed watching it as much as we did making it. 73, Kevin ~ k0klb

The Lyrics written and sung by K0KLB


Many thanks to everyone for sharing their tips here on QRPer Notes!