Friday, January 6, 2023, was a beautiful day and my route took me within 10 minutes of South Mountains State Park (K-2753).
Of course, I had to activate it!
In truth, I had only a short window to do the activation, but I knew it would be seriously fun.
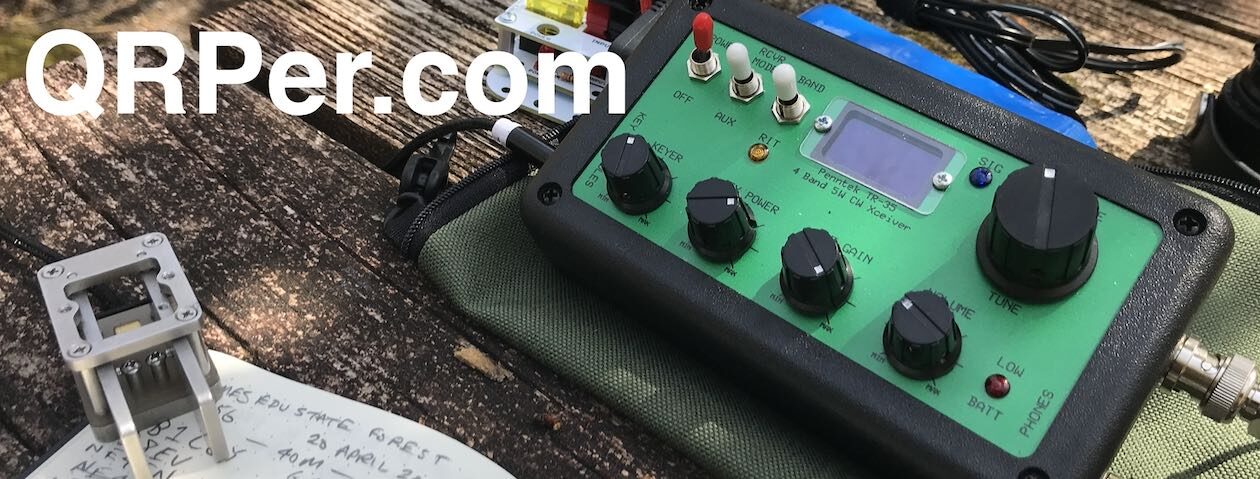
I’d packed my Penntek TR-45L and Chelegance MC-750 for the trip and was looking forward to pairing the two.
My TR-45L actually has the built-in Z-Match manual antenna tuner, but I wanted to, once again, configure the MC-750 as a resonant antenna (much like I did in my previous activation).
I also had my new VK3IL pressure paddle along for the ride and wanted to see how nicely it might work with the TR-45L.
If I’m being honest, it was a bit strange not to use a wire antenna at this particular park because South Mountains has some very large old-growth trees that are ideal for hanging antennas.
I try to start each year by doing a POTA or SOTA activation on New Year’s Day.
POTA actually issues a certificate for completing an activation on New Year’s Day so there are typically loads of activators and hunters working the bands. It’s an ideal time to play radio.
This year, we had a number of family activities on New Year’s Day, but I made a little time to fit in an activation during the late afternoon at my most accessible spot on the Blue Ridge Parkway: the Southern Highland Folk Art Center.
As with my last activation, I suspected I would be operating in the dark, so I brought my LED lantern along for the ride.
Although not intentional, this New Year activation had a lot of new-to-me stuff involved!
New VK3IL Pressure Paddle
The prior evening–on New Year’s Eve–while my wife and daughters were watching a classic movie movie marathon, I used the time to heat up the soldering iron and work through a few kits and projects that had been sitting on my desk.
Michael (G0POT) sent me the Pressure Paddle circuit board and heat shrink via Andy (G7UHN) several months prior. [Thank you so much, fellas!]
To my knowledge, the VK3IL Pressure Paddle isn’t available in complete kit package, but it’s quite easy to source everything yourself.
On his website, David provides the Gerber files you’ll need in order to purchase the circuit boards from your favorite manufacturer (I’m a huge fan of OshPark here in the States).
Next, you simply need to order the components. Here’s the list assuming you’re using DigiKey:
Quantity of 2: 732-7579-1-ND (CAP CER 10000PF 10V C0G/NP0 0805)
Quantity of 2: 1738-SEN0294-ND (RP-C18.3-ST THIN FILM PRESSURE S)
Quanity of 1: Three conductor wire with a (typically) 3.5mm plug (note that I had one of these in my junk drawer)
Keep in mind: the components are surface-mount. If you’re not used to working with SMD components (ahem…that would be me) I suggest buying a few spares of each in case you lose or damage one or more during the build.
It also helps to cover the finished board in heat shrink not only to protect the board and make it easier to grip, but most importantly (if you’re me) hide your electrically-sound yet unsightly surface mount soldering job.
The build might have taken me 20 minutes.
New FT-817ND Narrow CW Filter
Some time ago, I purchased a second FT-817ND with the idea of doing full-duplex satellite work. I later realized I could be taking the second FT-817ND out to the field more often if I simply had another narrow CW filter installed, so I built one.
This New Year’s Day activation was actually the first time I’d taken this particular FT-817ND and its new narrow filter out to the field!
New Armoloq TPA-817 Pack Frame
Earlier this year, I also decided that I wanted to outfit my 2nd Yaesu FT-817ND with an Armoloq TPA-817 pack frame. The idea was to experiment with building a rapid-deployment field kit around it.
Many thanks to Charles (KW6G) who shares the following guest post:
Product Review: Chelegance MC-750 Portable Ground Plane Antenna, Part 1
by Charles Ahlgren, KW6G
I recently purchased a Chelegance MC-750 portable ground plane antenna from DX Engineering. Essentially, the antenna system provides a ¼ wave portable vertical antenna with 4 counterpoise wires that operates on 20 through 10 meters. The antenna will also operate on 40 meters with the provided loading coil. The manual states the antenna will support 6 meter operation, but no instructions are provided on how to do so. 30 meter operation is not supported. It appears from our initial testing that no ATU is required.
Here are some of my thoughts on the antenna.
Product Description
The MC-750 comes with the following components:
GROUND ROD / ANT BASE
50 CM ANT ARM
5.2 M WHIP
7 MHZ COIL
4 COUNTERPOISE WIRES (radials)
COUNTERPOISE WIRE COLLECTOR BOARD
CARRY BAG
As provided, it is designed to operate on the 40, 20, 17, 15, 12, and 10 meter bands without any modifications. Six meters is also supported per the manufacturers manual, but no guidance on how to do that is offered in that document. However, finding the proper length of radiator for 6 meters should be straightforward using a tape measure to set the proper whip length.
[Update: Chelegance notes that to operate 6 meters, simply extend the last segment only of the whip (see photo) and for 30 meters extend the last four segments of the whip and 15cm on the 5th segment (see photo).]
I checked the ground rod / antenna base with a magnet and confirmed it is made from stainless steel as both components are not magnetic; a characteristic of stainless. Both the ground rod/ antenna base and the 50 cm antenna arm (which was also non-magnetic) had a hefty feel (together, they weigh about 2 pounds), therefore I think it safe to assume that these components are made of stainless steel. Since most ops will undoubtedly use the antenna arm as an aid to inserting / extracting the ground rod into / from the ground, it seems a prudent decision by the manufacturer to have this piece fabricated from a strong, stiff material such as steel. The machine work used to fabricate these parts appears to be quite good – the fit and feel were excellent, with no sharp or ragged edges to cause problems in the field.
I measured the whip while set at the various position marks for 20 through 10 meters. The band markings on the whip were accurate – giving a 1/4 wavelength radiator when combined with the 50 CM ant arm length…On 40 meters, the whip and rod measured about 1/8 wavelength. The required the loading coil needs to be inserted between the whip and the rod (at approximately 1/10 the total 40 meter whip height above the base). If you want to operate this antenna on 30 meters, it appears that you need to provide an extra 1.4 meter of additional rod as a quarter wavelength ground plane at 10.1 MHz requires a 7.1 meter radiator. Six meter operation would require a whip of around 4.7 feet. With the whip fully collapsed, the length of the rod and antenna arm measures 40-1/4”. Therefore, if 6 meter operation is contemplated, extending the whip about 16 inches from fully collapsed should suffice. However, I don’t think that an antenna configuration such as that would be a very good performer unless it were elevated from ground level; or maybe it would be good for a SOTA activation? Continue reading Guest Post: Reviewing the Chelegance MC-750 (Part 1)→
I purchased an MC-750 from DXE last week…It arrived Monday….Great antenna; very nice workmanship….I have not yet deployed it, but that will be in the near future….
After reading your emails/posts and viewing the videos, I got to thinking…The real oversight in this antenna design is the fact that the manufacturer has provided no protection for the tip of the ground spike….I can see where it would not be long until it worked its way through one of the ends of the carrying pouch…
So with this in mind, I went off to the hardware store where I found a 3/8″ ID X 1 inch long nylon spacer which fit over the end of the spike perfectly — problem solved for all of 58 cents…
Here are a couple photos:
73’s de Charles, KW6G
What a great, affordable solution! Thank you for sharing this, Charles!
After a fun “discovery” activation with the TEN-TEN R4020 on the morning of November 12, 2022–click here to check out that report and video–I realized I had just enough time to squeeze in another activation on my way back to the QTH.
I picked Lake James State Park (K-2739) because it was the most conveniently located; only a 20 minute detour.
When I arrived, the park was very quiet even though it was a Saturday no doubt because the ground was still saturated after the two days of rains we received from the remnants of Hurricane Nicole.
I grabbed my radio gear: the Elecraft KX2 and the new MC-750 vertical antenna sent to me (at no charge) by Jesse at Chelegance. This was only the second time I’d used the antenna–the first time was with the X5105.
I knew the MC-750 would be quick to set up and that was a good thing because I only had a max of about 45 minutes for the entire activation including set-up and take-down.
I walked down to a picnic table by the lake and deployed the station.
The MC-750 took me all of three (casual) minutes to set up.
Back in September, I was contacted by Jesse Chen (BD7LLY) who has been a long-time reader of QRPer.com. Jesse is also the founder of Chelegance (a.k.a. JNCRadio): a company that has been producing ham radio gear and accessories since 2020.
Jesse reached out and asked if I would consider evaluating a couple of the field portable antennas he designs and produces in China.
In truth, I get a lot–and I do mean loads–of requests to evaluate products and I pass on 97% of them. I only have so much time and I simply don’t bother with gear I think is unnecessary or that could be cheaply made.
Before replying to Jesse, I did a little research on Chelegance and discovered that DX Engineering now distributes their products. I decided that if DX Engineering liked the quality well enough to add Chelegance products to their catalog, then it must be up to a decent standard. I’ve never purchased anything sub-quality from DX Engineering.
I also like the fact that Jesse is a real amateur radio operator.
After checking back in with Jesse, he decided to send me two of his portable HF antennas: the M-104 and the MC-750. In full disclosure, he sent these to me at no charge–i.e. free–with the idea I could do a proper evaluation and share my thoughts both with him and with my readers.
He knew that both of these antennas had the potential to compliment my style of portable operating. I also told Jesse not to rush ship them to me as I was quite busy. I received both antennas at the end of October.
The first antenna I wanted to try was the MC-750.
The Chelegance MC-750
When I received the parcel from Jesse, I was very impressed with the MC-750’s custom soft-sided case. The stitching and quality of it are much better than I would have expected. The interior is custom designed to hold all of the MC-750 antenna components. There’s enough extra space in it, in fact, that I can also carry a 40′ RG-316 feedline inside.
Product Photo by Chelegance
The antenna basically consists of the following components in the supplied padded bag:
A heavy stainless steel ground spike and matching unit
40 meter coil
50 cm antenna arm/extension
5.2 meter telescoping whip
4 yellow counterpoise wires with a wire winder board
The only antenna I have that might compare with the MC-750 is the Chameleon CHA MPAS Lite which is one of my favorite portable HF antennas for its quick deployment, and overall quality. For reference, the CHA MPAS Lite retails for about $360.
QRP radios, product announcements, reviews, news and more. Low power amateur radio fun!
Please support QRPer by adding us to your whitelist in your ad blocker. Ads are what helps us stay online. All of our ads are ham radio related--no junk, we promise! Thank you!