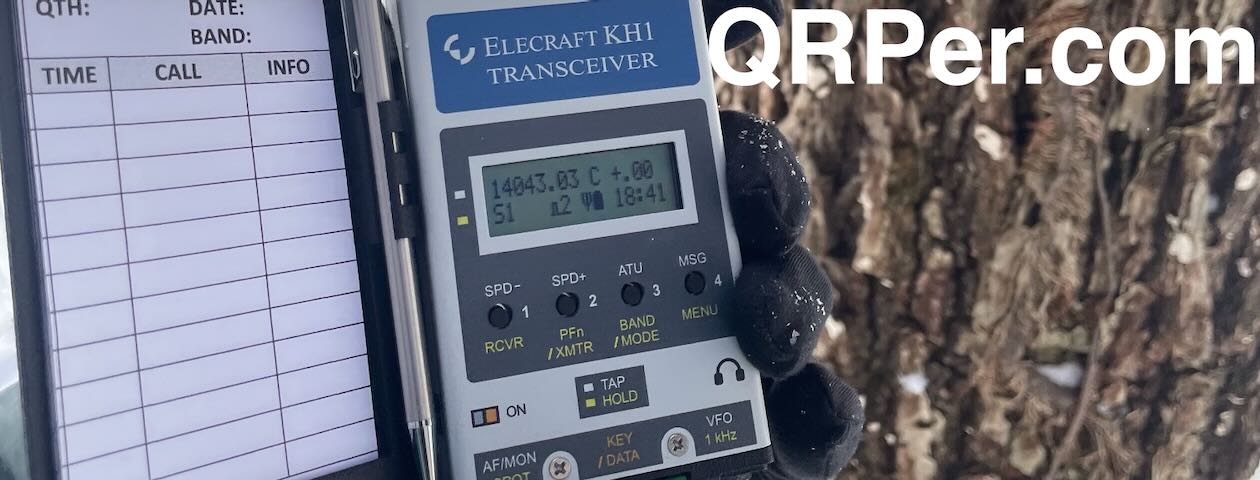
All posts by Thomas Witherspoon

POTA by Bicycle: VA3MZD’s QRP Ham Radio Journey

Many thanks to Rod (VA3MZD) who shares the following guest post:


POTA by Bicycle: A Ham Radio Journey

By Rod Murray VA3MZD

First, some background: I earned my Canadian Basic With Honours Amateur Radio License in February of 2022 as a retirement goal while taking advantage of pandemic isolation time to read and study for the exam. I then chose VA3MZD as my call sign. Back in 2007, while teaching in Australia, my students gave me the Aussie nickname, Mr Muzzdog, and it stuck. I’m now Victor Alpha Three Mike Zulu Delta.

At about the time I got licensed, I acquired a Yaesu FT-818ND QRP radio. I had read and heard a lot about POTA and was eager to get on the air but also to operate outdoors. Being active in hiking, cycling and paddling, my immediate goal was to activate a local park on one of my outdoor adventures. I learned as much as I could about QRP and POTA from subscribing to Thomas’ QRPer Blog as well as numerous other channels. I was thrilled when I made my first HF QSO followed shortly thereafter with my first POTA contact as a Hunter from my QTH. This made me even more intent on activating a Park.

My activation attempts from a local park, however, were unsuccessful. QRP with a compromised, mini loop antenna wasn’t working for me. My first successful activation was unique and did not occur until a few months later, far from home.

In May 2022 I traveled to Vancouver, BC to visit family. One of the regulars on my radio club’s morning net (The Elmira Radio Club), a long distance Elmer, so to speak, offered to take me to a local British Columbia park and help me make my first activation. Despite having never met, Trevor VE7BM, scheduled a rendezvous east of Vancouver at VE-3304, Castle Park, and in half an hour, we had over 10 QSOs in the log. I was hooked!

My First Activation with Elmer VE7BM at VE-3304, Castle Park, BC

Upon returning to my home province of Ontario, I acquired an EFRW antenna that I eventually tested for the first time on Field Day in June of 2022. The Nelson 9:1 worked well with my FT-818 and I began taking it on visits to my local Conservation Parks and on hiking trips. I made several successful activations with it but I then ordered a much more portable Tufteln QRP EFRW that Thomas had demonstrated on his QRPer channel. It performed very well and became my regular POTA antenna after installing the Nelson 9:1 permanently in the attic.

Having four POTA units close to home, all within 10 km, made it very convenient to make trips by vehicle to activate them. What makes those 4 parks even more interesting from an outdoor activity perspective is that they are linked by a well maintained rail trail, The Elora-Cataract Trailway which just happens to be part of VE-5082, The Great Trail of Canada! The rail trail connection means that all of these parks can be easily accessed on foot or, my preference, by bicycle.

The Elora Cataract Trailway / The Great Trail of Canada VE-5082 near Shands Dam and Belwood Lake

I started taking my pared down kit, the radio, antenna, tuner, battery and throw line in my bicycle pannier on my regular rides. Then I’d set up the radio for a POTA Activation while visiting a park. My most frequented and my most favourite is VE-5319, Belwood Lake Conservation Area, because of the 10 km eastbound ride through farms and forests, over Shands Dam into the park. Not only is it a pleasant ride, it’s a 2-fer with The Great Trail!

POTA by Bicycle at Belwood Lake Conservation Area – VE-5319/VE-5082

In the westbound direction, The Trailway ends in the scenic and historic tourist town of Elora, and just beyond the town is The Elora Gorge Conservation Area, VE-1392, where the Canadian Heritage designated Grand River cuts a 22 metre chasm through the limestone bedrock.

It has serviced campsites, trails, picnic shelters and tables near mature White Pine trees (Ontario’s Provincial Tree) perfect for deploying a wire antenna. I’ve been fortunate to have met each of these Parks’ Superintendents, and have been able to promote Amateur Radio, my radio club, and also received their full support for POTA activations and Winter Field Day.

Activating VE-1392 Elora Gorge Conservation Area from a picnic shelter with a radio club colleague

Between the two historic mill towns of Fergus and Elora that make up the municipality of Centre Wellington and accessible from The Trailway, stands The Wellington County House of Industry and Refuge National Historic Site, VE-5928. Now renovated to serve as the Wellington County Museum and Archives, the historic limestone building has an interesting, well documented history. Continue reading POTA by Bicycle: VA3MZD’s QRP Ham Radio Journey

Video: Comparing the Elecraft KH1 with Mountain Topper Series QRP Transceivers

A couple weeks ago, I posted a video where I compared the Elecraft KH1 and KX2;I mentioned that it was the most requested comparison I’d received after I started taking the Elecraft KH1 to the field.

The second most requested KH1 comparison focused on various Mountain Topper series models: the MTR-3B, MTR-4B and MTR-5B.

That’s what we’ll take a look at in the comparison video below!

Basic KH1 ($550)

So when folks have asked me how the KH1 compares with a Mountain Topper, I think of the basic KH1 ($550 US) package, not the ($1100 US) “Edgewood” package like I have.

Why?

Without the Edgewood package, the KH1 lacks the internal ATU, coils for the whip antenna, internal battery, internal battery charger, logging tray, whip antenna, counterpoise, case, and attachable paddles.

In short, the basic KH1 is a 5 band CW-only radio, much like Mountain Topper series radios–in fact, a lot like my 5 band Mountain Topper!

This is why, in my video below, I base the comparison on the basic KH1 package which includes the KH1, power cord, USB cable, and manual only.

Video

I should note that this video primarily focuses on making a purchase decision–it’s not a receiver comparison or in-depth reviews:

Click here to view on YouTube.

A few notes…

The video above contains a lot more detail, but at the end of the day, you can’t make a “bad” choice here. All of these are fantastic radios for someone who enjoys ultra-light operating.

The Elecraft KH1 is more a more feature-rich transceiver; it has adjustable filters, attenuation, CW encode/decode, mini pan/scan, general coverage, SWR/power meter, more message memories, internal logging options (soon), user upgradable firmware, an internal speaker, and much, much more. On top of that, the KH1 can be upgraded to become a complete shack-in-a-box radio with internal battery, charger, ATU, attachable whip antenna, and attachable paddles.

That said, even thought the Mountain Topper radios are spartan in terms of features compared with the Elecraft KH1, they get the job done effectively. Their feature set is laser-focused on providing a SOTA activator everything they need in order to complete an activation and not a lot else. They will also operate effectively on the smallest of batteries and consume a mere 20-17 mA in receive–proper battery misers! For more of my thoughts of the Mountain Topper, check out my MTR-4B review and my “Getting To Know You” report on the MTR-3B.

Again, you can’t go wrong with a Mountain Topper or a KH1: they’re both made by fantastic companies and have a loyal customer base for good reasons.

Price

The Elecraft KH1 base model (40, 30, 20, 17, and 15 Meters) is $550, the complete, fully-loaded, “Edgewood” package is $1,100. They are currently on backorder, but Elecraft does note that they intend to start shipping again mid-January 2024. Click here for the latest news about lead times.

The Mountain Topper MTR-4B V2.

The LnR Precision MTR-4B (80, 40, 30, and 20 Meters) is the latest Mountain Topper radio and the current model at time of publishing. You can purchase these new for $369 US. LnR Precision builds roughy 25 per month when they have the parts. You will need to follow LnR closely in order to be updated when a production run is shipping. Each time units are offered, they’re snatched up in a matter of hours. You can find used Mountain Toppers out there, but pricing tends to be within 10-20% of the new price.

Thank you

I hope you enjoyed this little comparison video and that it might help you make a purchase decision.

Of course, I’d also like to send a special thanks to those of you who have been supporting the site and channel through Patreon and the Coffee Fund. While certainly not a requirement as my content will always be free, I really appreciate the support.

As I mentioned before, the Patreon platform connected to Vimeo make it possible for me to share videos that are not only 100% ad-free, but also downloadable for offline viewing. The Vimeo account also serves as a third backup for my video files.

Thanks for spending part of your day with me!

Cheers & 72,

Thomas (K4SWL)

Greg discovers the joy of QRP in his first QRP SSB POTA activation

Many thanks to Greg (KJ6ER) who shares a post he originally published on Facebook regarding his first ever QRP SSB POTA activation. This post is just as much a break down of his field kit, so we’re also including it in our Field Radio Kit Gallery.


My First POTA QRP SSB Activation

by Greg (KJ6ER)

Wooo hooo! After 700 QRO SSB POTA activations in California over the past 2 years, I decided to try my first 10-watt QRP SSB activation from K-3473 in San Jose. To my pleasant surprise, it was very successful: 121 SSB QSOs in 4 bands (10, 12, 15 and 17M) across 5 countries including DX to Japan, Alaska and Argentina. I worked 34 U.S. states and 5 Canadian provinces. I operated a total of 4 hours, averaging a QRP QSO every 2 minutes. Lesson learned: Inspired by my QRP mentor Kevin Behn, QRP is not only as fun as QRO (when the bands are working) but it is simpler and faster to deploy. And I can wear the entire station on my back!

My QRP shack-in-a-pack is the ICOM IC-705 (in an ICOM backpack) with a 7M Spiderbeam fiberglass telescoping pole and my homebrew resonant halfwave monoband antennas. Quite frankly, a significant contributor to my success was the monoband resonant halfwave antenna: low angle of radiation and more gain than a typical quarterwave with radials. I modeled this after my homebrew POTA Dominator resonant halfwave antenna. If you’re interested in more detailed information about this antenna and components in my backpack, take a look at each photo with descriptions (below).

Starting on 10M, I was planning to work my way down the HF bands to 20M where I assumed would get me the most QSOs and help me officially activate.

Well … I never made it to 20M: by band, 24 QSOs on 10M, 13 QSOs on 12M, 32 QSOs on 15M and 52 QSOs on 17M = 121 QSOs! I will plan to do a 20 and 40M QRP activation soon, as well as 2M and 70cm since the IC-705 supports those bands, too.

Many thanks to all the hunters who helped me complete my first QRP activation! While I certainly did not experience any massive pile-ups like my typical QRO activations, the slower pace QRP activation made it very relaxing. I strongly recommend it! Feel free to let me know if you have any questions, I’d be happy to help  72 KJ6ER, San Jose

Field Kit Details

My complete QRP shack-in-a-pack!

The ICOM IC-705 running 10 watts off a 3Ah Bioenno battery. Just to the right of the pack in the field is my 7M Spiderbeam fiberglass telescoping pole supporting monoband resonant halfwave wire antennas for 10M, 12M and 15M. I also use the pole to operate on 17M and 20M as a sloper or inverted-V, and 40M as an inverted-V. I love how fast I can get operating with just a backpack and telescoping pole!

My first QRP SSB 10-watt activation resulted in 121 QSOs on 10-17M including DX to Japan, Alaska and Argentina.

I thought I would need 20M to activate but the uppers bands worked so well, I never got there. I completed my activation in 4 hours and averaged about 1 QRP QSO every 2 minutes. While I was not getting my usual 5-9 QRO signal reports, I was heard clearly on the low noise upper bands with my QRP SSB signal.

The 7M Spiderbeam fiberglass telescoping pole supports my monoband halfwave vertical wire antennas for 10M, 12M and 15M, as well as 17M and 20M when used as a sloper or inverted-V. I also use it as a center mast for my 40M inverted-V. Continue reading Greg discovers the joy of QRP in his first QRP SSB POTA activation

Field Radio Kit Gallery: KF6EFG’s Not so QRP box(es)

Many thanks to John (KF6EFG) who shares the following article about his portable field radio kit which will be featured on our Field Kit Gallery page. If you would like to share your field kit with the QRPer community, read this post.


Hello Thomas,

Thanks for posting so much interesting content on your website, and helping to host the Ham Radio Workbench! I have gotten a number of ideas for my ‘Fat Boy’ kit from you guys.

I am sending a couple of images of my not-so-lightweight field boxes.

I have been under time constraints while at work, so I developed a series of boxes that can be used in the field while on lunch break.

The core is a black watertight box and a 21ft mast. I can make do with my truck battery in a pinch, and did until I purchased an external battery.

Since I took these images, I have moved the RG-174 and choke to the black box, making black box a complete kit, sans power.

I am playing with a small netbook and will become FT-capable soon!

Black Box:

Orange box:

  • 50ft RG-8x coax cable
  • Bioenno Li4po battery, charger in box.
  • Tufteln Choke adapter
  • Tufteln EFRW antenna cut for 20m.
  • 25 ft RG-174
  • Amazon small packing cube with assorted adapters, small bungee cords, and tools.

Not shown:

  • 21ft fiberglass pole, in a PVC pipe case. Case doubles as a base and short guy point for the mast.
Please don’t mind my messy truck bed!

Green box:

  • Tripods
  • Wolf River Coils WRC-1000
  • Extra 21ft fiberglass pole.
  • Construction twine for disposable guying.
  • 2 extendable whip antennas

Also pictured above:

  • Adjustable antenna clamp
  • Homemade trailer reciever antenna stand off

The Amazon medium packing cube contains:

  • Various adapters
  • Various power pole wires and other ends (clamps, cigarette lighter, ring)

Tool kit:

  • Multi tool
  • Tape
  • Connectors (one screw on UHF, ring, butt)
  • 4 Radial wires , 17 ft.

This box resides in the truck bed for use when I want to use a vertical antenna.

I usually end up on my lunch break at the local RC flying club. I work at a multi use airfield, and the club has graciously allowed me to use their field when no flying activity is present.

73,

John McGrath

Getting To Know You: The Yaesu FT-817/818 Series Portable QRP Transceivers

I’m very fortunate in that in the past few years I’ve acquired a number of QRP radios that I use in rotation when I do park and summit activations.

I’m often asked for advice on choosing radios, and as I’ve mentioned in the past, I feel like the decision is a very personal one–everything is based on an operator’s own particular preferences.

I’ve written formal reviews about most of the field radios in my collection. In those reviews, I try to take a wide angle view of a radio–to see how it might appeal to a number of types of operators. I highlight the pros and cons, but I don’t focus on my own particular take because, again, my style of operating might not match that of readers. I try to present the full picture as clearly as I can and let the reader decide.

The Getting To Know You series gives me an opportunity to highlight one radio at a time and showcase what I love about it and why it’s a part of my permanent radio collection. After we spend a bit of time talking about the radio, we’ll do a park or summit activation with it!

The Yaesu FT-817 and FT-818 Series

As I mention in my “Getting To Know You” video below, my very first dedicated QRP field radio was the original Yaesu FT-817 (non-ND version), so it has a special place in my heart.

At the time, I was living in the UK and travelling extensively throughout Europe with my UK call (M0CYI).

The FT-817 hit the market and it blew my mind. Up to that point, there were no general coverage QRP radios on the market that small, that comprehensive, and that even sported VHF/UHF multi-mode coverage. It even had a small internal battery pack! What?!

I was an early adopter of this radio and travelled with it extensively–indeed, in all of the years I lived in the UK and Europe, the FT-817 was my only amateur radio transceiver.

Fast-forward to 2023–some 23 years later–and I still have an 817. Actually, I have two 817ND’s and one 818ND (although, I plan to sell one of my 817NDs soon–I don’t need three!).

I find the 817/818 to be an incredibly robust and capable field radio. It’s also a brilliant value–few radios offer you the capabilities of the FT-817/818 for under $700.

My FT-817ND in an Armoloq TPA-817 Frame.

Yaesu discontinued the FT-818ND almost exactly one year ago. Retailers no longer have new stock, but there are loads of them on the used market. Keep in mind that the FT-817/818 was a cash cow for Yaesu for over two decades–the used price remains fair because there’s just so much supply out there. I routinely see 817ND and 818ND models selling for between $375-700 depending on how they’re configured and what’s included.

If you’re looking for a comprehensive article about the Yaesu FT-817/818 series, I would encourage you to check out this piece I originally wrote for The Spectrum Monitor magazine.

Time to activate! Continue reading Getting To Know You: The Yaesu FT-817/818 Series Portable QRP Transceivers

Field Radio Kit Gallery: Bob’s MTR-3B Bug-Out Go-Kit

Many thanks to Bob (K4RLC) who shares the following article about his portable field radio kit which will be featured on our Field Kit Gallery page. If you would like to share your field kit with the QRPer community, read this post


MTR-3B Bug-Out Go-Kit

by Bob (K4RLC)

I wanted to build a lightweight Bug Out Go Kit around the incredible Mountain Topper MTR-3B LCD model.

Bass Pro Shop sold a tackle box that seemed perfectly for this. I took a Bear Grylls Scout Knife and cut/customized the partitions as needed. The Elecraft AX 1 antenna and tripod mount, and a flexible tripod fit perfectly.

Counterpoise consists of three 13 ft BNTECHNO 22 AWG silicon wires, attached with a Mueller 55 alligator clip to the tripod mount.

The CW Morse Outdoor Pocket Paddle (and cable) fit into another section. For audio, use either generic ear buds or the rechargeable cell phone speaker with PChero volume adjustment cable.

For power, rechargeable Li-Ion 9 volt batteries use a USB connection, so no separate charger is needed. I keep this in the car.

It’s a great set up for POTA and lightweight enough to throw into a backpack for the steepest SOTA climb. The MTR-3B, the size of a deck of playing cards and not weighing much more, is an awesome QRP rig that’s still a keeper, if you can find one.

Equipment List:

Field Radio Kit Gallery: WN1C’s Elecraft KX3 Camera Bag Activation Kit 

Many thanks to Thomas (WN1C) who shares the following article about his portable field radio kit which will be featured on our Field Kit Gallery page. If you would like to share your field kit with the QRPer community, read this post


KX3 and Speaker Wire Camera Bag Activation Kit 

by Thomas (WN1C)

For the QRPer’s Field Radio Kit Gallery, this is my KX3 and speaker wire in a camera bag activation kit.

This kit is the continuation of the equipment I used for my Maine ATNO expedition and other activities on that return to my parents almost a year ago. Primarily, it’s a change in bags and an improvement of the audio connection options for more sustained activations. Writing up this kit for the gallery also will probably be an incentive for further change. With how loosely packed it is, there’s space for options! You can see this kit in action on my recent trail activation.

The bag packed and ready for an expedition, even if just a little ways away.

The outside is the discontinued Peak Design Everyday Messenger 15″ v1. I picked this up lightly used on my local craigslist with an eye for expanding the kit contents capabilities. In that endeavor, it has been successful, but concentrating on this configuration to start:

Open the top to reveal the gear packed between dividers!

There’s a certain pattern (that I might not keep following in future re-packings), but the arrangement internally is:

  • Outer pouches: coax, radials, headlamp as necessary
  • Lid flap padded pouch: infrequently used adapters and short cables
  • Left division: antenna(s), throw line and weight, headset, coax, banana cables
  • Mid-left division: logging pouch with paddles and notebook
  • Mid-right division: KX3 with cover and heatsink
  • Right division: power cables, hand microphone, lithium-ion battery banks, LiFePO4 battery pack
  • Flopping around on top: TH-350 HT
  • Front zipper pouch: additional notebooks, earbud headphones, pen, coax, ARRL VE badge

Of course, not all of this gets used at the same time. Different LiFePO4 options with Anderson Powerpole connectors can be substituted. For quick and lighter operating (or when wearing more hats), the headset can be left behind. Anyway, to the details!

Full contents spread out much wider than I usually have space for! Featuring the wooden floor I rarely operate over because apartment living.

So, what is all of this?

Bags

  • Peak Design Everyday Messenger 15″ v1 (discontinued, acquired second hand) with an additional bright red divider stolen from one of my Crumpler camera bags
  • Case Logic accessories pouch from who knows where (underneath the notebook)
  • One of WesSpur’s low cost throw line bags (don’t get it, it’s smelly plastic and falls apart, as shown in the picture)

Radios

  • Star of the show: Elecraft KX3 in the “KX3 Pack” configuration (KX3, KXAT3, KXBC3, MH3) with Side KX KX3 Combo panels and cover, plus an aftermarket heatsink
  • TYT TH-350 tri-band HT (144-222-430 MHz) with bundled SRH-17 tri-band whip

Getting RF Out

  • 2x 28′ (ish) speaker wire on BNC-F to binding posts/banana connector, in use for a while, though now beefed up with a bit of heat shrink and crimped spade lugs
  • 4x 17′ speaker wire shorted together on dual banana plug (radials)
  • 6′ RG-58 BNC-M to BNC-M with a random split ferrite on it from who knows where
  • 2x Pomona banana test leads for occasions of connecting more things together
  • 60′ Marlow Excel Throw Line 2mm (a K4SWL recommendation)
  • WesSpur 10 oz Throw Weight
  • Assorted S-Clip Plastic Carabiners for the speaker wire, throw line, and whatever else needs clipping together
  • CablesOnline 25′ RG-316 with BNC for spare feedline
  • 2 foot BNC RG-316 jumper
  • Adapters: BNC F-F coupler, BNC-M to dual Banana-F/Binding Post, Dual Banana-M to BNC-F, BNC tee, BNC to center Banana-F/Binding Post; all provide options of hacking some options together

Getting Signals In and Out

  • Koss SB-45 Communication Headset (cheaper relative of the popular Yamaha headset; it shows, mostly in the cable quality)
  • Bamatech Bamakey TP-III Rot (an excellent set of dual paddles that can also serve PTT duty) stored in an Altoids Peppermint tin
  • Cable Matters Retractable 3.5mm Audio Cable
  • Hosa YMM-261 Stereo Breakout to allow use of the SB-45 electret mic with another switch wired to a 3.5mm plug for PTT on the KX3 mic port rather than just VOX
  • Custom microswitch to 3.5mm PTT (not very good at its job) using this snap switch
  • Elecraft MH3 hand mic from the kit configuration
  • Old Apple earbuds, headphones only (TRS)

Power

  • Bioenno BLF-12045W 12V / 4.5Ah LiFePO4 pack (can be substituted with the 3Ah pack I also have)
  • Anderson PowerPole to barrel plug for KX3 power
  • Old (sometimes RF noisy) USB Type-A power banks, one with a built-in flashlight (souped up with a much nicer white LED)
  • Misc USB cables, A to Micro-B and C for charging from batteries

Documentation

Steve tests the Diamond RHM-8B during a SOTA activation

Testing the Diamond RHM-8B portable screwdriver antenna

By Steve (MW0SAW)

I have seen many amazing K4SWL SPOTA pileups on YouTube using the AX1 antenna and the extension coil. I have fancied trying a small walkie talkie style whip antenna for a while now.

I have a AX1 and KX2, but my Yaesu FT-818 was the radio with a fully charged battery. So I pulled out The Diamond RHM-8B, an antenna I purchased a while ago but never used in the field. It has a BNC fitting and you tune the antenna by sliding the coil up and down for loudest signal and best SWR. They make one very chunky walkie talkie together! Diamond products do have a fantastic air of quality about their construction.

Radio conditions weren’t great, and bands were busy being the weekend of the CQ WW CW contest. So decided to go the my nearest summit that’s amount 12mins in the car and about a 25mins hike up. This was GW/SW-034 Garth Hill. On a clear day you can see out over the Bristol Channel into England, but mist/fog were the order of the day.

I wore the FT-818 and rubber duckie around my neck with the neck strap for a couple of 2m FM contacts, before setting up on 40m SSB sitting on the ground. Without a tablet or chair with me I found it most comfortable to support the radio between my knees.

I was really pleased to get 9 QSOs in the log, some 59 reports, some difficult contacts. Moving on to CW I managed another 8 QSOs with an S2S into Germany.

All the QSOs were UK and mainland Europe, but I was more than happy with the haul for such a small antenna.

So conclusion about the Diamond QRP antenna.

Can you qualify a SOTA summit on a short 1.5m whip antenna? Absolutely, no sweat!

Does it work as well as a full size wire antenna? Of course not. Nowhere close.

However, its makes such a great rapid deploy, ultra packable option with the Yaesu. Not quite as small as a AX1 but you have the bonus of not requiring a tuner. Definitely something for a travel bag if you own a FT-817/818.

Equipment:

Best 73
Steve
MW0SAW/P

POTA During a Beautiful Fall Afternoon at Tallulah Gorge State Park!

Sunday, October 15, 2023, was the final day of the W4 SOTA campout. That morning, Joshua (N5FY) and I packed up our tents/gear then played a little radio at our campsite (at Lake Rabun). We weren’t in a hurry because the morning was so enjoyable. In fact, I think we checked out not a minute before the dealine of 12:00 noon!

We both decided we wanted to squeeze in one more radio excursion before driving back to our QTHs.

Tallulah Gorge State Park (K-2202)

It wasn’t realistic to fit in another SOTA hike due to our schedules, but Tallulah Gorge SP was an easy detour for both of us.

We pulled into the park and queued up to to enter. The park was absolutely teeming with visitors that day. I would have expected nothing less on such a gorgeous Fall afternoon!

Joshua and I found a quiet picnic area–with a few picnic tables spaced apart from each other–near the lake shore. It turned out to be a perfect spot to play radio. We spaced our sites far enough apart so as not to easily interfere with each other while on different bands.

Joshua set up his KX1, a wire antenna, and used VK3IL pressure paddles.

Joshua deployed his KX1 next to the lake and I deployed my KX2 a bit further up the hill.

I paired my KX2 with my “no transformer” random wire antenna. Of course, I used a Tufteln antenna because, I mean, N5FY was standing right there! ?

This antenna consists of two 28.5′ 26AWG wires connected directly to a male BNC. Simplicity itself on the antenna side. It’s the KX2 internal ATU that does all of the matching (since there’s no transformer). I find that the KX2 can match this antenna from 40-10 meters with ease.

I think the magic of these simple random wire antennas is that they’re directly connected to the radio. There’s a bit of efficiency in having no line losses, etc. even if the ATU does soak up a bit of energy.

Time to hop on the air! Continue reading POTA During a Beautiful Fall Afternoon at Tallulah Gorge State Park!

Master of the Black Dog: Conrad’s POTA/SOTA activation leads to a new quest!

Many thanks to Conrad (N2YCH) who shares the following field report:


Connecticut POTA/SOTA combined activation

By: Conrad Trautmann, N2YCH

November 24, 2023

The author, Conrad, N2YCH at POTA K-1717, Sleeping Giant State Park & SOTA Mt. Carmel, W1/HH-002

Looking for my next activation challenge, I wondered if there were any overlapping POTA parks with SOTA summits in the state of Connecticut. I’ve only done two SOTA activations to date, one in Maine and the other in New Hampshire. I thought, there must be a few in Connecticut.

On my home computer, I brought up both the POTA map and the SOTA mapping page and quickly realized that it would take too much time to try and compare the two maps. Instead, both sites offer KML exports, so I exported all of the Connecticut parks from the POTA site and the summits from the SOTA mapping page and imported both files into Google Earth Pro. A yellow push pin represented the POTA locations and a blue triangle the SOTA locations. It was easy to spot the overlapping sites. Mt. Carmel and Talcott Mountain are both POTA parks and Summits for SOTA. There are a few other SOTA sites that have POTA trails that cross over as well.

I decided to tackle Mt. Carmel, SOTA W1/HH-002 also POTA K-1717, Sleeping Giant State Park. I’d already activated Sleeping Giant for POTA before, but not from the summit. For a SOTA activation to count, the operator must be within the “Activation Zone” as defined by the SOTA rules.

The Connecticut state web site has good maps and information about the park and showed that the trail to get to the summit is an “easy” 1.6 mile hike. I thought that sounded like a reasonable distance. What they don’t tell you on the web site that it’s also a 600’ climb up in elevation from the trailhead to the summit. I knew it would require a climb, but I didn’t expect that. I made the trip up, but it was challenging, especially carrying my backpack with the radio, a VHF handheld, antenna, batteries, computer, water, etc. I plan to travel lighter the next time.

The Mt. Carmel trailhead

Before I get to the activation, a little about the park. It’s called Sleeping Giant because from a distance, the ridge looks like a person laying on their back.

From the CT DEEP site

It’s located in a mountain range called Hanging Hills which extends North from Long Island Sound through Connecticut and Massachusetts up to the Vermont border. Quinnipiac University is across from the entrance to the park and the Quinnipiac Indian Tribe once inhabited the area. Please indulge me as I also share the ghost story of “The Legend of the Black Dog of the Hanging Hills.”

“If a man shall meet the Black Dog once it shall be for joy; and if twice, it shall be for sorrow; and the third time he shall die.”

As the legend has it, the Hanging Hills area is haunted by the Black Dog. You don’t want him to cross your path three times. It’s this story that is the basis for the SOTA “Master of the Black Dog” certificate. “An activator must have entered valid activation logs from each and every summit in the Hanging Hills Region and must have survived all of the activations.” There are currently four summits in the Hanging Hills Region. I need this award.

So far, I have completed activating one of the four summits and did NOT see the black dog. Wish me luck on the remaining three.

The view about half way up
The Lookout Tower

The lookout tower at the summit is the main attraction of the park. Built in 1936, it is listed on the National Register of Historic Places. It stands four stories tall and is 739’ above sea level, providing a 360 degree view in all directions and a clear view over New Haven to Long Island sound. According to the Sleeping Giant Park Association, over 100,000 people visit it each year.

I’ll admit, after hiking the trail up, the last thing I wanted to do was climb four stories more. I did go up before I left to get some photos.

For the activation, I found a bench to set up on with space behind me to set up the Chelegance MC-750 antenna. I ran FT8 on 20 meters beginning around 10 am ET and after roughly 30 minutes, moved up to 10 meters. My experience running QRP on digital modes is that I will cover the Eastern half of the US and some Europe on 20 meters. I can usually make contacts out to the West Coast and into Europe on 10 meters especially later in the day. By activating on both frequencies, I tried to cover as much area as I could to provide the best opportunity for hunters and chasers to reach me.

Setup: MC-750 vertical antenna in grass behind bench and KX3 and computer on bench

Equipment List

Coverage from the summit: Yellow pins are 20 meters, Green pins are 10 meters

Looking at the map, you can see that I covered the Eastern portion of the US on 20 meters. It was also 10 am local time and still pretty early on the West coast. When I shortened up the antenna and retuned the KX3 for 10 meters, I started making contacts with Germany, Italy and other EU stations.

The hike down from the summit was much easier, the temperature had warmed up a bit and I stuffed my coat into the backpack for the trip down. When I got to my Jeep, I noticed a number of empty picnic tables nearby and decided to set up and get a few more POTA contacts while I was there. I ended up with 48 total for the day.

The summit I was at was an easy one (worth 1 point) compared to many and it was challenging to me. I came away from the experience with a new appreciation for the challenges SOTA activators face. I also came away with a new goal, to get the Master of the Black Dog certificate!