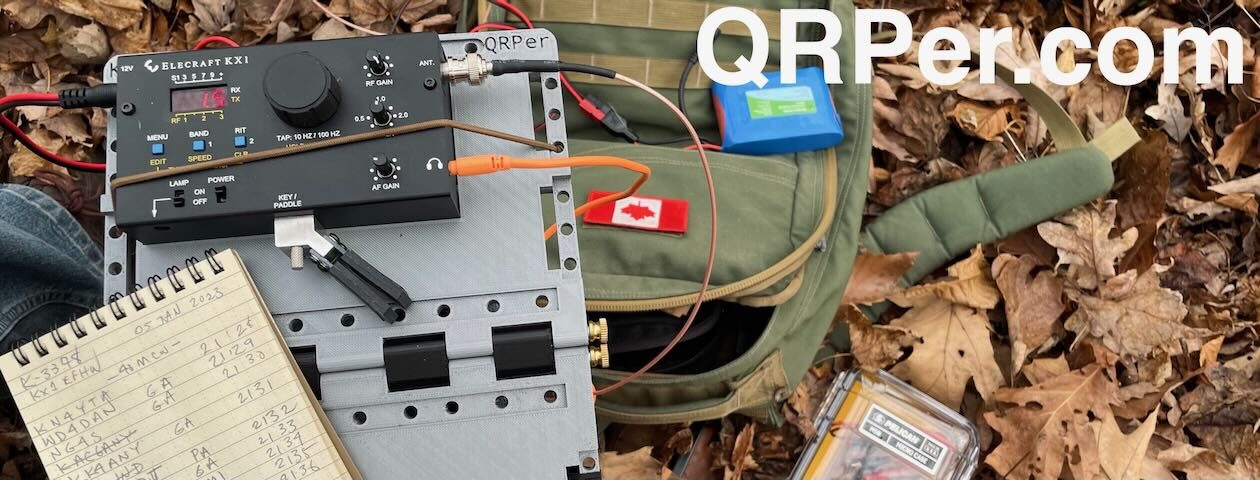
Sometimes when I’m activating a park or summit and work someone who, like me, is activating a park or summit for a Park To Park (P2P) or Summit To Summit (S2S) contact, in my head I wonder what their station and operating situation looks like on the other end.
At least one instance was uncovered recently when Dan (WB8JAY) reached out and shared a video he took while working me in a P2P contact. It’s awfully fun to hear what my signal sounded like on his end.
This video reminds me how CW distills the communications down to only those dits and dahs; unlike SSB, for example, where you might hear background noises and extra chatting during an exchange, in CW it’s just pure code.
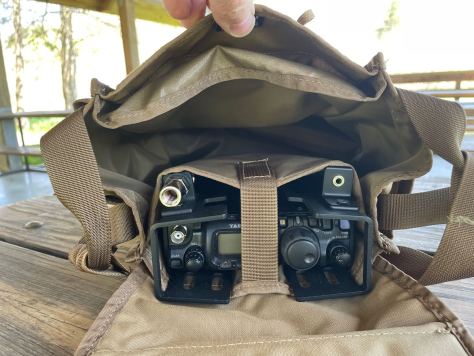
As I’ve mentioned a number of times on QRPer and on the SWLing Post, I’m a pack geek. I enjoy organizing and packing my gear for field radio activities and travel.
Last week, I made a very quick overnight trip to visit my parents. My time during this trip was very limited and I did not plan to fit in an activation, but Monday morning, I was able to knock out an errand very early and that freed up a couple of hours in the early afternoon. Fortunately, prior to leaving my QTH, I decided to pack a few travel items in my GoRuck GR1 pack along with a field radio kit built around my Elecraft KX2.
I never leave home without a field radio kit because I never know when an opportunity to play radio might happen.
On the way home Tuesday, I popped Lake Jame State Park and fit in a quick, last minute activation. Moments before arriving at the lake, I received a request from one of my YouTube subscribers asking if I would make the occasional video showing what’s in my radio packs and field kits.
I’ve been meaning to make these videos but, frankly, often forget when I arrive at a park or summit because I’m just a little too focused on starting my activation.
Since I had some overnight items in my pack, it wasn’t a typical SOTA or POTA field kit, but I decided to make the video anyway. After all, I love watching videos about how others pack and organize their radio and travel kits. But then again, I’m a pack geek. I did mention this right–?
Although I’m not always the neatest person (my wife is probably chuckling at this gross understatement), I’m a meticulous and very organized pack geek. What you see in the video is exactly how I pack when no one is looking. 🙂
I’ll add here that if you’re interested in field radio kits and packs, I’d encourage you to check out my Anatomy of a Field Radio Kit series; Part 1 has already been published and Part 2 will be posted later this week. In Part 2, I take a much deeper dive into safety gear I take on SOTA activations.
Gear
In the video, I mention that I would attempt to link to all of the items in my pack. I spent time sorting out links this morning; many links go straight to the pack manufacturer because the packs I use typically have no distributors other than the manufacturer, I have also purchased a lot of the smaller items on Amazon, but many can be found in big box stores like Walmart, Target, Canadian Tire, etc.
If I missed something, let me know in the comments.
Video
Like all my videos, this one us unscripted, made in one take (unedited), and also has no ads:
Out of order…
So this video was made prior to an activation at Lake James last week. I’ve mentioned before that my Internet speeds at the QTH are worse than dismal, but since this pack video was relatively short, I was able to upload it ahead of the activation video (it took 1.5 days to upload this 2GB file).
The activation video will be published in another week or so depending on my access to some proper broadband service.
Any other pack geeks out there?
I would love to share photos, descriptions, and/or a video of how and what you pack for field activations. If you’re interested in submitting a guest post, please do so!
Also, I’d love to hear about your favorite packs and how well they’ve held up with time.
Feel free to comment and thank you once again for hanging out here at QRPer.com!
I had a topic on the mind as I made my way back to the trailhead after a SOTA activation recently.
I get a lot of questions from readers and subscribers about resonant vs. non-resonant antennas and whether or not an ATU is a good or bad thing.
If you know me, you’ll know that I tend to lean towards qualitative research; meaning, I like to base my opinions on first-hand observations rather than laboratory or textbook explanations. Part of the reason is I’m not an engineer, so specifications and performance stats don’t influence me–I don’t understand them half the time–rather, I base my opinions on trying or field testing.
The proof is in the pudding, right?
So with the topic of antennas and ATUs on the brain, I decided to turn on the action camera and do an unscripted video on the trail as I hiked back to my car.
This video is essentially stream of consciousness: I won’t blame you if you skip it.
With that said, if you manage to stay awake for the whole video (congratulations in advance) I’m curious what your thoughts are so please consider leaving a kind comment!
Until 2016, I had never purchased a commercial field antenna; I built all the ones I had ever used.
These days, I take a number of commercial antennas to the field and use them in my real-time videos and I really enjoy deploying and using them. My buddy Eric (WD8RIF) reminded me, though, that I hadn’t actually used a homebrew antenna in ages. He was right!
You see, while I believe commercial field antennas can be incredibly durable and compact, it’s important to note that antennas are one of the easiest components of an amateur radio system to build yourself. They require only the most simple of tools and are very affordable. And the best part? They can perform as well as those that are available commercially.
I also get a great deal of pleasure out of building things.
A simple goal
I’ve mentioned in previous posts that I often set a little goal that runs in the back of my mind for each park or summit activation I make.
On Monday, June 14, 2021, I made a simple goal: buy my antenna wire en route to Lake James State Park, build the antenna on site, and complete a valid Parks On The Air (POTA) activation.
A very simple antenna
I also decided to employ my Xiegu X5105 since 1.) it’s one of the most affordable general coverage QRP transceivers I own and 2.) it has a built-in antenna tuner (ATU).
One of the cool things about having an ATU is that, if it has the matching range, you can allow it to do the “heavy lifting” in terms of matching impedance.
Although I’d never put the X5105 to the test, I suspected its internal ATU would have the matching range to forgo building a 4:1 or 9:1 transformer and simply pair it directly with a random wire.
All I would need was a 28.5 foot length of wire for a radiator, at least a 17 foot length for a counterpoise, and a BNC to binding post adapter.
The antenna would benefit from multiple 17′ counterpoises, but I really wanted to keep this setup dead simple to prove that anyone can build an effective field antenna with a very minimum amount of components.
Even though I have plenty of wire lying around the house to build this simple antenna, I wanted to pretend I had none to prove that any wire would work.
And to add just a wee bit more challenge, I also limited myself to shopping for antenna wire between my home and the park without making a serious detour from my route. That really limited my options because there isn’t much in terms of commercial areas between me and Lake James State Park.
The wire
As I left the QTH, I decided that the best spot to shop was a Walmart in Marion, NC. It would only be a four minute round-trip detour at most. I had a hunch that Walmart would even have speaker wire which would be ideal for this application.
In my head, I imagined I would have at least three or four choices in speaker wire (various gauges and lengths), but turns out I had a difficult time finding some at Walmart. We live in such a Bluetooth world, I suppose there isn’t much demand for it these days. A store associate helped me find the only speaker wire they had which was basically a 100 foot roll of the “premium” stuff for $17 US.
While I would like to have paid a fraction of that, in the end it’s not a bad price because once you separate the two conductors, you have double the amount of wire: 200 feet.
Although the frugal guy in me cringed, I bit the bullet and purchased their speaker wire. To be clear, though, I could have found another source of wire in that Walmart, but I preferred speaker wire for this application. And $17 to (hopefully!) prove a point? That’s a deal! 🙂
Lake James State Park (K-2739)
Once I arrived on site, I found a picnic site I’d used before with some tall trees around it.
Here’s how I prepared the antenna:
First, I cut 28.5 feet of the speaker wire from the roll and split the paired wires so that I’d have two full 28.5 foot lengths.
Next, I stripped the ends of the wire and attached banana jacks I found in my junk drawer. Although these aren’t necessary as the binding post adapter can pair directly with the wire, I though it might make for a cleaner install. In the end, though, I wasn’t pleased with the connection to the radiator, so dispensed with one of the banana jacks on site, and later dispensed with the other one as well. The connection is actually stronger without the banana jacks.
I then deployed the 28.5 radiator with my arborist throw line, and laid the other 28.5 half on the ground (the ground of this antenna would pair with the black binding post, the radiator with the red post). I only needed 17 feet of counterpoise, but once it couples with the ground, I don’t think any extra length makes a difference (although less than 17 feet likely would).
The antenna was essentially set up as a vertical random wire with one counterpoise.
I then plugged the BNC binding post adapter into the rig, hit the ATU button, and was on the air.
I’ll admit: I was a bit nervous putting this antenna on the air. Although I felt the X5105 ATU *should* match this antenna, I had no idea if it actually would.
Fortunately? It did.
At this point, if you don’t want any spoilers, I suggest you watch my real-time, real-life, no-edit, no-ad, video of the entire activation (including buying and building the antenna!).
I was very pleased that the X5105 found a match on the 40 meter band.
I started calling CQ in CW and validated my activation by logging 10 stations in 13 minutes.
Honestly: it doesn’t get much better than this.
I logged three more stations on 40 meters CW, then moved up to the 30 meter band where the X5105 easily found a match.
I worked one station on 30 meters before heading back down to the 40 meter band to do a little SSB. I logged three SSB stations in five minutes.
Mission accomplished!
In the end, I logged a total of 17 stations including a P2P with K4NYM.
Not bad at all for speaker wire!
After the activation, I tested the X5105 ATU by trying to find matches on other bands–I was able to find great matches from 60 meters to 6 meters. Most impressive!
All I can say is that I’m incredibly impressed with the X5105 internal battery. This was my fourth activation from one initial charge on May 16. The battery lasted for 20 minutes, taking me well beyond the 10 contacts needed to validate this park. I’ll now consider taking the X5105 on a multiple SOTA summit run!
Short Hike
Even thought the heat was intense and the humidity even more intense, I decided to take in a 2 mile hike post-activation. I snapped a few shots along the way.
Improvements
I’ll plan to add more counterpoises to the speaker wire antenna as I know this will only help efficiency.
In addition, I’ll plan to build even more antennas with this roll of speaker wire. If you have some suggestions, feel free to comment!
Thank you for sharing this, Pete! Sadly, I was unable to attend live due to my schedule, so am very happy to see these excellent presentations. I do hope that things will be normal next year and FDIM will happen in person again. If you attend the Hamvention, I strongly encourage you to also take in FDIM–it is always an amazing event.
I learn a lot about a radio the first time I take it to the field. I’m not sure if it’s because being out of the shack helps me give it my full attention, or if it’s because field conditions vary and this allows me to see how flexible and adaptable the radio is.
On Monday (May 17, 2021), I was eager to hit the field with a new-to-me radio.
The previous week I didn’t log even one park or summit activation. Typically I’d hit at least two. There were a couple of reasons for this…
First, we had a fuel shortage in western NC and I didn’t want to burn any extra fuel for activations knowing we had some important family errands that week.
Secondly, I needed to hunker down and finish a number of projects I’d been working on including a lengthy two-part field radio kit feature for The Spectrum Monitor magazine, and a new in-depth TX-500 review for RadCom. FYI: Part one of my feature for TSM will appear as the cover article in the June 2021 issue.
We also had a number of family projects to sort out. So a week at home perfectly timed with the fuel shortage.
The new radio
I collect reader and viewer suggestions and when I see that there’s a radio or product, in particular, folks would like to see tested, I try to obtain one.
One of the most requested radios lately has been the Xiegu X5105.
A number of readers have asked me to obtain an X5105 and take it to the field. Many are considering purchasing this (incredibly) affordable full-featured QRP transceiver, others own it, love it, and want to see how I like it compared with my other radios.
Last year, I came very close to purchasing the X5105 for review, but opted for the Xiegu G90 instead (here’s my review of the G90).
Even though the X5105 is only $550 US, I really didn’t want to make a purchase at this point because I’m budgeting for a new MacBook, new video camera, and I just purchased the TX-500.
So I reached out to Radioddity who is a sponsor over at the SWLing Post. I’d been in touch with Radioddity a lot as of late because I’ve been evaluating and testing the Xiegu GSOC for the past few months. They lent me the GSOC (and a G90 because I sold after my review) and I was in the process of packing up both units to send back to them.
I asked if they could lend me an X5105 for a few weeks. They were quite happy to do so and dispatched one in short order.
A clear relationship
Side story…
Back when I decided to place ads on the SWLing Post and QRPer.com, I worried about any inherent conflicts of interest. I read magazines that review products and can tell that they’re being gentle in their criticism because there’s a two page ad of the product immediately following the review. I don’t like that.
This conflict is something that’s almost inevitable with any radio publication that grows to the point of needing monetization to support it.
I made a few Golden Rules up front:
1.) I would only place radio-relevant ads on my sites. Period.
2.) My ads and sponsorships would be hand-picked and by invite only. I choose who can be a sponsor.
3.) I’m up-front with sponsors that my reviews call it like it is. If they send me product to review, I will give it an honest evaluation based on real-life use. If I don’t like it or can’t recommend one of their products, I’ll let my community know.
I’ve lost a couple of sponsors over Golden Rule #3 over the years. I’m okay with that because I’d rather not allow an advertiser on my site that can’t take customer criticism.
I invited Radioddity to be a sponsor of the SWLing Post last year after I had some positive interactions with them.
Radioddity sent me the new GSOC to review in November 2020. I discovered in short order that the GSOC had some major issues and, frankly, I didn’t like it and certainly couldn’t recommend it. I communicated my concerns about this product with detailed notes and suggestions for improvement. I was open and honest about the GSOC on the SWLing Post (read the thread here).
Radioddity not only embraced my criticisms but sent them to the manufacturer and thanked me.
Impressive.
Blue Ridge Parkway (K-3378)
But back to the activation!
So on Monday, May 17, I had an errand in town that took me right past the Blue Ridge Parkway Folk Arts Center. The detour to do an activation was maybe two minutes, so there was no “fuel-shortage” guilt! 🙂
Also, I had a good hour to burn before I needed to go home and pack for a quick trip to visit my folks.
I deployed the PackTenna 9:1 random wire antenna specifically because I wanted to see how easily the X5105’s internal ATU could match it.
I hopped on 40 meters first, hit the ATU button and it quickly found a 1:1 match–good sign!
This turned out to be a pretty easy and simple activation.
I started calling CQ and within 12 minutes I logged 11 stations.
I moved up to 20 meters knowing it would be a tougher band, but worked one more station–KG5OWB at K-0756–pretty quickly.
I was quite happy with logging 12 stations in short order. A nice contrast to recent activations where conditions were so poor it’s been a struggle to get even 10 contacts within an hour.
I would have stayed on the air longer but (as I mention in the video) I wasted a good 20-25 minutes waiting on the landscape crew to finish mowing on/around the site before I set up my station. I didn’t want to be in their way.
Here’s my log sheet from the POTA website:
Video
Of course, I made one of my real-time, real-life videos of the entire activation. I’ve quite a long preamble in this one, so if you’re interested in skipping straight to the on-the-air time, go to 16:24.
X5105 initial thoughts?
So far, I like the X5105. It certainly accomplishes its goal of being an all-in-one “shack in a box.”
I performed this activation only using the X5105 internal battery. In addition, the ATU worked perfectly with the random wire antenna.
I like the size–it’s much smaller than I imagined. It’s also fairly lightweight.
It feels rugged, too–I wouldn’t be concerned about it getting easily damaged in the field.
The speaker works pretty well, but if the volume level is pushed too hard, it starts to splatter. I wish it could handle a little more volume before the splattering kicks in.
The ergonomics are pretty good. It didn’t take long to sort out how to use most of the functions.
One area for improvement? The owner’s manual. It’s poorly written and (frankly) reads as if it was rushed to print.
For example, I wanted to set up CW memory keying prior to hitting the field. Unfortunately, the owner’s manual was no help.
There’s actually a dedicated page regarding CW memory keying, but the first thing it does is reference a different section of the manual (without giving a page number). I followed the procedure, but it didn’t work. In fact, it didn’t make sense as it seemed lead me down the path of digital mode macros. I think the manual may be referencing a procedure before the last firmware update (which, it appears, changed the menu structure significantly).
If you can help guide me through setting up CW memory keying, please comment! I’m sure it’s a simple process, but I haven’t sorted it out yet.
Overall, though? I see why the X5105 is so popular. It appears to compete with a loaded Elecraft KX2. It’s a bit larger, heavier, and less “refined” but it’s also half the price of a loaded KX2.
I also think it’s a great radio for CW operators. The keying feels natural and responsive. It uses relays instead of pin diode switching, so QSK includes a little relay clicking. I don’t find it to be too loud, though.
I’ll be taking the X5105 out again very soon. I’ve got it for 6 weeks, so it will get plenty of park and summit time. If you own the X5105, I’d love to hear your comments on this portable rig.
I’ve also been asked which radio is “better” and which one I’d purchase if I could only buy one.
To address these questions, I decided to make a YouTube video where I outline some of the pros and cons of both radios, and compare them in terms of features especially with regard to field use.
Last year, I was lucky enough to obtain a lab599 Discovery TX-500 QRP transceiver for review on the SWLing Post.
It was a bittersweet experience because 1.) I really liked this transceiver, and 2.) I could only keep it for one week!
One week?!?(Now I can’t get this BNL song out of my head.)
Typically when I receive a loaner transceiver for review, I like to keep it a minimum of 4 weeks, but actually ask for up to 6 or 8 weeks. I like spending quite a lot of time with a new transceiver so I have an opportunity, for example, to take it on multiple field trips, pair it with a wide variety of antennas, and also using it in the shack.
My time was limited with the TX-500 last year because I had one of only a handful of pre-production units in the US (one was being used for FCC testing). Josh, from Ham Radio Crash Course, sent me the TX-500 after he spent a week with it, and I sent it Ham Radio Outlet where it would be eventually used as a demo unit.
When I took delivery of that TX-500 in late August 2020, I immediately hit the field. In one week, I performed seven park activations and also spent a great deal of time with the TX-500 in the shack.
In short, I really like the TX-500 as a field radio. Sadly, however, I didn’t have an option to purchase one anytime soon. There was already a massive backlog or orders at Ham Radio Outlet and lab599, like other manufacturers last year, experienced production delays due to Covid-19.
Last autumn, I asked lab599 if they would consider sending me another TX-500 on extended loan when they had a unit available.
Yesterday, I took delivery of a new TX-500!
Of course, I’ll be taking this unit to the field ASAP and plan to make a number of videos readers have requested comparing the TX-500 to the KX2, KX3, FT-818, and IC-705.
Although I’m not a fan of “unboxing videos,” I did make one of the TX-500 yesterday only moments after I took delivery. Why? Frankly, because I believe the box design itself speaks to lab599’s attention to detail.
I’ll admit right up-front that this video is a bit of an unrehearsed stream of consciousness ramble as I tried to share some of my thoughts about the TX-500. You’ve been warned:
Again, I’m looking forward to taking this weatherproof rig to summits and parks soon, so expect some field reports and videos featuring the TX-500.
In the meantime, please let me know if you have a TX-500 and consider sharing your thoughts and comments!
Without a doubt, the most popular type of question I receive from readers here on QPRer.com and over at the SWLing Post has to do with making equipment purchase decisions.
In the past two months, I’ve had numerous questions from QRPer readers asking my opinion about choosing between the new Icom IC-705, or the Elecraft KX2. In fact, as I started putting this post together this morning, I received yet another email from a reader asking my opinion about these two iconic QRP transceivers!
I love both of these radios for different reasons, so the answer is not an easy one.
Let’s discuss this in some detail…
I decided to make a video talking about the pros and cons of each transceiver and note the reasons why one might pick one over the other. My hope is that this will help inform a purchase decision:
One of the things I love about POTA and now SOTA is that it gives me a reason to venture out and explore parks and other public lands that might have otherwise never shown up on my RADAR.
On the morning of Wednesday, March 10, 2021, I would have never guessed that by noon I would be standing on the summit of Rocky Face. That morning, I had planned to activate the summit of Baker’s Mountain–a park and summit I know very well as I’ve hike the trails there almost monthly and the mountain is a stone’s throw from my parents’ home.
That morning, when I arrived at Baker’s Mountain Park and the gates were shut, I remembered that they are closed on Wednesdays.
Oops.
I was determined to hike to a summit, though, so I grabbed my iPhone and launched the SOTA Goat app, then searched for nearby summits. That’s when I noticed Rocky Face which was *only* a 40 minute drive from Baker’s Mountain. I had heard of this 1 point summit and park, but had never been there, so why not take a little road trip and explore?
Rock Face (W4C/WP-006)
It was a very pleasant drive which was made all the better by gorgeous sunny weather.
When I arrived on site, I was surprised to see just how well developed this park was. There were two different parking areas, a visitor’s center, picnic area, rock climbing face, playground, and numerous trails. There’s even a large area for outdoor events.
I took the “Vertical Mile Challenge” to the summit (which I would recommend) and was more of a workout that one might imagine for a 1 point 576 meter summit.
The trail was very well maintained. The ascent up the granite slope offered some welcome views of the surrounding area.
I was a little surprised to find some Nodding Trilliums blooming on the side of, and even on the path. A sure sign spring is on the way!
March 10th was also one of the warmest days of the year so far.
On the summit, there were actually a couple of picnic tables–a total surprise which made this SOTA operation feel somewhat luxurious!
On The Air
I set up the Elecraft KX2 and Chameleon MPAS 2.0 which were still packed from a SOTA activation two days earlier at Elk Knob (I’ll post a report of that activation in the near future).
I had not charged the Lithium Ion pack in the KX2 after the Elk Knob activation, but I assumed I’d still have enough “juice” to get me through the Rocky Face activation at 5 watts.
I started by calling CQ SOTA on 20 meters. A friend told me that propagation was very unstable, so I feared the worst. Fortunately, 20 meters was kicking (40 meters much less so).
Right off the bat, I worked stations in France, Germany, Slovenia, Quebec, Spain, and all of the west coast states of the US. It was so much fun and exactly why I love QRP and playing radio in the field.
As I switched from 20 meters to 40 meters, some hikers passed by. Turns out it was my cousin and her husband–what a surprise! Of course, they had no idea what I was up to, so I ended up explaining not only SOTA, but amateur radio and why I was using CW (yeah, I cut that bit from the activation video below).
They moved on and I hit 40 meters which was hit harder by the poor propagation. Many stations I regularly work were a good 2-3 S units lower in signal strength.
I am certainly looking forward to some stable propagation eventually! Still…very, very pleased with the 24 stations I worked and the QRP DX as well.
Here’s a QSOmap of my contacts–all from 5 watts and a vertical:
QRP radios, product announcements, reviews, news and more. Low power amateur radio fun!
Please support QRPer by adding us to your whitelist in your ad blocker. Ads are what helps us stay online. All of our ads are ham radio related--no junk, we promise! Thank you!