I look forward to all your videos and am enjoying how you use the Elecraft AX-1 in the field.
I have built the “WD-PT-PB” attachment for my AX-1 antenna.
That is, it is for Windy Day-Picnic Table-Park Bench use. It can be set up horizontally or vertically on the edge of a picnic table or at any angle on the back of a park bench and is a secure attachment for the AX-1 off the radio.
[I] bought the bolts straight and put them thru a random C clamp secured with a nut or wing nut and then bent one in my vise. Loosen the wing nut and angle the bolt any way I want and tighten the wing nut.
The pictures show it better than paragraphs of a description.
73,
Jim Long
Madison, WI
N9EET
That’s brilliant, Jim! I love how versatile the clamp is and that it even fits in your Maxpedition pouch! No doubt, it’ll help the AX1 (or AX2, or any similar antenna) survive the windiest of deployments.
If you’ve been following QRPer.com and my YouTube channel for long, you’ll notice that I typically post two field reports with videos per week when my free time allows. Each report takes about four hours to produce along with a video. I’ve currently got a small backlog of videos I need to post, so in order to squeeze them into my schedule, I’m going to use a slightly more abbreviated field report format: a “postcard” format!
My Postcard Field Reports will still be information-packed, just slightly more concise and distilled than my average field report. I’ll primarily post these for sites I visit frequently.
Speaking of which….
Lake James State Park (K-2739)
Thursday, February 2, 2023, was a rainy, dreary day so the perfect time to play a little POTA, right? I made time in my morning to visit Lake James State Park (K-2739).
When I arrived at the Catawba River Access, the parking lot was empty. Not too surprising considering it was a Thursday morning on a chilly, rainy day.
During the months of January and February 2023, I’ve given my Elecraft AX1 a thorough workout. As I mentioned in a previous post, I thought it might be fun to take the AX1 out on a good 30 days worth of activations.
Turns out, I’ve had such brief windows of opportunity to play radio recently, the AX1 and now AX2 have been valuable tools in my field kit. They are, no doubt, the quickest-to-deploy and most portable antennas in my collection.
The Elecraft AX2 paired with the KX2.
If I only have a 20 minute window to squeeze in a quick park activation, the AX1 and AX2 make a valid POTA activation–with 10 logged contacts– a reality.
I originally purchased my Elecraft AX1 in the spring of 2020 and have used it extensively since then. In January 2023, I finally caved in and purchased the most recent addition to the AX family, the mono-band AX2.
Elecraft AX1 vs. AX2
Since I’ve been publishing numerous field reports recently using the AX1 (with more to come) and since Elecraft has included both the AX1 and AX2 in their February 2023 Specials, I’ve received questions from readers asking:
“Should I buy an AX1 or AX2–?”
and“If so, which one should I buy? What are the differences?”
At first, I simply pointed readers to the concise comparison guide that Elecraft publishes on their website (linked below).
I realize, though, that there are characteristics of each antenna that you might only discover after actually using them in the field.
I decided to make am unedited video–based on a few notes–not only describing the differences and similarities of the AX1 and AX2, but also if either would potentially benefit you as a field operator or traveler.
One quick note about resonance…
One point I touch on in the video is that both the AX1 and AX2 antennas are designed to be mostly resonant on 20 meters.
Small verticals like the AX1 and AX2, that use coils to electrically “lengthen” the antenna, have a higher Q than, say, a large aperture quarter or half wave antenna. In practical terms, this means that the window of resonance is narrow and more fickle than, for example, an end-fed half-wave.
A lot of factors can affect the SWR on higher-Q antennas like the AX1/AX2 including:
the type of terrain,
height off the ground,
length of counterpoise,
configuration of counterpoise,
and, most notably, the operator’s own body capacitance.
You may find that the AX2, for example, is natively resonant on 20 meters at one location, but isn’t at another location. This is quite normal. It’s also the reason why Elecraft states that both antennas are designed to be used with an ATU.
If you are pairing the AX1 or AX2 with a radio that doesn’t have an ATU (or you can’t use an external one), then you might consider making a simple capacity hat. Check out this field report and video where I paired the AX1 with the IC-705 and used a capacity hat to sort out the SWR.
Video
As with all of my videos, this one is unedited and commercial-free. If you’d like to skip through the video to the parts you might find most relevant, simply hover your mouse over the YouTube time line and click on the chapter indicated:
Another note here: I have no affiliation with Elecraft, but pushed this article and video to the front of the line to help those who are consider taking advantage of Elecraft’s AX1/AX2 February 2023 Package Deals.
I hope you find the video helpful. I’ll try to answer any other questions you might have in the comments of this post.
I’d also like to send a special thanks to those of you who have been supporting the site and channel through Patreon and the Coffee Fund. While certainly not a requirement as my content will always be free, I really appreciate the support.
Last year (May, 2022), Xiegu announced a new compact field radio that would be added to their line of transceivers: the Xiegu G106.
As I was capping off my summer in Canada (August, 2022), Radioddity started shipping the G106. Radioddity had me on their list of folks to send a loaner G106 to, but I didn’t have time to even look at the radio I was so busy upon my return, so didn’t immediately request it.
I did watch, however, K8MRD’s initial review and updated review of the G106. It was less than stellar [understatement alert!] but more than relevant to me because Mike shipped his second unit to me on behalf of Radioddity.
I connected that G106 to a dummy load, checked the transmitted signal, and it simply didn’t look very clean. It looked worse than it did when Mike checked it only a couple weeks prior.
I shared my results with Radioddity, told them I didn’t feel comfortable putting it on the air for testing in the field, and they asked to have that unit returned and checked out.
Updated G106
Fast-forward to January 2023 when I was once again contacted by Radioddity to see if I would like to field test an updated G106. I was happy to do so, in fact, because I was curious if the whole G106 experience had improved.
In the spirit of full disclosure: keep in mind that Radioddity is a Xiegu retailer/distributor–they are not the manufacturer nor are they owned by Xiegu. They are a sponsor of QRPer.com, but have no say in what I post nor any sort of editorial input. Indeed, this is always a condition of sponsorship from day one.
To Radioddity’s credit, some of my most critical reviews have been of products they’ve sent me on loan (especially the GSOC). They take criticism on the chin and keep on moving forward. This is why they are still a sponsor and I like working with them. They understand that I call it like it is and stand by what I publish.
This G106 has been sent to me on loan for a few weeks to review. I plan to take this unit on a number of activations and pair it with a variety of antennas and accessories.
Very early impressions
I will eventually publish a full review of the G106 (likely in The Spectrum Monitor magazine first) once I’ve put in a lot more field and shack hours with the G106. In the activation video, below, I do make a lot of comments about the radio–thinking out-loud–so if you’re considering purchasing the G106, you might at least listen to a few of my initial impressions.
I will say this: for a modern SDR-based transceiver, it’s pretty bare-bones. It lacks a number of features I assumed it might have despite the incredibly affordable $320 US price point:
No SWR meter
No Power meter
No CW or Voice message memories
No RF gain control
No AGC control
No dedicated headphone audio output
But, again, it has more features than many of the bare-bones CW-only QRP transceivers out there, so for the price perhaps expectations should simply be in check–?
Zebulon B. Vance Birthplace (K-6856)
On Tuesday, January 31, 2023, I took the G106 on its maiden POTA activation to K-6856.
The G106 doesn’t have a built-in ATU (which I would never expect at this price point) so I decided to pair it with a resonant antenna. Since it was a very rainy day and the area/ground where I tend to deploy my wire antennas at Vance was squishy and soft, I opted to deploy my Chelegance MC-750 next to the picnic shelter. Continue reading Taking the Xiegu G106 on its maiden POTA activation!→
Just for your info: if anyone wishes to adjust the sidetone level there is a way to do that:
TR-45L Internal Sidetone Adjustment
The sidetone level adjustment can be accessed by removing the front panel assembly from the rear case.
First, remove the six screws that secure the panel to the rear case half. Separate the panel assembly and lay it face down on the table. Be careful with the interconnecting cables.
While operating the unit, adjust the sidetone level pot (circled in red) for the level of your liking. Reassemble the panel to the case rear. You may need to squeeze hard on the corners to make the panel fit. Be careful with the dress of the internal cables.
Thank you so much for sharing this, David. This is a very simple procedure and shows, also, how WA3RNC designed the boards so that the pot is accessible without having to pull apart the two main boards!
On Friday, January 27, 2023, I dropped off one of my daughters at the library for a creative writing session.
Hazel was along for the ride, so we decided to hike on the nearby Mountains To Sea Trail (MST) while my daughter was in the meeting.
During the hike, I realized that I should have taken my field radio pack along because it would have been so easy to activate both the MST and Blue Ridge Parkway as a two-fer.
Instead, Hazel and I enjoyed our hike and got back to the car with about 35 minutes or so to do an activation–including set-up, on-air time, and pack-up. That would leave me just enough time to pick up my daughter at the library before they closed for the day.
Challenge accepted!
Because I had been using the Elecraft KX2 and AX1 recently, I had both packed in my Spec-Ops EDC backpack. In theory–even filming a video at the same time–I knew I could probably fit in a whole activation with 25 minutes on the air. I only needed 10 contacts, and I’ve never been in a situation where the AX1 couldn’t achieve that goal.
Many thanks to Brian (K3ES) who shares the following guest post:
The VK160 Antenna packed on its Winder/Feedpoint for storage, transport, and deployment.
Building and Testing the VK160 Antenna
by Brian (K3ES)
The ability to set and achieve long- and short-term goals keeps me interested and active in the Parks on the Air (POTA) program. Often these goals are associated with POTA awards. Currently, I am working slowly to complete the activator version of the James F. LaPorta N1CC award, which requires an activator to make QSOs on 10 amateur bands from 10 different parks. With my operating style, I have found it achievable to make QSOs on the 9 available HF bands (80m, 60m, 40m, 30m, 20m, 17m, 15m, 12m, and 10m), and this has become easier with the rising solar cycle. I have completed QSOs on non-HF bands using 2m and 70cm simplex. The other options to pick up 10th band QSOs include the 6m band and the 160m band.
I have found it difficult to make unscheduled POTA contacts on 2m and 70cm, and scheduled contacts can be difficult to arrange in parks that are remote from population centers. I have built a 6m antenna, but contacts are seasonal (and for me very elusive). So I started looking for a way to add 160m capability to my portable station. Ultimately that resulted in homebrewing a new antenna that I now call the VK160, and here is its story.
Objective
I needed a field-deployable 160m antenna. My operating style requires that the antenna system be both light and compact. QRP power levels are sufficient for my purposes. I am very comfortable deploying wire antennas in the Pennsylvania woods, and QRP wire antennas can be both light and compact. I have found that end-fed antennas are simpler to deploy in the field, because they can be configured as an inverted V or as a sloper, using only one point of support.
An end-fed half wave (EFHW) antenna would be naturally resonant, but would need to be over 250 ft (76m) long. A wire antenna of that length would be challenging to deploy, even in more open areas. So, I decided to pursue a 9:1 unun-based end-fed “random wire” (EFRW) antenna. In fact, I have two commercial EFRW antennas available, but have never been successful in tuning them for 160m using the ZM-2 tuner in my field kit. So, I concluded (probably incorrectly, but more on that later) that I needed to build a 9:1 random wire antenna with a longer radiating element than the 71 ft wire built into my largest existing EFRW. I also wanted to build this antenna myself, using available components, so that it would be both inexpensive and customized to my needs.
I broke the task into four parts:
First, I needed to build a 9:1 unun suitable for use at QRP power levels. The 9:1 unun is an autotransformer that reduces antenna feedpoint impedance by a factor of 9, hopefully a level that a wide-range tuner can match to the 50 ohm transceiver impedance.
Second, I had to design and build mechanical elements of the antenna system, incorporating the electrical components needed for the feedpoint.
Third, I needed to select a suitable non-resonant wire length for the radiator.
Finally, I needed to deploy and test the finished antenna on the air. If successful, testing would culminate in completing an on-air QSO with the antenna being driven at 5 watts or less.
Building the 9:1 Unun
While I have built successful 49:1 ununs as the basis for EFHW antennas, I had no experience building 9:1 ununs. Accordingly, I started with the ARRL Antenna Book, then a web search. VK6YSF’s excellent web page provided very detailed instructions for 9:1 unun construction. His 9:1 Unun design was based on a FT140-43 toroid wrapped with heavy gauge magnet wire, with design power rating around 100 watts. My application was focused on 10 watts maximum, and I wanted a lighter-weight solution to the unun design.
Looking at the components I had available, I found FT50-43 toroids and 24 AWG magnet wire in my inventory. I had used those during construction of successful 49:1 EFHW antennas. The VK6YSF design, built with the smaller toroids and lighter magnet wire, seemed to be a good (and cheap) starting point.
The “50” portion of the FT50-43 toroid designation specifies its 0.50 inch (1.27 cm) outside diameter. The “43” portion designates nickel/zinc composition that is suitable for high frequency inductive applications.
The next problem that presented itself was a problem with translating the winding technique to smaller wire and a smaller toroid. Put simply, my fingers do not have the dexterity to wrap three parallel 24 AWG wires around a ½ inch OD toroid without getting them crossed, twisted, or worse. So, why not twist the three conductors from the start, and wrap the toroid with “trifilar” windings? It would be simple enough to identify the mating wire ends after wrapping, just with a set of continuity tests. That would facilitate proper connection of the wires to yield the final auto-transformer configuration.
FT50-43 toroid with three-10 inch (25.4 cm) segments of 24 AWG enameled magnet wire staged for construction of the 9:1 unun.
I posed the “trifilar” winding question to my friends over on the QRPer.net discussion board. Nobody identified a significant flaw with the proposed method, but neither did anyone have experience that would assure success. So, I decided to use the “trifilar” winding technique to construct my 9:1 unun, with the full recognition that its success would be uncertain, and only proven by testing the finished product. Continue reading In Pursuit of the Top Band: Brian describes how he built and tested a field-portable 160 meter EFRW antenna→
As I mentioned in my previous field report, on Saturday, January 21, 2023, I had just enough time to activate two parks in short order on the way back to my QTH
I thought it might be fun to perform both of these activations with the Elecraft KX2 and AX1 combo because they’re so speedy to deploy.
Once again, I wanted to show the whole KX2/AX1 set-up and pack-up process in my activation video.
Lake James State Park (K-2739)
As I pulled into the Lake James Catawba River access, I discovered that there were few other guests there that day. I was expecting more people on a Saturday especially since the weather was so pleasant and South Mountains had been so busy earlier that morning.
Then again, the Catawba River access always has less visitors than the Paddy’s Creek area (which is really the main public access point for Lake James).
I pulled into a parking space, found one of the closest picnic tables, and set up the station in short order.
At South Mountains State Park, an hour earlier, I performed the entire activation on 20 meters. To shake things up a bit, I decided to perform the one at Lake James on 17 meters (note here that the AX1 only works on 20 and 17 meters unless you have the coil which adds 40 meters). Continue reading KX2/AX1: Second quick activation of the day at Lake James State Park!→
You might have noticed that I’ve been taking the Elecraft AX1 antenna out quite a lot recently. At time of posting, I’ve almost used it for a month’s worth of activations.
In December, I thought it might be fun to only use the AX1 for one 2023 calendar month–say, the month of March–but since I evaluate and review radios and antennas, it’s just not realistic to make that kind of commitment.
That said, I did decide to simply start using the AX1 as my primary field antenna for roughly a 30-ish day period and, so far, that’s working out very nicely. I thought it might give some real-world context and usage for those who still believe I’ve just been lucky the days I use the AX1 in the field. No better way to test that theory than to just do it!
Mini rove!
It’s been a while since I’ve had time to do a proper park rove. I hope to do a five park rove within the next month or so, if I can clear out space in the schedule. I find roves so much fun and a nice change of pace.
On Saturday, January 21, 2023, on the way back to my QTH in the mountains of WNC, I had just enough time to activate two parks in short order. Having just been challenged by a short activation window at the Vance Birthplace (which, turned into a normal length activation due to a schedule change in my favor) I thought it might be fun to once again, show the whole KX2/AX1 set-up and pack-up process in my activation video.
South Mountains State Park (K-2753)
I chose South Mountains State Park as my first stop.
South Mountains has a number of public access points. I decided to drive to the main park entrance and set up at the equestrian picnic area. Choosing the main park entrance added about 15 minutes to my overall driving time; the Clear Creek access would have been quicker, but I’d been there only recently. Continue reading A quick two park KX2/AX1 POTA run starting at South Mountains State Park!→
Many thanks to Alan (W2AEW) who shares the following guest post:
New AX1 POTA Activation
by Alan (W2AEW)
I have to admit, I have been bitten “hard” by the POTA bug! (I blame Thomas!) It started for me in August 2022 while I was on vacation at the Jersey shore. Since that time, I have completed 48 activations at 19 different parks. All of these have been QRP, and almost exclusively on CW. This story is about one of my recent activations, which was unique for a couple of reasons. Read on…
The Park
My job puts me on the road, covering a large portion of the northeastern United States. When my schedule permits, I’ll hit the road earlier than needed in order to potentially stop for a quick activation along the way (usually giving up a lunch-on-the-road stop in favor of a bit of QRP CW operation at a park).
This particular park was not your typical state park. It wasn’t a nature preserve, or a mountain lake, or a hiking or picnic paradise. No, this park is decidedly urban, occupying 2 blocks in the city of Holyoke, MA. This is K-2439, Holyoke Heritage State Park. According to the state park website, this park celebrates the rich industrial heritage of the city of Holyoke. The park also includes a Children’s Museum, a Volleyball Hall of Fame and a restored antique Merry-Go-Round.
The park is situated along a canal that once powered some of the mills that were located on the property.
It certainly is not like any other state park that I’ve been to!
One of the reasons I chose to stop at this park is that it had only been activated 4 times in the past. In retrospect, I suppose this could’ve been because of the city/industrial setting. Was it going to be noisy? Maybe this was a bad idea.. Thankfully, it wasn’t… Another thing that appealed to me is that it had not been activated on CW before. So, my activation would be a CW ATNO (All Time New One) for this park, which is kind of cool.
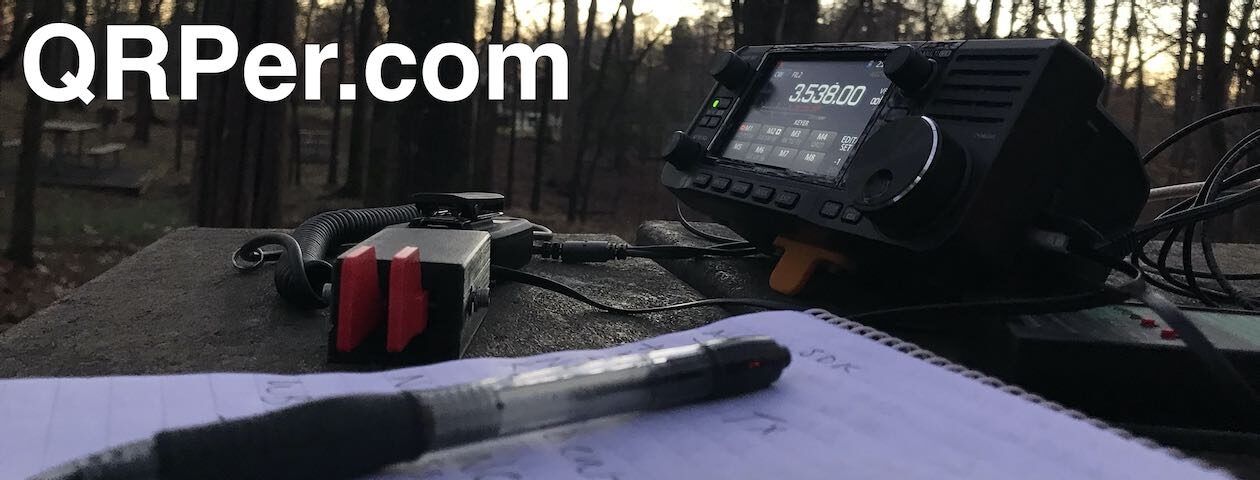
QRP radios, product announcements, reviews, news and more. Low power amateur radio fun!
Please support QRPer by adding us to your whitelist in your ad blocker. Ads are what helps us stay online. All of our ads are ham radio related--no junk, we promise! Thank you!