Do you usually try to use an isolator or do you often let your wires touch branches by just pulling them over? When you deploy 20m EFHWs, for example, do you try to avoid having an end touch a branch and only have the throw line going over the branch? I tried to go through your videos and look but you don’t often mention how far you pull the wire up and possibly over. Thanks!
This is a great question!
Before I answer, I’d like to add a little context:
I am a QRP operator. The maximum amount of power I use in the field is 10 watts, but 99.5% of the time, it’s actually 5 watts or even much less.
I am answering this as a field operator, meaning I’ll be referring to temporaryantenna deployments.
That said, the quick answer is no, during park and summit activations, I do not worry about my antenna radiator wire touching tree branches.
I do isolate the end of my wire antennas from tree branches and leaves, but I don’t worry about other parts of the radiator touching.
Also, all of my antenna wire has some sort of jacket–I don’t run bare wire in the field.
Last year, during a Black Friday sale, I took a calculated risk and purchased a bag I hoped would accommodate my Yaesu FT-817ND that has been outfitted with an Armoloq TPA-817 Pack Frame.
CP Gear Tactical Aircrew/Pubs Bag
Rod (VA3ON) first introduced me to CP Gear Tactical–a military pack manufacturer based in New Brunswick, Canada.
I contacted CP Gear Tactical shortly after outfitting my FT-817 with the TPA-817 pack frame. I measured the frame carefully and asked if the interior padded pocket (which is actually designed to hold a tablet–might fit my radio.
I never heard back from them. I could have called them, but on Black Friday, when it was on sale for 20% off and free shipping, I decided to throw caution to the wind and simply purchase it. My total price in USD was something like $62 shipped.
As soon as I opened the CP Gear pack, the first thing I did was check to see if the FT-817 with pack frame would fit in the interior pocket.
Much to my surprise, it fit it perfectly!
Indeed, it’s as if the pocket were specifically designed to accommodate the FT-817ND/TPA-817 combo.
Even the middle Velcro strap fits precisely in the middle of the radio between the pack frame side extensions. The strap holds the rig securely; once, I accidentally fumbled while holding the bag and even though it was upside down, the FT-817 remained securely inside. The strap held it in place.
The bag has loads of room inside. In fact, you can very easily transform it into a fully self-contained field radio kit.
I actually give a small tour of this pack in my activation video below, so if you’d like to see some of the exterior pockets, I would encourage you to check it out!
If you’ve read my “Anatomy of a Field Kit” series, you’ve likely gathered that field kits are a bit of an obsession. [Yeah, understatement alert!]
My field kits roughly fall into two main categories: modular and fully self-contained. My modular kits are ones where components like the battery, antenna, throw line, key, and radio are in separate pouches and can easily be combined to make a complete station before I leave for an activation.
My fully self-contained kits are ones that quite literally have everything needed to perform a park or summit activation in one pouch or box. A good example that I’ve documented here is my MTR-3B field kit.
If you’re a devoted park and/or summit activator, I think it’s important to keep a dedicated kit kit in your car at all times. Why?
It’s ready to grab for impromptu activations
It’s handy in case of road-side emergencies in remote areas
It’s always accessible to demonstrate amateur radio to those who are curious
It’s always always there for those times when you hadn’t planned to play radio, but the opportunity presents itself
I always have a full radio kit in my Subaru and over the years, I’ve changed and adapted it. For the most part, though, it’s been located in the trunk/boot and lives with anything and everything else I keep back there. Sometimes, it’s in the way when we need to fill that trunk space with family items for a trip or when we’re hauling things around town. Other times, it’s floating/sliding around freely in the back.
On long family trips, I’ve been known to store radios under the floor, but it’s a true hassle to remove them because I have to remove anything in the trunk before lifting the floor.
Contraband I hid in the car during our two month Canada trip last year.
I’ve always wanted a way to store my kit in the car in a dedicated space. In the past, I’ve tried to make a kit that could fit under the driver’s seat–thinking that might be ideal–but there’s very little clearance under it and it’s difficult to remove.
Enter the BROG Headrest Pouch Kit
Before I placed my initial order for the Blue Ridge Overland Gear (BROG) Gadget Bag, I checked out other items on their website. One that immediately caught my attention was their Headrest Kit.
It consists of a Velcro panel that fits around a vehicle headrest and a pouch (or pouches) attach to it.
BROG caters to Overlanders and vehicle storage/organization is huge in that community. The headrest kit makes a lot of sense: it’s using space that’s accessible, doesn’t interfere with any passengers, is off the floor, and is otherwise underutilized!
The big questions, of course:
would the pouch offer enough space to store an entire radio kit,
and would the kit weight too much for the Velcro back to hold it in place?
I asked for the Headrest Pouch Kit ($47.99) to be sent with my Gadget Bag order.
BTW: Big thanks to BROG for giving me flexibility with this order. Since I had no experience with their gear, I asked that they send me a list of items and allow me to evaluate them, then pay (full price) for what I decided to keep.
Would it work?
I knew I’d need to store a very small transceiver in this dedicated pack. A few could potentially fit the bill–namely the:
I think every portable operator thinks about their coax cables and how to use more light and flexible types. During the last few activations, I have switched from my rigid Aircell 5 to the lightweight and flexible RG316. I have bought a couple of different lengths, mainly from Chinese online sellers at AliExpress.
However, I had some hard to define issues like the vague feeling that I am not getting out as good as I should, or a changing SWR during an activation. So I thought I should check my cables before looking at other parts of my equipment.
My professional and educational background does not have anything to do with electronics, and I don’t have the equipment to measure the cable loss directly. But my goal was to check if the cables were faulty, not to measure the exact attenuation.
I have an SWR and Power meter from DJ9PK as per image below. It can measure PEP and has, according to the seller, an accuracy of +/-4 percent. You can find more details about it here in German or here in English (Google / auto translated).
My KX3 with a CW paddle served as signal source. As large differences are easier to spot than smaller, I switched to the 10-meter band as the HF band with the highest attenuation.
I then measured a short cable with a very low loss, a 1 m / 3.3 ft RG213, which should have an attenuation of less than 0.1dB (excluding plugs).
I simply checked how much power came out at the other end of the cable. That value I have used as reference. This cable (and all others) was plugged directly between the KX3 and the power meter, no ATU involved anywhere. The power meter was set to measure PEP. Continue reading Coax cables I used for SOTA/POTA – A horror story→
On Tuesday, March 28, 2023, I packed my Elecraft KX3 and took it to the Zebulon Vance Historic Birthplace (K-6856) for a nice, relaxing, early afternoon POTA activation!
It had been a few months since I’d taken the KX3 to the field and it really does deserve some outdoor time because…well…I still think it’s one of the best HF field radios on the market.
I’m spoiled, though, because I also own a KX2 and it does 80% of what the KX3 does, is much smaller, and sports a very long-lasting internal battery. Because of this, my KX2 gets way more field time and the KX3–hooked up to a KXPA100–is my main radio in the shack.
When I make an activation video in the field, I like using a speaker rather than recording from the line out of the radio. Besides the extra post-processing, sometimes the line-out audio from left and right channels are out of phase from each other and end up cancelling each other out in YouTube videos if listening in mono. I recently learned how to fix this, but I find the whole process just adds *that* much more time to post-processing and I’m always pressed for time.
The Elecraft KX3 has a built-in speaker, but it’s pretty anemic. I almost always pair the KX3 with an external speaker to amplify the otherwise excellent KX3 audio for my activation videos.
On this particular day, I had a new speaker to try as well: an Anker Soundcore Mini. I purchased this speaker on the same day I posted Mike’s speaker search and review of the Soundcore Mini. Although I have a Sony SRS-XB12 portable speaker and love it, they’re no longer produced and the battery life isn’t quite as good as the Soundcore Mini (Anker states up to 15 hours per full charge).
This activation would give me an opportunity to really test the Anker Soundcore Mini in the field. In the end, it did a brilliant job.
I should note that I also brought my Blue Ridge Overland Gadget Bag (see above) to the field that day, so I include a little tour and overview of this pack in my activation video.
As I mention in my activation videos, Vance is a small park and, unless you plan to operate from your car, there’s really only one good site to set up: in the picnic shelter. Thing is, if a school, club, or civic group is scheduled to meet that day, the picnic shelter will almost certainly be reserved for them.
Each time I activate Vance, I ask the park staff in advance if the picnic shelter is reserved and if it’s okay if I perform the activation. Fortunately, the shelter is reserved only about 20% of the time. On days when it’s reserved, I simply activate elsewhere.
The weather on the morning of April 4, 2023, was absolutely outstanding!
I woke up that morning, drank a cup of coffee, looked outside and knew what would be in store the day: a SOTA activation!
My schedule was actually open that fine Tuesday because my daughters were on spring break from school, so the only problem was deciding which summit to activate. A good problem, in other words!
After staring at the SOTL.AS map for a while, I decided to activate Flat Top Mountain (W4C/EM-026) near Blowing Rock, North Carolina. One of the main reasons I chose Flat Top was because the roughly five mile round-trip hike is such a pleasant, casual one. My left ankle was recuperating from a bit of a strain, so I knew Flat Top’s flat, wide carriage trails would fulfill my need for exercise without straining my ankle (which, by the way, is doing much better now).
The drive to Flat Top is a beautiful one–a good third of it is on the Blue Ridge Parkway including the Linn Cove Viaduct which offers up stunning long-range views. I made my way to Moses H. Cone Memorial Park, at BRP milepost 294, where I parked the car and put on my hiking boots.
The park was pretty active for early April, no doubt because the weather was so stunning.
I checked out the beautiful Flat Top Manor to see if renovations had been completed.
It looks very close to completion, I have to assume they’ll be open again soon. The old manor was looking beautiful against clear skies!
Flat Top Manor was built by in 1901 by Moses Cone who was a very successful local textile entrepreneur, conservationist and philanthropist. It’s so fitting that this beautiful bit of architecture and these expansive grounds (which includes no less than two SOTA summits) are now protected by the National Park Service for all to enjoy.
Since I first met Brooks, he’s always had a goal of learning CW and activating parks and summits using Morse Code.
I’ve been in touch with Brooks regularly over the past year and have followed him as he progressed on his CW journey.
Though, like me, he has an active family life, Brooks has found the time to practice CW both through lessons and actual on-the-air contacts. Fortunately, this is all possible because–again, like me–his wife and family are very supportive of his amateur radio adventures!
Early this year, we met on 80 meters and had a good one hour rag chew at about 12 words per minute. I could tell he was ready to do his first POTA activation in CW.
To give him a little real-world practice, we decided to hit the field on a day when I was performing an activation and he could log for me in real-time.
Fast-forward to 8:30 AM on March 24 when Brooks and I met at the Folk Art Center on the Blue Ridge Parkway. Coincidentally, this is the same location where I performed my first CW activation!
We deployed his MFJ-1984MP 40 meter EFHW (End-Fed Half Wave) and connected it to his Xiegu X5105 transceiver in very short order. Brooks also chose his lucky CW Morse paddle for this activation.
But before hopping into the field report, let’s back up just a bit…
First CW Activation: Getting there…
Brooks very kindly wanted to share a bit about his CW journey in this field report. He writes:
From the moment I knew of its existence, becoming a POTA activator using CW has been at the top of my “radio bucket list.”
It seemed like the ultimate challenge and I knew I would never be satisfied until I was able to confidently activate parks using CW. There is also a bit of mystique to CW that other modes lack, making it inherently more interesting to me. In this article, I am going to share the path I took to learn CW and how it culminated in a very successful CW activation.
Many thanks to Dave (KN4OK) who shares the following mini POTA field report:
POTA Activation K-3620 Florida Keys Overseas Heritage Trail State Park.
By Dave (KN4OK)
On April 8th, 2023, on our way to the Overseas trail near the 7 mile bridge, is a great place to activate with a picnic table and shade on the water.
I was smart enough to mention to the wife that we were going to activate a park and she was carrying my Elecraft KX2. Of course, in my hand was the antenna, the MFJ-1889T, and counterpoise wires that I borrowed from my WRC antenna.
After a mile hike on the trail, we stopped at the picnic table and I set the station up on 17 meters CW. The SWR was pretty good and I made 9 contacts with no problem. I then switched the radio and antenna to 20 meters and obtained a better SWR.
One thing that I noticed: extending the counter poise wire (33ft) all the way out for both bands helped a great deal. The jumper holes on the antenna were also changeable and helped as well. MFJ has a nice manual for band setups, but be sure to adjust for best SWR. Very easy to do and works great.
The 20 meter band was also a big success and I was very pleased with the performance of the MFJ 1899T antenna. Thanks for all the previous discussion of the similar antennas that inspired me to take out my antenna.
The end result was 19 contacts, all CW in about 45 minutes on a beautiful day!
Over the past couple of months, I’ve been trying to give the Xiegu G106 a thorough workout in the field. This little HF QRP radio is on loan to me from Radioddity who has very kindly been quite flexible about the loan period.
I want to give the G106 a fair shake-out because I believe it must be the least expensive multi-mode, full HF coverage transceiver on the market. Field ops are always looking for portable, affordable, effective radios to take to the field so many are considering the G106.
Of course, you simply can’t get benchmark performance out of a low-cost leader.
My full review of the Xiegu G106 will be in the May 2023 issue of The Spectrum Monitor magazine. It’s one of the longest reviews I’ve published in TSM because I try to fully explore the pros and cons of this pint size rig in order that pretty much anyone can make a purchase decision based on their own preferences and requirements.
POTA Plan B
On Saturday, March 18, 2023, I decided to take the G106 out for a very brief activation during a return trip to my QTH.
My park of choice was Tuttle Educational State Forest (K-4861) because it’s conveniently located, is an excellent POTA site, and I wanted to fit in a quick hike as well. Tuttle’s two mile loop fit the bill perfectly.
When I arrived at the park entrance, however, the gates were closed. I had double checked Tuttle’s schedule in advance and was under the impression that they had started opening the park on Saturdays again for the season.
I really wanted to fit in a decent hike so the next logical park choice was Lake James State Park. It didn’t require a major detour and I was certain it would be open.
Lake James State Park (K-2739)
Lake James has two major access points: the Paddy’s Creek Access and Catawba River Access.
I prefer the Catawba River Access even though it’s much smaller than Paddy’s Creek. For one thing, it’s always less busy and they’ve better spots to set up for POTA (since I like hanging wires trees more often than not). Although the Catawba River access lacks the trail network found at Paddy’s Creek, they do have a few trails that can be stitched together for a nice workout.
After arriving at the park, I put on my hiking boots and walked the Fox Den Loop and a bit of the Lake Channel Overlook.
I hiked back to my car, ate a bite of lunch, then grabbed my radio gear for some cheap POTA fun!
Many thanks to Steve (MW0SAW) who shares the following field report:
Mini Field Report: Testing the Gabil 7350T and BaMaTech TP-III on a brisk SOTA activation!
by Steve (MW0SAW)
Went for an early walk/SOTA activation up Fan Fawr GW/SW-005 (734m) this morning (9/4/23). I think someone said it was supposed to be the hottest day of the year in the UK. It was about 5 deg celsius with a bitter wind chill of -2c on the summit! It’s very close to the highest peak in South Wales, Pen Y Fan (886m).
As I mentioned a couple of weeks ago in our emails, I wanted to test a new compact antenna I purchased recently, called the Gabil 7350T in the USA, and branded as the Sharman MD-3500 in the UK where I got mine. I also took the Gabil GRA-ULT01 MK2 tripod which I did purchase from the USA on Amazon.com.
The Gabil 7350T Compact Antenna and Gabil GRA-ULT01 MK2 tripod
Another first for the the activation was the Bamatech TP-III ultra compact paddle, Dinos were included 🙂
Starting my walk, the lovely view of the reservoir quickly disappeared and was the last view I would see ascending into the mist.
I took refuge in my Decathlon 1 man camping shelter, setting up the tripod and antenna close by.
The wind was howling and turning my back the antenna toppled over. This was quickly resolved with a tent peg on one of the tripod legs. Quick setting of the slider with the analyser got 1.2 SWR and so after a slurp of coffee, I started to call CQ on 20m CW. A nice stream of European qsos ensued with good reports (many 599), it was pleasing to hear with such a small antenna (about 8 ft). Just as the contacts were drying up, I was taken aback by a strong VK station! Always great feeling to get some dx like that but especially pleasing with this tiny antenna on its maiden voyage 🙂
I switched to 20m SSB for a few more QSOs but struggled with QRM on two frequencies. My allotted time was running low and my fingers were numb, so I packed up the HF and got the handie out to catch a few local VHF contacts.
So what can I summarise from this activation, well I can safely say I love the Gabil/Sharman antenna and Gabil tripod. They would make a really nice additional to a small go bag, they seemed to work almost as good as a full size 1/4 on 20m. Time was limited this trip and I was too cold to hang about to try more bands, but extremely pleased with the performance so far.
The Bamatech key is a pure work of art, beautifully made, sensitive and precise. Probably my best portable key to date in my collection.
Equipment:
(Note: Amazon links are QRPer.com affiliate links.)
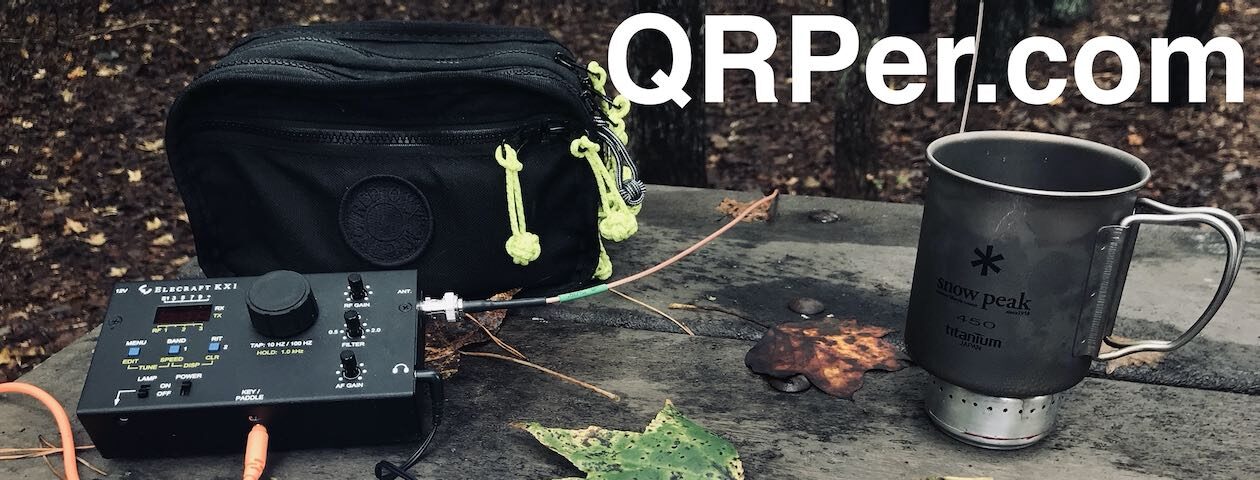
Connecting an international community through low-power field radio adventures.
Please support QRPer by adding us to your whitelist in your ad blocker. Ads are what helps us stay online. All of our ads are ham radio related--no junk, we promise! Thank you!
 Many thanks to Keysrawk on my YouTube channel, who asks:


