Category Archives: News

Field Kit Gallery: W4EMB’s Penntek TR-45L Portable Kit

Many thanks to Ed (W4EMB) who shares the following article about his portable field radio kit which will be featured on our Field Kit Gallery page. If you would like to share your field kit with the QRPer community, check out this post. Ed writes:


My QRP Portable Set up

by Ed (W4EMB)

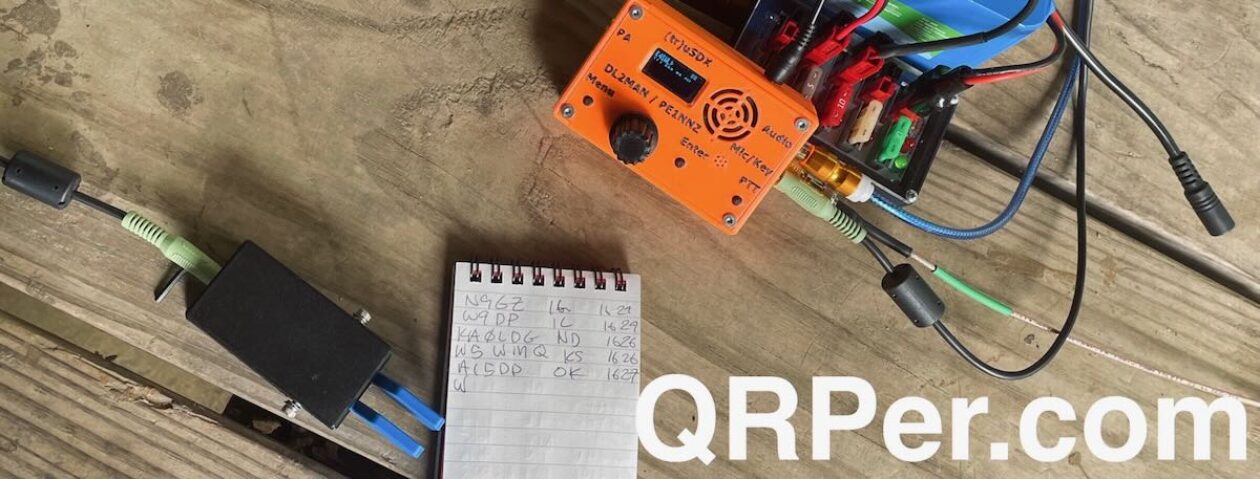
Radio: I have one priority rig I use 99% of my time. It is the TR45L Penntek. I have both versions. The fullsize one with built-in tuner and battery, I also have the “Skinny” version. The skinny does not have the tuner nor battery. My second Rig is the Yaesu 817 with the Windcamp Battery upgrade. I also have a 40m only QSX and the 5 band TruSdx.

Penntek TR45L Skinny with external batter and external tuner.

Antenna:  I use the Chelegance MC-750 most of the time, but also use a Homebrew EFHW with 49:1 balun and 67’ of wire.

I have the QRP guys Tri-Band vertical kit, and two pieces of 16ga Speaker wire cut to 33’ that I carry as well. To support the EFHW and Speaker wire antenna, I use the SOTABEAMS 10m (32 ft) “Travel Mast”.

For the QRP Guys Tri-band vertical, I use the SOTABEAMS Carbon-6 ultra light 6m (19.6 ft) mast. To support the 32’ mast I usually just lean it into the trees and slope my EFHW up from the feed point.

For the speaker wire antenna, I run the “red wire” straight up the mast while it is strapped to the picnic table. The “black wire” is simply thrown out across the ground. I might even elevate the black wire with sticks.

My carbon-6 fits right into a piece of 1 ¼ inch PVC pipe I have clamped to my brush guard on my van. Or, I use a Tiki-Torch stake to hold my carbon-6 in open ground.

carbon-6 with Tiki-Torch stake supporting and using the Tri-band Vertical.
carbon-6 inside of PVC pipe with the QRP Guys Tri-band vertical.

I find for me, that my QRP Guys antenna works great on 20m without a tuner. But when I try to use it on 30m or 40m, I require a tuner. For this reason, I lean on my MC-750 to be the main antenna.

I have modified my MC-750 slightly. I made my own set of radials to match the factory ones. I chose to make them out of silicone wire. I find it to be more flexible and does not kink or tangle as easy as the standard factory radials. I used 3mm banana plugs and 24ga yellow wire. I also crimped small ring connectors onto the ends of the radials. I did NOT strip the insulation and place them on the wire. I simply crimped them on the silicone. I use them to stake down the wire. I use four nails as “stakes” to pin the wire down. I find I only stake the radials out when I am on un-even ground.

The second modification, I made a set of “double” radials out of 26ga green silicone wire. Colors do not matter. It is what I had. I spread them evenly around the base of the MC-750.

MC-750 with “double radials” and RG316 for coax.

My key is a Czech military straight key from the 1950s. It was new old stock when I bought it. I also carry a small mini set of paddles. For the TR45L radio, I can not play my recoded CQ or 73 with out a paddle. The “play” button is dit or dah trough the paddle jack.

For coax, I use RG316 and the appropriate adapter for the MC-750.

I have two pencils from Kuru Toga. One pencil is .5mm the other is .7mm. I make my own POTA log sheets and I paper log, and then type them later. I am a not talented enough yet to play with a tablet or PC while operating. I have only done CW for the last 12 months.

On my table: I have a really thin yoga mat. I find the concrete picnic tables a bit rough on my equipment. The yoga mat can get a bit sticky when it is warm, so I drape a small hand towel over the edge where my arms lay. I also have a Write in the Rain tablet in full size paper. I have been out early in the mornings in this summer and humidity and steamy fog makes normal paper hard to write on. The .7mm pencil matches up well with the Write in the Rain paper.

Chelegance antenna pictured in the background. K-2965 Paris Landing State Park

I have found CW and POTA have re-energized my ham radio hobby and resurrected it from a dusty shack, to a fun out door activity.

My first challenge was how to get from the car to the table in one trip. Downsize to the necessities. Next was figuring out the antenna and radio combo that could work in different conditions. By conditions I mean space.

Location, location….. I had a dog run between me and my antenna. It pulled my radio right off the table and tumble behind the dog. So now I choose my locations like Bill Hickock… always face the door. Hihi. Food for thought.

Thank you to Thomas for inspiring me to get out there and do it. His you tube videos were great copy practice to give me the confidence to get out there. Finally, my Elmer. John, KM6NN. Without him I would have never started my CW journey. He is a true Elmer in every definition of the word. I am proud to know him and lucky he is in my life. Thank you John.

Gear:

Note: Check out W4EMB on YouTube as he makes his 1st POTA “Kilo” 

Out Of My Element: An Urban POTA activation at the Thomas Wolfe Memorial

It’s funny, but until September 7, 2023, I had never activated one of the closest POTA sites to my home: the Thomas Wolfe Memorial (K-6853).

I remember back in 2020 when I really kicked my POTA activations into high gear, I made a spreadsheet of all of the POTA sites within a 2 hour drive of the QTH and started activating them one by one.

At the time, almost 50-60%, or possibly more, had never been activated. Keep in mind that in early 2020, POTA had a wee fraction of the activity it has today.

It was a lot of fun especially considering those were the early days of the pandemic and it was just nice to get out and about. Any excuse, right?

The Thomas Wolfe Memorial is on North Market Street in Asheville, NC.

One of the parks on my list was the Thomas Wolfe Memorial but being a small historic site in an urban setting, they were closed for quite some time during the pandemic. There was nothing to stop me from walking on the site–or pulling up in their parking lot–and doing an activation while they were closed, but I just didn’t feel like it should be fair game when closed.

Then restrictions loosened up and, frankly, I just sort of forgot about it.

I tend to activate parks in rural areas and I am prone to overlook urban sites (although quite a few of my activations in Canada last year were urban).

Thomas Wolfe Memorial (K-6853)

On Thursday, September 7, 2023, I dropped off my daughters at school then made my way to a doctor’s appointment. I arrived at the office, gave them my name at the front desk, and then they reminded me that we had re-scheduled this particular appointment for later in the month.

Doh! I forgot to make the change in my calendar.

All of the sudden, I had a bit more free time!

Of course, I always fill free time with POTA activations, and I already had radio gear in the car, so it was only a matter of deciding where to go.

I called the Vance Historic Birthplace (about a 25 minute drive) to see if they were busy. Their director (who I know quite well at this point) told me that a large group was on the site, but would be gone by 1:30. That timing didn’t work for me, so I consulted the POTA map.

Since the POTA site used my coordinates to find the closest park, I was reminded that K-6853 was a mere 3 minute drive from the doctor’s office. I could have walked there.

I gave the site a call to ask for permission (again, I always do this for small historic sites) and they told me I’d be most welcome.

The site is on a small urban lot and consists of two buildings: the visitors’ center, and the Old Kentucky Home boarding house. Continue reading Out Of My Element: An Urban POTA activation at the Thomas Wolfe Memorial

Field Kit Gallery: KM4CFT’s QRP Labs QMX/QCX-Mini Go Kit

Many thanks to Jonathan (KM4CFT) who shares the following article about his portable field radio kit which will be featured on our Field Kit Gallery page. If you would like to share your field kit with the QRPer community, check out this post. Jonathan writes:


Hi Tom,

I thought I would share the two go kits I have. I tend to customize my equipment and supplies before I go on a POTA or SOTA outing but I keep these for the rare occasion when I want to grab a radio real quick. [The first on is my] QRPlabs go kit:

The kit is for my QRP Labs QMX/20 meter QCX mini. It contains everything I need to operate 20 meters CW.

The case is a regular Lowepro case that I got with my KX2 when I purchased it from another ham. I did not realize it came with it so I accidentally ordered an extra from Elecraft which I now use with the KX2 kit [featured in a future Field Kit Gallery post].

The kit uses many components from K6ARK, including the 20 meter EFHW antenna and the retractable paddle.

The battery is a TalentCell from Amazon. I use it because it supplies 12v instead of 13.8v. One of the downsides of the QMX is that it cannot handle 13.8v, so I have to stick with 12.

I keep a cheap pair of earbuds with me just in case but I try to bring a nicer pair of headphones whenever possible.

Hopefully this information is useful to you and your readers!
-Jonathan KM4CFT

Readers: Check out Jonathan’s YouTube channel by clicking here.

Field Kit Gallery: K4EAK’s Truck Portable SW-3B Field Kit!

Many thanks to Skip (K4EAK) who shares the following article about his portable field radio kit which will be featured on our Field Kit Gallery page. If you would like to share your field kit with the QRPer community, check out this post.


[I]n my truck I carry a little field kit for impromptu POTA activations.

I also have an FT-891 to an ATAS-120 permanently installed in the truck, which is another possibility for impromptu activations, but that requires me sitting in the truck for the activation. Not my favorite way to activate …

The SW-3B truck kit consists of:

All in a large Bagsmart electronics travel organizer (the case is too large, but since I only carry it in the truck, it didn’t matter)

With the case hung over a headrest hook behind the driver’s seat.

What a great idea [to share field kits]. I’m really curious to see what others post.

73 Skip K4EAK

Chameleon MPAS Lite: Using the coax shield as a counterpoise and how this might affect directionality

Many thanks to Dale (N3HXZ) who shares the following guest post:


Portable Operation Using a Vertical Antenna Without a Counterpoise Wire!

by Dale (N3HXZ)

In a previous article that Thomas was kind enough to post, I ran experiments to determine if the counterpoise wire orientation of the Chameleon MPAS LITE antenna system in the vertical configuration in any way shaped the antenna pattern.  The configuration of the antenna is shown below.

The system consists of a 17’ telescoping whip antenna, a matching transformer, a 50’ coax cable with an in-line RF choke, and a counterpoise wire (60’ long, but unwound to only 25’ for use in the vertical configuration).

Subsequent studies I performed have reinforced my earlier conclusions that the positioning of the counterpoise wire in this setup does not appreciably shape the antenna pattern. One of the comments from my post came from Stephan (HB9EA). He commented on the fact that the coax cable is indeed a counterpoise via the coax shield and that in fact my system set-up had two counterpoises.

It was Stephan’s comment which led me to contact Chameleon Antenna to discuss counterpoises with the MPAS LITE antenna in the vertical configuration. I communicated with the Director of Research and Development group at Chameleon and found out some interesting information that I wanted to pass on.

He mentioned that the system can be used with the coax cable acting as the lone counterpoise as long as the coax cable is at least 25’ long, and preferably 50’ long.  The coax should be spread out and not coiled along any portion of its length. It was stated that the counterpoise wire provided with the product should be used with short-length coax cables.

With regards to a counterpoise orientation shaping the propagation direction, he stated that it is generally accepted that using only the coax as a counterpoise tends to have the antenna pattern slightly favor the direction in which the coax is laid out. Adding the counterpoise wire in a direction opposite to the coax would tend to balance out that pattern. Having the coax and counterpoise wire at some angle to each other introduces variables that make it difficult to determine the antenna pattern.

My initial study had the counterpoise wire oriented at an angle to the coax cable.  I mentioned that my initial study showed that orientation of the counterpoise wire did not seem to appreciably shape the antenna pattern, and he agreed. What is unknown is the overall degree to which the coax cable shapes the antenna pattern with or without use of the counterpoise wire.  This is an area I am currently investigating.

Operating the MPAS-LITE vertical configuration with only the coax cable as a counterpoise was an intriguing thought.

To test it out I teamed up with Jim (KJ3D) for a SOTA activation on W3/PT-003 (Seven Springs). We both deployed the MPAS-Lite with only the supplied 50’ coax cable attached. Coax cables were laid out in a straight line. One cable was oriented southeast, the other one oriented east. We operated on 10 Watts in CW mode. The activation successfully worked all bands from 40M to 10M. I operated an Elecraft KX2 and Jim operated a KX3. The internal tuner of both rigs easily obtained a 1:1 match across all bands.

A map of the QSO’s is shown below. Note that despite the coax cables facing to the southeast and east, we easily worked stations in the opposite directions. Hence any minor shaping of the antenna pattern by the coax orientation does not appear to impede successful communication in all directions.

In summary, the MPAS-LITE antenna system in the vertical configuration utilizing the 50’ coax cable with an in-line RF choke as the single counterpoise has been demonstrated to perform well in the field.

For portable operation where fast deployment and simplicity is paramount, using the furnished coax as a counterpoise is a quick and dirty way to get the antenna erected and on the air with reliable communication capability. Eliminating the counterpoise wire allows for quicker set-up and tear-down, and one less thing to put in the backpack!

Field Kit Gallery: N8PEM’s MTR-3 Portable Field Radio Kit

Many thanks to Chris (N8PEM) who shares the following article about his portable field radio kit which will be featured on our Field Kit Gallery page. If you would like to share your field kit with the QRPer community, check out this post.


MTR-3 Field Kit Build by N8PEM

Ham radio is a hobby best enjoyed in community with others.

Ever since I began operating QRP portable a few years back I had admired the Mountain Toppers.  Granted my Elecraft KX2 is a perfect daily driver.  I’ve been lucky to have that as my sole portable QRP rig for some time.  That didn’t stop me from dreaming of an ultralight QRP portable kit centered on an MTR3.  High resale prices and scarcity made it a purchase I had long put on the back burner.  But then one day I saw my good friend Julia, KF8JBB, while walking my dog in the park.  So I stopped to chat.

Figure 1:  Antenna Design

Like many of us, Julia is an avid QRP and CW enthusiast.  She has numerous QRP and SWL radios.  Life is also pretty busy for her.  She doesn’t get out to operate as much as she would like.  As we chatted on that warm August evening, she offered to gift me her MTR3.  For her, it was time to move that rig on to a good home so it would get it’s proper use.  But the shrewd negotiator in me knew to never accept a first offer.  I countered.  I’d take the MTR3 off her hands if she let me build her a QRP portable antenna in return (later I also threw in a built N6ARA TinySWR kit for good measure).  She accepted.  The next day she dropped off the rig.  The fun of outfitting an ultralight (UL) QRP kit began.

I quickly determined that I wanted to build a trapped 20/30/40 meter EFHW antenna to match the three bands on the Mountain Topper.  I prefer end feds, and I wanted the challenge of building traps for the first time.  Keeping in mind I wanted an UL kit, I could also leave the coax at home with an end fed.  I had read that a trapped EFHW can be shorter than a standard EFHW due to the inductance of the traps.  This appealed to me as I knew from experience that getting a 40-ish foot antenna up in the air is much easier than a 60-ish foot antenna.  It took nearly six weeks to research, procure parts and build out this antenna, partly due to the fact I had to build this antenna twice.

My first attempt at this antenna build wasn’t good.  I couldn’t get SWR better than about 1.8:1 on any band.  I hadn’t tested every component at every step of the build.  Thus, I had a hard time determining what went wrong.  I used 100 and 150 pF capacitors for the traps which proved to have marginal shortening effects.  I needed more turns on the toroids!  I decided to do more research and start over.

Thanks to advice and blogs from folks like Dan AI6XG and Fred KT5X, I settled on a different, better design of the trapped EFHW.  I ordered more parts.  Switched out to 15 and 33 pF capacitors.  I took my time to build and test this antenna in a step by step manner.  The results were much better the second time around.  Overall 45 feet 8 inches long and weighing two ounces.  SWR better than 1.5 to 1 on all three bands.

I had the idea to place a TinySWR kit in line between the RCA plug and the end fed matching unit.  I know there are SWR kits which can be installed within the radio, but I didn’t want to modify the MTR3 in any way.  The stock design is sublime.  I also built a back-up emergency antenna into the design.  If for some reason I have a trap fail, I installed a bullet connector right before the first trap.  Thus, I can disconnect the 30 and 40 meter portions of the antenna and  have a basic resonant 20M EFHW.  These thoughtful touches seemed to perfect the antenna.

Photo 1:  Completed miniSWR, matching unit, 30m trap, and 20m quick disconnect

I tried to be thoughtful with the other choices in my kit as well.  At 3.5 ounces and the size of a bag of coffee, the LowePro CS40 padded case proved to be ideal.  I found it cheapest from a UK-based eBay seller.  I made my flight deck out of the steel housing from an old external CD Drive.  I measured, cut and filed the edges.  It’s perfectly sized for loose Rite in the Rain paper, lightweight and thin.  A metal flight deck also can hold the magnetic base of my CW paddles.  When it came to the battery, I decided to go with a RC airplane LiPo battery.  Fuzzy math told me that the 650 mAh would give me more than enough operating time.  Once complete, I was happy to find the entire kit weighed in at just 18 ounces, not counting a throw weight or collapsable mast.

Photo 2:  The completed MTR3 kit

My first activation with this kit was September 21st.  I wasn’t sure how well I would do.  Band conditions weren’t the best the previous two days.  I went to my favorite spot, Bunker Hill (W8O/SE-009) located within Great Seal State Park (K-1954) in south central Ohio.  It’s a short 20 minute hike to the high point on what was a partly cloudy 70 degree Thursday morning.  I set the antenna up in a sloper configuration, gave my dog Togo some treats, ate half my sandwich, took a sip of coffee, and pulled up the POTA and SOTA spotting pages.

In just over an hour I had made 54 QSOs covering all 3 bands.  The MTR3 combined with the trapped 20/30/40 EFHW worked flawlessly.  It was an absolute joy to operate.

Photo 3:  First activation complete

That joy came from the sublime kit for sure.  But enjoyment also came from the community carried within the kit itself.  The MTR3 from Julia KF8JBB.  The paddle and wire winder designs from Adam K6ARK. The MiniSWR Kit from Ara N6ARA.  The Trap PCB boards from Tim N7KOM.  The toroids, capacitors, and antenna advice from Dan AI6XG.  The blog post from Fred KT5X.  The 3D printing from my nephew Colin.  Even the RigExpert I bought from Glen W1ND this Spring was integral.  This kit is an homage to that community.

Figure 2:  First Activation QSO Map

If you made it to the end, thanks for reading!  I hope it was interesting and helpful.

TU 73 EE,

Chris N8PEM

Radio Kit

Antenna Build

A beautiful (and hot) day for a QRP SOTA activation on Bearwallow Mountain!

Tuesday, September 5, 2023, was a gorgeous day. A hot day, but a beautiful one!

I couldn’t pass up the opportunity to fit in a quick SOTA activation and the most accessible summit that day was Bearwallow Mountain.

Bearwallow Mountain (W4C/CM-068)

I was in South Asheville all day, so Bearwallow was only about a 25 minute detour.

Since it was a Tuesday in the latter part of the morning, there were few others parked at the trailhead. Had it been a Friday, Saturday, or Sunday? It can be difficult to find a parking spot. Indeed, the previous day (Labor Day) I’m sure it was packed!

I practically had the place to myself, though.

The hike up was most enjoyable although it was hot and humid, so sweaty I became.

That said–and I think I even say this in the activation video below–I really wished the hike was a bit longer. The Bearwallow trail is maybe a mile long.

I wanted a longer hike, but in truth, didn’t have the time for one anyway.

Bearwallow’s summit is a large pasture. It does offer up some spectacular long-range views.

Bearwallow is also home to a lot of comms towers including a number of local repeaters.

I found a nice, flat rock, set up my chair, and deployed my Chelegance MC-750 vertical. Continue reading A beautiful (and hot) day for a QRP SOTA activation on Bearwallow Mountain!

Business Travel & POTA: It’s as simple as One … Two … Three!

by Vince (VE6LK)

As always there are lots of links within the article. Click one! Click them all! Learn all the things! 🙂

The backstory

For those of us that work from home there are good and not-so-good things about it. One of the not-so-good things is that I’m not getting out somewhere every day like I used to, thus I embrace corporate travel as it represents a mini-escape from the day-to-day activities that would normally happen.  It also gives me an opportunity to operate in the field and away from the comfort of sites nearby my home.

In late September I was in the Edmonton Alberta area for work and, as always, I brought along a set of gear to play radio. Where I’d normally drive up and park my F-350 within the boundaries of the park and operate from the cab of the truck, this time I was in a rental vehicle so I had to be well-equipped for the unknowns. I also didn’t pre-plan my stops like I normally would, I just wanted to roll up and do my best to make it work.

These would all be CW activations at QRP power and are part of my 200 CW activation contacts per month personal goal to improve my CW skills. (Spoiler alert: I hit the goal while writing this article!) See below for my kit list that made this possible.

Not really pre-planning an activation is a stark contrast to how I normally roll as I usually pore over maps and satellite views on multiple websites to visualize where the park entrance is and where I’ll set myself and what I may encounter for surroundings when I get there. I know exactly where I’m going and just about down to the parking space. I build a set of kit up to support that/those activation/s.

With the lovely autumn weather we were experiencing in Alberta, my plan was to activate after work opportunistically around Edmonton – something I’d not yet done despite many trips to the area – and set up and operate right around 0000z. This time is after my workday, so a nice mental break from the day’s activities before kicking back for the evening. I think to my self that I’ll roll into a site nearest to where I was working arriving just before midnight UTC (1800h local) and get set up and start calling once the clock ticked over into a new day. From there I would then head to the hotel (or home) and grab a bite to eat and close my day off on a high note.

Continue reading Business Travel & POTA: It’s as simple as One … Two … Three!

I’m in portable field radio kit mode…how about you? Care to share?


A portable field kit:  it’s a seasonal thing.

In the early fall and spring, I go over my QRP radios and give serious thought to how I’ll build compact field kits around them.

Why? I’m pretty sure it’s the pending change in weather that’s the catalyst.  The temptation to get back out there and make some contacts.

Then again, any excuse:  I absolutely love building field kits, and fortunately it never gets old.

The radios I’m considering at present are my MTR-3B (named Threepence) and KX1, now named Audrey. (Yep, I chose “Audrey”…thank you for all of the amazing suggestions!)

Both of these are ideal little radios for kitting out because they’re so compact and truly made to be taken to the field.

One of these two radios––and I haven’t decided which one yet––is going to live in my EDC bag.

The Tom Bihn Stowaway in black has been my EDC bag for many years. I’ll need to pay attention to the weight and bulk of this field kit, because I’ll be lugging it pretty much everywhere.

I’ve got some ideas and a couple of pouches in mind, so this will all start coming together soon.

But first…

Care to share your portable radio kit?

One of the things I enjoy doing when I’m putting together a new field kit is to check out what others have done.  It’s a great way to get some fresh ideas…and besides, it’s  just plain fun to compare notes.

If you would like to showcase your field radio kit on QRPer.com, please send a short write-up with photos detailing how/why you built your kit as you did, and list all of the components with links to the manufacturers.

We’ll not only publish your field kit article as a post, but also on this new Field Radio Kit Gallery page I created!

We only ask that you send your own original ideas––and not just a link to another website article or video––as we’d like this content to become part of the QRPer archive. That way, if an external link is removed, it’ll still be safe and sound here. (We take our archiving seriously on this site.) Of course, we welcome links to blog articles and videos in your post.

Simply send your information via email to my callsign K4SWL at QRPer.com.

Interested? Feel free to get in touch!

One Watt, Low-Profile QRP: A Labor Day POTA Activation at Lake James State Park

I realize that I’m fortunate, in many ways, that I perform POTA activations at times when parks are relatively quiet: weekdays, mostly, and during that 9-5 window when many are at work. On the flip side, I’m also activating when there are fewer hunters out there.

The upshot, for me, is that I rarely have any competition for picnic tables or activation spots at state and national parks. In general, as you’ll see in my activation videos, the park is quiet and sometimes I literally have the place to myself.

I actually take this for granted until I activate on a busy weekend or a holiday. Something like…

Labor Day!

While traveling back to the QTH on Monday, September 4, 2023, I decided to pop by Lake James State Park (K-2739) for a quick POTA activation.

Lake James State Park spans about 3,743 acres and is divided into two areas: the Catawba River Access and Paddy’s Creek Area.

Typically, I play radio at the smaller Catawba River area because there are so many excellent picnic sites with loads of trees.

The Paddy’s Creek area is much larger and (big bonus) has many more trails.

Paddy’s Creek also has a large beach and swimming/boating area with a huge parking lot and large covered picnic shelter (that is often occupied or reserved).

On Labor Day, the weather was gorgeous and, as you might imagine, the park was packed!

So why did I choose Paddy’s Creek on such a busy day?

I might have mentioned in a previous video that we recently purchased a used Volvo C40 Recharge EV (Electric Vehicle). While I normally charge it up at home, I’m trying to familiarize myself with charging on the go as well.

I’d read that Lake James has two (free!) convenience chargers at the Paddy’s Creek area. I drove to the site mainly to see where the were located. On such a busy day, I didn’t assume either of the chargers would be available–my plan was to find them, then head to the Catawba River access.

But turns out, the only available parking spot I could find at the Paddy’s Creek lot was one EV charging spot right there at the beach access and shelter! What!?! That’s an omen, I told myself, so I pulled into the spot, plugged in, and by golly, the car started charging.

I’m still new at this stuff, so it’s all a bit of magic to me. Forgive my excitement.

But where to activate?

The park was teeming with people all out enjoying the weather, the water, and the food and drinks. Truth is, I love seeing parks being enjoyed on this scale. Continue reading One Watt, Low-Profile QRP: A Labor Day POTA Activation at Lake James State Park