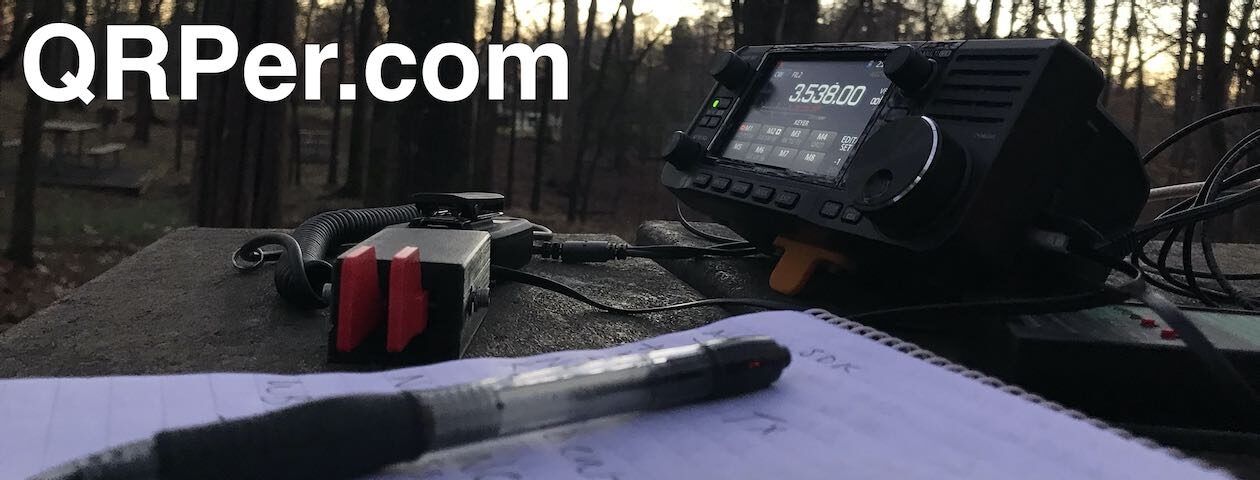
If you own a Xiegu G106, X6100, or any other radio that is prone to overloading when in the presence of an AM broadcaster, you should consider building an in-line BCI filter!
As many of you know, I’ve been testing the Xiegu G106 over the past couple of months for a review that will be published in the May 2023 issue of The Spectrum Monitor magazine.
One criticism of the G106 is that its front-end overloads when there’s an AM broadcaster within a few miles of where you choose to operate. The Xiegu X6100 is identical in this regard.
One quick way to remedy this is to build or buy a BCI filter. We’ve mentioned in the past how you can homebrew them and I planned to do so. After checking my parts drawer, though, I realized I needed to buy a capacitor, toroids and at least one of the two BNC connectors needed if I wanted an in-line filter in a small project box.
As I walked out the door on the morning of Tuesday, March 21, 2023, I grabbed my Elecraft KX2, MM0OPX 40 meter end-fed half-wave, and a key I hadn’t yet taken to the field: my Bamakey TP-III!
I had a full day of errands, appointments, and carting my daughters to/from school, but I also had a good 90 minute window to play radio!
As I’ve mentioned previously, the Vance Birthplace (K-6856) is incredibly convenient this particular school term. I pass by it twice a week, and I feel incredibly fortunate because it’s a wonderful POTA site with POTA-friendly staff. They all know me quite well there at this point.
The Vance site is a small park and the only negative (from the point of view of a POTA activator) is if you have poor timing, you might arrive only to find that a large school group has taken over the site. This is especially a concern on weekdays during school hours–in other words, the time I usually activate Vance.
I pulled into the Vance site that morning and there were no vehicles there other than park staff. A good sign so far!
The only appropriate spot to activate at Vance (if you operate a portable HF station) is in or near the picnic shelter. The rest of the site is where visitors wonder through the old homestead and take guided tours.
I never set up my station in the middle of park activities or in a viewshed.
At the end of the day, we represent all Parks On The Air activators and the amateur radio community at large when we’re in public spaces. The last thing we want to do is detract from others’ park experience.
Before pulling any gear out of the car, I walked into the visitor center and asked the park staff for permission to set up in the picnic shelter. I always do this because if a school or tour group is scheduled to visit the site that day, they almost always need the picnic shelter and have it reserved.
Fortunately, no one had scheduled the picnic shelter, so the park ranger told me, “It’s all yours! Have fun!”
Proper POTA Flea Power!
I like shaking up each new activation in some small way so that it’s not a carbon copy of any previous activation.
Many thanks to Scott (KK4Z) who shares the following post from his blog KK4Z.com:
Georgia Parks on the Air at FD Roosevelt SP K-2173
Friday evening, Mary K4SEZ and I traveled to FD Roosevelt State Park for a weekend in a very nice cabin. The cabin is located on Pine Mountain with some exceptional views. As you can guess, I brought some radios with me. I went QRV right before 1800 hrs. local to make sure all my equipment worked prior to the contest. Besides, the contest I had a regional HF net that I needed to check into Saturday morning. The contest starts at 0800 hrs local Saturday and the net was also at 0800 and lasted about 20 minutes.
Friday night was amazing! Twenty and forty meters was wide open. Using FT8, I made 223 contacts between 1800 hrs Friday and 0300 hrs Saturday morning. I worked stations as far west as Japan and Australia and as far east as Rwanda, Ukraine, and European Russia. Unfortunately, the rest of the weekend was not near as exciting. Between 0800 hrs Saturday morning and 1230 hrs Sunday, I made an additional 477 contacts. The bands were up and down and the pace was a little slower. I worked 48 States and 34 countries when it was all said and done. Sunday morning had an opening on 10 meters and I made 19 contacts many into Europe. In total, I had 700 contacts.
My antenna was my tried and true homebrew 28.5-foot random wire antenna which I named my K4SWL antenna as the original idea from Tom. It uses one 17-foot counterpoise. On this trip, the wire I used was 14 ga (I think), coated Flexweave I got from The Wireman many years ago. I was using some 20-something gauge I got from SOTABeams but because I use this antenna a lot, I worried about the thin wire breaking. I use a 9:1 UnUn with a 1:1 current BalUn to help with matching. The antenna is matched by an LDG RT/RC 100 matching unit. This is fairly new to and so far I like it. The tuning circuit out by the antenna helps keep stray RF out of the shack. It was also quite windy here Friday night and Saturday. The antenna held up well. The only issues I had were some of the sections on my MFJ push-up pole would collapse affecting the tuning. This pole is probably nearly 20 years old and should be replaced.
The radio was “The Rock” my IC-7300. I ran FT8 the whole time at 35-45 watts and the temperature gauge on the radio never moved past cool. Now that the FTDX10 has found a home in the shack, it’s nice to have my old friend back in the field with me.
The cabin is located on the ridge line of Pine Mountain, elevation ~1250′ ASL. Besides great views, it also gave my antenna a large aperture which may account for the many DX contacts I made.
I mainly worked FT8 as I also had to listen to a couple of conferences on the Internet and didn’t want to disturb my wife when she was doing things other than radio. We had a nice weekend away and of course, being able to bring radios is a huge bonus. When I get back home and settled, I may send the log to the GA POTA people. I don’t really contest anymore but they might find it useful for cross-checking.
In early February, Jeff (KD4VMI) sent the following message to me:
Good evening. Love your YouTube videos and QRPer posts and, from them, I know you appreciate rugged packs and gear.
I enjoy POTA, although I don’t get out as often as I’d like, but I’ve found Blue Ridge Overland Gear’s various bags and modular systems to be very handy for bundling my radios, batteries, cables, and antennas.
It’s been on my mind for some time to let you know about them (if you don’t know about them already) and I finally decided to take the time to write you. I’m not associated with them in any way, and I didn’t approach them about passing this on to you, or anything like that. I just really appreciate their gear and I think you might, too.
The BROG materials are high quality and stout, the zippers are beefy and smooth, everything is double or triple stitched and everything is modular so it can be used for just about anything, and in pretty much endless combinations with their various bags and gear.
Their products are not overly cheap, but are guaranteed for life. They’re located in Bedford, Virginia and all their things are made in the USA (I think mostly in Bedford).
I often use their tire puncture repair kit bag, for instance, to carry my FT-891, Bioenno battery, cables and mic, and PackTenna, and then strap the coax to the Molle system on the front of the bag.
They posted a YouTube video showing their gadget bag with accessory pouches for HTs, etc.
Anyway, I appreciate all you do for our great hobby and just wanted to share this info.
Take care and all the best to you and yours…
Thank you so much for the kind words, Jeff, and for the tip about Blue Ridge Overland Gear (BROG). You’re obviously a skilled pack enabler because you had my attention by the second paragraph–!
Shortly after my exchange with Jeff, I checked out the BROG website and was really impressed with their line-up of packs and gear–all with a focus on modular organization, especially in-vehicle since it’s for Overlanding. It’s just the icing on the cake that their gear is made in the USA.
I was very curious if their Gadget Bag, in particular, would lend itself to being a modular flied radio kit pack.
Thing is, there are so many options and configurations for the Gadget Bag, I wasn’t entirely sure what to order.
Being a fellow who expects to pay a premium for rugged products, made in the USA–especially ones that carry a lifetime warranty–I was prepared for some sticker shock. Turns out, BROG pricing is pretty reasonable in comparison with other cottage industry pack manufactures.
Still, I wasn’t quite sure how easily some of my radios and gear might fit in their zippered pouches, so I reached out to BROG–mentioning QRPer and my constant search for field radio packs–and asked if I could order some packs and pouches, test them with my radio gear, then pay for what I decided to keep. I didn’t want free gear, I just couldn’t tell based on the product images and posted dimensions what pouches and packs might fit my various radios and accessories. Also, I knew readers might ask if certain pouches and packs might fit certain radios.
The good folks at BROG kindly obliged, so I asked for the following list of items:
– QTY 1 Gadget Bag (shell) in black
– QTY 3 Large Velcro Pouches
– QTY 6 Medium Velcro Pouches
– QTY 1 Velcro Cord Keeper
– QTY 1 Medium GP Pouch
– QTY 1 Velcro Headrest
– QTY 1 Headrest Pouch Kit
Some of these items weren’t in stock, so it was a week or so later when I received notification that the package had shipped. It arrived a couple days later.
Over the past few years, I’ve received numerous requests to check out the Yaesu FT-891 HF transceiver. Almost all of my ham friends have one and they are widely considered one of the best 100 watt HF radios for park activators. Indeed, I bet it is *the* most popular 100W radio among POTA activators.
I’ve been tempted to ask Yaesu for a loaner model and I even came within one button click of ordering a new FT-891 from DX Engineering during a Black Friday sale in 2020.
I’ve resisted the FT-891 temptation, though, because I tend to use smaller, more portable QRP radios in heavier POTA rotation. I knew if I purchased an FT-891, it just wouldn’t get a lot of field use. It also demands a beefier field battery due to its current requirements and, frankly, it’s so rare I run more than 5 watts (and 5 watts is the lowest power setting on the ‘891) I would simply have a lot of radio for my needs.
A few weeks ago, however, a friend reached out because he wanted to sell his FT-891 and 30Ah Bioenno battery and downsize to a smaller field portable radio like the Xiegu X5105. Long story short, we worked out a trade/purchase which included the ‘891 and his battery. I had been thinking about a large capacity battery to use as a backup in the shack, so this worked out well for both parties.
Zebulon B. Vance Birthplace (K-6856)
On Tuesday, March 14, 2023, I once again had an hour to fit in an activation at the Vance Birthplace before picking up my daughters at school. I’ve really enjoyed the opportunity to play radio at Vance so much during this particular school term; next term, it’s unlikely I’ll have this opening, so I’ll enjoy it while I can!
I deployed the Chelegance MC-750 vertical again. I’ll admit that it’s so convenient keeping an antenna in the car trunk/boot that can be made resonant so easily from 40 meters and higher.
I was going to show the antenna deployment again in my activation video, but received a call and decided to deploy the antenna while finishing up the phone call. It only takes a couple of minutes to set up.
Next, I connected my 15Ah Bioenno battery to the FT-891. Even though I was only using five watts, the ‘891 needs more capacity than the 3Ah packs I normally carry with my QRP rigs.
Many thanks to Lee (K2LT) who shares the following guest post:
Fishing Hole Reflections
by Lee (K2LT)
Last week, I completed my 80th activation of a state forest very close to my home – Deer River State Forest (K-5199). That earned me what in POTA is called the “Fishing Hole” activator award. Compared with the achievements of other activators within POTA, it’s not at all a big deal. Yet as I sat on my camp stool in the snow in the middle of the woods last week with my radio, I realized how big of a deal it has been for me. There was no wind, I was surrounded by huge Red Pine trees, and the only noises were an occasional airplane, woodpeckers, ravens, and my CW signals. I was happy!
All of my activations of that spot haven’t been QRP but as I look back at my favorite memories from ham radio (I’ve been licensed for about seven years), they’ve been when I’ve put my gear into a backpack, found a secluded spot in the woods, sat on my campstool and operated from there.
This time of year is also my favorite. Our winters in Northern New York State (I’m only about 20 miles south of the Quebec border) are LONG. In late March when winter starts to lose its iron grip on our region, we’re all “chomping at the bit” for spring to arrive. Yet, as things get warmer in late April and May, the Adirondack black flies, mosquitoes, and deer flies will come out in force. In the fall, deer hunters populate the state forests and can make activations dangerous, and deep winter doesn’t often work unless I operate from my truck – numb fingers and CW operation don’t do well together. So, early spring is often the perfect time to be able to operate outdoors.
A couple of times, I’ve had POTA hunters inquire why I don’t post my activations prior to heading out. My wife and I have an adult disabled son in his twenties. We’ve made the commitment to keep him home with us as long as we can. As with all things in life, this decision comes with a cost. It means that I often only know at the last minute whether I’m going to be able to get out for a few hours. Having K-5199 so close has been a real blessing – I can get there and back quickly and do something that brings me a lot of enjoyment at the same time.
Learning CW in my fifties was a challenge, but the first time I saw a video of someone working an MTR-3B from a summit, I knew I had to try it. If I’m working a CW pile-up, I can’t be thinking about anything else. Deciphering signals and logging them correctly takes all the mental “bandwidth” that I’m able to muster; however, in an odd way, it’s also very refreshing – I get a vacation from the things that I’m usually preoccupied with. I always come back mentally refreshed. I’m sure my wife and family appreciate the break I’ve had as well!
Even though I’m retired, I’ve been taking some online classes. One question that often comes up in the “Introduce Yourself” section is – “tell us something unique about yourself.” Years ago, I always struggled with this request, but not anymore. I sometimes respond by saying, “For me, being out in the woods with my radio making contacts is like an afternoon at the beach for someone else.”
Ham radio and portable operating have truly been a blessing for me and I’m thankful for them.
Many thanks to Dennis (WQ7O) who shares the following article:
POTA – Getting There
by Dennis (WQ7O)
POTA activity seems to be popular and growing. I have been a ham since the 60s and I am excited by how fun POTA hunting and activating this “new” radio sport can be. I have heard it called “Field Day” every day.
Drawing on decades of hamming experience, I contemplated how we got here. I remember my first field day and the effort required. Basically, equipment meant to be used in an indoor and fixed environment was adapted for portable use. Let’s take a look at what that might mean.
Power supplies that operated on DC were available but expensive. Looking at say, a Drake
TR-4, a popular transceiver at the time, the rig cost $700 in 1968 dollars. The power supply and speaker ran another $200 or so. You’ll need a mic and key, which were not included. Few tuners were available. You could go for a Johnson Matchbox. Drake made the MN-4 and
MN-2000 to match your TR-4. Count on another $200 or so. If you are a CW op and you want a keyer, the Hallicrafters TO keyer and a Vibroplex paddle were another $200. The gear described here would just fit on an office sized desk and don’t ask about the weight.
Now just gather that up and take it to the park, right? Well for starters the DC supply was for mobile use not portable use. You won’t operate for long off a battery with the amperage needed to warm all those tubes. So, bring along a generator and that’s what we did. BTW, we used a truck to transport it all because we needed it. Backpacks weren’t useful.
Antennas were all for fixed use as well. We brought a tri-band yagi and lashed it on a mast to the truck. We ran some wire antennas and we were on the air. Antenna analyzers simply did not exist, we tuned around and graphed it by hand.
Image Source: RigReference.com
This may sound much like a modern field day but hardly the “light and fast” deployment of a SOTA/POTA activation. Also, take it from me, running tube gear in the field is tough. I had a Gonset Communicator (2 meters) issued to me by our ARES group. It was about 100 times the displacement of your trusty handheld and many times the weight.
So since the 60s, the microprocessor, large scale integration and SDR technology have reduced the size and power requirements for all the gear we use. Today a radio that fits in a pocket can include a rechargeable power source, an antenna tuner and run from 160 meters through UHF offering all modes.
From lead acid, NiCads, NiMH, Lithium Ion and now LiPO batteries, the availability of reliable and portable power sources to power rigs and accessories is a fairly recent development. The increased efficiency coupled with decreased power demand have set us free. How many of us have quick deployment solar panels to keep those batteries topped off during extended operation? It beats the noise, smell and mess of gas cans and a generator. Also, you do not want to backpack a lead acid battery for a SOTA activation. Too much weight and not enough power.
Then there is the internet. If you do POTA like I do POTA, you go to the web page and look for spots. How many would you find without the spots and the RBN? When an activation is deployed one of the first actions is to spot it on the POTA app. Thus, as with other digital modes, the internet becomes an integral part. We could do POTA without the internet, but it would be a whole lot harder. And our taken for granted cell phone brings the internet right to the picnic table.
Image Source: Universal Radio
What about the gear? What should we use and how available is it? Early rigs for portable and QRP use were not plentiful or feature rich. The styling of the popular Penntek TR-45 is reminiscent of the Heathkit “Benton Harbor Lunchbox.” At the risk of understatement, the features do not compare.
The manufacturers responded. We weren’t all going to home brew our QRP rigs. So came the Yaesu FT-817. In 2001, Yaesu introduced the 817 which did all modes, 160 through UHF, ran on batteries, fit in your backpack and was affordably priced. Suddenly, portable operation was possible, versatile, affordable, reliable, practical and fun. We were freed from attics, basements and garages and embraced nature.
I recently built a QRPLabs QCX mini. This tiny rig has more features than we ever knew we needed when we were operating that Drake TR-4. If you want more bands the LNR Mountain Toppers are wildly popular. Other manufacturers, large and small, increased the offerings with different form factors and features.
This included antennas. An early entry was the Buddipole. Many cottage industry entrepreneurs followed and today the selection of quick and easy deployment antennas is broad and deep. From a whip antenna to attach to the rig itself to wire antennas for 160, there are a lot from which to choose. Don’t forget that 3D printing also accounts for a lot of our accessories like keys, cages, stands and winders.
Want to add a tuner to your station? The Elecraft T1, I built mine as a kit, is a superb, self contained tuner and offers broad, automatic matching running on a 9 volt battery. Since the T-1, LDG, MAT MFJ, Icom and others have offered great tuner choices that travel easily as part of your kit.
Anyone who owns a Baofeng knows that the Chinese have entered the ham radio market. While the quality and availability of these rigs can be an issue, they are quite affordable. This brings in new users who learn the hobby and progress to greater things. I have heard hams criticize the quality of MFJ products. MFJ makes the accessories the major manufacturers don’t and at popular prices. When there are more licensed operators, the manufacturers can offer more products at better prices as markets expand. Xiegu HF radios have powered many activations with its built-in battery, tuner and microphone. If POTA and QRP were not driving activity would Icom have brought out the IC-705? The Elecraft KX-2 and 3, the Lab 599 TX-500 and these types of boutique radios answer market demands.
The “Prepper” movement evolved from natural disaster “EmComm” and operating “off the grid” has increased the demand and thus the supply of gear. Building a portable kit has gotten easier and more affordable with a broad selection of choices and options. More is better.
Lots of other simple things have come together to bring us to the “10 minute setup” of the QRP SOTA/POTA activation of today. A whole room full of heavy, power hungry gear has been reduced to a device that literally fits in a pocket. Add a wire and you are on the air. My ham career began as a boy with a tube driven Heathkit transmitter with crystal control fixed frequency in the attic of our family home. I don’t think anybody appreciates more than me opening a backpack and in a few minutes setting up a modern station, wherever I am. QSOs around the country and around the world roll in with a few watts and a wire.
On Saturday, February 18, 2023, I had a rare opportunity: a full day to play radio.
Instead of doing a five park POTA rove, I chose instead to do a summit activation followed by a park activation.
I published the summit activation on Moore’s Knob (W4C/EP-001) a couple weeks ago and planned to immediately follow that up with this report from my POTA activation at Pilot Mountain State Park (which I activated the same day).
In the process of moving my videos from the camera, to my laptop, and then to PC where I do my remote uploads (my bandwidth at the QTH is far too poor to upload large videos) I somehow managed to delete this particular video file.
I was quite frustrated, actually, because this particular POTA activation was challenging. Lately, I’ve had so few examples of just how quiet a band can be when propagation is less stable.
The SOTA activation I performed only a few hours earlier had some of the deepest pileups I’ve ever experienced. By the time I started my POTA activation a couple hours later, all of this had changed–at least on the bands above 20 meters and I’d chosen 17 meters (a WARC band) since a contest was in progress on 20 and 40 meters.
I’m incredibly pleased that I stumbled upon the raw video files on my backup drive. I was able to reproduce the video in its entirety. I’m so pleased it wasn’t lost!
This is why it’s a little out of sync date-wise with my other reports.
I hope you enjoy this field report:
Pilot Mountain State Park (K-2750)
After capping off a beautiful 4+ mile hike and SOTA/POTA activation at Hanging Rock State Park, I put my SOTA pack in the car and drove 30 minutes to Pilot Mountain State Park.
It being a gorgeous Saturday afternoon, the park was so full of guests the parking lot was completely full. A park ranger had incoming cars form a line and he allowed cars in as guests departed one by one. When I arrived, there were five cars in front of me. I was very tempted to do a three-point turn and head back down the mountain to the visitor’s center to do the activation. There was plenty of parking there. Continue reading Propagation changes make for a relaxed 17 meter POTA activation at Pilot Mountain State Park→
Many thanks to Adam (BD6CR) who shares the following guest post about his latest project:
From Open Source Project ADX to Kit ADX-S
by Adam (BD6CR)
BD6CR @ CRKits.COM
Original Design: WB2CBA
Modification and Kitting: BD6CR
I knew Barb, WB2CBA from his uSDX design a few years ago and I introduced both DL2MAN and his designs in my blog. So, when I came across the ADX – Arduino Digital Xcvr a few months ago, I immediately ordered both the ADX (through hole) and the ADX UNO (surface mount) PCB samples.
I started building the ADX UNO and put it in a dental floss case and made a few contacts on park bench. However, the soldering is too much for my eyesight. So, I turned back to the ADX because I don’t need to solder any SMD parts, since both the M328P and SI5351 are module based. I could build the project in 3 hours and it worked the first time.
However, I felt unsatisfied with the strong BCI since the CD2003 radio receiver chip was connected as a direct conversion receiver. JE1RAV mentioned in his QP-7C modification project that he tried JA9TTT’s idea to build a superhet SSB receiver with the TA2003 or CD2003, so I tried and it worked very well. I have decided to name the new circuit as ADX-S, where S stands for Superhet.
I shared the great news with Barb and he encouraged me to carry the flag to make it a kit, since my design D4D was his first digital radio and he loved it.
My hardware modification can be outlined in this schematic. I have added an FL1, PFB455JR ceramic filter by Murata and a C25 coupling capacitor from CLK2 of SI5351 module. The RX audio comes from pin 11 instead of pin 4.
Many thanks to Keith (KY4KK) who shares the following report:
Extreme QRP – Testing the AX1 with WSPR and 20mW
by Keith (KY4KK)
Thomas, thanks for all of your activation videos related to the Elecraft AX1 antenna. I ordered one the day you announced the package deal, and it arrived in less than a week. I’ve activated a few parks with it already (20m SSB). Like you and many others, I’m impressed.
About a year ago, a friend (NG4S) loaned me his pair of WSPR transmitters and suggested that I explore building and comparing antennas. I’ve been hooked on antennas of all kinds and WSPR since then.
I began doing WSPR tests on the AX1 the day after it arrived. With two transmitters set to the same frequency and power output, you can do direct comparisons between two antennas under identical propagation conditions.
I’ve already done a couple of comparisons between the AX1 and other commercial antennas. But I think the test I just completed might be of particular interest because it pits the AX1 against an antenna I’ve seen you use many times – a 28.5’ end fed with a 28.5’ counterpoise. I used 24 AWG silicone insulated wire. The end of the radiator was placed on a 19’5” telescoping fishing pole. This is my preferred POTA mast when I can’t use a tall tree.
I spent some time trying to control other variables so that the only significant difference during the test would be the antennas themselves.
For example, the SOTA Beam WSPRLite Classic transmitters don’t have an ATU. So, I had to make the antennas resonant on the 20-meter WSPR frequency of 14.097 MHz. For the AX1, Thomas’ videos helped a lot. I used a clip-on capacitance hat and adjusted the counterpoise to 15’ 2”. This gave me an SWR of 1.17:1. For the end fed, I tried the two UNUN’s I had available and settled on the 49:1, which got me the closest (2.2:1). I then used a manual tuner to achieve an SWR of 1.29:1.
I also wanted to deal with the difference in power output between the two transmitters. Although they’re identical, and both set to 20 milliwatts, there is no way to ensure both are actually producing that output level. Based on tests by NG4S, one of the transmitters runs at 19 milliwatts. The other actually outputs 27 milliwatts. So, my plan was to run the test for 48 hours. At the end of 24 hours, I would switch the transmitters (and callsigns) so that both antennas would benefit (relatively equally) from one of the transmitters being stronger.
At the end of Day 1, I reviewed the data from the two transmitters on dxplorer.net/wspr. The end fed averaged a 5.7 dB gain over the AX1 based on reports from receiving stations that spotted both transmitters in the same 10-minute block (simultaneous spots).
On Day 1, the stronger transmitter was on the end fed. The maps below are from WSPR.rocks.

 I decided it would be much easier to simply buy a kit and, based on a tip from a reader here on QRPer.com, I purchased one from Dan (K9DP). Continue reading Assembling a K9DP BCI Filter Kit (Photos)


