Many thanks to Scott (VO1DR) who shares the following guest post:
Portable/Kite QRP Operation in Central Newfoundland Wilderness by Float Plane: Part 2 – Radio Gear and Portable/Kite Operation
by Scott Schillereff, VO1DR
Introduction
This is Part 2 of a two-part story of a portable QRP adventure with a kite antenna at Mount Sylvester in the Bay du Nord Wilderness Area in central Newfoundland by float plane.
Part 2 here describes radio stuff and some dramas with kite antenna operation. I hope you enjoy reading this.
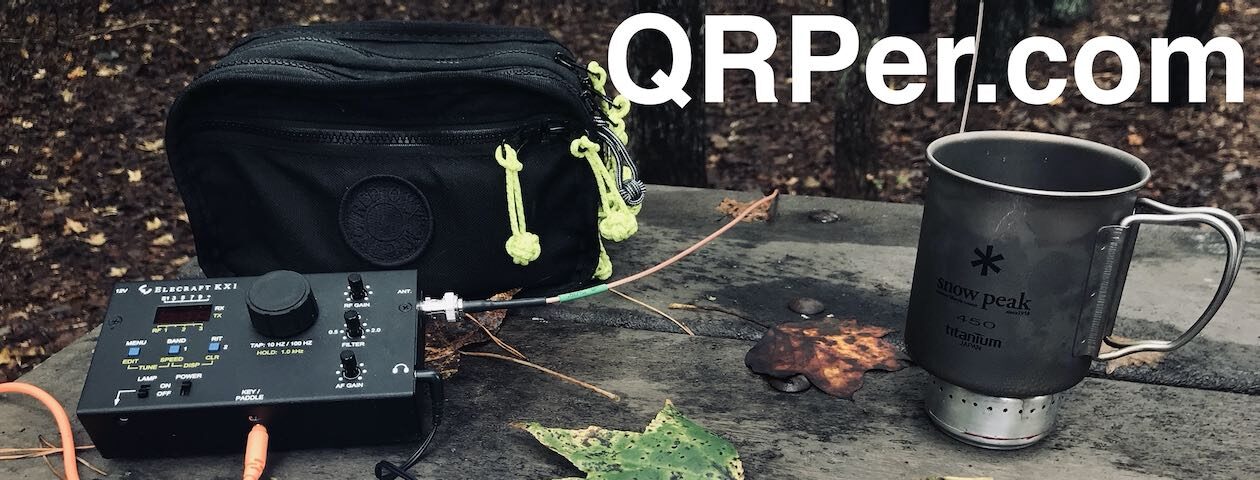
Radio Gear
Given that our hike up Mount Sylvester would be relatively easy (about half an hour up a gentle bedrock slope), I chose to bring a fair bit of radio gear with lots of backups.
Figure 1 – My gear in porch. L to R: survival bag and day pack (described in Part 1), haversack with radio gear and kite (orange bag), and plastic ammo box (for IC705). Our Havanese dog Chico was overseeing packing.Figure 2 – Haversack (originally a free gift to mother-in-law; now pressed into radio service).Figure 3 – Contents of Radio bagFigure 4 – End-fed wire antennas (HB9EAJ designs; Standard (on winder), and Compact (coiled)). The Standard has a 56:1 coupler (white barrel) and in-line latching band switch (black tape). Zip bag is a GODSPC (good ol’ Dollar Store pencil case). Wire is AWG24 speaker wire.Figure 5 – 5.8 m (19 ft) telescoping fibreglass pole (repurposed from a discarded bird-scaring mast found by a nearby school); collapsed, it doubles as my 1.4 m (4. 5 ft) walking stick. Yellow 1.5 m (5 ft) rope is for tying off to a support (e.g., picnic table) and forms a grip for walking.Figure 6 – Detail at top of pole. Top fitting is from a broken fishing rod. I added a homemade pulley and split sheave (easy to insert and remove antenna wire).Figure 7 – Detail of bottom of pole. Black ABS plumbing fitting (plug) fits snugly over base of pole and is tack-glued with cyano-acrylate glue (can be be forced apart if needed). Hiking/achor tip is a filed down 6 mm (1/4 in) steel bolt threaded and glued into plug from inside.Figure 8 – DIY guy rope system for pole. Stakes are 18 cm/7 in aluminum gutter nails (excellent tent pegs). Red ring is made from the top of a pill bottle that snugly fits over top of pole. Stakes are driven equi-distantly around the pole and tightened with 2.5 mm nylon cordage for rigid support. Tip: I tied the guy cords with fixed knots (Constrictor Knot) at the stake heads and moved the tensioning knots up near the ring – less bending over and I can reach them all!Figure 9 – Back-up base-loaded whip antenna (DIY, modified from QRP Guys DS-1). I call it the “MiracleWhip” it works so well. Too windy to deploy on this trip. It all fits in a GODSPC.Figure 10 – Nylon ground tarp 2 m x 2 m (6.5 x 6.5 ft). DIY tarp/poncho based on a Russian plash palatka (design dates back to the 1700s). Keeps me dry when sitting on damp ground; many survival uses too.Figure 11 – Rite In The Rain notebook #363. Waterproof, lays flat, pencil fits in spirals.Figure 12 – Plastic ammo box for IC705 and my ATU. For this trip, I just looped a nylon strap through handle for carrying. I’ve since made a sling attached to both the hinge end and clasp end (more stable).Figure 13 – Ammo box open. IC-705 (in WindCamp exo-skeleton) is in blue bag snug in bottom. ICOM mic on right. ZM-4 style ATU in red bag (a cut-down GODSPC).Figure 14 – Detail of ATU. I built this modified from QRP Project ZM-4 ATU design to fit in an Altoids tin. I have submitted an article on this build to Sprat journal of G-QRP club.
Many thanks to Scott (VO1DR) who shares the following guest post:
Portable/Kite QRP Operation in Central Newfoundland Wilderness by Float Plane: Part 1 – Gearing Up and Getting There
by Scott Schillereff, VO1DR
Introduction
I love getting out in the woods and wilds in Newfoundland for portable QRP operation. Lately, I have been trying kite-borne antennas. This is a two-part story of a portable QRP adventure with a kite antenna at Mount Sylvester in the Bay du Nord Wilderness Area in central Newfoundland by float plane. Part 1 describes the setting, history, geology, access, and outdoor/survival gear. Part 2 describes radio stuff and some dramas with getting a kite antenna aloft.
It is useful to describe the island of Newfoundland setting, since it is unique in North America. You can think of Newfoundland as a wild cousin of Nova Scotia – many similarities, but worlds apart. If you want to play radio in a well-developed, refined setting (where giant manicured lawns are a thing), then Nova Scotia is for you; if you want a wilder adventure with some risk and less people, come to Newfoundland and Labrador.
Central Newfoundland Setting
I live in St. John’s, the capital of the eastern-most Canadian province of Newfoundland and Labrador (NL), situated about equidistant between Boston and Ireland (Figure 1). This means QRP contacts to western Europe are as easy as those to eastern North America.
The island of Newfoundland is about the size of England but, with an island-portion population of only 479,105, we have less than 1/100th of the people in England. There is a lot of empty space here! Most of the people live in small towns and communities scattered along the coasts, originally to pursue various fisheries.
The principal highway (Trans-Canada Highway; Highway 1 on Figure 2) traverses an arc around the northern and western part of the island. The central area of Newfoundland is a vast sparsely-populated area, historically used by indigenous groups for hunting, fishing and gathering, and, since European contact and later occupation, mostly for logging, mining, recreation, and hydro power projects.
Figure 1 – Location of Newfoundland and Labrador
The Bay du Nord Wilderness Reserve and Mount Sylvester
The Bay du Nord Wilderness Reserve in southern Central Newfoundland (large green patch in Figure 2) was established by the Province in 1986, primarily to protect the Middle Ridge woodland caribou herd – the largest herd in the island of NL. This 2,895 km2 reserve includes ponds, rivers, bogs and fens, and forests, and is the last major unspoiled area on the island. There are no facilities, amenities, trail markers, or public buildings – just wilderness. This inland area has a cultural history of use by the Mi’kmaq indigenous peoples since the 18th century. The area was first described by European explorer (William Cormack) after his trans-island trek of 1822. Geologist James Howley was the first known person to travel the full length of the Bay du Nord River in 1887. A cairn he built atop Mount Sylvester as a surveying marker still stands today (see below).
Figure 2 – Eastern and Central Newfoundland showing Mount Sylvester within the Bay du Nord Wilderness Reserve. Also showing the capital St. John’s (east edge) and Gander (north-northeast), where we started our flight.
Mount Sylvester (Figures 3 and 4) is an inselberg (German: island mountain) created by weathering and glaciation with top elevation of 365 m (1,198 ft) above sea level, and rising 154 m (505 ft) above the adjacent flat glaciated terrain (for more stats search: peakvisor.com). It was named after Sylvester Joe, a Mi’kmaq hunter and guide hired by Cormack for his travels. The yellow arrows on Figure 4 point to Howley’s cairn (about 2.5 m high) at the top, and huge fluted glacial scours along the sides and flanks.
Figure 3 – View of Mount Sylvester looking southFigure 4 – View of Mount Sylvester looking west, showing Howley’s cairn at the top and fluted glaciated scours along the flanks
Getting There
Mount Sylvester lies immediately adjacent to Diamond Lake, with a gentle glaciated bedrock slope to the summit. A perfect spot to land a float plane and walk to the top for a QRP adventure!
My companion Kerry, a distant relation in Gander, NL, owns a float plane and for years has been interested to land on Diamond Lake and walk to the top – but never had a second person to go (for safety). We were a match made in heaven! My wife and I and our two Havanese doggies drove our motor home to Gander (about 4 hr drive) and Kerry and I geared up for the flight and hike on June 24, 2023.
As luck would have it, hundreds of forest fires were (and are) burning in eastern Canada. Smoke from those fires has drifted over eastern Canada and most of NL producing a tan haze that can block out the full sun (Figure 5) and reduce visibility for flying. Since Kerry is only certified for Visual Flight Rules (VFR) flying, it was touch-and-go whether we could fly at all.
Figure 5 – Forest fire smoke haze blocking sun, Gander, NL – June 23, 2023
On the morning of June 24, bright and early, we tried anyway. The smoke had shifted to form a layer above 1,500 ft altitude, but we could safely fly under it at 500-750 ft altitude. We were good to go! Kerry’s plane (C-FAVG) was the venerable Cessna 172 Skyhawk (Figure 6), among the most common small aircraft on earth. The C-FAVG airframe was produced in the 1970s and has been upgraded and certified ever since.
We drove to his float plane dock at Deadman’s Pond adjacent to Gander airport (this airport was the site of the massive commercial aircraft landings during 9/11/2001; the basis for the Come From Away musical). Kerry assured me not to worry about the name of the pond…
Figure 6 – Cessna 172 Skyhawk C-FAVGFigure 7 – Kerry fuelling wing tanks (takes 38 US gal of AVGAS; gives about 6 hrs of flying)
We took off just before 9 am and headed south for about an hour’s flight to Diamond Lake. Kerry checked in with Gander Tower and within half an hour, we were out of direct VHF contact. Our communications were by VHF with other planes, or our cell phones (they worked great all day, even on top of Mount Sylvester).
Figure 8 – Pilot Kerry in his happy place during take-off. Regarding small planes, he said: “Everyone should have one”.Figure 9 – Me in the plane (at 1.98 m or 6’6”, I barely fit in this dual-controls plane!)Figure 10 – Typical view in central Newfoundland – a vast glaciated terrain of boreal forest, ponds, and wetlands. The white patterns in the bogs are reflections of the sky on pools of water at surface. One cannot (easily or dryly) walk across such bogs, you must skirt around them.Figure 11- Woodland Caribou on heathery barrens (small ones are new-born calves)Figure 12 – Larger herd of caribou (expand photo to see calves).Figure 13 – Caribou on barrens with lurking black bear (circle at right). He will take advantage of a new-born calf in the natural order of things.
Geology
As a geologist, I am fascinated on why Mount Sylvester exists and its interesting geological features. First of all, the ENTIRE mountain was covered with glacial ice during last ice age (Wisconsinan-Age glaciation ending about 11,000 years ago). A small continental ice sheet covered the island of Newfoundland, and radiated out toward lower sea levels. Figures 3 and 4 show the smooth, fluted flanks of the inselberg created by the grinding passage of ice laden with rock blocks and fragments (Nature’s ultimate sandpaper). Continue reading Part 1 – Getting There: VO1DR Goes QRP Portable in Central Newfoundland via Float Plane→
Many thanks to Teri (KO4WFP) for the following guest post:
The Final Fling at Grand-Pré National Historic Site
by Teri (KO4WFP)
If you read my four previous articles, you know my family and I went to Nova Scotia for eight days. At this point in my trip, I had three successful POTA activations and three unsuccessful. Tomorrow, July 6th, my family and I would head back to the States. I hankered to attempt one more QRP POTA activation before that happened.
For our final day in Nova Scotia, we opted to drive back from our Airbnb in Middleton on Highway 101 to Halifax. The night before, I looked at the POTA website for parks along the route to activate. I had learned to avoid urban parks if possible due to the noise level and limited space for the EFRW antenna which I preferred to deploy. One park seemed to fit the bill – Grand-Pré National Historic Site (VE-4839).
The morning of Wednesday, July 5th was overcast and rainy. Despite the dreary and less-than-optimal conditions, we drove toward Grand Pré. To buy myself a bit more time in hope the showers might abate, we grabbed a bite to eat at the Just Us Roastery and Café outside the town.
After a quick breakfast, we arrived at the site around 12:45 PM. Given the rainy conditions, I would need to stay in the car. Too bad because the site looked inviting and I would have enjoyed setting up on my jacket like I did at Fort Anne.
The limitation of operating out of my car meant staying close to the parking lot. The trees in the main parking lot were all shorter than I preferred. And, as I learned at other sites, the main lot didn’t give me any buffer from people walking into my antennas. However, at one side of the property was a separate small lot for two or three RVs. Two trees on the far side of it were tall enough for my antenna and, better yet, no one would be walking into them. We pulled into this lot parking on the grass at its edge so I would be out of the way of any RVs. Continue reading KO4WFP: The Final Fling at Grand-Pré National Historic Site→
Many thanks to Barry (KU3X) for sharing the following guest post originally posted on his website:
Product Review: PAC-12 Portable Multi Band Vertical Antenna
by Barry G. Kery, KU3X
I am always on the hunt for a better mouse trap. Dave, NB3R came across a great multi band vertical antenna for portable operating. It’s a, “ PAC-12 7-50MHz Shortwave Antenna “ found on AliExpress.com.
The PAC-12 antenna is designed to operate on any frequency from 6 meters down to 40 meters.
Numerous manufactures make multi band vertical antennas designed to be used for portable operating. Some have quality issues and others may have performance issues, or both? Any hunk of wire or aluminum will radiate if RF is applied to it, but how much will be radiated is the question.
When it comes to ground mounted vertical antennas, one major factor that effects performance is the ground radial field. The PAC-12 comes with a long ribbon cable that you will have to separate each wire and cut to a quarter wave length per band of operation. There are ten wires within the ribbon cable. The length of the ribbon cable is 18 feet. This is too short for 40 meters but perfect for 20 meters. I made four 35 foot long radials out of some wire I had laying around the shack. This will increase the performance on the 40 meter band as well as making a better match. Spread the radial wires out equally around the base of the antenna. Since the radials are not elevated, they do not have to be tuned but it does make for a better match.
The antenna comes with a short stake that can be driven into the ground for attaching the ground radial crimp on to and attaching the feed insulator.
The stake is strong enough to support the entire antenna, even on windy days. The feed insulator has an SO-239 for connecting your coax. The feed insulator must be attached to the ground stake correctly. Make sure the writing on the insulator is on top of the SO-239 and the black portion of the insulator is attached to the ground stake.
So what makes this antenna perform better than most other commercially made portable vertical antennas? Answer, “the mast!”
Most manufactures, not all, use a tapped base loading coil to make the antenna resonant on numerous bands. On a quarter wave antenna, the wire or aluminum closest to the feed point of the antenna is the current portion of the antenna and the current portion does the most radiating. Continue reading Barry reviews the PAC-12 portable antenna→
Many thanks to Brian (K3ES) who shares the following guest post:
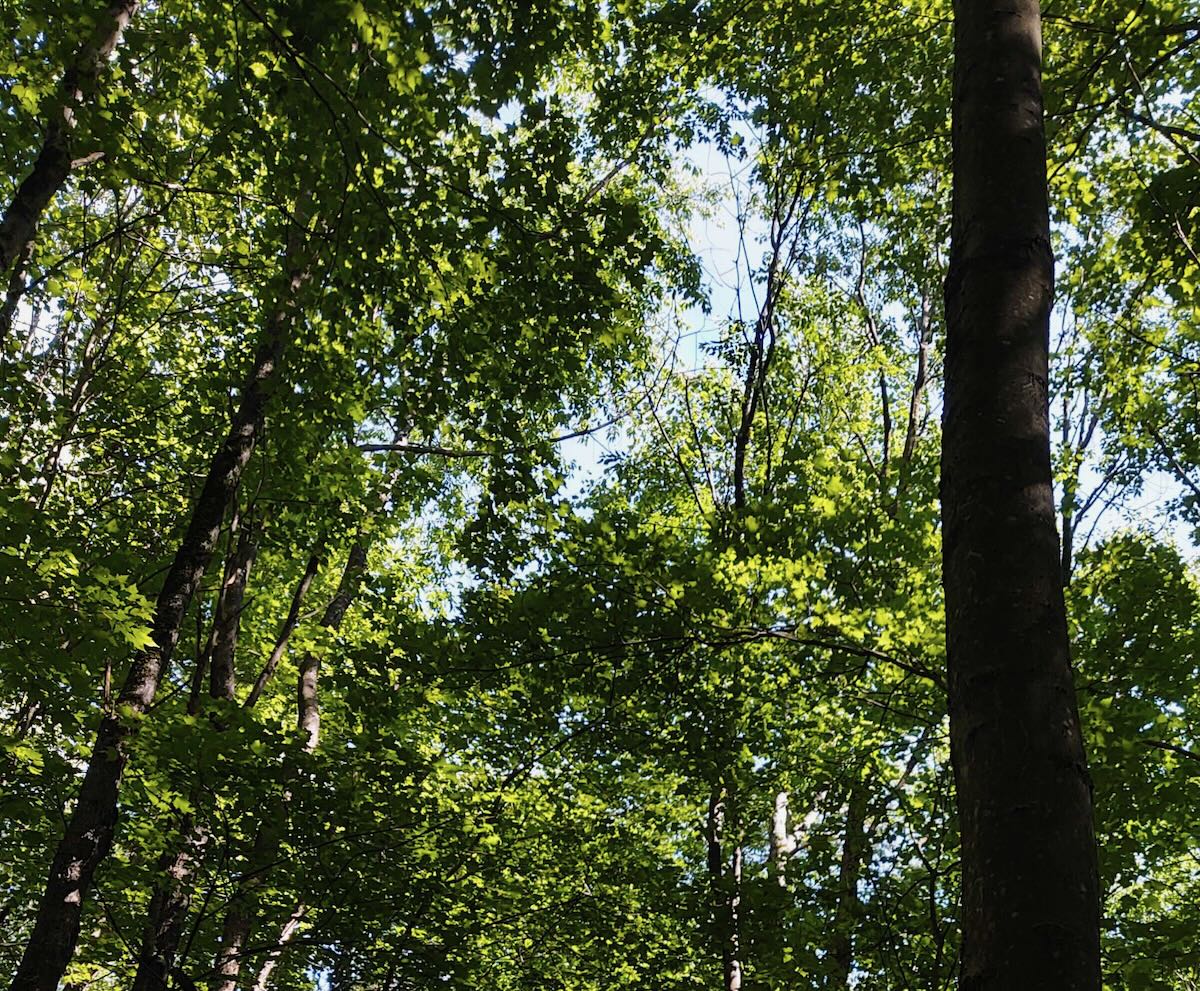
Green trees and blue sky in Allegheny National Forest, K-0619, makes a perfect backdrop for a POTA activation.
Activating Allegheny National Forest with Friends
by Brian (K3ES)
An Opportunity
I will confess. It has been a couple of weeks since I activated a park. With some much needed days of rain, and an otherwise busy schedule, things have conspired against me. So, when a bright, sunny day, without other pressing commitments came along, I jumped at the opportunity!
Mid-afternoon on Wednesday, July 5 was my time to head to the woods for a few hours. I decided to stay close to home to minimize travel time. In fact, a 10 minute walk up the road from my house gets me to a small piece of K-0619, Allegheny National Forest. I took my lightest kit, added a camping chair and water bottle as creature comforts, and slung it all over my shoulder for the trip to a favorite operating location.
Once there, I got out my throw line to get the antenna set up, but things did not quite work as planned. My toss sailed high, really high. So high, in fact, that the line was not long enough for the weight to return to the ground without taking the small storage bag for my arborist kit up in the air. Hmm… I tried some different fixes, including tying additional cordage to the storage bag and letting it rise into the air while the weight descended. Not sufficient.
Finally, I untied the tail end of the throw line from the storage bag (it normally stays tied, just in case the throw finds a branch that is a little high…), and let the weight drop. Then I had to coil the line up again for another throw. Fortunately, my second toss found a workable branch, and I got my antenna in the air. For this activation, I used a Packtenna 9:1 with a 71 ft radiating wire set up as an inverted V. Next, it was time to get my station set up, prepare my log, and start operating.
My operating station at K-0619, a clipboard with KX2, log book, pencil, and VK2IL pressure paddles balance on my knee.
Activation
The solar forecast predicted best propagation on higher bands, so I decided to start my 5 watt CW activation on 15m. After 10 minutes of calling CQ POTA, with neither a response, nor an RBN spot, I moved to 17m. Once again, nothing, so I moved to 30m, where the RBN picked up my call, but it still took more than 20 minutes to log 2 contacts.
When activating on Wednesday afternoons, I try to stay away from the 20 and 40m bands, because CW frequencies fill up quickly when the CWT sprint starts at 1900z, but with just over 20 minutes until before the CWT started, I decided to see if I could pick up enough contacts on 40m to validate the activation. The 40m band has always been good to me. Even with the solar forecast predicting disaster, it still proved to be productive. I had 12 additional contacts in the log by 1859z, giving me more than enough to validate the activation.
A bit of the view from my shack. Area deer came from my left and from behind. They did not hesitate to share their displeasure about finding me there.
While logging those contacts on 40m, which kept me focused and busy, I became the subject of some animated discussion among the local residents. I did not have time to do more than listen and glance, but I heard numerous snorts, and saw a few white tails raised in alarm. Several of the local deer were not pleased that I was intruding in their domain. Even so, I had a bit more time available, and decided to press on. Continue reading K3ES: Activating Allegheny National Forest with Friends→
The morning of Friday, June 30th, my family and I headed to Cape Breton Highlands National Park (VE-0013) which occupies 950 kilometers of Cape Breton Island. One-third of the Cabot Trail, a world-famous scenic highway, runs through the park. Talk about amazing scenery! The highway runs along a shoreline reminiscent of the rugged California coast, then moves upward and inland on top of the highlands, a wild landscape with scrubby firs and moose crossing signs, and then descends back toward the coastline with steep ravines and valleys off the side of the road.
We arrived at the Cheticamp park entrance a little before 11 AM. Looking around the information center parking lot, I spied a tree and nearby picnic table perfect for my activation. This arrangement would allow me to watch for people who might walk toward my antennas and provide the use of a table to which I was more accustomed.
I immediately set about picking out a branch (located in the upper part of the photo below) and pulled out my arborist line and weight. Though I know I am not, I am beginning to feel like a pro putting antennas up in trees. I snagged the branch for which I was aiming on my first try. Hooyah!
Many thanks to Conrad (N2YCH) who shares the first of a three-part field report series outlining his 2023 Hamvention rove with Peter (K1PCN). Click here for Part 1 and Part 2.
Part 3: Dayton Hamvention Trip QRP POTA Rove
By Conrad Trautmann, N2YCH
The Bonus State
Welcome to part three of a three-part POTA rove story where Peter, K1PCN and I decided to activate six state parks for our Parks on the Air Activated States Award on the drive to the Dayton Hamvention.
In installments one and two we activated Delaware, Maryland, West Virgina, Pennsylvania, Ohio and Indiana. I thought we had exhausted all our state activating possibilities for this trip, until…Peter said, “you know, Kentucky is not that far away. And, by the way, there is a park down there that has never been activated digitally…”
Really? I’m in.
We decided that on day two of the Hamvention, we would leave in the afternoon and make our way to Kentucky, which was just over an hour away. While we were standing on the line to get into the Hamvention on Saturday morning, one of the people near us mentioned that the Voice of America Museum was open until 9pm that night and he was considering going.
I stopped at the VOA booth in the Hamvention and picked up a brochure and on our way to Kentucky, Peter suggested that maybe on the way back, we stop in.
Kentucky
Our best bet for a Kentucky POTA activation, which was recommended by a fellow digital activator at the South West Ohio DX association dinner we attended the night before, was Big Bone Lick State Historic Site (K-3779). According to the Internet, it was named Big Bone Lick because of the “mammoth artifacts that were found and because of the salt springs that animals drank.” I found that it was impossible to tell anyone the name of the park without a smirk or chuckle in return.
When we arrived in Kentucky, we drove around Big Bone Lick park looking for a place to activate. Apparently, there are buffalo at the park…however, we did not activate near the buffalo. We found an unused picnic area and split up.
Literally about five minutes after I set up and got on the air, a group of moms with five-year-olds celebrating one of their birthday’s showed up. One of the mom’s apologized and explained that I had found her secret place in the park…but by then, I had almost completed my activation and was ready to break down.
I don’t mind it when people come up and ask about what I am doing, I’m always happy to explain ham radio to anyone who’s curious. Activating a park surrounded by a group of five-year-olds was a new experience that I hope to never repeat. Here is a photo of my setup at Big Bone Lick.
Given that it was later in the day by the time we arrived, Peter chose 40 meters, and I took 20 meters. 22 QSO’s later, here’s my coverage using the Buddipole with the 17’ MFJ whip and the Elecraft KX3 at 10 watts.
Many thanks to Simone (IU3QEZ) who shares the following guest post:
An enjoyable weekend
by Simone (IU3QEZ)
I’m part of a Club that promotes QRP activities in the mountains (Mountain QRP Club), in a minimalistic way – small power, small battery, small radio, simple DIY antennas and a lot of friendship.
So what’s better than a full outdoor weekend? Easy peasy, 10 friends together in the Italian alps – Monte Grappa, 1775 meters elevation.
Cars were well packed with QRP gear, tents and sleeping bags. Our place of choice was the nearby area with a mountain hut. We asked for permission to place our tents nearby so even those who are not used to sleeping in tents could participate.
Before starting radio operations we had breakfast. Local salami, cheese and, why not, a sip of good wine.
You can see here that Riccardo (IU3GKJ) is ready and strengthened from a good breakfast! It’s radio time.
We started with the activation of I-1484 “Massiccio del Grappa”.
To avoid interfering with one another we spread out along the radio spectrum: from HF to VHF/UHF, magic band included, each of us managed to get contacts on almost every band. Almost everybody was close to getting the 10 QSOs on 10 different bands required by POTA N1CC in just one day. Continue reading Guest Post: A most enjoyable weekend of SOTA and POTA in the Italian Alps!→
Many thanks to Matt (W6CSN) who shares the following post from his blog at W6CSN.Blog:
It Was Bound To Happen…
by Matt (W6CSN)
You’d be safe to guess that Mt. Davidson would have been my first SOTA activation seeing as it’s the closest SOTA summit to my home QTH. However, it actually took me a little while to get around to heading up W6/NC-423.
The trail begins near the corner of Dalewood and Lansdale.
Today was the day! I dropped my hiking buddy off at work at 8 AM then drove up Market Street, over Portola Drive and wound my way around Mt. Davidson, finding easy parking on Dalewood Way near Lansdale Ave.
The easy trail up Mt. Davidson.
From the trailhead near the bus stop, it a short and easy hike up to the activation zone. On this route you reach the east end of the summit, opposite the large cross, which is a well known landmark.
Except for the occasional exercise enthusiast, I had the place to myself this morning. Not wanting to lug the fiberglass mast up the hill, I deployed the Gabil Radio tripod and loading coil, using a 3 meter collapsible whip antenna. This is an easy setup and not too much of a compromise on 20 meters.
While I can do a lot of back and forth the get the loading coil set just right for a good match, I find it easier just to get the coil close enough and touch it up with a tuner for a low SWR reading.
I sent a spot via Sotamāt and started calling CQ SOTA on 14.058 using the QCX-Mini. My first call was from JG0AWE from Nagano City, Japan. This was followed quickly by several more stateside calls and I was able to gather the four QSOs needed within a span of five minutes.
QCX-Mini on 20 meters.
I continued working stations and chasing some Summit-to-Summit contacts for another half hour. It was at that point I noticed that I failed to throw the switch to the “Operate” position on the ZM-2 tuner. This whole time I had been operating in “Tune” mode with the 50 ohm absorptive bridge in circuit! It was almost like using a dummy load for an antenna!
Oops! I left the ZM-2 in the “tune” position!
Later, at home, I measured this tuner configuration with this radio using an actual 50 ohm load instead of an antenna and found that I was most likely operating with an effective power to the antenna of only 300 milliwatts!
Despite this extremely low power I was able, using CW, to complete the activation with no difficulty. This is a testament to the effectiveness of the CW mode, and not so much this operators skill.
Sutro Tower and Twin Peaks to the North.
After logging 10 contacts, I called it quits, packed up the station and headed back down for some breakfast. Next time I’ll try to remember to set the switch correctly after tuning up, but I make no promises. I’m guessing pretty much everybody that has a ZM-2 has at one point or other forgot to switch into “operate” mode, It was bound to happen.
Many thanks to Teri (KO4WFP) for the following guest post:
The Final Countdown and an Innovative Solution for My Nova Scotia Trip
by Teri (KO4WFP)
As I finalize preparations for my trip to Nova Scotia, during which I plan to activate six or seven parks, I ask myself “How the heck did I get here?” Those of you who read my first field report in this series know that Thomas Witherspoon’s decision to activate parks in Canada last year was my motivation. I admit it is gutsy of a relatively new op to believe I can undertake such a venture.
The necessity of traveling to Nova Scotia by plane drove the decision of what equipment to take. QRP became the name of the game, a great option for a CW op. I purchased the Elecraft KX2, a rig with a great reputation. Once it arrived in early May, I spent the next month and a half acquiring the necessary accessories and skills for this adventure. The final step before I leave is ensuring I have what I need and the room for it. Given others might want to undertake a similar venture, I will share what equipment I have chosen to take and how I am packing it.
I know most people prefer a roll-on suitcase, but after a trip to New York City last summer, I had enough of schlepping wheeled suitcases up and down the many flights of stairs we traversed. Upon my return to Savannah, I immediately purchased an Osprey Fairview 55 pack. The Fairview pack can be carried as a suitcase by a handle on its side or as a backpack (my preference). As for its size, it meets airline carry-on dimension requirements for domestic flights and has a few points to attach items you might carry if actually using it for hiking. And, best of all, it is made for YLs!
Included with and attached to the front of the pack is a smaller backpack that can be used as a daypack. I figured this would be perfect for most of my ham equipment and proceeded to find a way to fit everything in it. The larger Fairview pack would serve as my carry-on and the smaller daypack as my personal item for the flight.
As you can see, the daypack has a fair amount of room. In the main compartment I have the gorillapod tripod for mounting the AX1 on top of the rental car or a picnic table, the carrying case for Craig, my KX2, and his accompanying items, and two Tom Bihn travel bins. There are two additional compartments inside the daypack – a mesh, zippered pouch and a slot for a laptop or iPad.
When I first began CW POTA activations, I used a notepad to track contacts. However, to save time, I switched to a refurbished laptop with N3FJP loaded to log contacts in real-time. Juggling it and the key didn’t prove as difficult as I originally thought. Also in the laptop slot are documents I don’t want bent like my license (not pictured), band plan, UTC conversion chart, and call sign prefixes for European countries. I am also taking a small steno notepad as a backup for logging contacts as well as making notes for the trip reports I’ll write afterwards.
Connecting an international community through low-power field radio adventures.
Please support QRPer by adding us to your whitelist in your ad blocker. Ads are what helps us stay online. All of our ads are ham radio related--no junk, we promise! Thank you!