Many thanks to Jonathan (KM4CFT) who shares the following article about his portable field radio kit which will be featured on our Field Kit Gallery page. If you would like to share your field kit with the QRPer community, check out this post. Jonathan writes:
Hi Tom,
I thought I would share the two go kits I have. I tend to customize my equipment and supplies before I go on a POTA or SOTA outing but I keep these for the rare occasion when I want to grab a radio real quick. [The first on is my] QRPlabs go kit:
The case is a regular Lowepro case that I got with my KX2 when I purchased it from another ham. I did not realize it came with it so I accidentally ordered an extra from Elecraft which I now use with the KX2 kit [featured in a future Field Kit Gallery post].
The kit uses many components from K6ARK, including the 20 meter EFHW antenna and the retractable paddle.
The battery is a TalentCell from Amazon. I use it because it supplies 12v instead of 13.8v. One of the downsides of the QMX is that it cannot handle 13.8v, so I have to stick with 12.
I keep a cheap pair of earbuds with me just in case but I try to bring a nicer pair of headphones whenever possible.
Hopefully this information is useful to you and your readers!
-Jonathan KM4CFT
Many thanks to Skip (K4EAK) who shares the following article about his portable field radio kit which will be featured on our Field Kit Gallery page. If you would like to share your field kit with the QRPer community, check out this post.
[I]n my truck I carry a little field kit for impromptu POTA activations.
I also have an FT-891 to an ATAS-120 permanently installed in the truck, which is another possibility for impromptu activations, but that requires me sitting in the truck for the activation. Not my favorite way to activate …
Many thanks to Chris (N8PEM) who shares the following article about his portable field radio kit which will be featured on our Field Kit Gallery page. If you would like to share your field kit with the QRPer community, check out this post.
MTR-3 Field Kit Build by N8PEM
Ham radio is a hobby best enjoyed in community with others.
Ever since I began operating QRP portable a few years back I had admired the Mountain Toppers. Granted my Elecraft KX2 is a perfect daily driver. I’ve been lucky to have that as my sole portable QRP rig for some time. That didn’t stop me from dreaming of an ultralight QRP portable kit centered on an MTR3. High resale prices and scarcity made it a purchase I had long put on the back burner. But then one day I saw my good friend Julia, KF8JBB, while walking my dog in the park. So I stopped to chat.
Like many of us, Julia is an avid QRP and CW enthusiast. She has numerous QRP and SWL radios. Life is also pretty busy for her. She doesn’t get out to operate as much as she would like. As we chatted on that warm August evening, she offered to gift me her MTR3. For her, it was time to move that rig on to a good home so it would get it’s proper use. But the shrewd negotiator in me knew to never accept a first offer. I countered. I’d take the MTR3 off her hands if she let me build her a QRP portable antenna in return (later I also threw in a built N6ARA TinySWR kit for good measure). She accepted. The next day she dropped off the rig. The fun of outfitting an ultralight (UL) QRP kit began.
I quickly determined that I wanted to build a trapped 20/30/40 meter EFHW antenna to match the three bands on the Mountain Topper. I prefer end feds, and I wanted the challenge of building traps for the first time. Keeping in mind I wanted an UL kit, I could also leave the coax at home with an end fed. I had read that a trapped EFHW can be shorter than a standard EFHW due to the inductance of the traps. This appealed to me as I knew from experience that getting a 40-ish foot antenna up in the air is much easier than a 60-ish foot antenna. It took nearly six weeks to research, procure parts and build out this antenna, partly due to the fact I had to build this antenna twice.
My first attempt at this antenna build wasn’t good. I couldn’t get SWR better than about 1.8:1 on any band. I hadn’t tested every component at every step of the build. Thus, I had a hard time determining what went wrong. I used 100 and 150 pF capacitors for the traps which proved to have marginal shortening effects. I needed more turns on the toroids! I decided to do more research and start over.
Thanks to advice and blogs from folks like Dan AI6XG and Fred KT5X, I settled on a different, better design of the trapped EFHW. I ordered more parts. Switched out to 15 and 33 pF capacitors. I took my time to build and test this antenna in a step by step manner. The results were much better the second time around. Overall 45 feet 8 inches long and weighing two ounces. SWR better than 1.5 to 1 on all three bands.
I had the idea to place a TinySWR kit in line between the RCA plug and the end fed matching unit. I know there are SWR kits which can be installed within the radio, but I didn’t want to modify the MTR3 in any way. The stock design is sublime. I also built a back-up emergency antenna into the design. If for some reason I have a trap fail, I installed a bullet connector right before the first trap. Thus, I can disconnect the 30 and 40 meter portions of the antenna and have a basic resonant 20M EFHW. These thoughtful touches seemed to perfect the antenna.
Photo 1: Completed miniSWR, matching unit, 30m trap, and 20m quick disconnect
I tried to be thoughtful with the other choices in my kit as well. At 3.5 ounces and the size of a bag of coffee, the LowePro CS40 padded case proved to be ideal. I found it cheapest from a UK-based eBay seller. I made my flight deck out of the steel housing from an old external CD Drive. I measured, cut and filed the edges. It’s perfectly sized for loose Rite in the Rain paper, lightweight and thin. A metal flight deck also can hold the magnetic base of my CW paddles. When it came to the battery, I decided to go with a RC airplane LiPo battery. Fuzzy math told me that the 650 mAh would give me more than enough operating time. Once complete, I was happy to find the entire kit weighed in at just 18 ounces, not counting a throw weight or collapsable mast.
Photo 2: The completed MTR3 kit
My first activation with this kit was September 21st. I wasn’t sure how well I would do. Band conditions weren’t the best the previous two days. I went to my favorite spot, Bunker Hill (W8O/SE-009) located within Great Seal State Park (K-1954) in south central Ohio. It’s a short 20 minute hike to the high point on what was a partly cloudy 70 degree Thursday morning. I set the antenna up in a sloper configuration, gave my dog Togo some treats, ate half my sandwich, took a sip of coffee, and pulled up the POTA and SOTA spotting pages.
In just over an hour I had made 54 QSOs covering all 3 bands. The MTR3 combined with the trapped 20/30/40 EFHW worked flawlessly. It was an absolute joy to operate.
Photo 3: First activation complete
That joy came from the sublime kit for sure. But enjoyment also came from the community carried within the kit itself. The MTR3 from Julia KF8JBB. The paddle and wire winder designs from Adam K6ARK. The MiniSWR Kit from Ara N6ARA. The Trap PCB boards from Tim N7KOM. The toroids, capacitors, and antenna advice from Dan AI6XG. The blog post from Fred KT5X. The 3D printing from my nephew Colin. Even the RigExpert I bought from Glen W1ND this Spring was integral. This kit is an homage to that community.
Figure 2: First Activation QSO Map
If you made it to the end, thanks for reading! I hope it was interesting and helpful.
In the early fall and spring, I go over my QRP radios and give serious thought to how I’ll build compact field kits around them.
Why? I’m pretty sure it’s the pending change in weather that’s the catalyst. The temptation to get back out there and make some contacts.
Then again, any excuse: I absolutely love building field kits, and fortunately it never gets old.
The radios I’m considering at present are my MTR-3B (named Threepence) and KX1, now named Audrey. (Yep, I chose “Audrey”…thank you for all of the amazing suggestions!)
Both of these are ideal little radios for kitting out because they’re so compact and truly made to be taken to the field.
One of these two radios––and I haven’t decided which one yet––is going to live in my EDC bag.
The Tom Bihn Stowaway in black has been my EDC bag for many years. I’ll need to pay attention to the weight and bulk of this field kit, because I’ll be lugging it pretty much everywhere.
I’ve got some ideas and a couple of pouches in mind, so this will all start coming together soon.
But first…
Care to share your portable radio kit?
One of the things I enjoy doing when I’m putting together a new field kit is to check out what others have done. It’s a great way to get some fresh ideas…and besides, it’s just plain fun to compare notes.
If you would like to showcase your field radio kit on QRPer.com, please send a short write-up with photos detailing how/why you built your kit as you did, and list all of the components with links to the manufacturers.
We only ask that you send your own original ideas––and not just a link to another website article or video––as we’d like this content to become part of the QRPer archive. That way, if an external link is removed, it’ll still be safe and sound here. (We take our archiving seriously on this site.) Of course, we welcome links to blog articles and videos in your post.
Simply send your information via email to my callsign K4SWL at QRPer.com.
Last year, during a Black Friday sale, I took a calculated risk and purchased a bag I hoped would accommodate my Yaesu FT-817ND that has been outfitted with an Armoloq TPA-817 Pack Frame.
CP Gear Tactical Aircrew/Pubs Bag
Rod (VA3ON) first introduced me to CP Gear Tactical–a military pack manufacturer based in New Brunswick, Canada.
I contacted CP Gear Tactical shortly after outfitting my FT-817 with the TPA-817 pack frame. I measured the frame carefully and asked if the interior padded pocket (which is actually designed to hold a tablet–might fit my radio.
I never heard back from them. I could have called them, but on Black Friday, when it was on sale for 20% off and free shipping, I decided to throw caution to the wind and simply purchase it. My total price in USD was something like $62 shipped.
As soon as I opened the CP Gear pack, the first thing I did was check to see if the FT-817 with pack frame would fit in the interior pocket.
Much to my surprise, it fit it perfectly!
Indeed, it’s as if the pocket were specifically designed to accommodate the FT-817ND/TPA-817 combo.
Even the middle Velcro strap fits precisely in the middle of the radio between the pack frame side extensions. The strap holds the rig securely; once, I accidentally fumbled while holding the bag and even though it was upside down, the FT-817 remained securely inside. The strap held it in place.
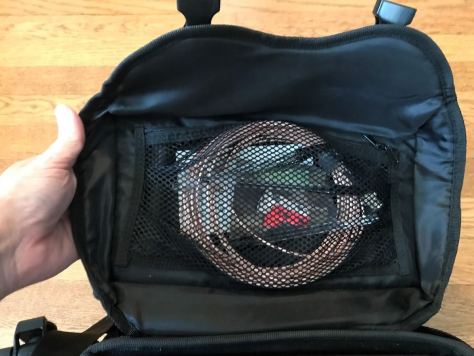
The bag has loads of room inside. In fact, you can very easily transform it into a fully self-contained field radio kit.
I actually give a small tour of this pack in my activation video below, so if you’d like to see some of the exterior pockets, I would encourage you to check it out!
If you’ve read my “Anatomy of a Field Kit” series, you’ve likely gathered that field kits are a bit of an obsession. [Yeah, understatement alert!]
My field kits roughly fall into two main categories: modular and fully self-contained. My modular kits are ones where components like the battery, antenna, throw line, key, and radio are in separate pouches and can easily be combined to make a complete station before I leave for an activation.
My fully self-contained kits are ones that quite literally have everything needed to perform a park or summit activation in one pouch or box. A good example that I’ve documented here is my MTR-3B field kit.
If you’re a devoted park and/or summit activator, I think it’s important to keep a dedicated kit kit in your car at all times. Why?
It’s ready to grab for impromptu activations
It’s handy in case of road-side emergencies in remote areas
It’s always accessible to demonstrate amateur radio to those who are curious
It’s always always there for those times when you hadn’t planned to play radio, but the opportunity presents itself
I always have a full radio kit in my Subaru and over the years, I’ve changed and adapted it. For the most part, though, it’s been located in the trunk/boot and lives with anything and everything else I keep back there. Sometimes, it’s in the way when we need to fill that trunk space with family items for a trip or when we’re hauling things around town. Other times, it’s floating/sliding around freely in the back.
On long family trips, I’ve been known to store radios under the floor, but it’s a true hassle to remove them because I have to remove anything in the trunk before lifting the floor.
I’ve always wanted a way to store my kit in the car in a dedicated space. In the past, I’ve tried to make a kit that could fit under the driver’s seat–thinking that might be ideal–but there’s very little clearance under it and it’s difficult to remove.
Enter the BROG Headrest Pouch Kit
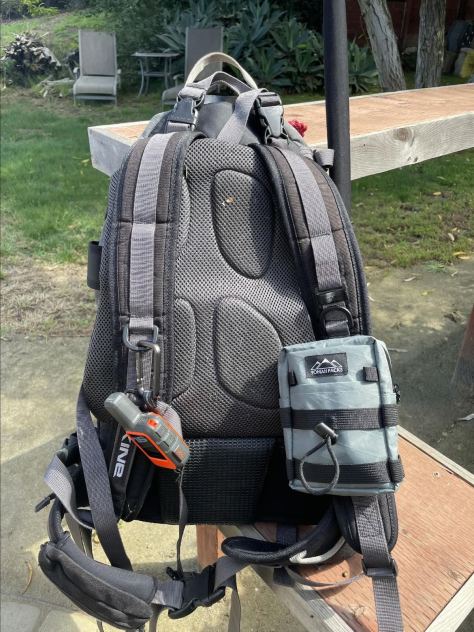
Before I placed my initial order for the Blue Ridge Overland Gear (BROG) Gadget Bag, I checked out other items on their website. One that immediately caught my attention was their Headrest Kit.
It consists of a Velcro panel that fits around a vehicle headrest and a pouch (or pouches) attach to it.
BROG caters to Overlanders and vehicle storage/organization is huge in that community. The headrest kit makes a lot of sense: it’s using space that’s accessible, doesn’t interfere with any passengers, is off the floor, and is otherwise underutilized!
The big questions, of course:
would the pouch offer enough space to store an entire radio kit,
and would the kit weight too much for the Velcro back to hold it in place?
I asked for the Headrest Pouch Kit ($47.99) to be sent with my Gadget Bag order.
BTW: Big thanks to BROG for giving me flexibility with this order. Since I had no experience with their gear, I asked that they send me a list of items and allow me to evaluate them, then pay (full price) for what I decided to keep.
Would it work?
I knew I’d need to store a very small transceiver in this dedicated pack. A few could potentially fit the bill–namely the:
In early February, Jeff (KD4VMI) sent the following message to me:
Good evening. Love your YouTube videos and QRPer posts and, from them, I know you appreciate rugged packs and gear.
I enjoy POTA, although I don’t get out as often as I’d like, but I’ve found Blue Ridge Overland Gear’s various bags and modular systems to be very handy for bundling my radios, batteries, cables, and antennas.
It’s been on my mind for some time to let you know about them (if you don’t know about them already) and I finally decided to take the time to write you. I’m not associated with them in any way, and I didn’t approach them about passing this on to you, or anything like that. I just really appreciate their gear and I think you might, too.
The BROG materials are high quality and stout, the zippers are beefy and smooth, everything is double or triple stitched and everything is modular so it can be used for just about anything, and in pretty much endless combinations with their various bags and gear.
Their products are not overly cheap, but are guaranteed for life. They’re located in Bedford, Virginia and all their things are made in the USA (I think mostly in Bedford).
I often use their tire puncture repair kit bag, for instance, to carry my FT-891, Bioenno battery, cables and mic, and PackTenna, and then strap the coax to the Molle system on the front of the bag.
They posted a YouTube video showing their gadget bag with accessory pouches for HTs, etc.
Anyway, I appreciate all you do for our great hobby and just wanted to share this info.
Take care and all the best to you and yours…
Thank you so much for the kind words, Jeff, and for the tip about Blue Ridge Overland Gear (BROG). You’re obviously a skilled pack enabler because you had my attention by the second paragraph–!
Shortly after my exchange with Jeff, I checked out the BROG website and was really impressed with their line-up of packs and gear–all with a focus on modular organization, especially in-vehicle since it’s for Overlanding. It’s just the icing on the cake that their gear is made in the USA.
I was very curious if their Gadget Bag, in particular, would lend itself to being a modular flied radio kit pack.
Thing is, there are so many options and configurations for the Gadget Bag, I wasn’t entirely sure what to order.
Being a fellow who expects to pay a premium for rugged products, made in the USA–especially ones that carry a lifetime warranty–I was prepared for some sticker shock. Turns out, BROG pricing is pretty reasonable in comparison with other cottage industry pack manufactures.
Still, I wasn’t quite sure how easily some of my radios and gear might fit in their zippered pouches, so I reached out to BROG–mentioning QRPer and my constant search for field radio packs–and asked if I could order some packs and pouches, test them with my radio gear, then pay for what I decided to keep. I didn’t want free gear, I just couldn’t tell based on the product images and posted dimensions what pouches and packs might fit my various radios and accessories. Also, I knew readers might ask if certain pouches and packs might fit certain radios.
The good folks at BROG kindly obliged, so I asked for the following list of items:
– QTY 1 Gadget Bag (shell) in black
– QTY 3 Large Velcro Pouches
– QTY 6 Medium Velcro Pouches
– QTY 1 Velcro Cord Keeper
– QTY 1 Medium GP Pouch
– QTY 1 Velcro Headrest
– QTY 1 Headrest Pouch Kit
Some of these items weren’t in stock, so it was a week or so later when I received notification that the package had shipped. It arrived a couple days later.
I’m writing to share my idea for a cheap and easy to build go box. It’s not for a QRP rig, but the concept can be applied for the ft818, for example. Check out this YouTube video:
I’ve been operating under snow with this box, in “ninja” style.
Because if I wait for it to stop snowing here I’ll do nothing for 3 months, hehe!
Last August, I celebrated my fifth year as a ham and at 74 I’m still able to do some backpacking. This was my first attempt at taking a radio along. The QCX-original was the only model at the time and sold for $49 + shipping. The case is a dollar store pencil box with the radio mounted on stand-offs.
I changed the antenna you see to K6ARK EFHW setup with counterpoise. No coax. I used the on-board key. The throw line was arbor line much like yours and my weight was the tent peg pouch filled with rocks from the camp site. This was my food bag hanging setup. Under $100 for everything.
Before I used it much I discovered POTA from you and purchased a KX2. Haven’t camped much lately but I have activated 70 of Georgia’s 203 parks and having a ball!
[I should note that a] few years back when I made the kit, prices were lower so it may be more difficult to hit that $100 mark. For example, a QCX-mini (no case) runs $57.79 and the QRPGuys EFHW kit is now $30. Adam’s (K6ARK) EFHW kit I changed to is only $20. The “water resistant “ pencil case is still $1! I was more interested in weight rather than cost and as shown the weight is 22.5 ounces.
Thanks Thomas and wish you and yours a Merry Christmas and peace and good health in the coming year.
Allen
72
Allen
N4NN
I love it, Allen! Pure QRP fun on a shoestring budget. Not bad at all! You make a good point here that many kits can be built into a waterproof (or in your case a water resistant) case. I’ve often wanted to do this myself and may very well one day!
QRP radios, product announcements, reviews, news and more. Low power amateur radio fun!
Please support QRPer by adding us to your whitelist in your ad blocker. Ads are what helps us stay online. All of our ads are ham radio related--no junk, we promise! Thank you!