Tag Archives: Field Radio Kits

Field Radio Kit Gallery: KR8L’s KX2 POTA Field Kit

Many thanks to William (KR8L) who shares the following article about his portable field radio kit which will be featured on our Field Kit Gallery page.

If you would like to share your field kit with the QRPer community, read this post. Check out William’s field kit below:


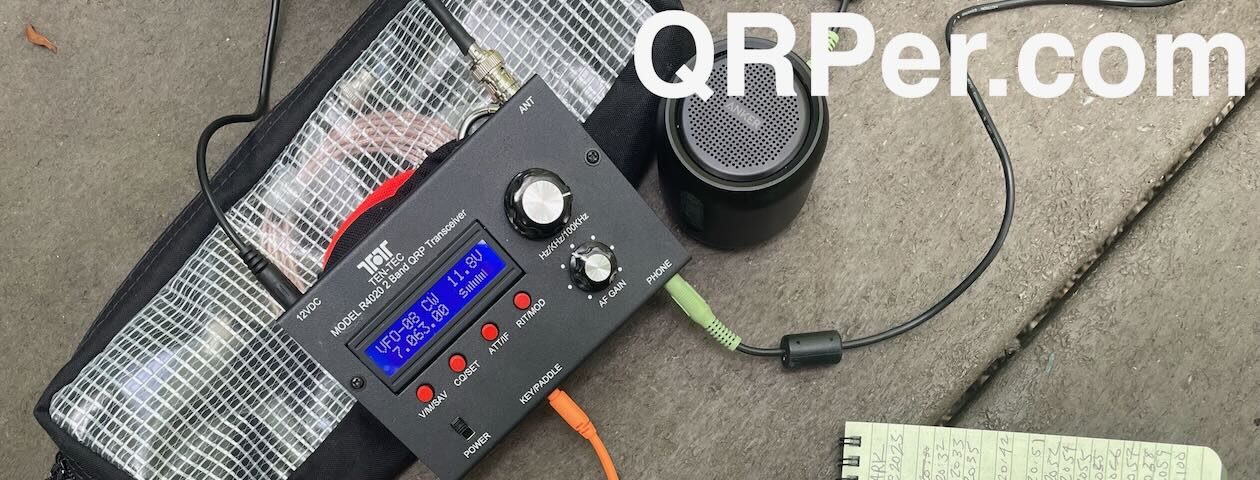
KR8L POTA Field Kit Components

KX2 Bag (CS40)

Battery Bag with shoulder strap (unknown origin)

L.L.Bean ACS Day Pack with the following:

Maxpedition Beefy Pocket Organizer

  • AXE1 40 meter loading coil
  • AX1 telescoping whip
  • RG316, six feet, with BNCs
  • Manfrotto Pixi mini tripod
  • AXT1 tripod adapter
  • AXB1 bipod
  • BNC right angle adapter
  • Counterpoise, Elecraft short, for AX1, AX2 (2)
  • Counterpoise, Elecraft long, for AXE1
  • Counterpoise, homebrew with 2.5 mm banana plug, 13 feet
  • Small gear ties (2)

Maxpedition Gear Cocoon Pouch

  • AX1 loading coil
  • AX1 telescoping whip
  • AX2 loading coil
  • Counterpoise, homebrew with 2.5 mm banana plug, 13 feet

Stuff Sack #1

Stuff Sack #2

  • RG174, 25 feet, with BNCs
  • RG316, three feet, with BNCs

Stuff Sack #3

  • QRPGuys Mini 49:1 transformer
  • Tent stakes, small (3)
  • Gear Ties (2)
  • Micro paracord, 25 feet
  • Paracord, three feet (3)
  • Small bungee cords (4)
  • 40 meter EFHW wire
  • 20/10 meter EFHW wire with the following adapters:
    • 40 meter loading coil and extension (34 microhenry coil and an additional 68 inches of wire)
    • 17 meter adapter*
    • 15 meter adapter*
    • 12 meter adapter*

Loose Items in L.L.Bean pack

Note: The 20 meter EFHW wire has a connector in the middle of the length.  By unplugging this connector and removing the half of the wire at the “far” end (i.e., away from the transformer and feedpoint) and replacing it with one of these adapters, the wire is then reconfigured to be an EFHW for 17, 15, or 12 meters.

Other Items as Appropriate (most items not for hikes of any great distance)

Summary

My experience from years of traveling for both pleasure and business has shown that I always overpack and take too much “stuff”, and POTA is no exception.  However, I have made an attempt to modularize my POTA gear so that I can lighten my load depending on what type of activation I have planned and how far I will be going from my parking spot.  If you will spend some time scrolling through my blog, you’ll find examples of most of the following:

If I’m going to a location where I’m planning on operating at or not too far from my truck, I’ll take everything on this list to give me maximum flexibility as to how I set up.  Probably the most extreme setup involves erecting my 12 meter Spiderbeam mast on my heavy duty towing-style bicycle rack and deploying a wire antenna as an end-fed vertical or as a sloper.

At the opposite end of the spectrum, if I’m going to be doing a pedestrian mobile (/PM) activation then all I need is my KX2 bag, my Maxpedition Gear Cocoon Pouch, probably my Sony ICD-UX570 Digital Voice Recorder (unless I can manage to log on paper somehow), and (optional) my battery bag with shoulder strap.

If I know that I’ll be doing a wire antenna activation using a tree for support then I can wear my L.L.Bean day pack, but omit the Maxpedition Beefy Pocket Organizer and the Maxpedition Gear Cocoon Pouch.  In that case I’ll likely wear my battery bag with shoulder strap.  I may put the KX2 bag in the pack or carry it by its handle.

And, if I know that I’m going to be doing an AX1/AXE1/AX2 picnic table activation then I can omit Stuff sacks #1,# 2, and #3, but otherwise wear my day pack and battery bag as described above.

Of course, there are always variations, such as using the camera tripod, AXT1, and RG174 coax to set up at a picnic table, but allow the AX1/AXE1/AX2 antenna to be more in the clear (such as operating from a picnic shelter).

I’ve also done what you might call “pedestrian stationary”, deploying the KX2 HT-style and hand-held, but sitting in my backpacking chair.  Or deploying a wire antenna (EFHW or “random”), but sitting in the backpacking chair with the rig balanced on my leg.  By traveling with “everything” but packing in a modular fashion, there are any number of variations on how I can set up for an activation.

Field Radio Kit Gallery: KD7DUG’s mcHF Field Kit

Many thanks to Dugbo (KD7DUG) who shares the following article about his portable field radio kit which will be featured on our Field Kit Gallery page.

If you would like to share your field kit with the QRPer community, read this post. Check out Dugbo’s field kit below:


Heli Pro Backcountry pack with portable field kit

Dugbo’s MCHF compact field kit

by Dugbo (KD7DUG)

Intro

My field radio kit is not so different or unique that it stands out from the many other experienced ham radio operators that have assembled and shared their field kits with the ham radio community. I am new in this game and by no means an expert. However, my field radio kit was designed as a fit for purpose and tailored to my CW operating needs and especially the bank account. I wanted my portable field kit to be nimble and easy to deploy at a minute’s notice. With many of the popular QRP radios backordered and even not available at this time, I chose a different route with my choice of radio.

Radio

Currently my preferred radio is the very capable SDR mcHF-QRP HF transceiver created by Chris, M0NKA. The mcHF is a smaller designed portable radio that simultaneously packs a left hook, upper hook punch, it’s a real contender. The radio is standalone, and its compact design is in comparison to other transceiver competitors with transmit and receive on 60-10 meter amateur bands with 5W output power on CW and SSB.

Currently the mcHF by M0NKA is very difficult to obtain and currently the kits are not available to purchase. However, there are multiple clones of the radio being offered by Chinese manufacturers.

Radio Equipment

Radio Equipment Kit

Priority was to protect the radio while traveling in the field. Securing the radio in a case to prevent damage from the motions of backpacking up a summit while also protecting the rig from environmental factors, dreaded dust, dirt, and water.

The Evergreen 57 waterproof dry box was a perfect match with the mcHF and additional operating equipment. The radio slides perfectly into the rubber molding of the evergreen case and prevents the radio from moving around in the case during transport.

To power the radio, I need an efficient battery for my needs. Batteries are heavy and weight was one of my concerns. Also on my mind was which battery would provide enough amp hours for an activation? To minimize the weight and provide enough power for one to two POTA|SOTA activations, I finalized my decision on a 3Ah BioEnno LIPO4 battery to supply power the mcHF. To link the battery to the radio, I am using a 5.5 x 2.1mm with an Anderson Pole connectors.

For audio I am using an Anker IPX5 speaker for GoPro sound recording along with 3.5mm Ugreen Headphone splitter for an old pair of Iphone headphones. I prefer headphones for copying incoming callsigns, RST and QTH from hunters and chasers. The headphone splitter, headphones and two additional 3.5mm connectors for speaker connection and key are packed into the rubber mesh located in the upper lid of the Evergreen case.

I am using two highly regarded and engineered portable keys. The CW morse N0SA and the BaMaKeY TP-III, are very rugged and ultra-compact twin paddle keys for CW operations.  For the BaMaKeY TP-III protection against the elements, it resides in a small waterproof case lined with foam. The N0SA paddle fits snuggly into the Evergreen case.  I use a Sea to Summit bag to carry a smaller travel case that contains the Rite in the Rain pad with pens for logging, the Anker speaker, NY4G EFHW antenna, ABR316 coaxial cable and two 10’ pieces of paracord with two tent stakes for antenna deployment.

Radio setup on Summit W6/CS-445

Once on the summit, I set up my radio equipment onto the Sea to Summit bag for additional protection from the ground. For a backup HF radio, I carry the very reliable Venus SW-3B 5W CW radio in small fly fishing Yonah Pack attached to my backpack. A perfect fit and well protected.

Antenna

I am using a NY4G 64:1 balun EFHW QRP 40,20 and 15m with additional 17 and 30m bands with a maximum of 15W on CW.

To deploy the antenna in the field in an inverted V configuration, I am using a modified 4.5m light weight expandable carbon fiber fishing pole (99g).

25-inch Valkyrie archery carbon shaft

To keep the antenna and mast vertical, I modified a 25-inch Valkyrie archery carbon shaft at one end with a 200g target tip and the other end with a center pin sleeve. No need to carry a small hammer to pound in the arrow shaft into the ground, mother nature has me covered with plenty of small size rocks in the field. I am using 15ft of ABR316 coaxial cable.

25-inch Valkyrie archery carbon shaft supporting the 4.5m expandable fishing pole

SOTA Activation W6/CS-323 EFHW antenna in an inverted V configuration
SOTA Activation W6/CS-445 EFHW antenna in an inverted V configuration

Navigation

I am using onX Off-Road GPS app on my mobile phone to download maps of selected activations. I also carry an inReach Mini Messenger satellite tracker and communicator for safe insurance. Unexpected situations can occur without warning, so I always like to be prepared than not to be.

Wrap Up

Heli Pro Backcountry pack with portable field kit

I am using a 20-year-old Dakine Heli Pro Backcountry pack to carry my compact field kit.

I used this pack for backcountry snowboarding in my early years. This pack is fantastic because of the extra compartments for carrying gear. It is also fitted with an ice axe strap that is perfect for carrying the expandable carbon fiber pole. The total weight of my portable field kit is 2.2 Kg or 4.9lbs. It might not be the lightest portable field kit setup, but it is definitely not the heaviest.

Yonahs Pack and the SW-3B

Overall, I am very satisfied with how my portable field kit came together as well as its performance in the field.

72 – DUGBO KD7DUG

Field Kit Gear

Field Radio Kit Gallery: VA7EKA’s Yaesu FT-857D Field Kit

Many thanks to Andrew (VA7EKA) who shares the following article about his portable field radio kit which will be featured on our Field Kit Gallery page.

You may note that this isn’t a QRP radio, but the FT-857D will run QRP power! If you would like to share your field kit with the QRPer community, read this post. Check out Andrew’s field kit below:


Yaesu FT-857D off-grid portable kit

Andrew (VA7EKA)

As part of my amateur radio operations, I’ve quickly seen the advantage of having a small, portable radio I can operate anywhere and deploy quickly. Especially as I don’t have a permanent HF antenna installation at home, being able to set up in the yard (or even indoors) in a pinch is pretty high on the list of requirements for me.

I started reading online and watching videos about this topic, and found an excellent video from KT7RUN “The Tech Prepper” (and an earlier one) which showed a super-slick portable radio setup featuring the Yaesu FT-857D. Prior to finding those videos, I had already acquired an FT-857D due to its all-band, all-mode operation and compact size, and Gaston KT7RUN’s kit seemed like a very compelling setup for this radio.

Here’s what I’ve ended up with for my off-grid-capable “grab’n’go” radio station:

Inventory

Currently this is the inventory for this kit:

Antenna options:

and for charging this station in the field…

Details

Of course, the core of this kit is the radio. It’s popular for a reason. All-band, all-mode “shack in a box” in a truly portable form factor. Capable of 100w operation, it’s more than enough to make whatever contacts you need. In my case, because the battery has a max 20A continuous-discharge specification, I wouldn’t actually transmit at a full 100w with this exact configuration. Not a problem – I’m not expecting to transmit at those levels with a pack of this size.

The pack frame is truly solid, though it adds a good amount of weight (1.364lbs with all options). It’s absolutely worth it though. Not only does it provide rigidity and protection, it also provides convenient mount points for attachments, like the relocated antenna connections and Digirig holster. I could securely attach additional items if needed.

The battery just fits into the MOLLE pouch which is pretty lucky. I got a small PowerPole distribution block so I can not only connect the radio to the battery, but also the Genasun solar charge controller and whatever other power-related accessories I might use (e.g. Dakota Lithium’s 5v USB charger which I’ve adapted to PowerPole). Solar-wise, the charge controller I went with has a little more capacity than what I’m using currently with the 75w panel. I figured I should bump up to the 10amp charge controller to allow for a larger solar panel later on.

For CW operation I’ve relocated the jack with a basic 3.5mm audio extension cable going up through the bag and looped through the PALS webbing on the High Ground Gear PRC-117G bag. For a key I’m usually packing a basic 3d-printed iambic paddle I got at a swap meet for $20. I’d love a N0SA SP4 paddle but… $$$ :‘D

In the following photos you can see how I’ve laid out the relocation cables. I specifically took photos of these to show people who want to re-create this kit, because it was pretty tedious to get it all in there. Hopefully these will save someone a bit of time. 😉

All in all, this kit weighs in at 11 pounds. It’s a bit heavy to carry for a SOTA activation, but for POTA it’s no problem at all. I have indeed carried it up to a SOTA summit, but HF propagation conditions were poor and I was really struggling to make any contacts. Ended up resorting to activating on 2m with a tape measure Yagi. 😉

Because of the PALS webbing on the PRC-117G bag, this portable kit could be strapped to a larger backpack as needed, though typically I have just carried the kit inside my backpack, to keep the weight closer to my body. Perhaps more notably, additional accessory pouches could be attached, like a pouch for logbook/pencil/antennas/CW key etc.

Conclusion

So how is this kit to actually use? In a word, awesome. Drop it on the ground or on a table, deploy and attach an antenna, turn on the power. If I’m expecting to be on air for a long time, I can attach the solar charge controller and solar panel to keep the station running (though I have yet to do this while operating, since I completed this kit very recently). I can go out into the field and use this setup indefinitely, regardless of available electrical infrastructure.

For digital operations, I have a ToughBook CF-31 which is fully configured with all relevant software I’d typically use. This is great for tossing in the vehicle for a POTA activation, and even feasible for SOTA if you’re in great shape or willing to carry the extra weight. An alternative for digital ops could be a lightweight single-board-computer, tablet, or netbook, of course.

Just for fun, here’s a map of most of the QSOs I’ve made with this rig since putting it together. It’s not exhaustive, but what I could quickly gather up for this post. 133 contacts across 11 countries. The furthest contact thus far is with VK2WN on 30m FT8, at a nice 11965km (7435mi) distance, with just 5watts of output power on my side. Nice!

If you have any questions about this kit or would like additional details, please feel free to reach out. I’d also be curious to hear from anyone who follows this build and creates their own variation!

73 de VA7EKA

Field Radio Kit Gallery: W2AEW’s Comprehensive Elecraft KX2 Field Kit

Many thanks to Alan (W2AEW) who shares the following article about his portable field radio kit which will be featured on our Field Kit Gallery page. If you would like to share your field kit with the QRPer community, read this post. Check out Alan’s field kit:


W2AEW Field Radio Kit

I’ve only been active with POTA for a little over a year, but have put together a kit that gives me lots of options for antenna deployments.

The main kit is in an old camera bag that I picked up at a hamfest for $5:

One of the outside side pockets houses a small tripod and some little ground stakes for securing support ropes, etc.

The other outside side pocket houses a small digital recorder and a cellular hot spot:

The front outside pocket houses some rubber coated twist ties that I use for securing a portable lightweight pole, as well as a few POTA brochures, QSL cards and eyeball cards:

The pouch on the inside of the lid contains a 25’ length of coax, a few extra pens and other accessories:

The main chamber houses the KX2 Shack a Box bag, a Maxpedition accessory bag, the AX1 antenna kit and my iPad:

The KX2 bag is the main bit of the kit.  Sometimes, this is the only thing I carry with me (and will often put the AX1 kit inside also):

The rightmost pouch contains the 40m EFHW antenna, which is one of my two workhorses for my activations.

The middle section holds the logging pad, writing utensils, spare wire bits for antenna and counterpoise use, lightweight clips, etc.

The main section of the bag holds the KX2 which includes the internal battery and tuner. Continue reading Field Radio Kit Gallery: W2AEW’s Comprehensive Elecraft KX2 Field Kit

Field Kit Gallery: K2EJT’s Self-Sufficient Elecraft KX1 Field kit

Many thanks to Evan (K2EJT) who shares the following article about his portable field radio kit which will be featured on our Field Kit Gallery page. If you would like to share your field kit with the QRPer community, read this post. Check out Evan’s field kit:


KX1 Field Activation Kit

by Evan (K2EJT)

I take a minimalist approach to most of my gear.  I don’t like to carry anything I don’t need.  Whether it’s what I pack in my daypack, an overnight pack, or my radio kit…..If I don’t need it, it’s probably not coming along.

That’s where this kit comes in.

This is the absolute minimum radio kit to do a field activation.  While it’s not the lightest kit I have, it still comes in at only 1008 grams (2.25lbs), and that’s including the Pelican case which makes this kit rugged and waterproof (I have an SW-3B kit that weighs 700g, but it’s in an ultralight stuff sack).

This kit contains EVERYTHING (and I mean everything) to do an activation.  The radio is an Elecraft KX1.  It’s a four band radio with the internal ATU.  Powering it are six AA Lithium Ion batteries.  I love this radio, and I wish it was still in production, but these days they’re unobtanium unless you’re willing to spend a ton of money and get lucky and find one for sale.

The CW key is a cwmorse.us N0SA paddle.  The headphones are a pair of old SkullCandy earbuds I’ve had forever, but sound great.

For an antenna I’m running a 41’ random wire antenna, with a 17’ counterpoise, constructed of 24ga silicone jacketed wire.  That’s attached to the radio via a BNC binding post.  While this setup isn’t the most efficient, it’s definitely the most compact and agile.  Normally I run resonant antennas, but having the tuner allows me to run the absolute minimum antenna, and swap bands quickly, and that was the idea behind this kit.

The throw bag is rip-stop nylon with a paracord loop sewn in the top and a velcro closure across the opening.  I fill that bag with rocks, seal it shut with the velcro, and it’s ready to go. The throw line is 65’ of 1.8mm high vis reflective cord.  The throw bag doubles as a stuff sack for the cordage, so it’s all contained in one neat little unit that rolls up tiny.

Also included in the kit are a pencil and a logging sheet, as well as the KX1 cheat sheet.

I have lots of other field kits, but I wanted to showcase just how little you can actually get away with and still get the job done. Yes, I know you could build a Pixie kit and a tiny home made key and stuff and make the kit smaller and lighter, but I wanted a kit with no major compromises or downsides.  This fits the bill.   There’s nothing like a 100% complete kit that contains literally everything you need to do an activation that fits in the palm of your hand!  Thanks for reading and 73!

Evan

K2EJT

Equipment:

Everything else is either generic, home made, or ancient.

Readers: Check out Evan’s YouTube channel for more field radio goodness.

Field Kit Gallery: NL5E’s Lightweight KX2 SOTA/POTA Alaska Backpacking Radio Kit

Many thanks to Eric (NL5E) who shares the following article about his portable field radio kit which will be featured on our Field Kit Gallery page. If you would like to share your field kit with the QRPer community, read this post. Check out Eric’s field kit:


NL5E SOTA/POTA Backpacking Kit

Description

Hello! NL5E here.

I’m one of the rare SOTA activators in Alaska (I also use this same kit for POTA). Anyone that has looked at a map of this state will know that we have some interesting difficult topography. Many of our summit hikes start out near sea level, but are 3000-6000 vertical feet of climbing to get to the summit. So I built my kit with compactness, versatility, and weight in mind. Everything weighs approximately 2lbs (not including the battery, I don’t always take it).

My primary operating modes are CW, FT8, and SSB.

To facilitate those modes I tried to keep everything as small as possible while still being usable. For example, I debated using N6ARA’s tiny paddle, but I found I made too many sending errors. The N0SA paddle is a perfect medium between portability and sending ability. For FT8 the FT8CN app has been a good alternative to carrying a Raspberry Pi or small laptop and the well loved Digirig is probably the best audio/cat interface on the market today. I don’t do a lot of SSB (especially at QRP levels), but the K6ARK mini microphone is a wonderful improvement over Elecraft’s comically massive microphone for the KX2. I added headphones so I don’t disturb anyone on popular summits and so I can hear CW a bit better.

My antennas of choice tend to be random wires and End Fed Halfwaves.

With the KX2 I chose to use K6ARK’s 20w antenna kits and built both a 9:1 and 49:1 version. I usually carry the 9:1 just to have the band flexibility as it will work from 40m-10m. If the ground is wet enough I’ve had it tune up to 80m.

For the 49:1 I chose 20m because bands lower than that have mediocre performance from the latitude. Because of how short both these antennas are, they pair very well with the SOTAbeams Carbon 6 mast. From a summit a 19’ mast is usually tall enough to work most of the US and lots of Asia from here. The only modification I made is gluing the top 2 sections together for durability. To attach the antenna wire I use a small Niteize carabiner and a prussik loop.

I also wanted to ensure that I could power many different devices while out hiking. I settled on an Anker battery because it is easy to power phones and the radio without having to bring a bunch of different adapters like I would with a dedicated 12V battery.

I know someone will mention protection and the bag I chose. Yep, a silnylon stuff sack offers zero protection from bumps and impacts. I firmly believe that hams “over baby” their equipment and think that their radios will hilariously explode if sneezed on wrong. I settled on the Gems Products cover and rails as a good solution to keep the radio from getting destroyed in a backpack. So far so good. I added the dry bag to my list for rainy days.

I didn’t include one in the images, but I also usually have an HT with me, but most summits don’t have good line of sight to our population centers. I usually run a Yaesu VX-6R with Diamond RH77CA or MFJ Longranger. I will usually run 2m FM when I am close to Anchorage or Palmer. I also didn’t include my logging solution, but that is usually HAMRS on my iPhone or a Rite in the Rain book and pencil. I find CW is easier to log on paper for some reason.

Thanks for looking and perhaps I’ll hear some of you on the air.

Component List

Radio: Elecraft KX2 with Side KX Heatsink and Cover

Antenna: K6ARK Random Wire with 29’ of polystealth wire and antenna winder

Note: I also run a 49:1 EFHW cut for 20m (not pictured, looks the same).

Dog: Luna. Standard issue Alaska Husky. Smol in size. Adds 5 dB gain to all antennas. Adds 45 lbs, but is self transporting.

Support: SOTAbeams Carbon 6

CW Paddles: CW Morse N0SA SP4 Paddle

Microphone: K6ARK mini microphone with printed case. Built from Digikey Parts.

Headphones: Sony Earbuds – could be any old ear buds. These work fine.

Digirig Mobile with Cables: Lets face it. Sometimes FT8 is all that works. I’m in Alaska.

Android Phone: Galaxy S10. Dealers choice for a phone. It exists only to run FT8CN instead of carrying a laptop for FT8.

Power: 

JacobsParts 15V 5A USB C PD cable 5.5×2.5mm DC (Ferrite Added)

Note: Outputs approx. 14.5V when measured using my multimeter. Radio shows the same/

Anker 747 25600mAh battery

Miscellaneous Items:

5.5×2.5mm to 4.0×1.7mm DC Adapter: Allows charging of various HT radios using the Anker battery with JacobsParts USB C cable

-Shower Cap: The all important rain cover for the KX2. Just in case. Just make sure it is transparent.

Storage: Sea to Summit 3L UltraSil Stuff Sack or Sea to Summit 3L Dry Bag

Field Kit Gallery: W4EMB’s Penntek TR-45L Portable Kit

Many thanks to Ed (W4EMB) who shares the following article about his portable field radio kit which will be featured on our Field Kit Gallery page. If you would like to share your field kit with the QRPer community, check out this post. Ed writes:


My QRP Portable Set up

by Ed (W4EMB)

Radio: I have one priority rig I use 99% of my time. It is the TR45L Penntek. I have both versions. The fullsize one with built-in tuner and battery, I also have the “Skinny” version. The skinny does not have the tuner nor battery. My second Rig is the Yaesu 817 with the Windcamp Battery upgrade. I also have a 40m only QSX and the 5 band TruSdx.

Penntek TR45L Skinny with external batter and external tuner.

Antenna:  I use the Chelegance MC-750 most of the time, but also use a Homebrew EFHW with 49:1 balun and 67’ of wire.

I have the QRP guys Tri-Band vertical kit, and two pieces of 16ga Speaker wire cut to 33’ that I carry as well. To support the EFHW and Speaker wire antenna, I use the SOTABEAMS 10m (32 ft) “Travel Mast”.

For the QRP Guys Tri-band vertical, I use the SOTABEAMS Carbon-6 ultra light 6m (19.6 ft) mast. To support the 32’ mast I usually just lean it into the trees and slope my EFHW up from the feed point.

For the speaker wire antenna, I run the “red wire” straight up the mast while it is strapped to the picnic table. The “black wire” is simply thrown out across the ground. I might even elevate the black wire with sticks.

My carbon-6 fits right into a piece of 1 ¼ inch PVC pipe I have clamped to my brush guard on my van. Or, I use a Tiki-Torch stake to hold my carbon-6 in open ground.

carbon-6 with Tiki-Torch stake supporting and using the Tri-band Vertical.
carbon-6 inside of PVC pipe with the QRP Guys Tri-band vertical.

I find for me, that my QRP Guys antenna works great on 20m without a tuner. But when I try to use it on 30m or 40m, I require a tuner. For this reason, I lean on my MC-750 to be the main antenna.

I have modified my MC-750 slightly. I made my own set of radials to match the factory ones. I chose to make them out of silicone wire. I find it to be more flexible and does not kink or tangle as easy as the standard factory radials. I used 3mm banana plugs and 24ga yellow wire. I also crimped small ring connectors onto the ends of the radials. I did NOT strip the insulation and place them on the wire. I simply crimped them on the silicone. I use them to stake down the wire. I use four nails as “stakes” to pin the wire down. I find I only stake the radials out when I am on un-even ground.

The second modification, I made a set of “double” radials out of 26ga green silicone wire. Colors do not matter. It is what I had. I spread them evenly around the base of the MC-750.

MC-750 with “double radials” and RG316 for coax.

My key is a Czech military straight key from the 1950s. It was new old stock when I bought it. I also carry a small mini set of paddles. For the TR45L radio, I can not play my recoded CQ or 73 with out a paddle. The “play” button is dit or dah trough the paddle jack.

For coax, I use RG316 and the appropriate adapter for the MC-750.

I have two pencils from Kuru Toga. One pencil is .5mm the other is .7mm. I make my own POTA log sheets and I paper log, and then type them later. I am a not talented enough yet to play with a tablet or PC while operating. I have only done CW for the last 12 months.

On my table: I have a really thin yoga mat. I find the concrete picnic tables a bit rough on my equipment. The yoga mat can get a bit sticky when it is warm, so I drape a small hand towel over the edge where my arms lay. I also have a Write in the Rain tablet in full size paper. I have been out early in the mornings in this summer and humidity and steamy fog makes normal paper hard to write on. The .7mm pencil matches up well with the Write in the Rain paper.

Chelegance antenna pictured in the background. K-2965 Paris Landing State Park

I have found CW and POTA have re-energized my ham radio hobby and resurrected it from a dusty shack, to a fun out door activity.

My first challenge was how to get from the car to the table in one trip. Downsize to the necessities. Next was figuring out the antenna and radio combo that could work in different conditions. By conditions I mean space.

Location, location….. I had a dog run between me and my antenna. It pulled my radio right off the table and tumble behind the dog. So now I choose my locations like Bill Hickock… always face the door. Hihi. Food for thought.

Thank you to Thomas for inspiring me to get out there and do it. His you tube videos were great copy practice to give me the confidence to get out there. Finally, my Elmer. John, KM6NN. Without him I would have never started my CW journey. He is a true Elmer in every definition of the word. I am proud to know him and lucky he is in my life. Thank you John.

Gear:

Note: Check out W4EMB on YouTube as he makes his 1st POTA “Kilo” 

Field Kit Gallery: KM4CFT’s QRP Labs QMX/QCX-Mini Go Kit

Many thanks to Jonathan (KM4CFT) who shares the following article about his portable field radio kit which will be featured on our Field Kit Gallery page. If you would like to share your field kit with the QRPer community, check out this post. Jonathan writes:


Hi Tom,

I thought I would share the two go kits I have. I tend to customize my equipment and supplies before I go on a POTA or SOTA outing but I keep these for the rare occasion when I want to grab a radio real quick. [The first on is my] QRPlabs go kit:

The kit is for my QRP Labs QMX/20 meter QCX mini. It contains everything I need to operate 20 meters CW.

The case is a regular Lowepro case that I got with my KX2 when I purchased it from another ham. I did not realize it came with it so I accidentally ordered an extra from Elecraft which I now use with the KX2 kit [featured in a future Field Kit Gallery post].

The kit uses many components from K6ARK, including the 20 meter EFHW antenna and the retractable paddle.

The battery is a TalentCell from Amazon. I use it because it supplies 12v instead of 13.8v. One of the downsides of the QMX is that it cannot handle 13.8v, so I have to stick with 12.

I keep a cheap pair of earbuds with me just in case but I try to bring a nicer pair of headphones whenever possible.

Hopefully this information is useful to you and your readers!
-Jonathan KM4CFT

Readers: Check out Jonathan’s YouTube channel by clicking here.

Field Kit Gallery: K4EAK’s Truck Portable SW-3B Field Kit!

Many thanks to Skip (K4EAK) who shares the following article about his portable field radio kit which will be featured on our Field Kit Gallery page. If you would like to share your field kit with the QRPer community, check out this post.


[I]n my truck I carry a little field kit for impromptu POTA activations.

I also have an FT-891 to an ATAS-120 permanently installed in the truck, which is another possibility for impromptu activations, but that requires me sitting in the truck for the activation. Not my favorite way to activate …

The SW-3B truck kit consists of:

All in a large Bagsmart electronics travel organizer (the case is too large, but since I only carry it in the truck, it didn’t matter)

With the case hung over a headrest hook behind the driver’s seat.

What a great idea [to share field kits]. I’m really curious to see what others post.

73 Skip K4EAK

Field Kit Gallery: N8PEM’s MTR-3 Portable Field Radio Kit

Many thanks to Chris (N8PEM) who shares the following article about his portable field radio kit which will be featured on our Field Kit Gallery page. If you would like to share your field kit with the QRPer community, check out this post.


MTR-3 Field Kit Build by N8PEM

Ham radio is a hobby best enjoyed in community with others.

Ever since I began operating QRP portable a few years back I had admired the Mountain Toppers.  Granted my Elecraft KX2 is a perfect daily driver.  I’ve been lucky to have that as my sole portable QRP rig for some time.  That didn’t stop me from dreaming of an ultralight QRP portable kit centered on an MTR3.  High resale prices and scarcity made it a purchase I had long put on the back burner.  But then one day I saw my good friend Julia, KF8JBB, while walking my dog in the park.  So I stopped to chat.

Figure 1:  Antenna Design

Like many of us, Julia is an avid QRP and CW enthusiast.  She has numerous QRP and SWL radios.  Life is also pretty busy for her.  She doesn’t get out to operate as much as she would like.  As we chatted on that warm August evening, she offered to gift me her MTR3.  For her, it was time to move that rig on to a good home so it would get it’s proper use.  But the shrewd negotiator in me knew to never accept a first offer.  I countered.  I’d take the MTR3 off her hands if she let me build her a QRP portable antenna in return (later I also threw in a built N6ARA TinySWR kit for good measure).  She accepted.  The next day she dropped off the rig.  The fun of outfitting an ultralight (UL) QRP kit began.

I quickly determined that I wanted to build a trapped 20/30/40 meter EFHW antenna to match the three bands on the Mountain Topper.  I prefer end feds, and I wanted the challenge of building traps for the first time.  Keeping in mind I wanted an UL kit, I could also leave the coax at home with an end fed.  I had read that a trapped EFHW can be shorter than a standard EFHW due to the inductance of the traps.  This appealed to me as I knew from experience that getting a 40-ish foot antenna up in the air is much easier than a 60-ish foot antenna.  It took nearly six weeks to research, procure parts and build out this antenna, partly due to the fact I had to build this antenna twice.

My first attempt at this antenna build wasn’t good.  I couldn’t get SWR better than about 1.8:1 on any band.  I hadn’t tested every component at every step of the build.  Thus, I had a hard time determining what went wrong.  I used 100 and 150 pF capacitors for the traps which proved to have marginal shortening effects.  I needed more turns on the toroids!  I decided to do more research and start over.

Thanks to advice and blogs from folks like Dan AI6XG and Fred KT5X, I settled on a different, better design of the trapped EFHW.  I ordered more parts.  Switched out to 15 and 33 pF capacitors.  I took my time to build and test this antenna in a step by step manner.  The results were much better the second time around.  Overall 45 feet 8 inches long and weighing two ounces.  SWR better than 1.5 to 1 on all three bands.

I had the idea to place a TinySWR kit in line between the RCA plug and the end fed matching unit.  I know there are SWR kits which can be installed within the radio, but I didn’t want to modify the MTR3 in any way.  The stock design is sublime.  I also built a back-up emergency antenna into the design.  If for some reason I have a trap fail, I installed a bullet connector right before the first trap.  Thus, I can disconnect the 30 and 40 meter portions of the antenna and  have a basic resonant 20M EFHW.  These thoughtful touches seemed to perfect the antenna.

Photo 1:  Completed miniSWR, matching unit, 30m trap, and 20m quick disconnect

I tried to be thoughtful with the other choices in my kit as well.  At 3.5 ounces and the size of a bag of coffee, the LowePro CS40 padded case proved to be ideal.  I found it cheapest from a UK-based eBay seller.  I made my flight deck out of the steel housing from an old external CD Drive.  I measured, cut and filed the edges.  It’s perfectly sized for loose Rite in the Rain paper, lightweight and thin.  A metal flight deck also can hold the magnetic base of my CW paddles.  When it came to the battery, I decided to go with a RC airplane LiPo battery.  Fuzzy math told me that the 650 mAh would give me more than enough operating time.  Once complete, I was happy to find the entire kit weighed in at just 18 ounces, not counting a throw weight or collapsable mast.

Photo 2:  The completed MTR3 kit

My first activation with this kit was September 21st.  I wasn’t sure how well I would do.  Band conditions weren’t the best the previous two days.  I went to my favorite spot, Bunker Hill (W8O/SE-009) located within Great Seal State Park (K-1954) in south central Ohio.  It’s a short 20 minute hike to the high point on what was a partly cloudy 70 degree Thursday morning.  I set the antenna up in a sloper configuration, gave my dog Togo some treats, ate half my sandwich, took a sip of coffee, and pulled up the POTA and SOTA spotting pages.

In just over an hour I had made 54 QSOs covering all 3 bands.  The MTR3 combined with the trapped 20/30/40 EFHW worked flawlessly.  It was an absolute joy to operate.

Photo 3:  First activation complete

That joy came from the sublime kit for sure.  But enjoyment also came from the community carried within the kit itself.  The MTR3 from Julia KF8JBB.  The paddle and wire winder designs from Adam K6ARK. The MiniSWR Kit from Ara N6ARA.  The Trap PCB boards from Tim N7KOM.  The toroids, capacitors, and antenna advice from Dan AI6XG.  The blog post from Fred KT5X.  The 3D printing from my nephew Colin.  Even the RigExpert I bought from Glen W1ND this Spring was integral.  This kit is an homage to that community.

Figure 2:  First Activation QSO Map

If you made it to the end, thanks for reading!  I hope it was interesting and helpful.

TU 73 EE,

Chris N8PEM

Radio Kit

Antenna Build

QRP radios, product announcements, reviews, news and more. Low power amateur radio fun!