How to assemble a narrow CW filter for your Yaesu FT-817/FT-818/FT-857/FT-897 (an affordable YF-122C equivalent)

QRPer.com readers know that I’m a big fan of the venerable Yaesu FT-817 and FT-818 series transceiver.  So much so, I own two FT-817NDs–I purchased a second unit last year primarily for full duplex satellite work.

As I mentioned in a previous post, the one gotcha with the FT-817 and FT-818 is narrow CW filter availability. The YF-122C 500 Hz and YF-122CF 300 Hz Collins filter boards are no longer produced. Neither are the Inrad equivalents.

With the renaissance of CW we’re experiencing along with the growth of POTA, WWFF and SOTA, narrow CW filters for the FT-817/818 are very difficult to find and come at a premium when you do find them. I saw one sell recently for $250 US–over double what I paid two years ago.

In addition, this same filter not only fits the FT-817/818, but I believe it also fits the popular FT-857 and FT-897 series transceivers (please correct me if I’m wrong about this).

The Problem: I wanted another narrow CW filter

One of my FT-817NDs is loaded with a Collins 500 Hz mechanical filter that I purchased from my buddy Steve (WG0AT) nearly two years ago.

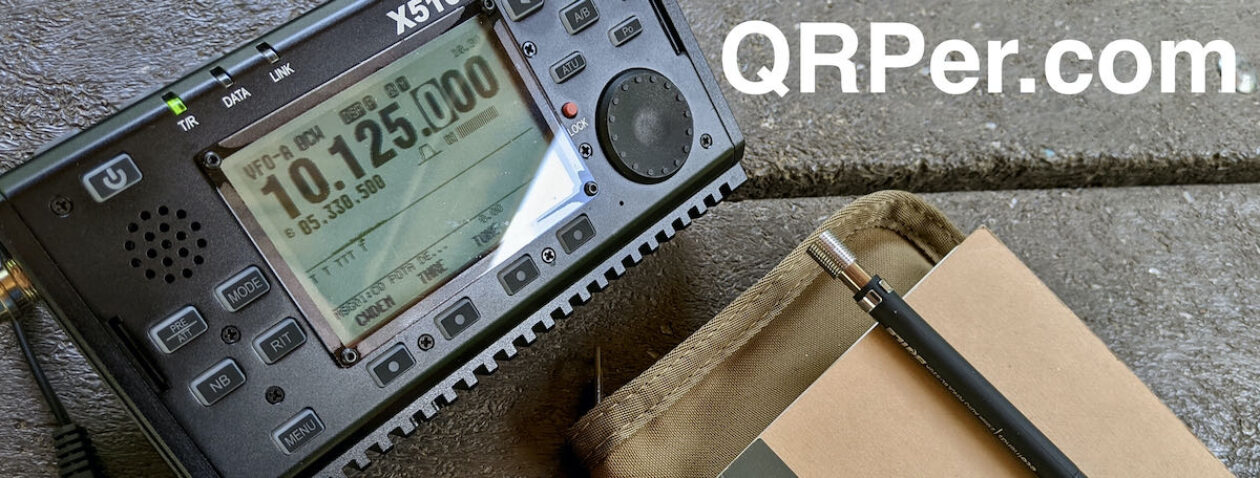
The second FT-817ND had a narrow Inrad 2 kHz SSB filter that came with the radio when I purchased it used (see image above).  Initially, I had no intention of buying yet another narrow CW filter because I’d only planned to use the second unit for FM and SSB satellite work.

Then, during field day this year, I decided it might be fun to build a quick-to-deploy portable HF station with something like an Armoloq TPA-817 pack frame. That thought experiment made me realize that I should simply bite the bullet and get a narrow CW filter for the second FT-817ND.

I started searching in late June and was simply not willing to pay the price for the very few filters that have shown up on the the used market.

The Solution? Assemble one!

I owe QRPer reader, Petr (OK1RP), for this tip.  Thank you, Petr!

The process of assembling your own narrow filter is actually quite simple and affordable. If you have even the most basic soldering skills, you’ll be able to manage this easy project. If interested, keep reading and I’ll show you how you can assemble your own…

Continue reading How to assemble a narrow CW filter for your Yaesu FT-817/FT-818/FT-857/FT-897 (an affordable YF-122C equivalent)

Photos from the 2022 Shelby Hamfest on the SWLing Post

Just a quick note: I’ve posted over 100 photos of the 2022 Shelby Hamfest over on the SWLing Post.

I find this hamfest to be one of the best in the southeast US if you’re in search of vintage gear.

Click here to check out the photo tour on the SWLing Post!

7 SOTA Summits, 4 Firsts & 1 Scorpion

A SOTA road trip from Berlin to Tuscany via the Alps and back

sota-flag-mountain-panorama
On the summit of Kellerjoch OE/TI-311

by Leo (DL2COM)

Flashback March 2021: I am sitting on a couch in the countryside 2h north of Berlin, Germany. It’s a rainy day and my 1-year-old kid just fell asleep on my chest. I am watching Youtube and enjoying the feeling of just having maintained the chainsaw after a productive run preparing firewood.

Then suddenly something special got washed into my feed: Adam K6ARK activating a summit in CW somewhere on the U.S. West Coast. I thought: I have no idea what this wizardry is but this is exactly what I want to do. Right here, right now. Well I have a child to take care of, the next mountain with a prominence of >150m (~500 feet, min. requirement to be a valid SOTA summit) is 3h away, I don’t know what ham radio is, I have no license and what the heck is CW. 

sota-backpack
Complete SOTA kit incl. 6m mast

Jump to July 2022: I am sitting in my car commencing a vacation road trip to the south of Tuscany, Italy. Due to the chaotic luggage situation at EU airports and unreal prices for rental cars my family and I had decided that we would be better off if I drove down while my wife and kids took the plane without having to check in any bags (btw: best decision ever).

alps-panorama
Innsbruck embedded in the Inn valley

Our schedule allowed for me to leave a few days early so I could make room to do a little bit of hiking and throw in a few casual SOTA activations because why not. On top I saw that there were a few never activated summits in close proximity to where we planned to stay. I could feel my heart pumping already followed by a strong reassuring feeling radiating from the well-thought-through contents of my backpack in the trunk. Am I ready? Who cares. I am on my own now. I had completed a quick 1-pointer activation in May and a few POTAs but what was planned now was a different level.

sota-road-trip
From Berlin to Cortona (Tuscany) via Brenner pass (Alps) (Source: Sotl.as)

Going into detail about every summit would go beyond the scope of this article so here are just a few highlights: The first leg down to the Garmisch-Partenkirchen area went by in a wink (7h drive). I passed most of the time rehearsing CW by singing license plates out loud. The fun peaked with plates along the lines of M-OT-9990 or E-SI-5545. It’s all about melody and timing, remember. I met up with my buddy Chris whom I hadn’t seen in a long time and who agreed to join me on the first hike up Zirbelkopf (8-points summit) to witness the cult activity I had tried and failed to explain to him beforehand.

Continue reading 7 SOTA Summits, 4 Firsts & 1 Scorpion

Welcome News: POTA now has a manual log entry form on their website! Here’s how it works.

If you’ve watched any of my activation videos, you’ll note that I tend to log both on paper and on an app like HAMRS (iOS, Android) or ACLog (Windows Tablet).

Some have asked me why I still log to paper when I have a means to do it electronically in the field and that’s a valid question. There are a few reasons, actually:

  1. I don’t like the idea of my tablet or phone having issues mid-activation and losing all of the contacts that I’ve logged.
  2. I simply enjoy keeping paper logs. They’re easier to manage in the field, are easier to correct if I miss a letter in a call and paper gives me a space to scratch notes and extra callsigns I hear in a pileup.
  3. Plus, again, my paper logs can’t crash or freeze up.

It’s true that my phone and tablet rarely fail in the field, but I’m still a bit paranoid about it. I know it’s way more likely that the electronic logs could fail than my paper logs. That and I’ve been to the field recently and discovered my phone’s battery was very low because it wasn’t charging properly in the car en route to my activation.

If I’m being honest, I really dislike logging both to paper and to my phone simultaneously. It makes for a lot of busywork as I manage contacts rolling in on the bands–especially during pileups–plus I find typing callsigns on a phone with my fat fingers quite frustrating.

So why do I continue logging to an app in the field? The simple answer is that it saves me so much time later. POTA requires that all log entries be uploaded electronically (obviously) and my logging applications are not designed for transcription later; they’re designed for live-logging.

For example, if I transcribe my logs to ACLog the day after my activation, I have to manually correct the date and time of each log entry because ACLog defaults to the current date and time. It’s a bit tedious. Sometimes I try to use find/replace strings in a text editor after creating the log to make that process go a little more quickly, but I still have to correct the time of day manually for each entry.

I can set up ACLog to be more POTA-friendly, with only a minimum of fields, but I have to keep that customized ACLog installation separate from the main one I use in the shack.

Now, however, there’s a much better option should I choose to only log on paper in the field…

New Manual Log Entry on the POTA Website (Public BETA)

Only a couple months after introducing self-uploads, the POTA development team have introduced a web-based log entry form (currently as a public Beta) and it works brilliantly.

Continue reading Welcome News: POTA now has a manual log entry form on their website! Here’s how it works.

A challenging but fun POTA ATNO activation at Parc des Moulins

Some activations are more challenging than others.

I think we had all hoped on our climb into Cycle 25 that we’d get some brilliant propagation, stable conditions, and the opportunity to use less power and yield more DX.  Who doesn’t want that?

But we get what we get from our local star and the theme this year is that it is indeed showing some positive indicators, but at the same time–this summer, especially–it’s spitting stuff toward our pale blue dot that makes a mess of the ionosphere.

Photo by K4TLI

Lately, each time I head out the door to activate a park, I never know what to expect. It’s part of the fun. Will band conditions be in the dumps, or will the ionosphere provide the perfect platform for my QRP signals–?

On Thursday July 7, 2022 it was the former rather than the latter.

My family decided to head into Québec City that day to visit one of our favorite used book stores (in search of some Bandes Desinées–read more about that at the bottom of this post) and other errands.

I checked the POTA Map and discovered a park we’d never visited in the past, so it looked like a good candidate for a POTA activation!

Digging deeper, I also discovered it was an ATNO (All-Time New One) and had never been activated for POTA before. Hard to believe given its location, but there you go!

I put my POTA backpack in the car and we hit the road!

Parc des Moulins (VE-5068)

After a little searching, we finally found a good parking spot at the park. There was a LOT of construction going on around the grounds.

Parc des Moulins, like many of the parks I’d recently activated in/around Québec City, is a proper urban park with manicured paths and gardens. It’s a beautiful little park!

Continue reading A challenging but fun POTA ATNO activation at Parc des Moulins

Getting to know you: Take a radio manual deep-dive!

We hams have a tendency to unbox our new radios, toss the manual to the side, and get on the air. We sort out radio functions by playing with the radio and using it.

By “we” I’m certainly including myself…

Typically, there’s no harm in doing this. Experienced ham radio operators know how to hook up their radios, and know what common functions and features they must identify. In fact, when I review a radio, I rarely read the manual for this very reason: I’m curious how intuitive the controls are.

With that said, I’ve had no less than three emails from readers this past week asking questions about their radios–questions that all could have easily be answered by even skimming over the manual.

Sure, I’ve had this happen to me before. Subscribers to my YouTube channel have watched my activation videos and pointed out shortcuts and features I hadn’t yet used on a radio. Many times, I was aware of the function/feature, but while on the air couldn’t remember how to engage it. (This is where a printed cheat sheet come in handy!)

Truth is, modern  rigs are simply chock-full of features. Many of these features are incredibly useful, but not obvious on the front panel.

Case in point: MTR-3B Direct Frequency Entry

The venerable Mountain Topper MTR-3B

In the past, you may have heard me mention that that the MTR-3B “isn’t a good transceiver for hunting stations” because it has no rotary encoder to quickly move from frequency to frequency. There’s no number pad for direct frequency entry either.

Instead, the user has up and down arrow buttons that you push and hold until eventually you reach the desired frequency. If the frequency is 50 kHz away? Yeah, you’re going to be holding that button down for a while (there is a fast tune option, but it’s still slower than an encoder).

Early this year, I pulled out the MTR-3B manual to give it another thorough read-through–from cover to cover. It’s not a large manual. My goal was to refresh my memory about recording and playing back CW message memories. In the process, I also discovered that the MTR-3B has a clever (and quite unconventional) direct frequency entry method.

Via the DFE function, you simply enter four digits of the desired frequency, 0 to 9 via Morse Code, starting with the 100 kHz digit. It’s a little quirky, but it works quite well!

This doesn’t make band-scanning any easier, but it does help me while hunting since I can directly enter the frequency I find on the POTA or SOTA spots page.

This one function made my MTR-3B that much more usable. Somehow, I missed this part of the manual when I first purchased the MTR-3B–I’m so happy I took a deep dive later.

Getting to know you…

Advice from Julie Andrews:

If it’s a rainy day, or you’re simply trying to stay awake during a mandatory remote meeting for work, or like today there’s a radio blackout, use that time to get to know your radio by taking a deep dive in its manual.

Read it from cover to cover: I guarantee you”ll learn something new about an old friend.

Joshua acquires an Argonaut 509

Many thanks to Joshua (KO4AWH) who shares the following guest post:


Ten-Tec Argonaut 509 Acquisition

by Joshua (KO4AWH)

My club president sent me a text on Sunday before our Monday club meeting. He wanted to know if I was interested in a Vintage 80s QRP Radio. He knows I have an affinity for QRP. Honestly, I think he is still amazed at how I managed to get through piles ups on his hexbeam during summer field day with my TX-500. Boy was that fun.

The deal was a Ten-Tec 509 with the microphone and CW filter, the matching 251 power supply with meter, and the 504 matching 50W amplifier. He sent me a photo, I had to look it up. I have heard of Ten-Tec, thanks to Thomas K4SWL, but certainly was not familiar with their Argonaut 509. I was intrigued. I don’t have a single vintage piece of equipment. I have only been a Ham for less than 3 years.

We had some equipment from a club member SK donated for auction to raise funds for some club repeater upgrades. This was a good excuse to purchase an old piece of equipment that I likely would not have purchased otherwise. After looking over the 509 and accessories, all of which were in great condition, I brought them home. Of course I couldn’t help but hook everything up and turn on power. Everything powered up but no movement of the frequency indicator, not a great sign, and no audible hint of changing reception frequency. After further inspection it seemed the dial tuning mechanism was seized up. Looks like another project.

The next morning, as I had a few minutes to spare I started taking things apart. I have never pulled apart an old transmitter before so I took my time as I studied all the components and marveled at the simplistic yet complex circuitry found under the covers. Once I was down to the tuning mechanism, a few desoldered wires later, it was removed and ready for cleaning. I don’t know if the grease was original, but it sure was hard. After carefully cleaning, greasing, and reassembling all the components, soldering a couple wires back, and reassembling the housing, I was ready to power it back up. I don’t want to understate the work involved, it can be quite tricky, but I really enjoy this type of thing.

After tuning around a bit and working with the controls on the Radio, I found a POTA operator to zero beat. I needed something to reference in order to adjust my knob indicator so I would know what frequency the radio is on. I actually received the manual for the radio and each of the components. Reading through a few key points the night before really helped out when I was ready to start tuning in and transmitting.

I had the amplifier on, I set the DRIVE to about half way guessing that was okay and called back to the Activator. First call, he called me back with a 59! WOW, I was excited. I let him know I was on an old Ten-Tec that I had just repaired and he came back and said the audio and signal were great. How exciting! So, naturally, I hunted a few more stations and then listened to a few rag chews as I got familiar with the Radio.

Not only was I excited to have repaired my first radio, I am also amazed at the capability of this Radio originally released in 1973. I am not a long time SWL or radio operator but there is certainly something very appealing to me about the audio this Rig produces. I wasn’t certain what I was getting into with this rig, but I sure am happy how it worked out! I may just be on the hunt for another Ten-Tec. I even plan to take this to my local park and do at least one activation with it.

Here is a quick excerpt from the introduction in the operating manual.

“The Argonaut opens a whole new world of excitement and fun in Amateur Radio. We think you will find QRP a welcome change. Five watts are only 2-1/2 S-units below 150 watts for the same conditions. When skip is favorable and QRM light, you will not be conscious of using low power.”

73

Joshua

KO4AWH

The new CW Morse CNC Machined Aluminum Pocket Double Paddle Key

If you’ve watched many of my videos or read my field reports, you’ll know that I use CW Morse paddles during most of my activations.

Up to this point, CW Morse has specialized in 3D-printed paddles and keys: the quality is superb, especially for the price point.

I’m so fond of CW Morse, that earlier this year, I invited them to be a sponsor of QRPer.com and they very enthusiastically accepted (you’ll see their ad in the right nav bar of QRPer.com).

CW Morse has now moved into the world of CNC machined aluminum products.

Last week, they send me an evaluation model of their new CNC Machined Aluminum Pocket Double Paddle Key:

The form factor and size is very similar to their Pocket Paddles I’ve used for the better part of two years.

The feel of the CNC machines paddles, however, is much more solid than that of the 3D-printed key, no doubt because aluminum simply has less play.

Not only can you adjust the action of the paddles (in terms of travel to the center contact), but you can also adjust the spring tension.

The key they sent me also has a magnetic base (you can see the rare earth magnets in the four corners of the base plate below).

As with all CW Morse products, this key is designed and manufactured in the USA.

In the spirit of full disclosure, CW Morse sent this key at no cost to me. They asked for my honest evaluation.

So what do I think? Is this key for you?

This is one of the most solid feeling paddles I’ve ever used. Since this key is built with 6061 billet aluminum blocks and the the main body is made in one solid piece, it feels substantial. To be clear, though, it’s not what I would consider heavy, but it obviously weighs more than their 3D printed pocket paddles.

I believe these paddles could take heavy abuse from ops (like me, I’ll be honest) who are pretty heavy fisted. You may have noticed in my videos that I tend to slap around my paddles and keys. I can tell this paddle will take serious abuse!

If you’re the sort of op who likes a lighter touch, though, you might stick with CW Morse’s 3D printed paddles. The action feels lighter and, again, being 3D-printed, the material is a bit lighter.

I can tell you that these CNC machined aluminum paddles are going to get a lot of use and abuse from me. In fact, I’ve been using them exclusively for about one week in the shack and I’ve been very pleased. I feel like my sending accuracy has been excellent. I can’t wait to take them to the field soon, but first I need to finish a few DIY projects at the QTH–POTA and SOTA activations will be my reward!

Click here to check it out the new aluminum paddles at CW Morse.

Please note that CW Morse is now a sponsor and most links to their site now have a  referral code that gives back a small percentage to QRPer.com. If you’d prefer to order a product without our referral code, click here.

Side trail POTA ATNO at Boisé des Compagnons-de-Cartier in Québec City

On July 4, 2022, I plotted a multiple park POTA run that included four urban parks all clustered in the Sainte-Foy region of Québec City.

The first park I activated that day was Parc de la Plage-Jacques-Cartier (VE-0970)–click here to check out my full field report and activation video. The second park was Parc Cartier-Roberval (VE-0964)–click here to check out that field report and activation video. The third park was Boisé de Marly Provincial Park–click here to check out that field report and activation video.

My fourth park was Boisé des Compagnons-de-Cartier which essentially adjoined the previous park I activated. As I mentioned in the previous field report, I could have simply walked through the trail system to this park from my previous site, but I needed to find a different parking spot for my car, so I simply drove to a large lot next to the secondary school I spotted on Google Maps.

Turns out even though that lot was nearly empty, it was a paid parking, so I reserved a parking spot for one hour.

Boisé des Compagnons-de-Cartier (VE-0958)

When I first parked, I wasn’t entirely sure where the park entrance was until I spotted a bench and park sign at the far corner of the lot.

This park, much like the previous one, seemed to be an urban park with trails for walking and running.

I walked the main path into the park and looked for a park bench like I found at the park entrance (above). I thought it might be nice to set up along the path and do a park bench activation much like I did at another urban park in Québec City.

I walked for a decent distance and couldn’t see a bench in sight.  The path was fairly busy with walkers and runners, so I was very pleased when I found a side trail cutting through the middle of the park.

I could tell that this path–while very well-worn and obvious–was not one maintained by the park admin. It looked more like a simple foot trail that local children have probably used in the past (I spotted a little wooden fort/lean-to in the woods.)

Keep in mind that this was my fourth park activation of the day and by this time, I was running behind–no surprise there. After the activation, I had two errands to run in QC before heading back to our condo and enjoying dinner and a movie with the family.

Continue reading Side trail POTA ATNO at Boisé des Compagnons-de-Cartier in Québec City

Joshua’s ATU-10 review update after new firmware upgrades

Many thanks to Joshua (KO4AWH) who shares the following update to his previous guest review of the ATU-10 automatic antenna tuner:


Update on the ATU-10: new firmware released

by Joshua (KO4AWH)

The short story is that David N7DDC has a Firmware update with a new tuning algorithm that seems to fix the previously seen failure to find a decent match. As noted earlier in comparison with the Elecraft T1, the ATU-10 still does not necessarily get as close a match to 1:1 SWR but it now does indeed find a good match making this tuner my go to for use with my IC-705.

Not previously mentioned, the ATU-10 is also designed to work with the IC-705 for tuning commands when connected with a TRS 3.5mm cable, not just as an auto tuner when given a signal. And, in practice it works just as it should. I actually took the IC-705 and the ATU-10 and worked a SOTA/POTA with the beta version of this new firmware. I ran a 35’ wire and it worked great allowing me to work 40m, 20m, 15m and 6m for a total of 26 contacts. As a followup to my previous testing with the prior firmware 1.4, below are my results with the current new 1.5 firmware.

Testing on August 20th, 2022

The only difference from the original testing is the 31.5’ radiator was replaced with a 35’ and I did not tune and record results with the T1.

Conclusion on the ATU-10

I now feel very comfortable recommending this ATU. newdiytech.com has a great price and the build quality seems just fine. With the new algorithm update, a good match is found. The ATU-10 works great stand alone and also works fully automatically when used with a IC-705. This configuration means you can put the ATU at the antenna feed point and run a control cable back to the IC-705 and have a 50 ohm across the coax to help minimize loss, making for a nice portable setup with great band hopping flexibility.

Of course, if interested, I sell a protection cover for the ATU-10 just as I do for the T1.

If your curiosity is strong, here is some testing I did for David as he was updating the Algorithm now used in firmware 1.5.

UPDATE August 3rd 2022:

David Fainitski N7DDC has released a test firmware with a new tuning Algorithm with some promising initial results. A quick test on each band in the table has been added to reflect the new algorithm. This is not a firmware update yet but I suspect it will be soon. Results are great as tested. I hope to see this in a new FW soon.

August 6th, 2022

A second test firmware from David Fainitski N7DDC with the ability to increase or decrease the L and C manually allowed me to verify if a better match could be made. Turns out in a few cases it could. After testing again with a Tufteln 9:1 T80-2X2 on a 41ft sloping radiator I was able to achieve much better results than with the current version 1.4. In two cases I was able to find a better match manually. I realized later that if I were to tune a second time the ATU-10 would find the same, better match, on its own. Again, not a full firmware update, i.e. you have to flash back to 1.4 if you want to be able to turn off the turner.

(Click to enlarge.)

August 7th, 2022

Another test firmware David asked me to check. This version seemed more likely to find the best match. I did have the ATU go to L0, C0 twice but then find a match on a second try. This happened once on 40m and once on 10m. Almost like it faulted but there was some switching/clicking involved before stopping, it just landed at a 3:1 or higher with 0 for L and C. A second tune however straightened it out. I did not record those two cases. Below are the results. I was able to find a slightly better match twice but I am sure one would never notice the difference during normal use. The improvement both times was within the error of SWR across the three device measurements.

(Click to enlarge.)

QRP radios, product announcements, reviews, news and more. Low power amateur radio fun!