Lately, I’ve been kitting out another fully self-contained field radio kit that would be small enough to fit in my EDC (everyday carry) laptop bag–something super compact.
I’ve been getting some great ideas from those of you who have added your kits to the Field Radio Kit Gallery.
[By the way, if you’ve submitted your kit to the gallery and haven’t seen it yet, note that I’m posting these in the order received and there are many in the pipeline!]
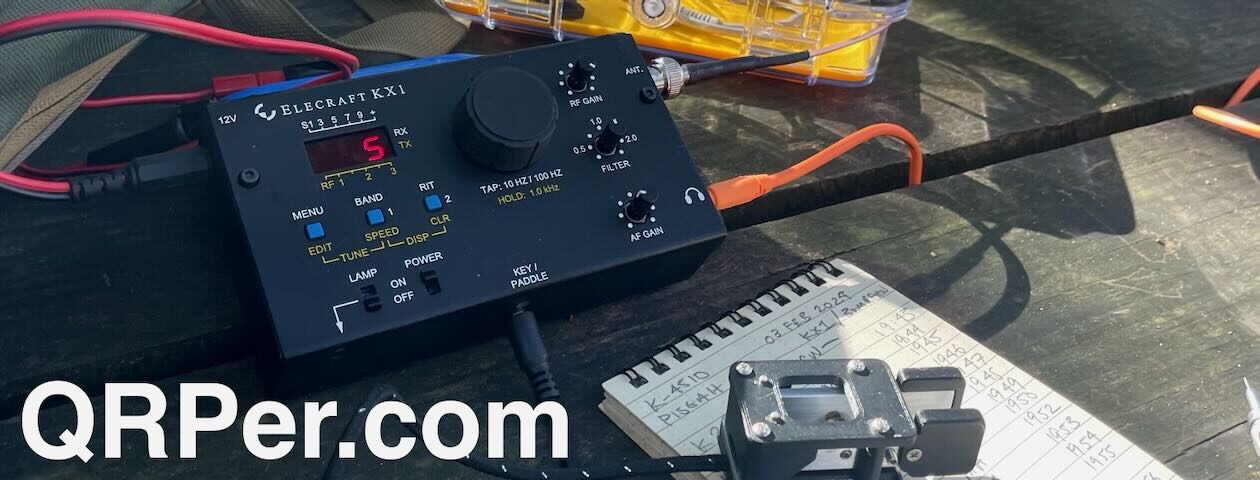
I’ll likely build my EDC field kit around the Elecraft KX1 or the Mountain Topper MTR-3B, then pair it with a good wire antenna.
But this process got me thinking: if money was no object, and I wanted the most compact and versatile multi-band field kit, what radio and antenna system would I choose?
My answer? A kit built around the Elecraft KX2 and AX1 antenna.
In my experience, the KX2 AX1 combo is hard to beat. It’s compact, effective, low-profile, and you can set it up pretty much anywhere.
Let’s explore my reasoning here keeping in mind–in my world–this is a very deep rabbit hole to go down. I’ll do my best–no promises–to keep this as concise as possible:
Compact, Low-Profile, Self-Supporting, and Simple
Here are all of the components of my typical KX2 AX1 field kit:
This is all that is needed for a field activation.
And if you’re an SSB operator? You don’t really need a microphone because one is built into the KX2 (that said, I’d suggest you build a compact mic if you plan to do a lot of SSB operating).
If I wanted to make this kit even a bit more versatile? I’d add a kneeboard to the list. This gives one the ability to operate without a picnic table.
What makes this field kit so portable is that the KX2 is one of the most compact general coverage HF transceivers on the market.
It’s certainly the most compact (at time of posting) when you realize that two important components–the battery and ATU–are internal options.
The AX1 antenna is also incredibly compact–it comes apart in such a way that no one component is longer than about 6 inches. What you see in the photo above is the entire radio and antenna system.
Yes: A Compromise
Sure–and let’s get this out of the way right up-front–the AX1 is a compromised antenna, and being a massive fan of simple wire antennas myself, I know a properly deployed wire in a tree is going to provide better gain each and every time.
From Elecraft: something BIG, in an incredibly small package…!
Just this morning, Elecraft introduced the new Elecraft KH1.
In brief, the KH1 is a five-band (40, 30, 20, 17, and 15 meter) handheld QRP CW transceiver with options for an internal battery, internal ATU, whip antenna, and fold-out logging pad.
Exciting! And if you’d like to get the scoop on this new handheld radio–– along with photos––we’ve got it here.
Q: What is the Elecraft KH1?
A: The Elecraft KH1 is a compact, five-band CW QRP transceiver designed for both handheld and tabletop operation. Indeed, the “H” in the model number signifies “Handheld.”
To be clear, although it is quite small, the KH1 isn’t just a tiny radio: it’s ergonomically purpose-designed, to be a pedestrian-mobile CW station. It’s lightweight, easy to hold and use, and will fit both right and left-handed operators. With the optional “Edgewood Package,” it also includes a fold-out logging pad.
Q: How much does the Elecraft KH1 weigh?
A: With all options (ATU, Antenna, Battery, and logging pad) the KH1 weighs in at a featherweight 13 oz.
Q: What features does the Elecraft KH1 offer?
A: Here’s a feature list from the Elecraft brochure:
KH1 features:
40-15 meter ham bands
6-22 MHz for shortwave broadcast band listening
CW mode; 5 watts, all bands
ATU includes whip & high-Q inductor for 20/17/15 m
2.5 AH Li-Ion battery & internal charger
CW decode & 32K TX log
Scan/mini-pan feature
RTC [Real-Time Clock]
Full remote control
Speaker
RIT, XIT, & VFO lock
Light gray case stays cool even in bright sunlight
Three CW message memories with chain and repeat functions
Like nothing else on the market…
The KH1 design is all Elecraft and built on several years worth of design iterations. It is, no doubt, fueled by Wayne’s passion for handheld portable HF.
Again, the KH1 focuses on ergonomics that would make handheld operation not only easy, but enjoyable.
The two main multi-function controls (the AF Gain and Encoder), for example, are located on the bottom of the radio. This gives the operator easy and ergonomic access to the controls while the radio is in-hand.
The four buttons on the top of the radio default to the most useful functions one would need while operating portable. Using them to dig deeper into the menu levels, however, is also intuitive and well thought-through.
While the KH1 menus and features are naturally not as deep as those of the KX2 and KX3, it’s impressively well-equipped for a radio this size. At the end of the day, it’s a much more simple field radio––by design––than its KX2 and KX3 predecessors. If anything, it’s more akin to the venerable KX1!
The KH1’s paddles (KHPD1) are located at the bottom of the radio––they flip down for transport, and up during use, so your fingers are well away from the AF and Encoder knobs.
The KH1 has an optional internal ATU that is not as wide-range as that of the KX3, KX2, or T1, but is much better than that of the KX1. I understand that it’ll match most of what you throw at it.
Wayne told me that one of the most complicated parts of the KH1 design was the fold-out logging pad. He wanted the logging pad to be functional for one-handed operation. The indents around the loose-leaf logging sheets allow you to pull out a completed sheet and slip it behind the others in the stack.
The logging sheets are available as a PDF download; simply print and cut. No doubt, the format would be easy to modify.
Whipped!
This is the part I love: the KH1 is designed to operate with a telescoping whip antenna.
Basically, you unclip the whip from the side of the radio (assuming you have the ATU/whip option) and screw it on the top of the top. The ATU will match the whip antenna––there’s a mechanical slide switch that selects 15/17 m or 20 m high-Q inductance for whip––or an external antenna on the BNC port.
If you’ve been reading my field reports and watching my videos, you know I’m a huge fan of the Elecraft AX1 antenna. The KH1 basically has the option of a built-in AX1 antenna…Just take my money!
Speed…and stealth
If the counterpoise is already attached and wrapped around the body of the KH1, you will be able to deploy the station and be on the air in about 20 seconds.
As many of you know, I’ve always said that the secret power of the AX1 and AX2 antennas is speed of deployment. The KH1 allows for an even speedier deployment.
This will be most especially appreciated when activating summits in the winter where exposure to the elements from simply setting up the antenna and station will often make your hands go numb.
Also, the KH1 is so low-impact and low-profile, you’ll be able to activate parks that might otherwise be off limits to an HF field installation. I know of one urban park that, with permission, I’ll definitely use the KH1 to activate; it has no park benches and no trees, just a strip of grass around a historic building in the middle of a city. Perfect for the KH1!
KH1 versus KX2?
The KH1 and KX2 are very different animals. Elecraft actually produced this comparison chart to help potential customers make a purchase decision.
My advice? If you have a KX2 on order, don’t cancel it.
The KH1 is not a KX2 replacement. The KX2 is a much more capable radio. The KH1, however, is a radio focused on ultra lightweight, low-profile, pedestrian-portable, CW HF field operation.
A KH1 review?
Yes, it’s coming! I will purchase and review the KH1 “Edgewood” package. My unit should ship next week, so look for updates and photos, and I will push those field reports and videos to the front of the line.
To be completely transparent: I have been in a volunteer group of testers for the KH1. Other than this, the only real affiliation I have with Elecraft––besides knowing Wayne, Eric, and some of their staff––is being a long-time customer. I own, or have owned, every radio they’ve ever made, save the K3 and K4 lines. And it’s Elecraft that makes my favorite field radios.
My good friend, Wlod (US7IGN), sent me the following message recently and has kindly allowed me to share it here on QRPer:
Hi Thomas,
I was going to write to you too. I saw your posts on QRPer.com about QRP field kits and decided to share my collection of QRP radios, which I keep now. One of them is my homemade one.
I called it PFR-5 because it has 5 bands, unlike original PFR-3, which was taken as a basis.
The rest are my friends’ radios that I’m temporarily storing. Tulip/Tulipan SDR from SP3OSJ, ELECRAFT KX3, and copy of Mountain Topper and original PFR-3.
I did not compare them, because this needs to be done outside the city where there is no noise and you can evaluate their RX performance, which I cannot do now for obvious reason.
Have a good day!
—
73 de US7IGN!
Thant’s brilliant, Wlod! I think you may have the only PFR-5 in the world! Ha ha! I love how you marked it as the “Ukrainian Edition” and gave it that brilliant image on the front face.
Thanks for sharing with us, OM! I dream of the day you can take these radios to the field and give them a proper comparison.
Many thanks to Alan (W2AEW) who shares the following article about his portable field radio kit which will be featured on our Field Kit Gallery page. If you would like to share your field kit with the QRPer community, read this post. Check out Alan’s field kit:
W2AEW Field Radio Kit
I’ve only been active with POTA for a little over a year, but have put together a kit that gives me lots of options for antenna deployments.
The main kit is in an old camera bag that I picked up at a hamfest for $5:
One of the outside side pockets houses a small tripod and some little ground stakes for securing support ropes, etc.
The other outside side pocket houses a small digital recorder and a cellular hot spot:
The front outside pocket houses some rubber coated twist ties that I use for securing a portable lightweight pole, as well as a few POTA brochures, QSL cards and eyeball cards:
The pouch on the inside of the lid contains a 25’ length of coax, a few extra pens and other accessories:
I’m very fortunate in that in the past few years I’ve accumulated a number of QRP radios that I use in rotation when I do park and summit activations.
I’m often asked for advice on choosing radios, and as I’ve mentioned in the past, I feel like the decision is a very personal one–everything is based on an operator’s own particular preferences.
Over the years, I’ve written formal reviews about most of the field radios in my collection. In those reviews, I try to take a wide angle view of a radio–to see how it might appeal to a number of types of operators. I highlight the pros and cons, but I don’t focus on my own particular take because, again, my style of operating might not match that of readers. I try to present the full picture as clearly as I can and let the reader decide.
The Getting To Know You series gives me an opportunity to highlight one radio at a time and showcase what I love about it and why it’s a part of my permanent radio collection. After we spend a bit of time talking about the radio, we’ll do a park or summit activation with it!
The Elecraft KX3
I was originally introduced to the Elecraft KX3 at the 2011 Dayton Hamvention–over a decade ago at time of posting!
I was commissioned to write a review of the KX3 for the Monitoring Times Magazine and Elecraft was kind enough to lend me a brand new KX3.
At the time, there was nothing like the KX3 on the market and I felt like I’d just received a radio from the future.
The KX3 offered 160-6 meter general coverage with an optional 2 meter module, ATU, internal AA battery compartment, and roofing filters. The controls were top mounted and current draw in receive was as little as 150 mA. At the time, there was no other radio on the market that could compare with the KX3’s field prowess.
But it wasn’t just its field design that was impressive.
This field radio sported a bullet-proof front end and true contest chops, displacing $10,000+ high-end rigs.
Today, the KX3 (at time of posting) is still number 12 on Rob’s list. An impressive feat!
Herein lies the danger of doing reviews…
I didn’t have the KX3 in my grubby little hands for more than a few hours when I decided I had to buy one. I sold some gear to free up money and I bought the KX3 Elecraft sent me on loan for the full price.
I’ve taken this KX3 on numerous activations and on international travels. It’s a brilliant QRP companion.
These days, it’s in the shack more than in the field because I keep it hooked up to my KXPA100 amplifier. I feel like the KX3/KXPA100 combo is like having a poor man’s K3. As a huge bonus, the KX3 takes up little space on my table and the KXPA100 sits on a shelf–the overall footprint is much smaller than a K3 or K3s. It’s like having a remote head on my desk and works perfectly for my limited space shack.
The KX3 is a stellar, benchmark field radio, so it was great fun to feature it in this video.
Many thanks to Evan (K2EJT) who shares the following article about his portable field radio kit which will be featured on our Field Kit Gallery page. If you would like to share your field kit with the QRPer community, read this post. Check out Evan’s field kit:
KX1 Field Activation Kit
by Evan (K2EJT)
I take a minimalist approach to most of my gear. I don’t like to carry anything I don’t need. Whether it’s what I pack in my daypack, an overnight pack, or my radio kit…..If I don’t need it, it’s probably not coming along.
That’s where this kit comes in.
This is the absolute minimum radio kit to do a field activation. While it’s not the lightest kit I have, it still comes in at only 1008 grams (2.25lbs), and that’s including the Pelican case which makes this kit rugged and waterproof (I have an SW-3B kit that weighs 700g, but it’s in an ultralight stuff sack).
This kit contains EVERYTHING (and I mean everything) to do an activation. The radio is an Elecraft KX1. It’s a four band radio with the internal ATU. Powering it are six AA Lithium Ion batteries. I love this radio, and I wish it was still in production, but these days they’re unobtanium unless you’re willing to spend a ton of money and get lucky and find one for sale.
The CW key is a cwmorse.us N0SA paddle. The headphones are a pair of old SkullCandy earbuds I’ve had forever, but sound great.
For an antenna I’m running a 41’ random wire antenna, with a 17’ counterpoise, constructed of 24ga silicone jacketed wire. That’s attached to the radio via a BNC binding post. While this setup isn’t the most efficient, it’s definitely the most compact and agile. Normally I run resonant antennas, but having the tuner allows me to run the absolute minimum antenna, and swap bands quickly, and that was the idea behind this kit.
The throw bag is rip-stop nylon with a paracord loop sewn in the top and a velcro closure across the opening. I fill that bag with rocks, seal it shut with the velcro, and it’s ready to go. The throw line is 65’ of 1.8mm high vis reflective cord. The throw bag doubles as a stuff sack for the cordage, so it’s all contained in one neat little unit that rolls up tiny.
Also included in the kit are a pencil and a logging sheet, as well as the KX1 cheat sheet.
I have lots of other field kits, but I wanted to showcase just how little you can actually get away with and still get the job done. Yes, I know you could build a Pixie kit and a tiny home made key and stuff and make the kit smaller and lighter, but I wanted a kit with no major compromises or downsides. This fits the bill. There’s nothing like a 100% complete kit that contains literally everything you need to do an activation that fits in the palm of your hand! Thanks for reading and 73!
Evan
K2EJT
Equipment:
Radio: Elecraft KX1 4 band w/ATU (no link since it hasn’t been in production in years)
Many thanks to Ed (W4EMB) who shares the following article about his portable field radio kit which will be featured on our Field Kit Gallery page. If you would like to share your field kit with the QRPer community, check out this post. Ed writes:
My QRP Portable Set up
by Ed (W4EMB)
Radio: I have one priority rig I use 99% of my time. It is the TR45L Penntek. I have both versions. The fullsize one with built-in tuner and battery, I also have the “Skinny” version. The skinny does not have the tuner nor battery. My second Rig is the Yaesu 817 with the Windcamp Battery upgrade. I also have a 40m only QSX and the 5 band TruSdx.
Antenna: I use the Chelegance MC-750 most of the time, but also use a Homebrew EFHW with 49:1 balun and 67’ of wire.
I have the QRP guys Tri-Band vertical kit, and two pieces of 16ga Speaker wire cut to 33’ that I carry as well. To support the EFHW and Speaker wire antenna, I use the SOTABEAMS 10m (32 ft) “Travel Mast”.
For the QRP Guys Tri-band vertical, I use the SOTABEAMS Carbon-6 ultra light 6m (19.6 ft) mast. To support the 32’ mast I usually just lean it into the trees and slope my EFHW up from the feed point.
For the speaker wire antenna, I run the “red wire” straight up the mast while it is strapped to the picnic table. The “black wire” is simply thrown out across the ground. I might even elevate the black wire with sticks.
My carbon-6 fits right into a piece of 1 ¼ inch PVC pipe I have clamped to my brush guard on my van. Or, I use a Tiki-Torch stake to hold my carbon-6 in open ground.
I find for me, that my QRP Guys antenna works great on 20m without a tuner. But when I try to use it on 30m or 40m, I require a tuner. For this reason, I lean on my MC-750 to be the main antenna.
I have modified my MC-750 slightly. I made my own set of radials to match the factory ones. I chose to make them out of silicone wire. I find it to be more flexible and does not kink or tangle as easy as the standard factory radials. I used 3mm banana plugs and 24ga yellow wire. I also crimped small ring connectors onto the ends of the radials. I did NOT strip the insulation and place them on the wire. I simply crimped them on the silicone. I use them to stake down the wire. I use four nails as “stakes” to pin the wire down. I find I only stake the radials out when I am on un-even ground.
The second modification, I made a set of “double” radials out of 26ga green silicone wire. Colors do not matter. It is what I had. I spread them evenly around the base of the MC-750.
My key is a Czech military straight key from the 1950s. It was new old stock when I bought it. I also carry a small mini set of paddles. For the TR45L radio, I can not play my recoded CQ or 73 with out a paddle. The “play” button is dit or dah trough the paddle jack.
For coax, I use RG316 and the appropriate adapter for the MC-750.
I have two pencils from Kuru Toga. One pencil is .5mm the other is .7mm. I make my own POTA log sheets and I paper log, and then type them later. I am a not talented enough yet to play with a tablet or PC while operating. I have only done CW for the last 12 months.
On my table: I have a really thin yoga mat. I find the concrete picnic tables a bit rough on my equipment. The yoga mat can get a bit sticky when it is warm, so I drape a small hand towel over the edge where my arms lay. I also have a Write in the Rain tablet in full size paper. I have been out early in the mornings in this summer and humidity and steamy fog makes normal paper hard to write on. The .7mm pencil matches up well with the Write in the Rain paper.
I have found CW and POTA have re-energized my ham radio hobby and resurrected it from a dusty shack, to a fun out door activity.
My first challenge was how to get from the car to the table in one trip. Downsize to the necessities. Next was figuring out the antenna and radio combo that could work in different conditions. By conditions I mean space.
Location, location….. I had a dog run between me and my antenna. It pulled my radio right off the table and tumble behind the dog. So now I choose my locations like Bill Hickock… always face the door. Hihi. Food for thought.
Thank you to Thomas for inspiring me to get out there and do it. His you tube videos were great copy practice to give me the confidence to get out there. Finally, my Elmer. John, KM6NN. Without him I would have never started my CW journey. He is a true Elmer in every definition of the word. I am proud to know him and lucky he is in my life. Thank you John.
Many thanks to Skip (K4EAK) who shares the following article about his portable field radio kit which will be featured on our Field Kit Gallery page. If you would like to share your field kit with the QRPer community, check out this post.
[I]n my truck I carry a little field kit for impromptu POTA activations.
I also have an FT-891 to an ATAS-120 permanently installed in the truck, which is another possibility for impromptu activations, but that requires me sitting in the truck for the activation. Not my favorite way to activate …
Xiegu fans will be happy to see that this new transceiver has a removable battery pack. If this pack is easy to source/obtain, that will indeed be a strong point.
It looks like Xiegu has also added fixed rails to protect the front panel along with reinforcement around the chassis.
It looks quite durable, although it also appears there are two knobs protruding on the top of the radio–?
On our previous post, there were a number of skeptical comments about the new Xiegu transceiver. Indeed, some of the comments were from X6100 owners who feel that Xiegu hasn’t fully completed all of the published features promised in the ‘6100 (which was released two years ago). A number of owners also commented that getting support or repair work done after the one year warranty has challenging. These are, for sure, some of the risks associated with price-competitive radios. Xiegu radios offer a lot of features for the price.
After this radio new is released, I will reach out to Xiegu or Radioddity and ask for a loaner to test in the field. I’ll be very interested to know if it has a few of these improvements over previous models:
Better front end with some built-in BCI filtering
Cleaner audio with balanced AGC
Lower noise floor
Longer battery life than the X6100
Published features which actually work in the first production run
I haven’t gotten a confirmation of the price or availability yet.
QRP radios, product announcements, reviews, news and more. Low power amateur radio fun!
Please support QRPer by adding us to your whitelist in your ad blocker. Ads are what helps us stay online. All of our ads are ham radio related--no junk, we promise! Thank you!