Category Archives: QRP Radios

The Yaesu FT-817/FT-818 and narrow filter availability

IMPORTANT UPDATE:

After this article was originally posted, I discovered a very easy way to assemble your own narrow CW filter. Click on this link to read a post that describes, in detail, how you too can build a replacement Collins narrow CW filter for the FT-817/818 series radios (plus other similar Yaesu models). 

What follows is the original article:


So I’m a big fan of the Yaesu FT-817/818 series radios. This general coverage QRP radio has had a longer market run than any other transceiver I can think of and for good reason.

While the 817/818 lacks some of the advanced features of more modern field rigs and have no internal tuner, it makes up for it by:

  • sporting multi-mode HF, VHF, and UHF coverage,
  • having two selectable antenna options (a front panel BNC and back panel SO-239),
  • being incredible durable/rugged,
  • featuring excellent QSK (albeit with a bit of relay clicking…which I actually like),
  • and  generally being very affordable (prices typically from $400 used to $650 new).

In addition, they tend to hold up well with time.

For the price? I feel like you get a lot of radio with the FT-817/818.

This is the reason why I often recommend the FT-817ND and FT-818ND if it sounds like a good match for the operator.

One gotcha though…

I’m starting to realize that there is one downside to this rig especially if you’re primarily a CW operator: optional narrow filter availability. Continue reading The Yaesu FT-817/FT-818 and narrow filter availability

The Elecraft KX2 version of Scott’s chest plate/manpack

Many thanks to Scott (KA9P) who writes:

As a follow-up to my previous post: this chest pack is still a bit of a work in progress but has been tested and works as is. I didn’t want the non-IC-705 owners to feel left out 🙂

The Condor MCR-3 chest plate can be used with a Condor T & T pouch (30 bucks) for most QRP rigs with a KX format.

The Condor T & T pouch is a frequently reviewed favorite of hikers and hunters – YouTube videos abound. The key feature is the way the pouch opens from a chest plate, or just straps, to form a tray. I expect you could modify other clamshell pouches of other sizes with an adjustable cord to do the same thing. I haven’t seen other pouches built to do this, yet.

The “tray” section contains a number of MOLLE loops as well as some loop material. This makes it easy to fashion your own radio attachment system. I have been using some hook material fastened to the back of KX2 for now, but am working on something that locks in, rather than tempt fate. Continue reading The Elecraft KX2 version of Scott’s chest plate/manpack

Video: Taking the new (tr)uSDX QRP transceiver on a CW POTA activation!

As I mentioned in a post published three days ago, I’m now the proud owner of a (tr)uSDX QRP transceiver.

The (tr)uSDX has been a much-anticipated QRP transceiver for those of us who love playing radio in the field.

What’s not to love? It sports:

  • Up to 5 watts output power
  • CW, SSB, FM, and AM modes
  • A built-in microphone
  • Five bands: 80, 60, 40, 30, and 20 meters
  • A super compact and lightweight form factor
  • An open-source hardware and software design
  • Super low current consumption in receive
  • A super low price of roughly $89 US in kit form and $143 US factory assembled (via AliExpress, but there are numerous other group buys and retailers)

Frankly speaking, this sort of feature set in such an affordable package is truly a game-changer. Back when I was first licensed in 1997, I could have never imagined a day when a general coverage QRP transceiver could be purchased for under $150 US. The price is almost unbelievable.

My initial impressions

On Wednesday, March 30, 2022, I took the (tr)uSDX to the field to attempt a Parks On The Air (POTA) activation. I had only taken delivery of the (tr)uSDX about 15 hours beforehand and had only had it powered up for a total of 30 minutes the previous day. Most of that time, in fact, was checking the power output at various voltage settings into a dummy load. I did make one totally random SSB POTA contact shortly after hooking the radio up to my QTH antenna.

I knew that taking the (tr)uSDX to the field and making an activation video might not be the best idea having had so little time to play with the radio and get to know it in advance, but then again, I was simply too eager to see how it might perform.  That and I always believe there’s value in sharing first experiences with a radio. Continue reading Video: Taking the new (tr)uSDX QRP transceiver on a CW POTA activation!

The (tr)uSDX QRP transceiver: My initial impressions after a CW POTA activation

I mentioned in a previous post that I placed an order for a (tr)uSDX kit with roWaves in February. My order was placed for a third production run kit and I assumed I would receive it sometime in March 2022.

Later that month, I discovered that DL2MAN announced AliExpress would sell both kits and fully-assembled versions of the (tr)uSDX. I used the link from DL2MAN’s website and ordered a fully-assembled unit.

My thinking was that I would receive the kit first, build it, then test the performance by comparing it with the factory-assembled unit. These units are so dang affordable I felt like I could splurge for both.

roWaves order on hold

I recently discovered that my (tr)uSDX kit had been placed on hold due to issues that popped up in the first and second kit group buys via roWaves.

Evidently–and someone can correct me if I’m wrong here–the first and second production runs kits had a component issue that equated to lower output power. In addition, Josh (KI6NAZ), reports that the early group orders had no boot loaded and the MCU was DOA.

I’ll patiently wait for roWaves to sort this out. I’m not in a huge hurry at this point because, frankly, my available time to build a kit has come and gone. The next few months, I’ve a lot of plans, travels, and projects to work through.

Fully-assembled (tr)uSDX

Much to my surprise, the assembled (tr)uSDX arrived Monday and I picked it up when I was at home on Tuesday of this week.

I was only home one night, but managed to do some quick testing.

I soldered Anderson Powerpole connectors on the supplied power cable pigtails. Next, I hooked the (tr)uSDX up to my variable power supply and a dummy load.

A quick test showed that I was getting about 3 watts of output power with about 13-13.2 volts, 3.25 watts at 13.8 volts, and 2 watts of power with 9-10 volts. This is lower than the expected 5 watts of output power @ 13.8 volts. The current consumption in receive however was about 60 mA even at 9 volts. That’s slightly below the published specs.

I honestly had no time that evening to play radio, but I took a moment to hook up the (tr)uSDX to my skyloop antenna just to check the audio quality in SSB.

As luck would have it, the first station I heard on 40 meters was a POTA activator in Ohio. He was calling CQ, so I couldn’t help but reply. I pressed the PTT button on the (tr)uSDX, spoke into the internal mic,  and he came back immediately with a 5×8 report. My meter was showing a max of 2 watts output power–the heavy lifting, of course, was done by the antenna.

This gave me a very good initial impression!

(tr)uSDX POTA Activation

The following morning, after running a few errands and carting my kids to some appointments, I left the QTH for a couple nights of travel.

I just couldn’t help but pack the (tr)uSDX and attempt a park activation en route. My goal was to see if it had enough positive receiver characteristics to be a proper POTA/SOTA portable rig–the feature set is comprehensive for a $135 radio.

I stopped by South Mountains State Park and paired the (tr)uSDX to an EFHW my buddy Steve (MW0SAW) kindly built and sent me. [Steve–I’m loving this antenna! Thanks again, OM!]

I made a video of the entire activation and will soon post the field report. I’ll push this video to the front of the line, but with my internet bandwidth, it might still be a few days before I can post it. Because of this, I thought I’d go ahead and share some of my experience with the (tr)uSDX in case you’ve been thinking of purchasing one.

(tr)uSDX pros

This little radio design has a lot going for it.

The chassis is very compact–perhaps the size of two Altoids tins stacked on top of each other. The encoder does protrude–in fact, it’s nearly as deep as the radio chassis. It’s not that the encoder is particularly tall, it’s just that the (tr)uSDX is so wee.

The radio has all of the CW adjustments you’d typically find in a compact field transceiver and even sports QSK (there’s also a semi QSK setting) with no relay noise. I assume it uses PIN diode switching.

(tr)uSDX Cons

Unfortunately, I did find a few negatives. The reviewer in me automatically gives the (tr)uSDX wide berth and a lot of forgiveness: we’re talking about a $135 transceiver here. I don’t think anyone is under the impression this would be a stellar performer.

In my opinion, the biggest negative is the (tr)uSDX audio. This little rig has a very high noise floor–perhaps S5 or S6.

The internal speaker is very modest and mine is incapable of producing audio at a level that is workable in the field where there are ambient noises like wind, water, conversations, birds, etc. The audio sounds decent when working a strong station, but weak stations are extremely hard to hear. If you turn up the volume on my unit beyond level 14, the audio simply squeals. I need to tinker with the volume control more.

Since the audio was so weak, I hooked up my Sony digital audio recorder to the (tr)uSDX headphone jack and made a separate audio recording for the upcoming activation video.

The headphone audio is louder, but there’s also a lot of noise in the audio amplification chain–again placing the (tr)uSDX noise floor around S5 or S6.

I was fully expecting the (tr)uSDX receiver to overload and it does. The variable filter helps and narrowing it makes the audio sound more pleasant in CW, but it doesn’t stop adjacent signals from bleeding through. Honestly, though? I could live with this and just use the filter between my ears if the audio was simply cleaner.

I also discovered that my unit needs alignment: the frequency display is off by 1.6 kHz in CW mode on 40 meters. I’ve put this on my to-do list–after all, this is a project radio meant for hands-on tweaking. I’m good with that.

One final point and minor quibble: the OLED display is very difficult to read outdoors. It’s superb indoors, but outside any sunlight or reflection simply wipes it out. To read the display I had to cover it with my hand.

The activation was a success: I worked 11 stations in 20 minutes or less, but I’m sure there were weaker signals out there I missed because they were simply buried in the (tr)uSDX’s noise floor.

I liked the (tr)uSDX keying, and I love the form factor, but I’m not sure I’ll ever use this radio again–configured as it is now–during an activation. For casual contacts, it could still be fun.

A little (tr)uSDX grace

I mean…$135 right?!?

The (tr)uSDX is an open source project and truly pushes the boundaries of what one can achieve for $135–again, even much less for the kit version. Frankly, I’m in absolute awe that any transceiver can be made below the $150 price point; especially a multiband, multimode transceiver.

The (tr)uSDX is an experimenter’s radio and I plan to dig into this little unit and see if there’s anything I can do to lower that noise floor. My hope is that the CPU or display may simply need better grounding or isolation. My time is limited at the moment, but I will open into this radio in the next few weeks.

In fact, eventually completing the kit build will give me an opportunity to explore the components and connections in much better detail.

I do know that my unit also seems to have the power output issue that some of the roWaves kits have. I can’t achieve anything better than 3.25 or 3.5 watts output at 13.8 volts. It should be about 5 watts at 13.8 V.

I would welcome your suggestions especially if you’ve built the (tr)uSDX kit or if you’ve put your assembled (tr)uSDX on the air and found that it had much better audio characteristics.
New Beta Elecraft KX2 and KX3 Firmware

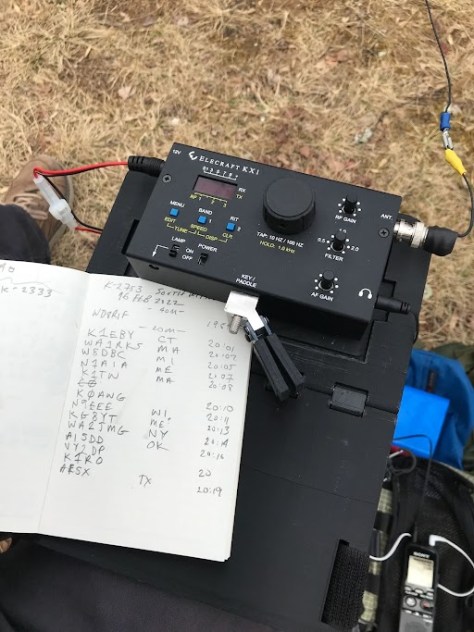
Many thanks to Tony (AE0KW) and Eric (WD8RIF) who note that Elecraft has released new a Beta firmware for the KX3 and KX3 that extends the time before the radio drops to 5W in CW mode:

  • The KX2 release extends CW operating time at 10 W by allowing the supply or battery voltage to go as long as 9.0 V before dropping to 5 W.
  • The KX3 release has the same CW power improvement, as well as a fix to the TX inhibit function of the ACC2 jack.

Details: https://elecraft-kx.groups.io/g/main/message/71950

Leo’s complete QCX-mini field kit and ZM-4 manual tuner kit

Many thanks to Leo (DL2COM) who recently reached out after watching my livestream with Josh at HRCC on the topic of QRP/CW portable. 

Leo shared some photos of a complete radio kit he built around the QCX-mini along with a ZM-4 ATU kit he also recently built. Leo has kindly agreed to share these on QRPer.com.

Leo notes:

Attached is a photo of my ultra light kit.

It consists of a QCX-Mini 20m version (self-built), K6ARK EFHW, Palm Radio Pico Paddle, Eremit 2Ah LiFePo battery, headphones and a few cables.

I usually also carry a small arborist kit and if there is still room also the 6m mast from Sotabeams, depending on what I think will work best.

I chose a hard case and went for the Peli 1060 Micro. It has room for everything I need and it could easily hold a bit of RG316 coax in addition (even more if I chose to shorten the 30m arborist line).

The main benefit for me is that I really don’t have to worry at all about what’s inside – compared to a soft pouch. So I can just shove it into my backpack or glove box and forget about it since this configuration is a lot more rugged and water proof – while being slightly heavier. Continue reading Leo’s complete QCX-mini field kit and ZM-4 manual tuner kit

Brent’s initial impressions of the CQHAM TB-BOX

Many thanks to Brent (VA3YG) who writes:

Hello Thomas,

The Fedex courier just left my driveway. I ordered the CQHam TB box on Feb 29 and paid the $39 US for Expedited International shipping vs the Free Speedpack shipping from Hong Kong that promised it by June 1.  I really don’t like waiting for a parcel to arrive! Lol

I know there was some interest on your site about this product, so I thought I would write and give you some brief, first impressions.  Sadly,  I don’t have any more time to play with it until next week as I’m about to leave now to visit friends.

It arrived in 10 calendar days, well packed and everything inside survived the Fedex journey from Hong Kong to Southampton ON via Anchorage AK and Memphis TN.

No one would ever mistaken this equipment for gear made by Elecraft or Icom but it appears to work just fine. The variable capacitors are not smooth and the fit and finish is okay at best but I think, if you’re careful with it, and do your adjusting carefully, it should last you some time.

The “faux” leather case is actually quite nice and reminds me of the Yaesu FT-817 case.  As a bonus, a telescopic whip was included.

The batteries came charged and the rig showed 11.3vdc. I didn’t remove the battery tray as it didn’t want to slide out willingly and I didn’t want to force it. I’ll try that later when I have more time….

I connected my 43’ ZeroFive vertical with 30 radials to it and was able to tune from 80m right up to 10 meters with no problem.

I made a nice contact (my first phone contact in about 8 yrs) on 17 meters with a station in Biloxi.

It should be fun and it’ll give me an excuse to work the 817 again.

73 fer nw,
de Brent VA3YG

Thank you for sharing your initial impressions and the inside shots of the matching unit, Brent. We look forward to any updates you might provide as you spend more time with this field kit!

Repairing Ruby: Dr. Vlado performs surgery on the Elecraft KX1

I might have mentioned in a previous post that I named my little Elecraft KX1 “Ruby.”

I name all of my field radios that are permanent; ones I never plan to sell or trade at any point in the future. Ruby is firmly in that keeper list.

Why do I anthropomorphize field radios? That’s perhaps a discussion for a different day but I reckon it’s because I feel they have a lot of character and are, quite literally, trusted companions. They go with me on travels, hikes, and all sorts of outings.

Ruby love

So Ruby is actually the second KX1 I’ve owned.

My first Elecraft KX1 also had a dedicated Pelican 1060 case. There’s even room to fit an external Whiterock paddle.

The first one I purchased in 2008 as a reward to myself for learning CW (see photo above). I enjoyed that KX1 until 2016 when I sold it to help fund the purchase of my KX2.

I immediately regretted selling it, although it helped that I sold it to an amazing person.

In October 2020, I purchased Ruby and wrote a post about how great it was to be reunited with this gem of a radio.


At the time, I had no idea what a great deal I had landed.

Ruby turned out to be a four band radio (it was advertised as three), included the built-in ATU, and the package came with a simple wire antenna, three different coaxial DC plugs, a Pelican 1060 waterproof case, earphones, and a set of KXPD1  paddles. All of this for $300 US shipped.

I took Ruby on a number of field activations and couldn’t have been happier

Intermittent issues surface

In the summer of 2021, I started noticing some odd behavior.

Sometimes, after turning on the power switch, the rig wouldn’t completely power up. Instead of the typical two clicks we KX1 owners are accustomed to hearing, I only heard one click and neither the display nor any of the functions worked.

This was an intermittent issue–the next day it might power up as it should.

I did a little troubleshooting: I completely disassembled it, visually inspected all of the solder joints, and removed/cleaned and reinserted the firmware chip. This had no effect at all.

So, I took Ruby to one of the best radio repair technicians in the world who also happens to be one of my best friends: Vlado (N3CZ). He actually does a lot of repair and even has a radio repair website.

Dr. Vlado

Vlado (N3CZ) draws a crowd during a joint park activation on the Blue Ridge Parkway a few years ago.

Vlado will be the first to tell you that the worst problems to diagnose are those that are intermittent; it takes much longer to trace the source of the problem.

A few days later, Vlado sent me a message notifying me that the patient (Ruby) was on the operating table and surgery was about to begin. (See why I call him “Dr. Vlado”–?)

Vlado checked the circuit board very carefully. He found a few solder joints that needed work including a couple on the chip holder. In fact, he completely desoldered the chip holder and soldered it back in properly. Keep in mind here that the KX1 was only ever available as a kit, so quality had everything to do with the skill of the original builder.

He re-assembled Ruby and she worked perfectly.

A second operation

I put Ruby back on the air for a few months, but then in December 2021, a variation of the same issue resurfaced. This time, the “two clicks” in startup took a couple seconds longer than it should. Then it simply stopped working altogether.

Vlado wanted Ruby back in surgery ASAP, so I dropped her off at his “Emergency Room.”

Since the problem was no longer intermittent, Vlado quickly sorted out the main issue: a faulty encoder.

I should note here that since the KX1 hasn’t been produced by Elecraft in many years, there’s always the fear that a replacement part might already be “unobtainium.”

I called Elecraft support and fortunately for KX1 owners everywhere, the encoder is one Elecraft uses in a few of their radios. They have a healthy inventory and the part costs less than $5.00. Woo hoo!

Admittedly, when I placed the order, I also order a few extra parts I thought could fail in the future and might be difficult to find: 3.5mm jacks, pots, and even the LED screen. If I was paying shipping anyway, why not add a few extras? The parts are all very reasonably priced.

The KX1 doesn’t seem to have a lot of unobtainium in it–I seem to recall though that the firmware chip can no longer be ordered from their website and neither can the pushbuttons.  I bet you could find other pushbuttons if needed, though.

I had the encoder shipped directly to Vlado and he completed Ruby’s operation in short order. Thank you, Vlado!

To the field!

I’m so happy to have Ruby back on the air! We’ve chased numerous parks and summits in the past week and I took her on an activation Monday, pairing her with my recently-built K6ARK EFHW antenna.

I’ll post an activation report and video in the coming weeks.

KX1 advice

Elecraft KX1s have become as rare as hen’s teeth lately. You’ve no doubt noticed this if you’ve been looking for one. I’m sure I could sell my KX1 package in a heartbeat for twice more than I paid a year and a half ago. It’s a little insane, really, but I get it.

If you’ve been looking for a used KX1, I would offer the following notes/advice:

  • Since these were only available as kits, you might ask the seller about the original builder and/or have them take photos of the soldering work inside prior to purchasing.
  • Assume issues might arise with time. With radios like this, I mentally set aside at least a couple hundred dollars for future replacement parts and/or repairs.
  • Keep in mind that as with any other radio that’s a bit long in the tooth, you may find that some components are simply no longer available. That’s the risk we take being custodians of these cool little rigs.
  • Actively looking for a KX1 at time of posting (Feb 2022)? Note that interest in particular radio models waxes and wanes over time. With a little patience, you’ll eventually find one. I’ve seen this happen with so many other radios over the years.
  • The KX1, as with most Elecraft radios, comes in a number of configurations and you need to be aware of this if purchasing. Some only have two bands, some have three, and some have four. I’m not certain if band modules are still available via Elecraft, so you might get stuck with the configuration you purchase.  Also, the internal ATU was an option; don’t assume the one you’re purchasing has the ATU.
  • KXPD1 paddles are very difficult to find these days. It’s a big bonus if your radio comes with them. Not everyone likes these paddles, but the version I have now seem to work really well, actually. N6ARA Tiny Paddles are a brilliant little replacement, but you might wish to make a 3D-printed holder to attach the the paddle point on the front of the radio to take a little strain off of the 3.5mm jack inside.

I should also add that Vlado is a brilliant repair technician and has worked on numerous Elecraft, Icom, Yaesu, Kenwood, and Ten-Tec models over the years–if it’s solid state, he can repair it. If you ever need his services he can be reached via his website HamRadio.repair.

Also, Dave (W8FGU) is an Elecraft employee that is devoted to their legacy radios like the KX1/KX1/K2, etc. He’s a great guy, brilliant resource, and I believe can also arrange repair, if needed.

Enough blogging: I think Ruby and I will chase a few summits now while I finish my morning cuppa’. 🙂

Brent builds the Penntek TR-35 transceiver kit

Many thanks to Brent (VA3YG) who writes:

Good morning Thomas, from wintry southwestern Ontario.

I thought I would send you a quick message to share my experiences, so far, with the little TR-35.

Yesterday, around 3pm, I took the above unassembled kit off the shelf and began to melt solder. The smoke test was successfully performed the next morning at 1:30am, after non-stop building (with the exception of a few hours for eating and catching up on a little tv). I measure twice and solder once hihi.

I ordered the kit a few weeks back from John Dillon, WA3RNC, and it arrived quickly by courier and all in one piece. John has super customer service and knows how to pack for delivery. Continue reading Brent builds the Penntek TR-35 transceiver kit

César’s field radio kit

Many thanks to César (CA7OKD) who shares the following photo (click to enlarge) and description of his field radio kit:

Hi Thomas,

I share my backpack to get away anywhere, to a hill, park or beach…

    • Backpack for photographic equipment
    • Mini EF Hfkits antenna (the Balun Hfkits is missing because I lost it on a beach)
    • Coaxial M&P Hyperflex 5 with M&P connectors
    • Bottom: MFJ1899T antenna
    • Xiegu X5105, Micro, Dry Bag
    • Xiegu X6100 (perhaps the first in Chile)
    • Folding tripod stool chair

I had a very good RS-188 (McHF clone) and a uSDR; I sold them because these equipments don’t have a tuner (I like to keep the minimum).

The X5105 is a very good transceiver, the integrated tuner is wonderful.

The X6100 that fails to convince me. At least in 40 meters it is acceptable.

Greetings,
César CA7OKD

Thank you for sharing this, César! Photography backpacks in many ways are absolutely ideal for radio gear. Many allow for a great amount of flexibility in terms of adjusting internal organization. In addition, they’re very well-padded.

Interesting what you say about the X6100 compared with the X5105. I’m hoping to do a video soon focusing on the differences between these two. 

Thanks again for sharing!