If you’ve read my field reports or watched any of my activation videos, you’ve no doubt noticed that I rely very heavily on automatic spotting via the Reverse Beacon Network (RBN) for both POTA (Parks On The Air) and SOTA (Summits On The Air).
I’ve gotten a lot of questions about how to use the RBN functionality for both SOTA and POTA, so thought I might clarify (in very basic terms) how the system works and how you can take advantage of it.
Note: CW and Digital Modes Only
Keep in mind that Reverse Beacon Network spotting only works with CW and some digital modes.
I, personally, have only used it for CW activations.
The system does not currently recognize voice transmissions (although as voice recognition becomes more accessible and effective, I wouldn’t be terribly surprised if something like this is offered in the near future!).
Here’s how the RBN works
The RBN is essentially fueled by a global network of volunteer receiving and decoding stations that feed information into the RBN spotting system. This system is running 24/7 and recording spots constantly.
This is what the RBN spots search results look like using my call at time of posting.
If I hopped on the air right now and made at least two generic CQ calls with my callsign–barring any abnormal propagation–the RBN would no doubt collect my information and spot me automatically to their network.
Maybe it’s just in the nature of those of us who love QRP.
We get a small thrill out of seeing what we can accomplish with less.
AX1 Doubts?
On the morning of February 7, 2022, I received an email from a subscriber in South Carolina who had placed an order for a new Elecraft KX2 and an AX1 antenna package. He picked this particular combination because he wanted the most simple and easy-to-set-up field radio system for impromptu CW POTA activations and a little random QRP fun.
He mentioned that, at his age, mobility is a bit of an issue and even though he knew a wire antenna would be more effective, deploying it while walking on uneven ground just wasn’t in the cards. The AX1 was a much more manageable and packable system. Plus, as he said, “I’m not going out to work DX. I just want to play and have fun.”
Only a week after placing his order, he was having buyer’s remorse which prompted his message.
He explained that he had exchanged emails with a friend in his radio club who told him he’d made a foolish mistake and that the AX1 was completely ineffective as an antenna and would only lead to disappointment. His friend said [direct quote here], “I owned [an AX1] for a month and was never able to make a single contact. It is really good at being a dummy load and nothing more! This thing shouldn’t be marketed as an antenna. It doesn’t work.”
I pointed out that I’ve used the AX1 numerous times in the field and have yet to be disappointed.
Before I used the AX1, I too, was very skeptical but after actually using it (instead of simply theorizing about it) I found it’s one of my most valuable antennas for a quick and fruitful activation. I pointed him to this playlist that includes all of my AX1 activations on YouTube. In all of these activation, I’ve limited myself to 5 watts as well even though the antenna can handle a full 10 or 15 watts from the KX2 or KX3.
I told him I’d been planning to pair the AX1 with my Mountain Topper MTR-3B and, it turned out, that very day a small window of opportunity opened in the afternoon. I told him we could both see how the AX1 might perform with three watts of power, especially since he’d planned to use 10 watts with his KX2.
A few months ago, Mike (KE8PTX), contacted me with info regarding his latest 3D-printed creation: a compact housing for an end-fed half-wave balun.
Mike’s 3D drawing
He called it the “Oreo Balun.”
Once printed, and after he wound the coil and installed the BNC, he sent this photo:
It’s cute, isn’t it?
He then surprised me by putting it in a padded envelope and sending it to me as a gift. Wow–thanks, Mike!
Oreo plans
End-Fed Half-Wave antennas are popular portable antennas for a reason: they’re effective!
They’re compact, easy to deploy, and resonant.
I only needed to attach some wire to the Oreo Balun, trim it, and hit the field!
Earlier this year, my buddy Vlado and I built two doublets with some scrap wire I had in my antenna parts box. I measured the amount of wire I had left from that same spool. I knew it wasn’t enough length for a 40 meter EFHW, but I did think there was enough for 30 meters.
After giving it a bit of thought, I liked the idea of having a dedicated 30 meter EFHW. For one thing, 30 meters is a great band for field deployments and in the past this band has saved my bacon when either 40 meters or 20 meters was wiped out. Thirty meters is also a refuge WARC band during contest weekends. In addition, a 30 meter EFHW is short enough that it could be deployed on most SOTA summits (which often have shorter trees).
Fortunately, I had just enough wire for 30 meters. IN fact, after trimming the antenna, I only had about two feet of wire to spare. It’s as if I had planned it! I would have never guessed that spool of scrap wire would have made two doublets and one 30 meter EFHW.
When I take a new radio to the field, I often don’t know what to expect until I arrive at the site and put it on the air. It’s one thing to use a radio in the shack, and quite another to use it in the field.
Earlier this year, I purchased a Venus SW-3B, three band QRP transceiver after much poking and prodding from readers and subscribers. I actually contacted Dale (BA4TB) at Venus and asked for a loaner to do a review, but he had no units set aside for loans, so instead offered me a coupon code. I was hesitant to purchase yet another QRP radio–which is why I asked for a loaner–but his coupon discounted the radio enough I could even afford to splurge for expedited shipping. He made money and I didn’t have to worry about loan periods, etc. It turned out to be a win/win.
I knew I wanted the SW-3B’s maiden voyage to be a SOTA summit, but I had to wait for a good weather window.
On Thursday, February 10, 2022, I got that opportunity!
Dogback Mountain (W4C/EM-066)
I learned about Dogback Mountain from my buddy Dave (W4JL) who activated it earlier this year. He told me it was a drive-up summit and was high enough to even rack up winter bonus points.
The road had no ice on it February 10, although it was very muddy and slippery in spots. Made for a very enjoyable drive in the Subaru, although post-activation you would have never guessed I’d washed the car the day before!
I arrived on site and parked the car at a pull-off that was well within the activation zone of the summit. Dave was right: this summit was very accessible (well, as long as your vehicle has a bit of clearance–this isn’t a road for sports cars or low sedans).
There are days when I leave the QTH and have no idea if I have enough time to fit in a park or summit activation. Because of this, I always keep a radio field kit in the car.
On Monday, January 31, 2022 I had an appointment-packed day ahead of me, but I was hopeful I might be able to squeeze in a quick activation of some sort.
Specifically, I had a new-to-me super easy, drive-up SOTA site in mind: Peach Knob (W4C/CM-097). In fact, it’s a bit odd that I hadn’t activated this site before. It must be the most accessible summit (to me) in the area.
After a 2:00 appointment in downtown Asheville, I drove 15 minutes to the summit of Peach Knob where I discovered 1.) there was almost no space to park and 2.) what little space there was was taken up with crews working on a cluster of communications towers. In situations like this, the last thing I want to do is get in the way; that sort of activator persistence could lead to “no trespassing” signs in the future.
The site also reminded me that what I love about SOTA is the hike to the summit. Sites like this one are wedged between private property and city property–I just feel like I’m in the way, arousing neighborhood suspicions, and just doing the activation for the points. I’m not a points guy (though I’ll do a happy dance when I accumulate 1000 for ‘Mountain Goat’ status sometime within a decade at this rate).
Moving forward, I think I’ll skip drive up sites like this one; at least for HF activations.
At this point, I pretty much abandoned the idea of a field activation as I’d taken up the wee bit of free time in my schedule just checking out Peach Knob.
I’ve been spending more time with my Mountain Topper MTR-3B (“Tuppence”) recently and have been thoroughly enjoying this little radio’s companionship.
Since I made a dedicated ultra-compact field kit for the MTR-3B, it has also been even easier to toss it in my backpack and take it on little field adventures. The field kit is truly a grab-and-go and even includes a throw line and weight.
On Friday, January 28, 2022, after a total of six individual park activations during the previous two days (a POTA RaDAR run and my first 2020 Antenna Challenge activation) driving back to the QTH I thought, “surely I can skip doing an activation today.”
That quickly turned into, “Wait a minute…I’ve got enough time to fit in both an activation and a hike!”
So I made a quick detour off of I-40 to visit the Clear Creek access of South Mountains State Park.
South Mountains State Park (K-2753)
I pulled into an empty parking area; not really a surprise on an early Friday afternoon. In addition, I figured many were out grabbing bread and milk since winter weather was in the forecast.
On January 26, 2022, I fit in multiple park activations in one day as a RaDAR (Rapid Deployment Amateur Radio) run. My hope was to activate four or five sites between 14:00 – 21:30 UTC.
Here are the field reports and videos of my first four activations:
The next park in my run (#5) was Tuttle Educational State Forest and it was the final park in this modest RaDAR run!
I packed up the gear at Johns River Game Land in a matter of three minutes, popped it all in the car, then drove 8 minutes to nearby Tuttle Educational State Forest which, at this point, almost feels like a home away from home.
Tuttle Educational State Forest (K-4861)
As I pulled into the Tuttle parking lot, I found my buddy Max (W4GZ) activating the park from his truck. It was no surprise finding Max here since I had just worked him Park-To-Park (P2P) from Johns River next door.
Max delivered some precious cargo: some more of his mom’s homemade QRP pickles!
On January 26, 2022, I fit in multiple park activations in one day as a RaDAR (Rapid Deployment Amateur Radio) run. My hope was to activate four or five sites between 14:00 – 21:30 UTC.
Here are the field reports and videos of my first three activations:
The next park in my run (#4) was either going to be my last activation, or second to last depending on my available time.
After visiting with my buddy, Hamilton, at his ceramics studio in Morganton (read about that in the previous report) I looked at the time and decided I could fit in a very quick activation of Johns River Game Land (#4) en route to Tuttle Educational State Forest (#5).
I made up my mind en route that I’d use my fastest-to-deploy combo: the Elecraft KX2 and Chameleon CHA MPAS Lite.
I really wanted to be in and out of the site within a 20 minute window. That’s actually very doable as long as I could rack up at least ten contacts in 10-15 minutes. Some days, propagation can make that a tall order, though!
Johns River Game Land (K-6916)
Johns River actually has a number of access points and, frankly, none of them are exactly “bucolic.” Other than the river itself which is beautiful and the main access point for the river which is well-maintained, most of the game land parking areas are filled with litter.
I chose a parking area for this activation which has, in the past, looked like a dumping ground. I was pleased when I pulled into the parking lot this time to find it much cleaner (no old refrigerators or sofas dumped at the far end of the lot) but then again the snow on the ground was likely hiding quite a bit of litter! My philosophy is to always leave a site cleaner than I found it, but Johns River often has so much littler, I could spend a week picking up trash.
After doing a very short intro for my activation video, I set up the Elecraft KX2 and MPAS Lite antenna in a matter of two minutes.
I started calling CQ POTA (with my fingers crossed!) on 40 meters and was very pleased that chasers were out and about!
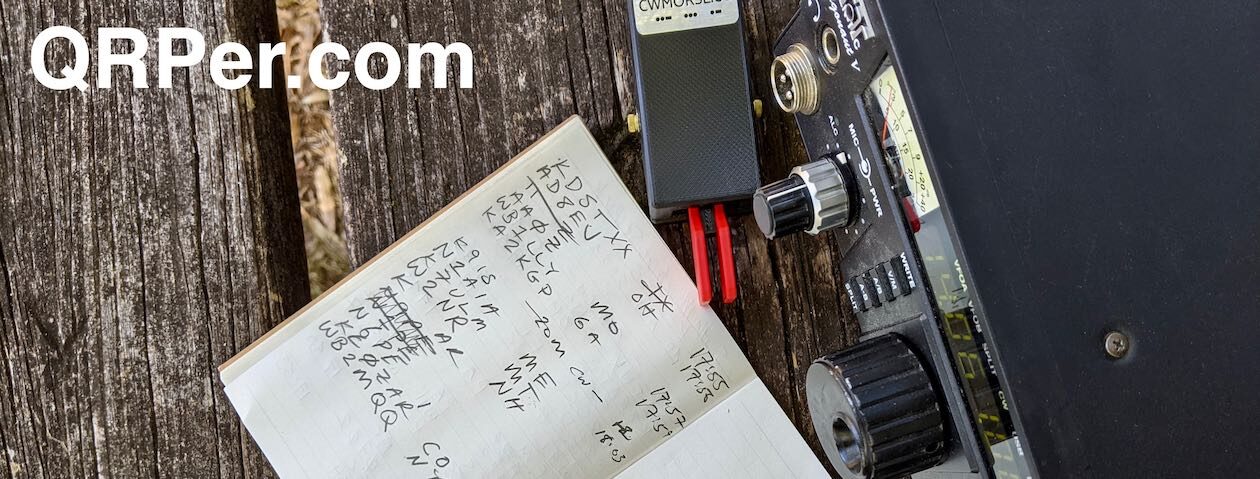
I worked my ten contact in 9 minutes and then went QRT! Woot! Here’s the log sheet:
In this short activation, there was actually a P2P with Max (WG4Z) who was just up the road at Tuttle Educational State Forest. We were definitely working each other via ground wave.
The contacts were flowing so well, that I wanted to stay on the air a bit longer, but I knew to fit in Tuttle and a hike, I really needed keep moving. As soon as I worked my ten, I hopped off the radio.
While I like putting more contacts in the log–especially when they’re flowing so freely–it was actually kind of fun to validate this activation in somewhat of a “sprint.”
QSO Map
Here’s what 5 watts and the MPAS Lite yielded in nine minutes on the air:
Activation video
Here’s my real-time, real-life video of the entire activation. This must be one of the shortest activation videos I’ve ever made:
Thank you so much for reading this short report and coming along with me on this RaDAR run! I’ll be posting Park #5–Tuttle Educational State Forest–soon where I catch up with Max (WG4Z) and we work park-to-park once again.
As always, I’d like to send a special thanks to those of you who have been supporting the site and channel through Patreon and the Coffee Fund. While certainly not a requirement as my content will always be free, I truly appreciate the support.
These are crazy times we’re living in these days (at time of posting). I wish all of you good health, safety, and peace–especially our good friends in Ukraine.
Let’s all treat each other with kindness and respect this week as we remember that all we’ve got on this old planet is each other.
On January 26, 2022, I decided to fit in multiple park activations in one day as a RaDAR (Rapid Deployment Amateur Radio) run. My hope was to activate four or five sites between 14:00 – 21:30 UTC.
Here are the field reports and videos of my first two activations from this run:
The next park in my run (#3) was Table Rock Fish Hatchery, a good 40 minute drive from the spot where I operated at activation #2.
The drive to Table Rock was most pleasant and I stopped a couple times to take in views along the forest service road leading down the mountain.
I was pointing my finger and saying, “I’m going to activate your summit soon, Table Rock!”
I mentioned in a previous post that I made this RaDAR run unnecessarily more complicated by deploying a different antenna and radio combo at each site.
On the drive to the fish hatchery, I decided to use the PackTenna 9:1 UNUN random wire antenna and pair it with my Yaesu FT-817ND.
As mentioned in my last field report, on January 26, 2022, I decided to fit in multiple park activations in one day as a RaDAR (Rapid Deployment Amateur Radio) run. My hope was to activate four or five sites between 14:00 – 21:30 UTC.
The first activation at Lake James State Park went so well, it started me out a little ahead of schedule.
After packing up my gear at Lake James, I began a 40 minute drive to the second site–Dogback Mountain–where I hoped to do a POTA two-fer along with a Summits On The Air activation.
The drive was beautiful. Only twenty minutes into the trip, I came to the forest service road that lead to Dogback Mountain. For a six mile drive, Google Maps was telling me it would take about 20 minutes, so I knew the dirt road would require slow driving.
The road was actually in pretty good shape, but there are rocky and rough spots that pretty much require good vehicle ground clearance. My Subaru had no issues at all–in fact, I love driving on back roads like this!
Three or four miles into the forest service road I reached an impasse.
While there hadn’t been snow in the area for at least a week, the north slope portions of the road were quite icy. The thaw and night time freezing pretty much meant that there was no snow to navigate–only ice, and I’m not a big fan of ice.
I already passed through two sections of ice where I could still manage a little traction on the side of the road (at least half the car had traction). At one point, though, I saw a large section of icy road ahead, so I parked the car to investigate what it looked like over the crest of the hill.
It was so icy, I struggled to find a spot to walk on to peek over the hill and almost slipped once. That hill was pretty steep and I could see no spots for the car to get traction. Remembering what my wife said that morning (“Don’t do anything crazy, okay?“) and knowing that the worst thing for my RaDAR run would be getting stuck in a spot recovery vehicles might struggle with, I chose the option of forgoing the summit activation.
Frankly, if the summit activation was the only thing on the schedule that day, I would have likely parked, then hiked 3 miles to the summit along the forest service road. But my RaDAR run left no time for this.
Fortunately, where I parked was firmly in the two-fer zone of Pisgah National Forest and Pisgah Game Land!
Pisgah National Forest (K-4510) and Pisgah Game Land (K-6937)
QRP radios, product announcements, reviews, news and more. Low power amateur radio fun!
Please support QRPer by adding us to your whitelist in your ad blocker. Ads are what helps us stay online. All of our ads are ham radio related--no junk, we promise! Thank you!

 The RBN is essentially fueled by a global network of volunteer receiving and decoding stations that feed information into the RBN spotting system. This system is running 24/7 and recording spots constantly.


