I’ve read through this and must admit that as someone who typically operates at QRP power levels, I would have less worries than those pushing the legal limits in densely-populated neighborhoods.
Here in the Asheville, NC area, there’s one mountain that almost anyone can recognize by sight: Mount Pisgah.
Mount Pisgah is prominent because not only is it one of the taller summits bordering the Asheville basin, but it’s also home to the WLOS TV tower and and a cluster of public service and amateur radio repeaters.
I’ve been eager to activate Mount Pisgah for Summits On The Air (SOTA). Along with Bearwallow Mountain, and Mount Mitchell, it’s one of the most popular SOTA summits in the Asheville area.
Being so accessible from the BRP, the Mount Pisgah trail also receives a heavy amount of foot traffic. Being locals, our family tends to skip this trail when we’re venturing along the BRP because it can be so congested at times.
Mount Pisgah (W4C/CM-011)
On Tuesday, June 1, 2021, Hazel and I decided to hit Mount Pisgah fairly early and avoid the crowds.
We arrived at the trailhead around 8:15 AM and there were very few cars there–a good sign indeed!
Hazel was chomping at the bit to start our hike!
The trail is only about 1.5 miles with a 700 foot elevation gain, so not strenuous.
It was blissfully quiet and we only passed two other groups of hikers on the way up.
I’ll admit that I was keeping an eye out for black bears, though. We saw bears very close to the trailhead entrance on the BRP that morning. I may have mentioned before that black bears are not something to be feared here in western North Carolina; they typically avoid people and your chances of being fatally injured by a black bear are incredibly slim–right there with being struck by lightening.Still, the black bears that wonder near populated spots like Pisgah along the parkway are often fed by tourists and lose their fear of humans. Not only that, but they even expect people to be food dispensers. Not good. As we say around here, “a fed bear is a dead bear” because feeding bears leads to aggressive behavior and the poor creature’s eventual euthanization.
But I digress!
Hazel and I reached the summit and were happy to find that we were alone. Pisgah’s summit can get very crowded as there really isn’t a lot of space–only a large viewing platform next to the massive tower.
When we arrived on site, the summit was surrounded in clouds.
I briefly considered operating from the viewing platform, but knew I would have to cope with a lot of curious hikers while trying to operate CW. Since I’m not a good multitasker, I decided to do what many SOTA activators do: carefully pass under the tower and find an activation spot on the other side of the summit.
Hazel and I found a small overgrown trail used primarily by those working on the tower. I deployed my station in a small clearing.
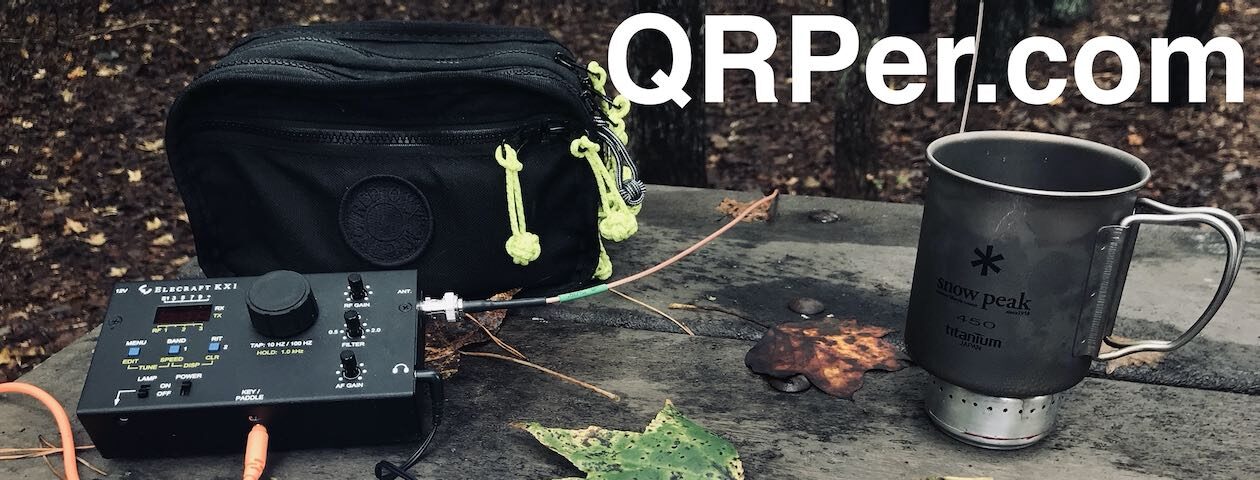
For this activation, I chose my Elecraft KX2 and paired it with the Chameleon CHA MPAS Lite which has quickly become one of my favorite SOTA antennas.
I deployed the CHA MPAS Lite perhaps 15 feet away from my operating spot, in the middle of a spur trail. I was able to extend the 17′ vertical without touching any branches. I rolled out about 20-25′ of counterpoise wire along the ground.
After setting up, it dawned on me that I’d forgotten my clipboard. No worries, though! I simply flipped over my GoRuck GR1 pack and used the back as an operating surface.
On The Air
Not only was this a summit activation, but also a park activation–indeed, a two-fer park activation at that! The summit of Mount Pisgah is in both Pisgah National Forest (K-4510) and Pisgah State Game Land (K-6937).
If I’m being honest here–since I’m not a “numbers guy” and don’t follow my activation counts closely each year–it’s very tempting not to announce or count this activation in both the SOTA and POTA programs since K-4510 and K-6937 aren’t rare entities. The main reason for this is because, back home, I end up doing double entry with my logs: loading them via the SOTA online log submission tool, then entering them in N3FJP or TQSL for submission to the POTA and WWFF programs. It can be very time-consuming doing this.
I am working on a way to “massage” the ADIF file data so that I can submit it to both programs with less effort.
But, of course, I announced the activation on both SOTAwatch and the POTA site. At the end of the day, I’ve never *not* announced a dual SOTA and POTA activation because I can’t help but think it might offer up the sites to a new POTA hunter. It’s worth the extra log entry later.
Another plus with activating a site in two programs is that you’ll likely be spotted in both thus increasing your odds of logging the necessary contacts to validate your activations.
Turns out, snagging valid activations that Tuesday morning was incredibly easy. And fun!
Fabulous conditions!
I started on 20 meters CW and logged fifteen stations in eighteen minutes. The band was energized because not only did I easily work stations from France, Slovenia, and Spain in Europe, but also stations all over North America from the west coast to as close as the Ohio valley and into Canada.
I wanted to play a little SSB, so I moved to the phone portion of 20 meters and spotted myself on the SOTA network. I worked five stations in eight minutes. Fun!
Next, I moved up to the 17 meter band and stayed in SSB mode. I worked five more stations in nine minutes. Had I only activated this site in SSB on 20 and 17 meters, I could have obtained both a valid SOTA and POTA activation in 17 minutes.
Even though I knew I needed to pack up soon, I decided to hit the CW portion of 17 meters before signing off. I started calling CQ and was rewarded with sixteen additional stations in eighteen minutes.
Phenomenal!
All in all, I logged 41 stations.
Here’s the QSO Map of my my contacts–green polylines are CW contacts, red are SSB (click to enlarge):
A welcome interruption!
If you watch my activation video, you’ll note that as I moved to the 17 meter band and started calling CQ, another hiker popped in and introduced himself.
Turns out it was Steve (WD4CFN).
As Steve was setting up his own SOTA activation on Mount Pisgah next to the observation deck, his wife, Patty, heard my voice off in the distance giving a signal report.
Steve and I had a quick chat and coordinated frequencies so we wouldn’t be on the same band at the same time and interfere with each other.
After finishing my activation, I stopped by the observation deck and spent some time with Steve and Patty as Steve finished his SOTA activation and packed up his gear.
Steve was also using an Elecraft KX2 and strapped his telescoping fiber glass mast to the side of the observation deck to support a wire antenna. Very effective!
Hazel and I hiked back to the trailhead with Steve and Patty. It was so much fun talking ham radio, QRP and SOTA with kindred spirits. What an amazing couple!
Steve and Patty were actually on a multi-day camping trip in WNC and planned to hit two more summits by end of day. In fact, I got back to the QTH *just* in time to work Steve (ground wave!) at his second summit of the day. It was fun hunting someone I had just spent time with on a summit!
Steve and Patty: Again, it was a pleasure to meet you both!
Hazel and I both needed a little trail time that Tuesday morning. Hiking to the summit in the low clouds, taking in the views, enjoying a stellar activation and then meeting new friends? It doesn’t get any better than this.
I’ll say that I do love the Elecraft KX2 and CHA MPAS Lite combo. It makes for a compact and effective SOTA pairing that can be deployed so quickly.
A couple months ago, I ordered a SOTAbeams Tactical Mini fiberglass telescoping pole. I plan to pair it with my QRPguys tri-bander kit antenna.
If I’m being honest, though, I find that the CHA MPAS Lite is so quick to deploy–like 2-3 minutes tops–I’ve yet to take the Tactical Mini and Tri-Bander to a summit. No worries, though, as I will eventually deploy this pair on a summit. Admittedly, I need to work on my mast guying skills in advance–let’s just say that I’m still in that awkward stage of struggling to manage each guy line as I try to keep the Tacmini vertical during deployment. I welcome any tips!
I hope the first two parts of my SOTA journey with Mark, NK8Q, has been interesting reading. It is really tough to put into words what the trip meant to me. Back in November I had my left knee replaced, and was preparing myself to possibly not be able to enjoy the luxury of being able to walk, run, hike and backpack. I never would have dreamed by the time this SOTA journey started that I already would have walked a half marathon on the new knee, nor be able to hike up summits. I have been truly blessed to be able to continue to do the things I enjoy. SOTA and POTA over the past year has renewed my interest in the hobby.
After we left Stony Man Mountain, we headed to the campground we were staying at along Skyline Drive. We lucked out earlier in the day by randomly arriving around 11:45 a.m. at the campground and even though the sign said it was full, the park ranger said to wait 15 minutes because there could be some checkouts right at the cutoff. We waited it out and at noon the ranger confirmed we had a campsite! Perfect…after 2 days of staying in motels, I finally got to camp in my new tent.
Once settled in, I thought it would be a good evening to set up my antenna and operate a little “late shift” on POTA – Shenandoah National Park (K-0064). I was just a bit too far off the A.T. to make it a “twofer”. This yielded 16 QSOs and then called it a night.
The next morning was also the last day of our SOTA trip. I woke up after a pretty restless night due to the fact my old body cannot tolerate being so low to the ground. I believe the last time I slept in an actual tent was in 1981 in boot camp at Parris Island. I am now a hammock camper and it sure feels much better on the back. So, back to the story. After breakfast we packed up and drove to the first of two SOTA summits before heading home.
The first was Pinnacle Overlook (W4V/SH-005). The climb took an unexpected wrong turn from the parking lot but quickly rectified. The hike to the summit was fairly steep, but there was beautiful flowers and rock formations and the summit was aptly named The Pinnacle. What a beautiful view of the Shenandoah National Forest.
We saw several thru hikers on our hike both up and back down the mountain after the activation. Several were interested in our ham radio operations. I found a perfect spot to operate from right along the Appalachian Trail and off to my left I could look over and see the view. I had 20 QSO’s and the bands were in decent shape.
It was time to head back down to the parking lot and continue our journey to the next stop, Hog Back Overlook (W4V/SH-007). There wasn’t much of a view once we climbed to the top of Hog Back, but met more through hikers, including one lady who was wearing a hat from Boston Marathon. Her trail name was GiGi, which is her Grandma name, which is also my wife’s Grandma name. She decided at age 65 she was going to hike the entire A.T. and had already run the Boston Marathon, so this was a bucket list item for her. I told her hiking the entire A.T. is my goal in 2026 when I’m retired and was nice to know there are hikers in our age group that are still able to accomplish these things. We gave her some trail magic, and Mark and I continued on our way to the top of the summit. There wasn’t much besides an old building which may have been a ham radio shack at one time, and some towers but not much of a view. We did a fairly quick activation and I had 12 QSO’s before packing it up. (I almost thought I heard the sound of banjos playing up there.)
We made a couple of other stops along the Skyline Drive, one was for the tunnel that was built along the route, and another stop to see the scenery from the outlook. It was time for me to start heading back to Lancaster County, which was about a 4 to 5 hour drive and Mark had two other summits he wanted to visit. What I did not expect to see at the one stop to look at the views was a lady who was sitting along the rock fence painting. I asked her if I could take a picture of her holding the picture she was painting and she gladly agreed. It took her about an hour to paint it and was finishing up when I arrived. After I left I regretted not thinking to ask her if I could have purchased the picture!
I arrived home around 5:30 pm on that Sunday evening and was completely exhausted. Mark sent me a text and told me at his next summit he was on the trail and saw GiGi again.
Thankfully, I had taken Monday off for a vacation day because I was exhausted from all the traveling Mark and I had done in 4 days. In addition to the driving, we did a lot of walking to the summits and operating. It was an experience neither of us will ever forget. We are already starting to plot our plans for next year for another adventure.
I’d like to thank Mark for putting this trip together and plotting out which Summits to do on each day and the best way to navigate to each destination. The hikers on the trail were all wonderful, and some of them asked questions about what we were doing, especially when we had our fishing poles at the summit with no trees. I used the HAMRS program for the 4 days, and other than some operator error, the program worked flawlessly. I especially would like to thank Thomas Witherspoon for allowing me to share my story on QRPer. Tom is an awesome ham and we share many of the same interests for POTA or SOTA, and we both enjoy antenna experimenting and our passion for QRP operating. Thank you again Thomas for the opportunity to share my experience, and I hope you enjoyed my SOTA experience.
Many thanks to my friend Ollie–an SWL in Germany–who shares the following guest post:
German spies are eavesdropping on you!
I recently made the first all-night listening sessions at the German North Sea coast for this year. On the night of June 10th/11th I picked up 2 POTA SSB activations over here and I thought you guys might find it mildly interesting what that sounds like here. 🙂 Condx were just going down from “slightly elevated” to “regular solar minimum” values that evening.
RX was an Icom IC-705, antenna is a 10m/33′ lazy monopole (running 10m wire vertically up a fiberglass pole, no counterpoise, no matching network, balun, flux capacitor, just a wire and pretty conductive ground).
Video: KI5OLV activating K6574 (Lower Neches Wildlife Management Area, TX), around 1:40 UTC
Video: W8CFS activating K-1552 (Warren Dunes State Park, MI), around 23:00 UTC, condx to the stateside were dipping at that time
I don’t know that W8CFS had brought to his park, KI5OLV brought an IC-7100 and was running its 100W into a hamstick antenna on his truck. Nothing to learn from that really, I’m just happy I can hear y’all! 🙂
A few weeks ago–out of the blue–I received a QRPver Minion SDR operator’s manual in the mail. From the return address, I couldn’t determine why I would have received it–in fact, I assumed it was sent to me in error.
Still, I read through the manual because I came very close to purchasing one last year. I had seen the Minion SDR transceiver on Gil Grusome’s channel Radio Prepper.
A few days later, I received a USPS Priority Mail box in the post. Again, scratching my head, I opened it to find a QRPer Minion SDR transceiver inside! Woah!
The fellow who sent it included a kind note saying that he wanted this to be considered a contribution to my work here on QRPer and YouTube. He noted some of the Minion’s shortcomings (which Gil had also pointed out) including how sensitive it is to any RF coming back from an antenna. I’ll need to build an RF choke for sure.
I could tell from his note that he’d rather remain anonymous, so I respect that.
Thank you so much for passing the Minion along! I look forward to putting it on the air! It is an incredibly tiny radio–much smaller than I had even imagined.
I’ll need to take it to my buddy Vlado for a minor repair up front. Somehow, when I plugged a speaker into the audio jack, I broke it off the circuit board. It can easily be fixed by Vlado with a little outpatient surgery. 🙂
Thank you again to the kind subscriber/reader for passing along his Minion. I’ll put it to work!
I told Thomas I would do my own field test of the Xiegu X5105 doing a couple of Parks on the Air activations and what I thought of the radio.
I have had several radios I’ve used on POTA and SOTA activations over the past year and without a doubt my favorite radio for out in the field is my ICOM IC-705. It has everything I want in a portable radio, however I’m also enjoying it alongside my ICOM IC-7300 in the shack. Therefore I’ve looked at other portable radios for field use.
My latest acquisition was a used Xiegu X5105 that I purchased used on QRZ. The radio works fine and for the most part the menu system with it is very easy to understand. As Thomas has pointed out, the CW memory is absolutely insane to use. It just makes no sense to me why with the 10 memory slots that it’s really impractical to use more than the memory in Slot 1, which for me is the CQ POTA. I would never even have known how to set it up in the first place without instructions to Tom that was shared in Tom’s post regarding the X5105.
I got the radio on June 3, played around with it in the shack to get familiar with it and programmed in the memories. I went to K-5481 (Wm. Penn State Forest), which has several parts scattered around eastern Pennsylvania. It has a very small 10 acre tract in the Cornwall mountains between Lancaster and Lebanon County, which is also at a SOTA summit. I used my Sotabeams EMCOMM III antenna and turned on the radio to start calling CQ POTA. For the life of me I could not get the CQ message to send, so I gave up on that and used my CW Morse paddle and did it the old fashioned way. I also spotted myself on the cluster and made 3 QSO’s on 40 meters fairly quickly. I had success on 30 and 17 meters as well. In total, there were 10 QSO’s made in about 45 minutes.
Other than my disappointment not being able to easily send the CQ from memory, overall I was pleased with the activation. When I got home I investigated again how to send CW. I also learned how to use the DSP to make it more narrow on CW, which I was thankful for. I then started to see if I could go hands free using my Heil headset that I was able to use when I had the G90. Unfortunately that did not work at all using the AD-1-iCM adapter as it would not transmit with the foot pedal. I did use the Heil headset in the side jack and put the radio in headset mode. I was disappointed to find that I had to increase the volume up the whole way to be able to hear CW loud enough for my old ears. When I unplugged the headset suddenly the radio RX was very loud. (If anyone can offer a solution, please let me know).
Today I took it to my local POTA park near my house, K-1418 (Samuel Lewis State Park). I used the same Sotabeams antenna and was on the air in no time. Band conditions were not so good and I ended up with 18 QSO in just over an hour. It was nice having the CQ function working, however I am used to the interval where it would automatically send every 7 seconds like the IC 705 does. Not a big deal, I just had to press the PTT button on the top.
I never tried using the radio on SSB before so I called unsuccessfully on 20 meters and went to 40 where KM4JEG called me and gave me a 55. Sadly, I had to take my headset off because when I keyed the mic I was hearing my distorted voice through the headset. So, headset was removed. I didn’t expect that was going to happen, so now on SSB, I’m not able to use the headset, at least on TX.
The Good:
I really like the internal battery in the radio. I did not have to bring the Bioenno 12v 3aH battery along. The internal battery works great!
It is very portable. I watched a YouTube video, and unfortunately I cannot find who it was, but they had an Osprey UltraLight Roll Organizer which I purchased on Amazon. This is perfect for storing the X5105 and the few accessories it needs, in my car so I’m always going to have a portable radio available when I travel.
The ATU is great on the radio. I can tune all the bands I want to work with the Sotabeams antenna. This also saves having an extra wire and external ATU like I would have to use on the IC 705 with this type of antenna.
The radio is nice and portable and will store nice in my car when not in use and will be ready to go.
The Bad:
The CW presets are almost worthless and not easy to get to. Once I found how to send from the memories, it only really makes sense to use one of the memory slots. I wouldn’t easily be able to switch to a 73 menu shortcut, then go back to the CQ memory.
With the headset plugged in, when I was transmitting CW, I could hear some distortion while it was sending, however it was not too bad, but something I’m not used to hearing.
The Ugly:
The headset for SSB could not be used at all due to the distorted noise it made. Also, the volume for the headset and the volume through the radio are night and day. As I mentioned before, when I unhooked the headset and the audio came out of the radio again, I had to quickly adjust the volume down.
My Opinion:
Overall, my opinion of the radio is this: For the price and the features it has, I would say it’s a good field radio, as it is easy to store in the car, it has the built in ATU if being used on a random wire antenna, and for 5 watts, people had no problems hearing me, even with poor band conditions and QSB. I hope this radio grows on me, and in the back of my mind don’t find myself thinking during the activation, gee I miss my IC-705 out here.
I know comparing the X5105 to the IC-705 is like comparing apples to oranges. Each radio has it’s good and bad. For the price difference, the Xiegu definitely is worth the price. I would never use it as a first HF radio in the hamshack if I were a new ham. This radio is also not going to be used by me on digital modes. If I want to do digital or work a contest while doing a POTA, then there is no doubt the 705 is coming along for the activation. The Xiegu will be used by me when I want to use a random wire antenna since it has the built in ATU, along with the fact it will be light in the backpack if I am hiking to a summit, and the IC 705 will be used with one of my end-fed half wave antennas or the Hustler vertical array so I don’t need the mAT-705 which I’ll use in the hamshack. I’m trying my best to get away from wires all over the place when I activate, so the laptop computer is staying home. I really like the HAMRS logging program, which I highly recommend, on my Android Samsung S-20.
If anyone who reads this who has some insight into some of the issues I mention, please reply so I have a better understanding of this radio.
73!
Scott KN3A
Scott Lithgow (KN3A) is a contributor on QRPer.com. Click here to check out his previous posts.
Many thanks to a number of QRPer readers who note that WA3RNC has recently introduced the TR-25 CW Transceiver Kit and announced the upcoming TR-45L QRP Transceiver Kit.
Here is a compact but powerful 2-band CW transceiver kit that uses no tiny pushbuttons, and without those seemingly endless and hard-to-remember back menus. There is a knob or a switch for every function!
Size 5 ½ X 3 ¼ X 1 ½ less protrusions, weight 10.6 Oz
Full band coverage of 40 and 20 meters
About 10 watts output with a 14 volt power supply
5 Watts minimum output with a 10 volt supply
4 Watts output with an 9 volt supply
Optimized for operation from 3 series-connected 18650 Lithium cells
RIT tunes + and – 5KHz
Blue OLED display reads frequency to 10 Hz and RIT offset
Built in Iambic keyer is adjustable 5 to 35 WPM with front panel control
Separate jacks for straight key and paddles; Always ready for SKCC contacts
Operates on 9 to 14 volts, < 90ma receive, about 1 Amp Xmitt at 10 volts
Selectable tuning resolution steps of 10, 100, and 1000Hz
Low battery indicator with internal adjustment 9 to 12 volts
Front panel adjustable RF gain control
Front panel TX power control; Adjustable from 0 to 10 watts (@14V)
Rugged TO-220 FET RF amp can deliver 5 Watts key down for 5 minutes
Signal quality blue LED, RIT warning orange LED, Low battery red LED
More than enough audio to fill any room with an external speaker
Excellent receiver sensitivity with MDS of -132dBm (0.06 microvolt)
Very effective receive AGC prevents ear damage with strong signals
Transmitter harmonics and spurs -58dB, meets FCC specs
CW sidetone is the actual transmitter signal as heard by receiver
Match the received signal tone to the sidetone for perfect zero beating
Sharp IF filter; Better than 300 Hz at the -6dB point, plus 700 Hz audio filter
Over 200 machine placed SMT parts, and about 55 user installed parts
All critical circuits are factory pre-aligned and calibrated
No endless “back menus”; There is a control or switch for every function
Options include pre-wound toroid coils, precision optical tuning encoder, and complete factory assembly
Price is $250 or you can add pre-wound toroids for $18, a precision optical encoder for $30, or for $310 you can purchase this kit fully assembled and tested. Click here to check it out.
TR-45L is a 4-band 5-watt CW transceiver covering the 80-75, 40, 30, and 20 meter bands.
Full band coverage is provided, with the transmitter optimized for the CW band portions.
The receiver is provided with both narrow and wide band IF filters, and CW and SSB detectors.
An illuminated front panel meter shows “S” units on receive, and power output (forward or reverse) while transmitting. The meter also will display the battery state of charge.
A “High SWR” warning indicator will illuminate if the antenna SWR exceeds about 2:1.
The transmitter power output is adjustable from less than ½ watt to 5 watts with a front panel control.
RIT is provided to adjust the receive frequency up to + or – 5 KHz from the transmit frequency.
Two VFOs for each band are provided with recallable memories.
A built-in keyer is adjustable from about 5 wpm to 35 wpm with a front panel speed control.
Separate straight key and keyer paddle inputs are provided on the front panel.
A front panel adjustable sharp notch filter is provided to null out interference.
A front panel receiver RF gain control is provided.
Operates from a 12 volt nominal power source requiring up to 1.3 amperes on transmit, and about 130 ma on receive. A front panel power on – off switch is provided.
Tuning speed is easily settable from 1 Hz to 1 KHz per step.
A selectable dial lock is available to prevent inadvertent frequency changes.
There is a knob or switch for every function – no confusing back menus!
Size 8-1/2” wide, 5” high, 3” deep Weight about 2.8 lb with Internal Batteries
Beta testing is continuing…73 de WA3RNC
No pricing or availability has been noted yet.
I life the look of both of these kits. I love the fact that you can buy pre-wound toroids as this is often one of the more complicated parts when building radios. Also, I’m pleased to see that all SMD components are pre-installed and that all critical circuits are factory pre-aligned and calibrated. That will make this kit accessible to a much larger kit building audience.
If you live here in the States and like to play radio in the field, I highly recommend one of the DeLorme Atlas & Gazetteer issues.
Although I use electronic devices like smart phones and dedicated GPS, it’s always nice to have a paper map. I always have one of these Gazetteers in my car. You should never be without a paper map, I say.
I love the Gazetteer because it shows lines of elevation and every/any possible road and trail. It’s incredibly useful for finding summit road and trail access points and also for finding game land entry areas.
Funny, but I opened my new Gazetteer while still in the parking lot of the camping store and almost instantly spotted a brilliant new access point for the Overland Victory trail in Morganton. It’s an even better activation spot than I’ve used in the past.
Last year, I wanted to purchase the latest edition for North Carolina but I’m sure due to the pandemic, they were as rare as hens teeth!
The other week, I found one in a local camping store and grabbed it! The store owner told me he’d only gotten a handful in recently and had been out for months. Check for one at your local camping store, book store or outdoor center. If you can’t find one there, check Amazom.com (affiliate link).
I’m a huge map geek. Although I don’t recall them including topographic information, when I lived in the UK, I was a massive fan of A to Z road maps for their design. I’d love to know if there’s a topo map equivalent.
If you live outside the US, I’d love to know what maps you use for your field activities! Please comment!
Connecting an international community through low-power field radio adventures.
Please support QRPer by adding us to your whitelist in your ad blocker. Ads are what helps us stay online. All of our ads are ham radio related--no junk, we promise! Thank you!
 Many thanks to Paul (VP9KF) who notes that Ofcom have recently published their amateur radio user’s guide to the new EMF licence condition.


