A completely under-prepped SOTA & WWFF activation which turned out to be perfect
In preparation for a tough conversation a good friend once told me: “You know what, just walk into the fire. If you have bad news to deliver, don’t sugar coat it and do it right away. You’ll be fine.”
“Just walk into the fire.” I believe this can be applied to many other situations in life. While I would consider myself to be well-prepared on most trips, hikes and activations and getting a lot of joy out of optimizing my kits I try to stay open-minded. Imagine the things you would miss out on if you wouldn’t be spontaneous or only do things while fully prepared and 100% safe – even if it means taking risks.
The QCX-Mini silently drying after a successful activation
Last Wednesday, I kind of walked into the fire. Not fire as in fire-fire but fire as in Latvian winter storm. In general this wouldn’t be such a big deal had I brought the right clothes, gear and shoes to my short business trip to Riga.
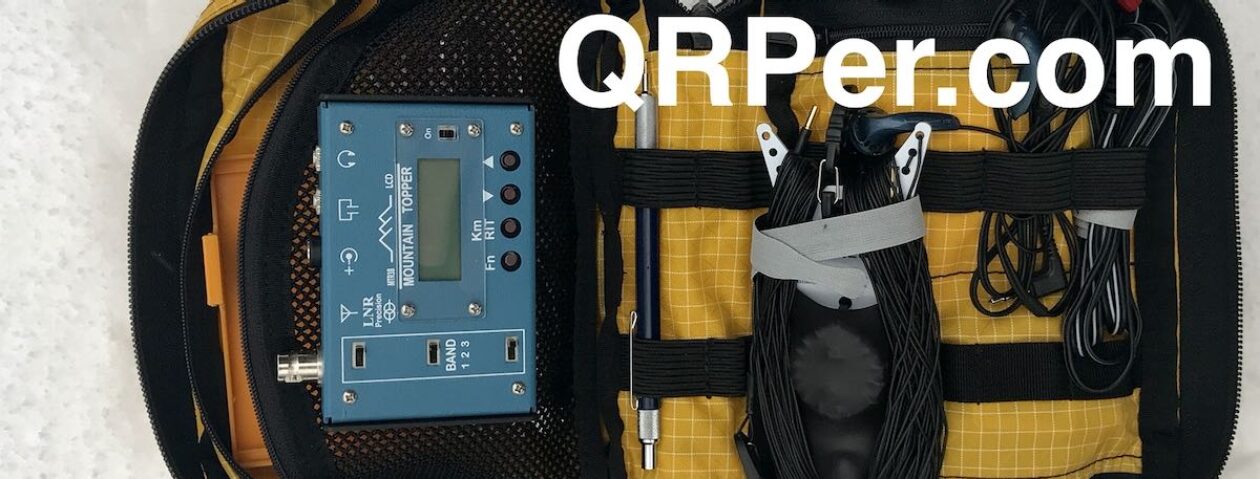
Due to very strict luggage restrictions I could only bring one small backpack for three days. Inside I had enough room for a laptop, washbag, spare clothes and the compact QCX-Mini Kit I built for exactly these occasions. I was wearing sneakers and jeans. At this point I had not planned a specific activation but I wanted at least to be able to operate YL/ & /p maybe 30 minutes from a nearby park – not a problem if you can jump right back into the warm hotel afterwards.
My rental car rocking summer tires in Winter (yes, I was driving veeeeeeery slowly)
During our stay, my schedule for Wednesday morning freed up so I decided to try activating one out of only three SOTA summits in Latvia: YL/YL-003. It turns out this summit is also located within WWFF territory YLFF-0007 about a 1,5h drive from Riga. Big Thanks to Val (YL2SW), Latvia’s WWFF manager, for assisting me with local rules and processing my log. A quick look at the weather forecast showed freezing temperatures, 90% chance of snow, heavy winds and overcast. Many of you will understand why a SOTA&WWFF combo in a rare country could be a small reason not to use the hotel’s sauna on a day like that. Sometimes things just need to get done.
The majestic watchtower on YL/YL-003
I got up early the next morning and was very happy to be able to grab a Bolt rental car from the street and get going quickly. The drive went by without issues up to a point just about 3km away from the mountain (well, 1-pointer hill I should say). The roads were completely covered in snow so I could barely see where I was driving. Latvia is a rather flat country but here it started to get a bit hilly and the tires were certainly not cut out for that. Continue reading CQ From Latvia with Love→
How I found the best antenna for my SOTA/POTA activations
by Thomas (DM1TBE)
Intro
Until January this year I had a German “Klasse E” / CEPT-novice amateur radio license (equivalent to the US General Class), which limits the use of HF to the 10-,15-, 80- and 160-meter bands. When I started with SOTA I used homemade single band end-fed antennas most of the time. However, that is only feasible for the 10- and 15-meter bands.
Unfortunately, both bands are very moody and sometimes they have not worked at all. Unlike the UK for example, FM is uncommon for SOTA in my home association DM (i.e. Germany Low Mountains). You can be lucky and get your 4 QSOs, but I did not want to rely on pure luck.
Therefore, I bought an end-fed half-wave antenna for 10-, 15-, 20-, 40- and 80-meter bands, after some experiments with 10-80-meter end-fed half-wave antennas, from a small German company called ANjo.
Although I could not use the 20- and 40- meter bands at that time, the EFW80-10P (en: auto-translated) antenna gave me the possibility to use the 80-meter band. The antenna could also be tuned for 15. It has a mechanical length of 23.6 m / 77 ft and a coil for the 80-meter band. It is pretty lightweight with 0.4 kg / 14 oz and allows up to 30 watts PEP – more than enough for me. 80-meters is not the best band for daytime SOTA activations, but in 21 months doing SOTA activations, it worked 37 times and tipped the scales for an activation from time to time.
It was sometimes a bit tricky to raise the long wire into the air, but it always worked … better or worse …somehow … like here in the woods along a trail.
In January this year, I upgraded my license and a new world of HF-bands opened for me. Although I have learned a lot about propagation for the exam, I am in favour of a German saying: “The difference between theory and praxis is larger in the praxis than in the theory”. Continue reading How I found the best antenna for my SOTA/POTA activations→
POTA and I had a very one-side relationship so far.
Roughly a year ago I tried to activate a park, but although I spotted myself, I had not been able to make a single QSO. In April last year, I tried it again, with the same result. Luckily, I was on a SOTA summit and spotting me on SOTA brought me enough QSOs to make it a successful activation for both, POTA and SOTA. So I decided to disregard POTA and my only POTA activity was watching Thomas (K4SWL) nice videos on YouTube.
My bad experience with POTA was probably due to two factors:
I only had an intermediate license previously, which limited me on HF to the 10, 15 and 80 meter bands and
POTA was no as popular in Europe and Germany in particular as it was and is in the US. While SOTA and the Flora & Fauna program already had a very active community in Europe for years, POTA had a hen and egg problem.
However, with the increasing popularity of portable operations, POTA has also gained some traction in Europe. I have the feeling that every time I take a look at the spots on the POTA website, I see more European stations.
Things here in Germany have changed for the better, too. POTA got a German website (parksontheair.de) and a community called “Draussenfunker.de” (“Outdoor ham”) with website + Discord that became very active with those pursuing outdoor activities in general and POTA in particular. Lately, local POTA coordinators have been named, who started to add new parks to the program.
I thought suggesting a recreation area close to my home would be a good idea. A few days later I had the brand new POTA park DA-0410 30 minutes away. The park has a size of 6.3 km² / 1,567 acres and a peak elevation of 780 m / 2559 ft, which is also the SOTA summit Kaltes Feld (DM/BW-659).
My plan was to operate from the clearing on the top plateau, where there is also a mountain hut with restaurant. The 2 km / 1.25 mi trail was not very difficult with an incline of just 105 m / 344ft as the parking area is already at an elevated level.
Although the park extends to the proximity of the parking area at the Hornberg gliding airfield, I wanted to be in the SOTA activation zone due to my bad experiences with POTA activations. The gliding site was founded nearly 100 years ago. After the First World War, the Allies largely banned motor flight sports in Germany, so gliding airfields, such as this one, popped up across Germany. Continue reading Guest Field Report: Germany has a new POTA activator!→
Many thanks to Thomas (DM1TBE) for the following field report:
Shivering with 18 WPM on the ruins of the medieval Hohenstaufen Castle
by Thomas (DM1TBE)
Intro
It had been two weeks since my last field activation and my bad conscience grew, so a friend and I scheduled an activation, even with expected temperatures at -2 °C / 28 °F. The choice fell on the summit Hohenstaufen (DM/BW-102).
The Hohenstaufen is one of the two SOTA summits that I can see from home in Southern Germany and one of the so-called group Drei Kaiserberge – the middle one does not qualify for SOTA, unfortunately.
A Little Bit of History
On top of the summit are still ruins from the medieval Hohenstaufen Castle. The castle was built around 1050 and used until 1525, when it was looted and burned down during the German Peasants’ War. The summit has been populated since at least the 8th century.
The castle (picture from 1470 above), was the seat of the Hohenstaufen dynasty to whom belonged several Kings and three Emperors of the Holy Roman Empire, which, at its greatest extent, included the area of Germany, Switzerland and parts of France, Austria, Italy, Czech, Belgium, Netherlands, Slovakia – or easier: almost all of Central Europe.
There is not much left of the castle nowadays, but you can still spot parts of the foundations and walls.
Equipment
Due to the positive experiences during the last two activations, I decided to go with an end-fed half-wave antenna for the 30 meter band along with my Elecraft KX3, a 4Ah LiFePo4 battery, a 10 m / 33 ft fibreglass pole and the BaMaKeY TP-III (a 70 g / 2.5 oz light magnetic paddle). The paddle is too light for me to use, so I usually attach the magnetic base of the paddle to a metallic clamp on a clipboard. Although I studied computer science, I prefer pen and paper for logging. Part of the fun is the guessing of the logged call signs after an activation.
Many thanks to Thomas (DM1TBE / M0KEU) who shares the following SOTA field report he also shared on the excellent SOTA reflector.
How two Scottish SOTA activations encouraged me to upgrade my German license
by Thomas (DM1TBE / M0KEU)
I just wanted to tell someone this story. Not sure if you want to hear it, but I will tell you anyway
During June last year, my boss asked me if I could step in for an ill colleague and visit a business partner in Frankfurt and Edinburgh. As a SOTA activator, I first checked the map and have happily spotted a summit within walking distance of the hotel in Edinburgh.
Unfortunately, there were three issues to solve:
The UK does not accept my German “Klasse E” (CEPT novice/intermediate) license;
operating a radio on the summit requires written permission and
as the duration of the trip was planned with just 2 overnight stays, only hand luggage was possible.
At the Ham Radio in Friedrichshafen, I asked an RSGB representative if it is possible to get a British license as a German. Mark, M1MPA, explained to me how the process worked, so I started the online course provided by GM6DX. It was not too difficult, and I soon passed every mock exam. Roughly, two weeks before the trip, I passed the RSGB operated online exam and got my UK foundation license, so I could operate in Scotland as MM7TBE.
Regarding the issue with the permission to operate on the summit, I first chose to ignore and pretend being a stupid foreign tourist until I was told that it is really enforced, and my activation could be deleted. So, I asked the Ranger Service at Historic Environment Scotland for permission less than two weeks before my activation and received it just one day later with a comment that it is usually expected to ask one month in advance. Many thanks to the Ranger Service, next time I will come earlier – I promise!
The last issue was the size of the equipment.
There is no tree on top of the summit Arthur’s Seat GM/SS-272, and I had very little space left. So I went with a KX3 with an AX1 antenna and a FT2D for 2m FM.
Now the journey could begin.
On the first day, I was at a very high place in Frankfurt but unfortunately, it did not qualify for SOTA. That evening I arrived in Edinburgh.
The next day, late afternoon, the fun could start.
Many thanks to Skip (K4EAK) who shares the following guest post:
The QRPguys DS-1 Portable Antenna Kit
by Skip (K4EAK)
There have been several videos and extended comments lately about the Elecraft AX1 and AX2 antennas, both of which function remarkably well for a small, highly compromised antenna.
For those interested in other, similar designs, especially those hams who find that building the equipment is half the fun, another option to consider is the QRPguys DS-1 antenna.
The DS-1 is similar in concept and design to the AX2. It consists of a base-loading coil, a 46.5-inch collapsible whip, and a plate to attach the antenna to a small tripod. One can also purchase an add-on 40-meter coil. The can be deployed in just a couple minutes and, when collapsed, the longest portion is only 6.5” long, easily fitting in the palm of one’s hand. QRPguys recommends a 16.5′ counterpoise; I use two such wires, usually spread out at a 180-degree angle. I’ve also used it with a clamp-on mount and a car window mount.
Building the antenna is simple and took me less than an hour. After installing a BNC connector into a brass plug and inserting the plug onto a length of PEX tubing, one simply runs the supplied 22AWG wire from inside the tubing, out and around making 22 turns, and then sealing it with a length of heat shrink tubing.
There are really only two aspects of assembly that are slightly more difficult. The first is that it’s necessary to drill and tap two holes for 4-40 screws, which obviously means that (1) one needs a 4-40 tap and (2) one needs to be careful tapping the threads to assure a clean cut. The second is that the heat shrink tubing, at least as supplied in my kit, was grossly oversized, which required some finesse in getting a final product that was at least reasonably aesthetic, to say nothing of accomplishing that without dry roasting my fingertips.
Field testing of the DS-1 shows that it works surprisingly well. The SWR is well below 2.0 across almost all of the 20-meter band and where it is higher than that (the upper end of the voice portion), the KX2 internal tuner can tune it easily. As one would expect, on 40 meters the antenna has a somewhat narrower range, although the KX2 tuner has handled it on all of the frequencies I’ve tested so far (all CW). And it appears to be efficient enough.
I have used it on numerous activations and consistently get to the requisite 10 contacts within 20 minutes or so after getting spotted. After that, the number of contacts depends on the time available, but for those occasions when I have only a 30-minute window for an activation, the antenna is a convenient and practical alternative.
I keep the antenna, the tabletop tripod, and the counterpoise wires in the water bottle pocket of my pack, ready for use whenever I have a few moments for a quick activation.
Many thanks to Conrad (N2YCH) who shares the following field report:
AX1 Test using American Radio Supply AM-801 Window Mount: POTA Activation at Stuart B. McKinney Wildlife Refuge, K-0228
February 19, 2023
By: Conrad Trautmann (N2YCH)
If you’ve been reading the posts here on QRPer.com lately, you probably already know that the Elecraft AX1 has proven to be an excellent antenna for POTA activations for CW, SSB and Digital modes.
Personally, I used it for a New York City POTA rove I did at the end of 2022 and was able to activate four parks in one day all over Manhattan.
Recently, Alan, W2AEW contributed a story to QRPer.com detailing how he used a window bracket he constructed with an AX1 to do a CW park activation from his car. I’ve actually done a few digital activations from the car using the AX1, however, I used the tripod with the Elecraft tripod adapter and ran coax to it out the window and draped the counterpoise down the hood or trunk. This has worked well except for windy days where it would blow over. I was intrigued by the possibility of using the window mount and a number of the commenters to Alan’s post suggested sources for these types of mounts. I ended up ordering an AM-801 from American Radio Supply.
Since the AX1 depends on a counterpoise wire to operate properly, the first thing I did after receiving the AM-801 mount was to drill a hole in the base for a screw and a wing nut. The base is painted black, so I got my continuity meter out to double check that the screw was making a good ground, which it was. I had to bend the mount up slightly for the antenna to be vertical, since my Jeep windows don’t have much of an angle to them. I’m sure it would be just right for most cars.
(This article is full of educational and fun links – click on as many as you wish)
Antenna tuning on Superb Owl Sunday
by Vince (VE6LK)
While many in North America were watching a number of Superb Owls move a pigskin around a playing field, I was off to play radio, successfully, for the first time in weeks. This is part of my goal to activate 200 CW POTA contacts per month this year.
During recent visit to Vancouver attempting to operate from within my hotel room, and utilizing the Edisonian Approach, I was shown -more than once- what did not work. This will no doubt be a discussion point on an upcoming Ham Radio Workbench Podcast. I was therefore in very bad need to get back on the air while operating portable. I was close to feeling twitchy and in need of some POTAXXIA (Hyperradio Moduzolium). A plan was needed!
My goals were to trim out a new-to-me EFHW (thanks VE6VID), and make some contacts while operating outdoors. The weather was forecast for 50F, but turned out to be unexpectedly windy. Also, when the wind comes off the Canadian Rockies in Southern Alberta, it cools the area where I’d be (downwind), so a choice of operating location was key. I love going to this park for the moment that you drive west along Highway 533 and come around the corner as you see here in this short video.
Chain Lakes Provincial Park (VE-1168) is located between the Porcupine Hills and the Rockies on Highway 22 (locally known as the Cowboy Trail) in Southern Alberta, about 90 minutes south of Calgary. It’s especially gorgeous at sunrise and sunsets. A campground, lake with boat launch and a day use area all adorn this park created for water management with an earthen dam. While it is in a valley, the wind can be howling on some days. On this day it would prove to be just above a nuisance, sort of like mosquitos in the spring -you can live with the nuisance, but only for so long before you blow a proverbial gasket.
I located a lovely spot below the dam -and the majority of the wind- however it was outside of cellular range. I’d need to rely on the Reverse Beacon Network to spot me. The RBN will, in turn, post your spot to the POTA website once it hears you if you schedule your activation in advance.
RBN showing spots on 30 to 10mOverhead site view showing my two operating positions
The place I found would only be more perfect were it warmer than 45F and without wind. A babbling brook was by the picnic table, and a nearby footbridge had built-in supports for my painter’s pole that would serve as the far end support. I’m pretty sure that they weren’t intended for me specifically, but they were the perfect size to simply slide the pole into place and hold it firmly. By luck I parked the truck the correct distance away with it’s drive-on mount and 28′ Fibreglass Flagpole from Flagpoles-To-Go via Amazon. Continue reading VE6LK: Antenna tuning on Superb Owl Sunday→
Many thanks to Brian (K3ES) who shares the following guest post:
The VK160 Antenna packed on its Winder/Feedpoint for storage, transport, and deployment.
Building and Testing the VK160 Antenna
by Brian (K3ES)
The ability to set and achieve long- and short-term goals keeps me interested and active in the Parks on the Air (POTA) program. Often these goals are associated with POTA awards. Currently, I am working slowly to complete the activator version of the James F. LaPorta N1CC award, which requires an activator to make QSOs on 10 amateur bands from 10 different parks. With my operating style, I have found it achievable to make QSOs on the 9 available HF bands (80m, 60m, 40m, 30m, 20m, 17m, 15m, 12m, and 10m), and this has become easier with the rising solar cycle. I have completed QSOs on non-HF bands using 2m and 70cm simplex. The other options to pick up 10th band QSOs include the 6m band and the 160m band.
I have found it difficult to make unscheduled POTA contacts on 2m and 70cm, and scheduled contacts can be difficult to arrange in parks that are remote from population centers. I have built a 6m antenna, but contacts are seasonal (and for me very elusive). So I started looking for a way to add 160m capability to my portable station. Ultimately that resulted in homebrewing a new antenna that I now call the VK160, and here is its story.
Objective
I needed a field-deployable 160m antenna. My operating style requires that the antenna system be both light and compact. QRP power levels are sufficient for my purposes. I am very comfortable deploying wire antennas in the Pennsylvania woods, and QRP wire antennas can be both light and compact. I have found that end-fed antennas are simpler to deploy in the field, because they can be configured as an inverted V or as a sloper, using only one point of support.
An end-fed half wave (EFHW) antenna would be naturally resonant, but would need to be over 250 ft (76m) long. A wire antenna of that length would be challenging to deploy, even in more open areas. So, I decided to pursue a 9:1 unun-based end-fed “random wire” (EFRW) antenna. In fact, I have two commercial EFRW antennas available, but have never been successful in tuning them for 160m using the ZM-2 tuner in my field kit. So, I concluded (probably incorrectly, but more on that later) that I needed to build a 9:1 random wire antenna with a longer radiating element than the 71 ft wire built into my largest existing EFRW. I also wanted to build this antenna myself, using available components, so that it would be both inexpensive and customized to my needs.
I broke the task into four parts:
First, I needed to build a 9:1 unun suitable for use at QRP power levels. The 9:1 unun is an autotransformer that reduces antenna feedpoint impedance by a factor of 9, hopefully a level that a wide-range tuner can match to the 50 ohm transceiver impedance.
Second, I had to design and build mechanical elements of the antenna system, incorporating the electrical components needed for the feedpoint.
Third, I needed to select a suitable non-resonant wire length for the radiator.
Finally, I needed to deploy and test the finished antenna on the air. If successful, testing would culminate in completing an on-air QSO with the antenna being driven at 5 watts or less.
Building the 9:1 Unun
While I have built successful 49:1 ununs as the basis for EFHW antennas, I had no experience building 9:1 ununs. Accordingly, I started with the ARRL Antenna Book, then a web search. VK6YSF’s excellent web page provided very detailed instructions for 9:1 unun construction. His 9:1 Unun design was based on a FT140-43 toroid wrapped with heavy gauge magnet wire, with design power rating around 100 watts. My application was focused on 10 watts maximum, and I wanted a lighter-weight solution to the unun design.
Looking at the components I had available, I found FT50-43 toroids and 24 AWG magnet wire in my inventory. I had used those during construction of successful 49:1 EFHW antennas. The VK6YSF design, built with the smaller toroids and lighter magnet wire, seemed to be a good (and cheap) starting point.
The “50” portion of the FT50-43 toroid designation specifies its 0.50 inch (1.27 cm) outside diameter. The “43” portion designates nickel/zinc composition that is suitable for high frequency inductive applications.
The next problem that presented itself was a problem with translating the winding technique to smaller wire and a smaller toroid. Put simply, my fingers do not have the dexterity to wrap three parallel 24 AWG wires around a ½ inch OD toroid without getting them crossed, twisted, or worse. So, why not twist the three conductors from the start, and wrap the toroid with “trifilar” windings? It would be simple enough to identify the mating wire ends after wrapping, just with a set of continuity tests. That would facilitate proper connection of the wires to yield the final auto-transformer configuration.
FT50-43 toroid with three-10 inch (25.4 cm) segments of 24 AWG enameled magnet wire staged for construction of the 9:1 unun.
I posed the “trifilar” winding question to my friends over on the QRPer.net discussion board. Nobody identified a significant flaw with the proposed method, but neither did anyone have experience that would assure success. So, I decided to use the “trifilar” winding technique to construct my 9:1 unun, with the full recognition that its success would be uncertain, and only proven by testing the finished product. Continue reading In Pursuit of the Top Band: Brian describes how he built and tested a field-portable 160 meter EFRW antenna→
Many thanks to Brian (K3ES) who shares the following guest post:
A shelter for Winter Field Day operations in a field
Field Report: Winter Field Day with a New Antenna
Winter Field Day (WFD) 2022 found me operating indoors, despite my best intentions to get out in the field. I was recovering from a bad cold, and did not want to risk having complications arise from sitting out in the cold and damp. So for WFD 2023, outdoor time with my radio was a must. I wanted to operate a 1-Oscar station, and to do that I had to set up more than 500 feet from my home QTH. So a site next to the pond in our back field, about 800 feet from the house, became my WFD shack.
I started planning and collecting kit for the operation in mid-January, with the long term forecast hinting at near-freezing temperatures with the potential for rain or snow. Let me introduce you to my WFD station.
Shelter
A shelter was needed to keep out rain and snow, and to provide a barrier against the winds whipping across the adjacent field. A few poles lashed together, and steadied by stakes, provided the frame to support the shelter. With a poly tarp secured to this frame, the resulting a-frame shelter, while not completely enclosed, did provide effective weather protection for both operator and equipment. There was about 3 inches of snow on the ground when I set up the shelter, and I was able to pile some of it along the bottom edge of the tarp to keep the wind from getting under it.
A-frame shelter constructed of a poly tarp stretched over a frame of poles
Antenna
I know that when setting up a station, the antenna is not generally the first thought, but I had recently finished building a homebrew 9:1 random wire antenna with a 144 ft radiating wire, and I wanted to test it out. There are better ways to put a new antenna on the air, but the opportunity was a good one. Besides, I had backup antennas that could be quickly substituted if the need arose. In the event, things worked well, and the antenna proved agile and capable on all activated bands. I particularly wanted to see if it would tune on the 160m band. More on that later.
The feedpoint of the 9:1 random wire antenna is built into a wire winder to support transport, deployment, and recovery for field use. The RF functional components include a female BNC connector, a 9:1 unun, and miniature banana jacks for connecting the radiator and counterpoise wires. There is no wire on the winder, because a corner was broken off during WFD deployment, and a mechanical repair is needed. (Click to enlarge)The 9:1 unun is mounted near the BNC connector, and is electrically connected to a one miniature banana jack for the radiator and another for the counterpoise. The unun and wiring are covered with hot melt glue to provide mechanical integrity and protection from the weather.
Radio
The goal of trying the antenna on 160m left me with only one choice for a radio. I would use the Lab599 TX-500 Discovery, because it is the only transceiver among my field rigs that is capable of operating on the 160m band. Since a tuner is required, I paired it with an LDG Z-11Pro II, a wide-range autotuner. I also included a Monitor Sensors Power and SWR Meter in the feed line to help assure that I was legitimately running less than 5 watts to qualify for the QRP power multiplier. Continue reading Brian puts a new antenna to the test during Winter Field Day!→
Connecting an international community through low-power field radio adventures.
Please support QRPer by adding us to your whitelist in your ad blocker. Ads are what helps us stay online. All of our ads are ham radio related--no junk, we promise! Thank you!