Category Archives: Grab And Go

Introducing the new Elecraft KH1 handheld-portable CW QRP transceiver

WG0AT holding the Elecraft KH1

From Elecraft:  something BIG, in an incredibly small package…!

Just this morning, Elecraft introduced the new Elecraft KH1.

In brief, the KH1 is a five-band (40, 30, 20, 17, and 15 meter) handheld QRP CW transceiver with options for an internal battery, internal ATU, whip antenna, and fold-out logging pad.

Exciting!  And if you’d like to get the scoop on this new handheld radio–– along with photos––we’ve got it here.

Q: What is the Elecraft KH1?

WG0AT with the KH1 making contacts pedestrian mobile.

A:  The Elecraft KH1 is a compact, five-band CW QRP transceiver designed for both handheld and tabletop operation. Indeed, the “H” in the model number signifies “Handheld.”

To be clear, although it is quite small, the KH1 isn’t just a tiny radio:  it’s ergonomically purpose-designed, to be a pedestrian-mobile CW station.  It’s lightweight, easy to hold and use, and will fit both right and left-handed operators. With the optional “Edgewood Package,” it also includes a fold-out logging pad.

Q: How much does the Elecraft KH1 weigh?

A: With all options (ATU, Antenna, Battery, and logging pad) the KH1 weighs in at a featherweight 13 oz.

Q: What features does the Elecraft KH1 offer?

A:  Here’s a feature list from the Elecraft brochure:

KH1 features:

  • 40-15 meter ham bands
  • 6-22 MHz for shortwave broadcast band listening
  • CW mode; 5 watts, all bands
  • ATU includes whip & high-Q inductor for 20/17/15 m
  • 2.5 AH Li-Ion battery & internal charger
  • CW decode & 32K TX log
  • Scan/mini-pan feature
  • RTC [Real-Time Clock]
  • Full remote control
  • Speaker
  • RIT, XIT, & VFO lock
  • Light gray case stays cool even in bright sunlight
  • Three CW message memories with chain and repeat functions

Like nothing else on the market…

The KH1 design is all Elecraft and built on several years worth of design iterations. It is, no doubt, fueled by Wayne’s passion for handheld portable HF.

Again, the KH1 focuses on ergonomics that would make handheld operation not only easy, but enjoyable.

The two main multi-function controls (the AF Gain and Encoder), for example, are located on the bottom of the radio. This gives the operator easy and ergonomic access to the controls while the radio is in-hand.

The four buttons on the top of the radio default to the most useful functions one would need while operating portable. Using them to dig deeper into the menu levels, however, is also intuitive and well thought-through.

While the KH1 menus and features are naturally not as deep as those of the KX2 and KX3, it’s impressively well-equipped for a radio this size. At the end of the day, it’s a much more simple field radio––by design––than its KX2 and KX3 predecessors. If anything, it’s more akin to the venerable KX1!

(Source: Elecraft)

The KH1’s paddles (KHPD1) are located at the bottom of the radio––they flip down for transport, and up during use, so your fingers are well away from the AF and Encoder knobs.

The KH1 has an optional internal ATU that is not as wide-range as that of the KX3, KX2, or T1, but is much better than that of the KX1. I understand that it’ll match most of what you throw at it.

Wayne told me that one of the most complicated parts of the KH1 design was the fold-out logging pad. He wanted the logging pad to be functional for one-handed operation. The indents around the loose-leaf logging sheets allow you to pull out a completed sheet and slip it behind the others in the stack.

The logging sheets are available as a PDF download; simply print and cut. No doubt, the format would be easy to modify.

Whipped!

This is the part I love: the KH1 is designed to operate with a telescoping whip antenna.

Basically, you unclip the whip from the side of the radio (assuming you have the ATU/whip option) and screw it on the top of the top. The ATU will match the whip antenna––there’s a mechanical slide switch that selects 15/17 m or 20 m high-Q inductance for whip––or an external antenna on the BNC port.

If you’ve been reading my field reports and watching my videos, you know I’m a huge fan of the Elecraft AX1 antenna. The KH1 basically has the option of a built-in AX1 antenna…Just take my money!

Speed…and stealth

If the counterpoise is already attached and wrapped around the body of the KH1, you will be able to deploy the station and be on the air in about 20 seconds.

As many of you know, I’ve always said that the secret power of the AX1 and AX2 antennas is speed of deployment. The KH1 allows for an even speedier deployment.

This will be most especially appreciated when activating summits in the winter where exposure to the elements from simply setting up the antenna and station will often make your hands go numb.

Also, the KH1 is so low-impact and low-profile, you’ll be able to activate parks that might otherwise be off limits to an HF field installation. I know of one urban park that, with permission, I’ll definitely use the KH1 to activate; it has no park benches and no trees, just a strip of grass around a historic building in the middle of a city. Perfect for the KH1!

KH1 versus KX2?

The KH1 and KX2 are very different animals. Elecraft actually produced this comparison chart to help potential customers make a purchase decision.

KX2 & KH1 Comparison Chart (PDF)

My advice? If you have a KX2 on order, don’t cancel it.

The KH1 is not a KX2 replacement. The KX2 is a much more capable radio. The KH1, however, is a radio focused on ultra lightweight, low-profile, pedestrian-portable, CW HF field operation.

A KH1 review?

Yes, it’s coming! I will purchase and review the KH1 “Edgewood” package. My unit should ship next week, so look for updates and photos, and I will push those field reports and videos to the front of the line.

To be completely transparent:  I have been in a volunteer group of testers for the KH1. Other than this, the only real affiliation I have with Elecraft––besides knowing Wayne, Eric, and some of their staff––is being a long-time customer. I own, or have owned, every radio they’ve ever made, save the K3 and K4 lines. And it’s Elecraft that makes my favorite field radios.

Product Brochure

Click here to download the KH1 product brochure.

Pricing & Availability

As with all Elecraft products, you’ve many options in terms of pricing.

Basic KH1 ($549.95 US):  Including the KH1, power cable, USB cable, manual

KH1 Edgewood Package ($1,099.95): Includes all BASIC KH1 items, plus all options (KHATU1 Antenna Tuner, KHPD1 Keyer Paddle, KHLOG1 Logbook Tray w/mini-ballpoint pen, KXBT2 rechargeable Li-Ion battery, KHIBC1 Internal Battery Charger,  and ES20 Custom zippered carrying case)

Click here to view the Elecraft KH1 on the Elecraft website.
Field Kit Gallery: KM4CFT’s QRP Labs QMX/QCX-Mini Go Kit

Many thanks to Jonathan (KM4CFT) who shares the following article about his portable field radio kit which will be featured on our Field Kit Gallery page. If you would like to share your field kit with the QRPer community, check out this post. Jonathan writes:


Hi Tom,

I thought I would share the two go kits I have. I tend to customize my equipment and supplies before I go on a POTA or SOTA outing but I keep these for the rare occasion when I want to grab a radio real quick. [The first on is my] QRPlabs go kit:

The kit is for my QRP Labs QMX/20 meter QCX mini. It contains everything I need to operate 20 meters CW.

The case is a regular Lowepro case that I got with my KX2 when I purchased it from another ham. I did not realize it came with it so I accidentally ordered an extra from Elecraft which I now use with the KX2 kit [featured in a future Field Kit Gallery post].

The kit uses many components from K6ARK, including the 20 meter EFHW antenna and the retractable paddle.

The battery is a TalentCell from Amazon. I use it because it supplies 12v instead of 13.8v. One of the downsides of the QMX is that it cannot handle 13.8v, so I have to stick with 12.

I keep a cheap pair of earbuds with me just in case but I try to bring a nicer pair of headphones whenever possible.

Hopefully this information is useful to you and your readers!
-Jonathan KM4CFT

Readers: Check out Jonathan’s YouTube channel by clicking here.

POTA Field Report: Testing my CP Gear Tactical Aircrew/Pubs Bag with FT-817ND and Armoloq TPA-817 Pack Frame

Last year, during a Black Friday sale, I took a calculated risk and purchased a bag I hoped would accommodate my Yaesu FT-817ND that has been outfitted with an Armoloq TPA-817 Pack Frame.

CP Gear Tactical Aircrew/Pubs Bag

Rod (VA3ON) first introduced me to CP Gear Tactical–a  military pack manufacturer based in New Brunswick, Canada.

I’d had their their Aircrew/Pubs Bag with Padded Tablet Pocket on my wish list since the Ham Radio Workbench podcast episode where we talked about backpacks and pouches. CP Gear Tactical manufactures a wide variety of gear primarily for the Canadian military market. Everything is made either in Canada or the US (or both).

I contacted CP Gear Tactical shortly after outfitting my FT-817 with the TPA-817 pack frame. I measured the frame carefully and asked if the interior padded pocket (which is actually designed to hold a tablet–might fit my radio.

I never heard back from them. I could have called them, but on Black Friday, when it was on sale for 20% off and free shipping, I decided to throw caution to the wind and simply purchase it. My total price in USD was something like $62 shipped.

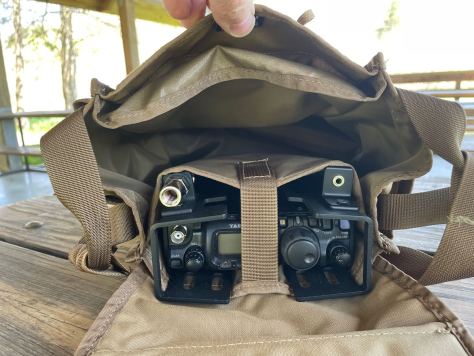
As soon as I opened the CP Gear pack, the first thing I did was check to see if the FT-817 with pack frame would fit in the interior pocket.

Much to my surprise, it fit it perfectly!

Indeed, it’s as if the pocket were specifically designed to accommodate the FT-817ND/TPA-817 combo.

Even the middle Velcro strap fits precisely in the middle of the radio between the pack frame side extensions. The strap holds the rig securely; once, I accidentally fumbled while holding the bag and even though it was upside down, the FT-817 remained securely inside. The strap held it in place.

The bag has loads of room inside. In fact, you can very easily transform it into a fully self-contained field radio kit.

I actually give a small tour of this pack in my activation video below, so if you’d like to see some of the exterior pockets, I would encourage you to check it out!

Zebulon B. Vance Birthplace (K-6856)

On Tuesday, April 11, 2023, I once again popped by the Vance Birthplace for a leisurely POTA activation–I thought this activation, in particular, would be a good one to test my new Aircrew/Pubs bag! Continue reading POTA Field Report: Testing my CP Gear Tactical Aircrew/Pubs Bag with FT-817ND and Armoloq TPA-817 Pack Frame

Testing my new Headrest QRP POTA Field Kit!

I love field radio kits.

If you’ve read my “Anatomy of a Field Kit” series, you’ve likely gathered that field kits are a bit of an obsession. [Yeah, understatement alert!]

My field kits roughly fall into two main categories: modular and fully self-contained. My modular kits are ones where components like the battery, antenna, throw line, key, and radio are in separate pouches and can easily be combined to make a complete station before I leave for an activation.

My fully self-contained kits are ones that quite literally have everything needed to perform a park or summit activation in one pouch or box. A good example that I’ve documented here is my MTR-3B field kit.

For more on this, again, check out my “Anatomy of a Field Kit” series.

Vehicle kit

If you’re a devoted park and/or summit activator, I think it’s important to keep a dedicated kit kit in your car at all times. Why?

  • It’s ready to grab for impromptu activations
  • It’s handy in case of road-side emergencies in remote areas
  • It’s always  accessible to demonstrate amateur radio to those who are curious
  • It’s always always there for those times when you hadn’t planned to play radio, but the opportunity presents itself

I always have a full radio kit in my Subaru and over the years, I’ve changed and adapted it. For the most part, though, it’s been located in the trunk/boot and lives with anything and everything else I keep back there. Sometimes, it’s in the way when we need to fill that trunk space with family items for a trip or when we’re hauling things around town. Other times, it’s floating/sliding around freely in the back.

On long family trips, I’ve been known to store radios under the floor, but it’s a true hassle to remove them because I have to remove anything in the trunk before lifting the floor.

Contraband I hid in the car during our two month Canada trip last year.

I’ve always wanted a way to store my kit in the car in a dedicated space. In the past, I’ve tried to make a kit that could fit under the driver’s seat–thinking that might be ideal–but there’s very little clearance under it and it’s difficult to remove.

Enter the BROG Headrest Pouch Kit

Before I placed my initial order for the Blue Ridge Overland Gear (BROG) Gadget Bag, I checked out other items on their website. One that immediately caught my attention was their Headrest Kit.

It consists of a Velcro panel that fits around a vehicle headrest and a pouch (or pouches) attach to it.

BROG caters to Overlanders and vehicle storage/organization is huge in that community. The headrest kit makes a lot of sense: it’s using space that’s accessible, doesn’t interfere with any passengers, is off the floor, and is otherwise underutilized!

The big questions, of course:

  1. would the pouch offer enough space to store an entire radio kit,
  2. and would the kit weight too much for the Velcro back to hold it in place?

I asked for the Headrest Pouch Kit ($47.99) to be sent with my Gadget Bag order.

BTW: Big thanks to BROG for giving me flexibility with this order. Since I had no experience with their gear, I asked that they send me a list of items and allow me to evaluate them, then pay (full price) for what I decided to keep. 

Would it work?

I knew I’d need to store a very small transceiver in this dedicated pack. A few could potentially fit the bill–namely the:

  • Mountain Topper MTR-3B
  • Venus SW-3B
  • QCX-Mini
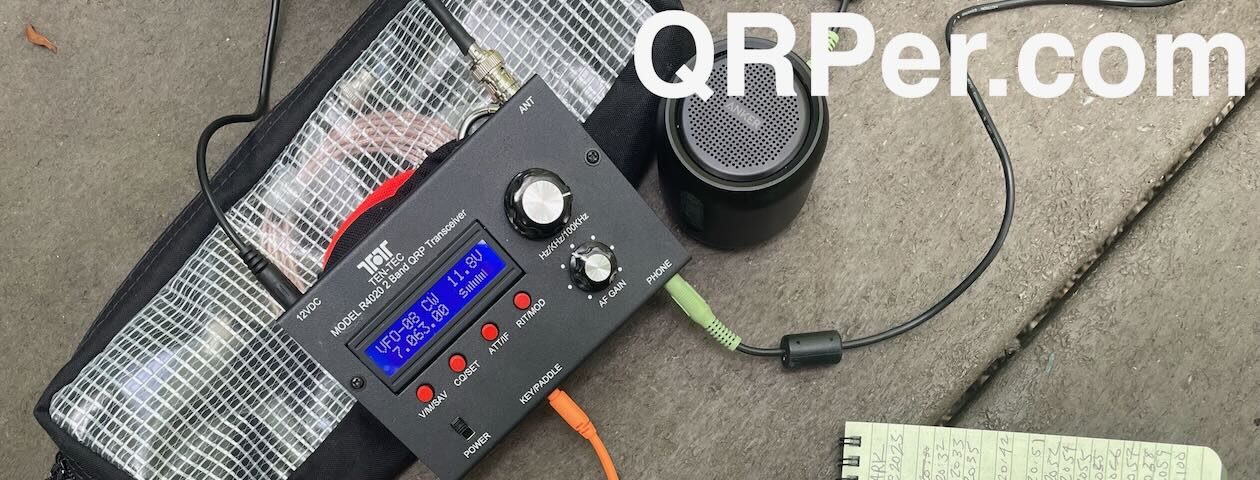
  • TEN-TEC R4020

I eliminated the QCX-Mini from this list because it’s mono band (mine is set for 20M) plus, I really love the field kit I already designed for it. Same for the MTR-3B–the kit I built for it is now time-tested and I love it as-is. The R4020, while quite compact, is the largest in this group of wee rigs. Continue reading Testing my new Headrest QRP POTA Field Kit!

Field Report: BROG Gadget Bag Tour, New Anker Speaker, & Pairing the KX3 w/the MC-750 for Serious QRP POTA Fun!

On Tuesday, March 28, 2023, I packed my Elecraft KX3 and took it to the Zebulon Vance Historic Birthplace (K-6856) for a nice, relaxing, early afternoon POTA activation!

It had been a few months since I’d taken the KX3 to the field and it really does deserve some outdoor time because…well…I still think it’s one of the best HF field radios on the market.

I’m spoiled, though, because I also own a KX2 and it does 80% of what the KX3 does, is much smaller, and sports a very long-lasting internal battery. Because of this, my KX2 gets way more field time and the KX3–hooked up to a KXPA100–is my main radio in the shack.

When I make an activation video in the field, I like using a speaker rather than recording from the line out of the radio. Besides the extra post-processing, sometimes the line-out audio from left and right channels are out of phase from each other and end up cancelling each other out in YouTube videos if listening in mono. I recently learned how to fix this, but I find the whole process just adds *that* much more time to post-processing and I’m always pressed for time.

The Elecraft KX3 has a built-in speaker, but it’s pretty anemic. I almost always pair the KX3 with an external speaker to amplify the otherwise excellent KX3 audio for my activation videos.

On this particular day, I had a new speaker to try as well: an Anker Soundcore Mini. I purchased this speaker on the same day I posted Mike’s speaker search and review of the Soundcore Mini. Although I have a Sony SRS-XB12 portable speaker and love it, they’re no longer produced and the battery life isn’t quite as good as the Soundcore Mini (Anker states up to 15 hours per full charge).

This activation would give me an opportunity to really test the Anker Soundcore Mini in the field. In the end, it did a brilliant job.

I should note that I also brought my Blue Ridge Overland Gadget Bag (see above) to the field that day, so I include a little tour and overview of this pack in my activation video.

I did recently post a review of the BROG Gadget Bag here on QRPer as well.

Zebulon B. Vance Birthplace (K-6856)

As I mention in my activation videos, Vance is a small park and, unless you plan to operate from your car, there’s really only one good site to set up: in the picnic shelter. Thing is, if a school, club, or civic group is scheduled to meet that day, the picnic shelter will almost certainly be reserved for them.

Each time I activate Vance, I ask the park staff in advance if the picnic shelter is reserved and if it’s okay if I perform the activation. Fortunately, the shelter is reserved only about 20% of the time. On days when it’s reserved, I simply activate elsewhere.

On the 28th, I had the site to myself and the staff encouraged me to activate as long as I wanted to. Continue reading Field Report: BROG Gadget Bag Tour, New Anker Speaker, & Pairing the KX3 w/the MC-750 for Serious QRP POTA Fun!

First look at the Blue Ridge Overland Gear Gadget Bag

In early February, Jeff (KD4VMI) sent the following message to me:

Good evening. Love your YouTube videos and QRPer posts and, from them, I know you appreciate rugged packs and gear.

I enjoy POTA, although I don’t get out as often as I’d like, but I’ve found Blue Ridge Overland Gear’s various bags and modular systems to be very handy for bundling my radios, batteries, cables, and antennas.

It’s been on my mind for some time to let you know about them (if you don’t know about them already) and I finally decided to take the time to write you. I’m not associated with them in any way, and I didn’t approach them about passing this on to you, or anything like that. I just really appreciate their gear and I think you might, too.

The BROG materials are high quality and stout, the zippers are beefy and smooth, everything is double or triple stitched and everything is modular so it can be used for just about anything, and in pretty much endless combinations with their various bags and gear.

Their products are not overly cheap, but are guaranteed for life. They’re located in Bedford, Virginia and all their things are made in the USA (I think mostly in Bedford).

I often use their tire puncture repair kit bag, for instance, to carry my FT-891, Bioenno battery, cables and mic, and PackTenna, and then strap the coax to the Molle system on the front of the bag.

They posted a YouTube video showing their gadget bag with accessory pouches for HTs, etc.

Their website is: https://www.blueridgeoverlandgear.com/.

Anyway, I appreciate all you do for our great hobby and just wanted to share this info.

Take care and all the best to you and yours…

Thank you so much for the kind words, Jeff, and for the tip about Blue Ridge Overland Gear (BROG). You’re obviously a skilled pack enabler because you had my attention by the second paragraph–!

Shortly after my exchange with Jeff, I checked out the BROG website and was really impressed with their line-up of packs and gear–all with a focus on modular organization, especially in-vehicle since it’s for Overlanding. It’s just the icing on the cake that their gear is made in the USA.

I was very curious if their Gadget Bag, in particular, would lend itself to being a modular flied radio kit pack.

Thing is, there are so many options and configurations for the Gadget Bag, I wasn’t entirely sure what to order.

Being a fellow who expects to pay a premium for rugged products, made in the USA–especially ones that carry a lifetime warranty–I was prepared for some sticker shock. Turns out, BROG pricing is pretty reasonable in comparison with other cottage industry pack manufactures.

Still, I wasn’t quite sure how easily some of my radios and gear might fit in their zippered pouches, so I reached out to BROG–mentioning QRPer and my constant search for field radio packs–and asked if I could order some packs and pouches, test them with my radio gear, then pay for what I decided to keep.  I didn’t want free gear, I just couldn’t tell based on the product images and posted dimensions what pouches and packs might fit my various radios and accessories. Also, I knew readers might ask if certain pouches and packs might fit certain radios.

The good folks at BROG kindly obliged, so I asked for the following list of items:

– QTY 1 Gadget Bag (shell) in black
– QTY 3 Large Velcro Pouches
– QTY 6 Medium Velcro Pouches
– QTY 1 Velcro Cord Keeper
– QTY 1 Medium GP Pouch
– QTY 1 Velcro Headrest
– QTY 1 Headrest Pouch Kit

Some of these items weren’t in stock, so it was a week or so later when I received notification that the package had shipped. It arrived a couple days later.

I love the feed bag style packaging, by the way.

Photos

Although you’ll start to see this field kit in upcoming activation videos, I thought I share a photo tour of this pack… Continue reading First look at the Blue Ridge Overland Gear Gadget Bag

André’s All-Season Yaesu FT-891 Go-Box

Many thanks to André (PY2KGB/VE2ZDX) who writes:


Hi Thomas!

I’m writing to share my idea for a cheap and easy to build go box. It’s not for a QRP rig, but the concept can be applied for the ft818, for example. Check out this YouTube video:

I’ve been operating under snow with this box, in “ninja” style.

Because if I wait for it to stop snowing here I’ll do nothing for 3 months, hehe!

Photos:

Continue reading André’s All-Season Yaesu FT-891 Go-Box

Photos of Mike’s uber-organized Icom IC-705 field kit

Many thanks to Mike (2E1BFH) who shares the following photos of a new field kit he’s built around the Icom IC-705:


Continue reading Photos of Mike’s uber-organized Icom IC-705 field kit

Jim’s Icom IC-705 travel kit housed in a Nanuk 915 rugged waterproof case

Recently, I was in in touch with Jim (WA7VFQ) who was trying to decide which radio to take on a vacation to the North Carolina coast. He replied with details about the field kit he put together for the trip which will require air travel. Jim writes:

Last year in one of your QRPer posts you mentioned your search for a case for one of you radios. I commented that I had a Nanuk case that I liked and promised pictures.

Well, we are finally there!

It wasn’t until yesterday that I decided to take my Icom IC-705 over my Elecraft KX3 [on vacation]. I had new foam for the case and last night I did my “foam plucking” and I’m pleased with the outcome. I had a couple of Icom decals and since it wasn’t the Elecraft, one of them wound up on the exterior. Some guy on the internet was touting the Tom Bihn Travel Trays; we have 4 on them, 3 large and one small. All are headed to NC with us. One of them will carry my extra radio gear.

The Nanuk 915 (above) houses the Icom IC-705 (with cage), a RigExpert 230 Stick analyzer, Bioenno 4.5 Ah battery and Mat 705 Plus ATU. Continue reading Jim’s Icom IC-705 travel kit housed in a Nanuk 915 rugged waterproof case

Scott’s Icom IC-705 manpack built on a Condor MCR3 chest plate

Many thanks to Scott (KA9P) who writes:

Here’s a MOLLE-related [piece of field kit] you may not have seen yet.

My summer 2022 QRP /PM rig is built around a Condor chest plate – not really a pack although there is a plate carrier compartment that thinner things store in easily enough. And I often have a small accessory pouch in the chest plate.

The key ingredient is the IC-705 adapter plate, made from scrap 0.06 inch thick aluminum scrap.

The four tines that fit the chest plate MOLLE webbing are spaced per the MOOLE/PALS standard of every 1 1/2 inches, but the tines themselves are 3/4 inch wide rather than 1 inch to make them easier to insert in the chest plate.


The plate is attached to the 705 with M4 by 10 socket head screws. I first used a single quick disconnect 1/4-20 photographer’s knob, and it worked, but eventually would loosen enough that the radio would start to swivel.

The orange strap that retains the adapter plate at the top of the chest plate is riveted to the adapter plate with plastic POM rivets. The chest plate is a Condor MCR3, about 26 bucks on eBay.

The radio goes in and out of the chest plate in less than a minute, and the adapter plate can be removed in a minute or two. The radio is very stable and easy to operate.

As a bonus, the loops also hold a Buddistick mast section, then a Versatee with a Buddistick.

With the antenna in front, I can change bands and adjust the whip and coil while standing. The antenna also goes in and out of the chest plate quickly.

I’m finding it’s great fun to listen and operate on the way to and from my operating destination. Definitely the easiest /PM set I’ve had. Every control and jack, and the battery, is easily accessed with the radio attached to the plate.

It’s like the 705 was intended to be used this way!

72, keep up the great work.

Scott ka9p

Absolutely fantastic pedestrian mobile setup, Scott! I love how the custom IC-705 mounting plate makes such a stable surface for the IC-705 to be suspended as you operate. As you say, you also have very easy access to all of the station components.  Brilliant!

Thank you for sharing your design notes and photos!