Tag Archives: Spark Plug Gear

W2AEW’s Trapped EFHW Antenna Tutorial: Building a Smaller, More Versatile Solution for Portable Operations

Many thanks to Alan (W2AEW) for the following guest post:


Trapped EFHW antenna story (it’s all Vince’s fault)

by Alan (W2AEW)

One of my favorite antennas to use for POTA activations is a 40m EFHW wire.  When properly tuned and deployed, it can be used on 40, 20, 15 and 10m without the use of a tuner (although, I really don’t mind using a tuner when I need to).  Most of my activations are on 40 and 20m, so those bands are covered easily.  It can be used successfully as a sloper, an inverted vee, or a combination of these (whatever the trees or support structures allow).  It is efficient, inexpensive to build, lightweight and effective.

There are a few downsides to this antenna.  The first is that it is approximately 68 feet (almost 21 meters) long.  That’s a lot of wire to get in the air.  Some POTA sites just don’t have that much room or support structures to effectively use this antenna.  Another downside is that it doesn’t naturally support operation on the 30m band, another favorite of mine.

A few weeks ago, I watched a video from my friend Vince VE6LK entitled: “Discover the secret ingredients to build a trapped EFHW antenna”. This piqued my interest…

The video introduces a design for a 40/30/20m trapped EFHW.  The fact that it covers the three bands I use the most, and would be shorter than my trusty full-sized 40m, and give me 30m to boot, got me excited to learn more.

Vince used a pair of traps (30m and 20m) that are offered in kit form by Tim Sherry, N7KOM.  Here is a link to kit on Etsy.

Image Source: Tim Sherry, N7KOM

These are exclusively for use at QRP power levels – perfect for my application.  I placed my order immediately after watching the video.  The build instructions are very detailed, including how to tune the traps, which is critical in getting the antenna to work.

Image source: SparkPlugGear

He also used a 49:1 UNUN from SparkPlugGear.  I’ve had one of these in my POTA kit for a while, but only used it occasionally.  This was another good reason to proceed with this antenna build.

Of course, you could also use the QRP UNUN kit from KM4CFT that I made a video about earlier this year.

I created a video that showed how to assemble and tune the traps.  Tuning can be a little tricky, and then stabilizing the turns/spacing to preserve the tuning is critical – not hard, just takes a bit of patience.

With the traps built and tuned, the next step would be to build and tune the antenna itself.

I was able to find the time this weekend to do just that, and make a video of the process.

Details of the resulting wire segment lengths are in the video.  It is important to note that if you decide to build this antenna, your wire lengths will likely vary from mine.  Several factors will effect the resulting lengths (details of the UNUN used, the trap construction, etc.).  My video goes through the process I used to build, tune and test the antenna.

“The proof is in the pudding” as they say.  It was time to actually run a POTA activation with this antenna.  The overall length of the antenna was about 43 feet (about 13.1 meters), which is about 2/3rds the length of the 40m EFHW.  This opens the possibility of using my 12 meter Spiderbeam mast (video review) as a support rather than just relying on a tree branch.

The weather here in NJ has been oppressively hot and humid with heat indexes over 100F, so I opted for a morning activation, before the heat really built up.  The intent was to get some contacts on all three bands, even though 20m probably wouldn’t be very active.

I setup at my “home” park – Washington Rock State Park, US-1635.  I decided to setup the Spiderbeam mast as the support for the new antenna:

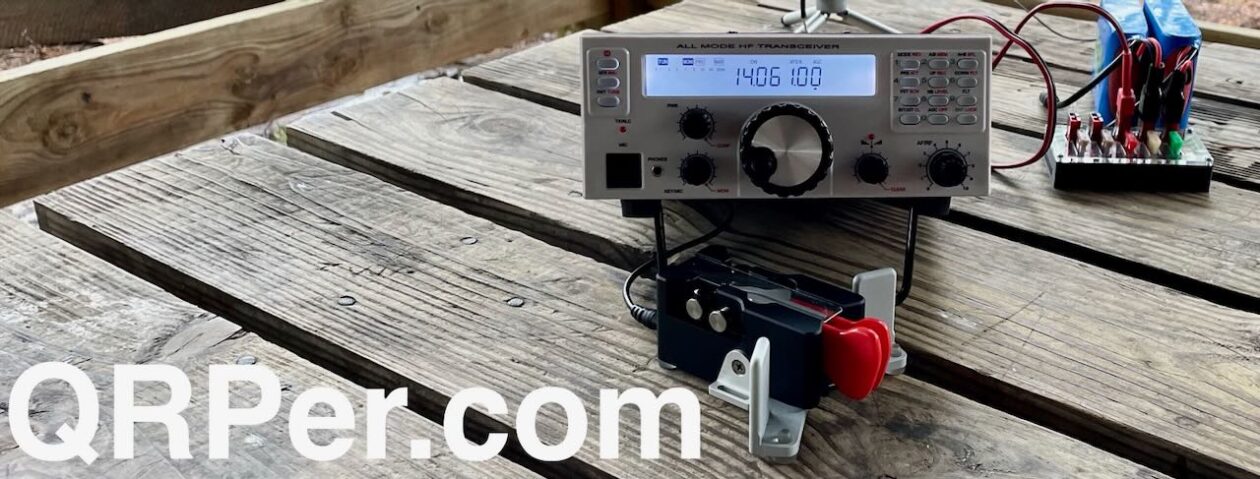
The rig was my trusty KX2 with the BamaTech TP-III paddles:

I only had about an hour to dedicate to operating before the family activities for the day, so I figured I’d start on 40m and get most of the “ten” there first, then move on to pick up a few on 30m and 20m.

I was able to put 14 contacts in the log, under “so-so” band conditions, which at least a few on each band, several of which were park-to-park contacts.

Here’s the map of the “reach” that the new antenna had during this short activation:

Overall I am quite pleased with the antenna’s performance.  The near ideal band coverage for my typical activations, and the ease of deployment compared to the full-sized 40m EFHW make this antenna a great addition to my POTA kit.  I suspect it will get a lot of use!


Resources:

Experimenting during Field Day 2024

by Vince (VE6LK)

Field Day 2024 started out with the best of plans to be spent with the best of friends and ended up totally different – and, unexpectedly, I had a hoot! With my carefully made plan behind me, my new last-minute plan was to run solo for Field Day in the backcountry of Kananaskis Country and bring along my new-to-me Nikon D3400 and lenses and rekindle my interest in (D)SLR photography at the same time as doing some experimentation with radio gear.

I grew up in a home with a scratch-built enlarger and a darkroom, so a love of taking pictures has been with me for a long time. My Father taught me patience to get the shot as he would set up a 120 format bellows camera on an air-triggered remote release to get closeups of chipmunks while we were camping, a process that took hours and yielded excellent results. My Brother, AG7GM, has attempted to instill within me the basics of composition, rule of threes and such and his wonderful skill in editing both stills and live video. While I have plenty of patience, with composition I think I’m fair to middling at best.

Thus photography has always been on my mind.

With a recent sale of a few ham radio related items, I had fun money, so just for fun I started looking [on Thursday before I activated] at used DSLRs and was shocked at how much camera I can get for such a relatively low cost compared to new. I had said once, 25 years ago when I divested out my 35mm kit, that when I could get a DSLR with a 25 to 300mm lens for <$500 I’d jump in… and finally that day is here, even if it means carrying two lenses. Of course, I started looking on the day before Field Day for deals – and scored them too! 🙂 Around these parts, good quality pre-owned consumer grade DSLRs are easily available. I purchased this as much for still photography as for ability in shooting high-quality video for my YouTube channel.

These peaks form part of the border between Alberta and British Columbia to the west

For me, Field Day has always been about the experimentation rather than chasing points. Trying new things. Changing up from the normal way I operate in the field. Comparing, analyzing and making notes as I go.

For example, and as a tribute to Chip Margelli K7JA (SK) after corresponding with his brother David, last year I attempted to wet a piece of string and see if the KX3’s tuner would match it and radiate a signal. Chip was known for many things, among them his proficiency in CW as he demonstrated on The Tonight Show with Jay Leno in 2005. David told me that he and Chip would do crazy and fun experiments like loading up clotheslines and wet string to experiment .. and it fostered a new direction I could take each FD and on some days between. The string experiment was a failure last year but I haven’t given up yet!

This year, I wanted to work with a few different antennas and a Charmast 100W battery pack from Amazon along with a USB-C PD 12v power cable for my KX3 [note: Amazon affiliate links!].

I wanted to know, in no uncertain terms, that the Charmast would or wouldn’t be as quiet as my trusty Talentcell LiFePO4 pack. The Charmast is also used in my field soldering kit with a Pinecil as it delivers USB-C PD. What better way to test this out than to head as far away from noise sources as possible, see the Canadian Rockies in their early summer glory with snow on the peaks, rivers running high (and cold) and the sun in the sky? Just for grins I would ensure that I was in POTA entities while doing Field Day.

Continue reading Experimenting during Field Day 2024

Field Kit Gallery: K2EJT’s Utra-Compact Venus SW-3B Field Kit

Many thanks to Evan (K2EJT) who shares the following article about his portable field radio kit which will be featured on our Field Kit Gallery page. If you would like to share your field kit with the QRPer community, read this post


K2EJT’s Venus SW-3B Field Kit

by Evan (K2EJT)

I’m big on small.  When it comes to field radios, especially ones I’m going to have to carry any distance, I prefer them to be small and light.  I don’t mind lugging a big heavy rig around if I’m going to be 20 feet from my truck, but if I’m hiking five miles into the woods, I want to measure my kit weight in grams, not pounds.  That’s where this little kit comes in.  Weighing in at only 733g, this kit fits the bill perfectly:

The stuff sack is from Dutchwear Gear.  It’s crazy light, and the entire kit fits in the palm of your hand.  Inside you’ll find everything you need to do a field activation.

The rig is a Venus SW-3B.  I really like this radio, especially for what it costs.  While it’s not as nice a radio as say my MTR-4B, you can get two of them for the price of one LNR radio, and get them in half the time!  The one thing that you need to be careful with on this radio are the rotary encoder and the gain knobs.  They protrude from the face of the radio, and I’m not sure how robust they are. Because I was concerned about how much abuse they’d handle, I 3D printed a set of side rails and a cover for the radio to protect them.

The key is a cwmorse.us N0SA paddle.  I have two of these keys.  One lives in this kit, and the other lives with my KX1.  They’re really nice keys for their size and weight.  There are downsides (like the sides being open), but aside from that I really enjoy sending on them.

As for an antenna, I’m running a Spark Plug Antennas 64:1 EFHW.  The wire is cut for 40, 20, 15, and 10, and is made of 24ga silicone jacketed wire with a tiny plastic clip on the end to attach to the throw line.  I really like this antenna.  It’s a great combination of small size, low weight, and good durability.  It works very well.  In fact, I like it so much I own two.

The coax is 15’ of RG316 from Amazon.  I don’t generally like to drag expensive coax into the woods.  I’ve killed enough of it to know it’s not worth spending a fortune on something that’s likely to get destroyed.

The throw bag and line are the same setup I run with my KX1.  It consists of a ripstop nylon bag with a paracord loop sewn in at the open end, and velcro across the top to close it.  Fill the bag with rocks, close the velcro, and you’re ready to go.  The line is 65’ of high viz, reflective 1.8mm cord.  The throw bag doubles as a stuff sack for the cord when not in use.

The headphones are a set of old Skullcandy earbuds I’ve had forever.  The kit also includes a Rite in the Rain pad and a pencil for logging, the power cable for the rig, and the radio instruction manual.

Powering the whole thing is a set of four AA size LiFePO4 batteries in a 4 cell holder.  The four batteries combined are a little over 13V fully charged, and are about 2600mAh.  They can power this little radio for a LONG time.  I get multiple activations out of a single charge.  I threw a set of Anderson Powerpoles on it to connect to the power cable on the radio.

This is the kit I carry when I want to go light.  As always, I could go lighter, but then I’d have to make compromises I’m not willing to make.  I’ve done plenty of activations with this kit, and it never lets me down.  You can see a description of the kit here:

And the kit in use here:

Gear list:

Evan (K2EJT)

MJ’s Mountain Topper MTR-4B brag photo!

Many thanks to Mike “MJ” ( WO9B) who writes:

Hi Thomas,

I’m not normally enthusiastic about an equipment review, but as for the MTR gear…welcome to the 4B-V2 club. For no good reason I have to pass along a brag photo of my setup.

After growing tired of chasing a key around the picnic table, a removable epoxy bracket was added to mount the venerable Begali Adventure paddle. The battery is a small LifePO4 1.1 Ah battery which provides about 5 hours of Field Day operating.

Naturally, I use a Spark Plug for my antenna. The last two Field Days have been with this setup. It is an outstanding piece of gear. It took me one email exchange with Steve, WG0AT, to overcome the lack of a volume control. Not a moment of buyer’s remorse.

See you on the air….

MJ, WO9B

Thank you for sharing this, MJ! I love brag photos.

What a nice combo, too: the Begali Adventure and the MTR-4B! 

Readers: MJ is owner of www.sparkpluggear.com. I’ve heard many good things about his Spark Plug EFHW. I need to grab one and give it a go soon!

And yes, MJ, I’ll see you on the air!