Tag Archives: POTA

QRP POTA: A Pre-Dayton Activation at Lake Alma State Park with WD8RIF!

On Wednesday, May 14, 2025, my good friend Eric (WD8RIF) and I started our drive from Athens to Dayton, Ohio. We left Eric’s QTH early that morning—not because it’s a long drive (it’s only about 2.5 hours)—but because we wanted to activate at least two new-to-me parks en route and still arrive early enough to stop by the Commissary at Wright-Patterson Air Force Base, check into our hotel, and meet up with friends for dinner.

The day before, I wasn’t able to activate a park in West Virginia as planned due to thunderstorms in the area. I also heard that propagation was incredibly poor—something we’ve seen off and on lately—so if you’re planning to validate an activation, be sure to budget extra time to reach your ten contacts.

That Wednesday morning started off foggy and misty, but the clouds quickly burned away and gave way to a beautiful day.

Amish farmers are not an uncommon site in rural Ohio.

Since I was firmly in WD8RIF’s activation territory, I let him do all of the planning for us that day. (Let’s be honest—I tend to let Eric do all of the planning no matter where we’re roving! Don’t tell him that, though.)

Lake Alma State Park (US-1967)

Our first stop was Lake Alma State Park near Hamden, Ohio.

Lake Alma is a beautiful park with large parking areas, great lake access, and numerous ideal spots for a POTA activator to set up.

Eric suggested we check out the gazebo, but I was keen to use one of the picnic shelters because it sat right beside an old-growth hardwood tree—just the kind I like to use to support my antennas!

Often when Eric and I do joint POTA activations, we activate at the same time to save time. In this case, we decided to take turns—me first at the key.

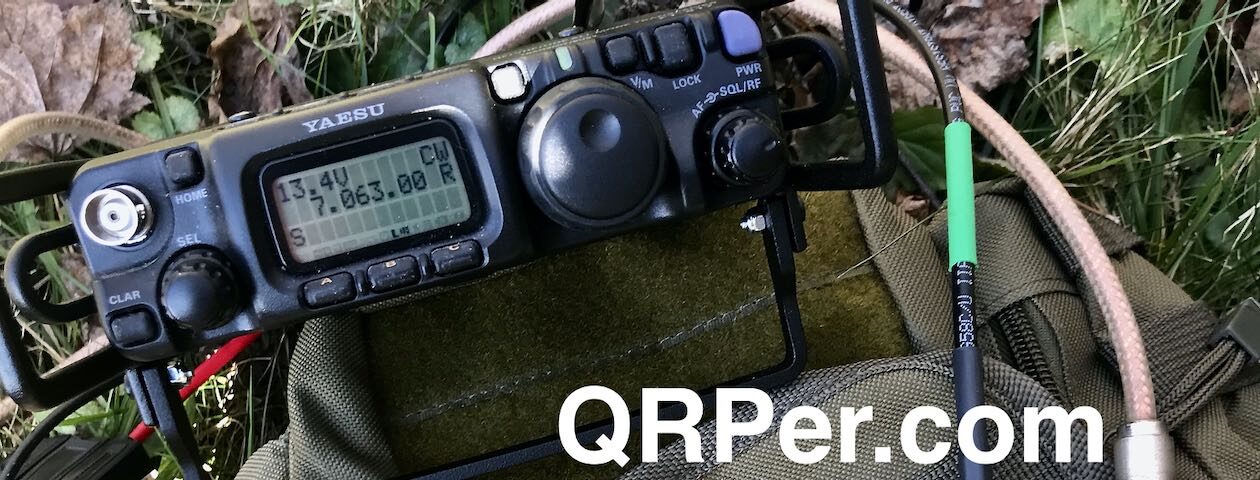
I knew Eric had never used a Penntek TR-45L, so I brought along my “skinny” version of this magnificent little rig. Paired with a 40-meter EFHW deployed next to the shelter, I figured we’d have nearly ideal conditions—even if propagation wasn’t.

MW0SAW’s 40M EFHW ready for action!

Setup was quick and easy!

My Red Oxx Micro Manager has become the TR-45L Skinny’s pack of choice!

Somehow, I managed to go first, so I prepped my log and aimed to get ten contacts to validate this new park.

Gear

Note: All Amazon, CW Morse, ABR, Chelegance, eBay, and Radioddity links are affiliate links that support QRPer.com at no cost to you.

Radio

  • Penntek TR-45L “Skinny”

Antenna System and Throw Line

Key/Cable

Pack/Cover

Battery

Logging

Camera and Audio

On The Air

I started calling CQ POTA on 20 meters. Fortunately, the band had some life in it! Continue reading QRP POTA: A Pre-Dayton Activation at Lake Alma State Park with WD8RIF!

A Strong Case for the (tr)uSDX: Jamie’s Perspective

Readers, there’s a bit of a backstory to this guest post by my friend Jamie (AA4K). During the W4SOTA campout in October 2023, Jamie showed me his favorite field radio: the (tr)uSDX. I’ve used the (tr)uSDX for a couple of activations, but I’ll be honest—I haven’t exactly shown it a lot of love. I’ve even complained about its audio and receiver performance in the past. Jamie, on the other hand, really enjoys using his and makes a solid case for it as a field radio.

Jamie showing me his (tr)uSDX during the W4SOTA campout.

I asked if he’d be willing to write a guest post for QRPer, and he agreed (eventually!). When I saw him at Hamvention this year, he told me the article was ready—and in true form, he sent it to me via Winlink… using his (tr)uSDX.


A Case for the (tr)USDX

by Jamie (AA4K)

Introduction

There are many factors that must be considered when choosing a field radio. How big and heavy is the radio? How hard is it to repair or replace the radio if it becomes damaged or lost? How hard is the radio to operate? How power-efficient is the radio? Does the radio have the desired/required modes and features? Of course, the most fundamental question is, “Does the radio work?” I will try to answer these questions as I lay out… a case for the (tr)USDX as perhaps an almost perfect field radio.

The last two contacts on this page were with my friends Carlos (KB4CO, now AE2W) and Thomas (K4SWL).

How big and heavy is it?

The first question is an easy one. Aside from small home-brew radios such as K6ARK’s “Choking Hazard”, there isn’t a smaller or lighter commercially available radio out there that I am aware of. The (tr)USDX measures 112 x 61 x 50 mm (I trimmed the encoder post and used a lower profile knob), and weighs 5.3 oz, or 151 g. The next closest currently available commercial radio is perhaps the QRP Labs QMX. This radio is very comparable in size (110 x 64 x 38 mm) and cost, but it does weigh more at 7.3 oz, or 207 g. The more rugged metal case probably plays a big part in the weight difference.

(tr)USDX with a modified case I designed to use the radio as the antenna winder.

How hard is it to replace or repair it?

The (tr)USDX is often sold as a kit for about US$86 (+$20 for the case) [QRPer affiliate links]. Any repairs should simply involve desoldering affected components and replacing, or possibly just updating the firmware. I am a relative noob when it comes to kit building and this kit is honestly not very difficult to build… about one day. The instructions and support videos provided by the hardware developer, Manuel DL2MAN, are very thorough. I learned a lot about radios from building the kit. If you have no interest in kit building, the assembled radio can currently be purchased from Amazon for US$138, complete with a case. Whether purchased as a kit, or already built, the band pass filters on the radio board will need to be tweaked to get the most out of your radio.

How hard is it to operate?

The (tr)USDX only has 4 buttons including the rotary encoder: Menu, Encoder, Enter, and PTT. The Menu and Encoder cover the majority of the adjustments, and most of the time I don’t use the Enter and PTT buttons. The PTT functions only as a ptt or cw key depending on the mode (yes, if your key breaks mid activation, you have a built-in backup key). The single-layer menu system is simple to scroll through, and the most commonly used items are near the front of the menu.

The most challenging aspect of operation for some people is the tiny OLED screen which gets obliterated in bright light. Reading glasses do help, although when you become familiar with the menu are not as important. I would love to see a version with an e-ink display and, more importantly, a push-button wheel rotary encoder (to remove the protruding knob).

How power-efficient is it?

This radio sips power. I tested the radio I built using a LiFePO4 battery that supplied 13.56v. The current draw on receive is 66.1 mA, and 570 mA on CW keydown into a dummy load. A properly tuned (tr)USDX delivers about 5w on each of the five bands when fed ~12v. A set of three 18650s in series will provide the proper voltage and power the radio through many activations.

Does the radio have the desired/required modes and features?

The (tr)USDX is not for princesses. It is a minimalist’s radio. But if you start from the perspective of an ultralight backpacker who has to justify every gram in their kit, this radio checks all of the boxes. It is a five band radio (Low, Classic, and High band models available). It is capable of doing voice, cw and digital modes. Thanks to a beta update from the firmware developer, Guido PE1NNZ, this radio will interface with a computer without requiring a soundcard. One of my favorite features of the radio is the built-in SWR meter. With the SWR feature enabled in the menu, just put the radio in CW mode and press the PTT to find out if your radio is happy with the current antenna arrangement.

This photo was taken while sending the text of this article via Winlink to Thomas, K4SWL.

Does the radio work?

Although my total activation count is nowhere near as high as many of you, I have used the (tr)USDX for a majority of my successful POTA (156 as of this writing) and SOTA (72 as of this writing) activations. My confidence in this little radio was demonstrated when I used it on an ATNO activation of Admiralty Island National Monument (US-4537) in Alaska.

Conclusion

One reason why I like to participate in SOTA and POTA is that it gives me an opportunity to practice field radio deployment and operation with the goal of being ready to communicate anywhere and anytime. This level of readiness means that I have the necessary equipment with me all the time. For me, the (tr)USDX is my EDC (every day carry) radio. It can bounce around in my backpack (in its protective case, of course) and be ready to deploy if needed. If it were to get lost or broken, I can fix or replace it easily. And I find it to be easy enough to use with the understanding that it isn’t a luxury radio.

The author at ~11,000’ in Uncompahgre National Forest.

Video

Click here to view on YouTube.

(tr)uSDX Winder Case:

Click here to download the print file for Jamie’s the modified (tr)uSDX case.

Parting Waves: My Last Activation with the Venus SW-3B

On Tuesday, May 6, 2025, I made a little time in my afternoon schedule to take my Venus SW-3B on a final POTA activation.

I might have mentioned in previous posts (and certainly on the Ham Radio Workbench) that starting in April, I’ve been trying to downsize the shack a bit. This is a process I go through at least annually. My shack/office is very small, so things pile up quickly—and I like to divest myself of gear as best I can.

During this process, one of my readers here on QRPer reached out and asked—on a whim—if I’d consider selling him my Venus SW-3B. I gave it some thought and decided to do so.

I love the SW-3B, but the truth is, I hadn’t used it in a long while. It’s been tucked away in my headrest kit for more than a year, and I just haven’t been reaching for it. That and, frankly, I’ve a couple of MTR-3B LCDs, an MTR-4B, and an MTR-3B Currahee model–I’m flush with super compact transceivers.

I agreed to sell him the SW-3B but told him I wanted to take it out on one final activation—and that’s exactly what I did!

Blue Ridge Parkway (US-3378)

I had to fit this activation into a one-hour window while my daughter was in a class. Fortunately, the class was no more than a mile from the Blue Ridge Parkway. Unfortunately, if I wanted a site with a picnic table for easy operation and setup, I wasn’t terribly close to one.

Luckily, I had my complete SOTA kit packed, including my Helinox chair and Tufteln knee board. With those two items—paired with the SW-3B—I could operate comfortably just about anywhere.

I picked a spot on the side of the road, very close to the parkway entrance from US-25. I knew the drive back to her class would take no more than three minutes.

I paired the SW-3B with my KM4CFT 30-meter end-fed half-wave, which includes a 40-meter linked extension. I figured with this antenna, I could operate on 40, 30, and 20 meters (by removing the link if necessary).

Lately, propagation has been flaky, so having a bit of frequency agility is key to a successful activation!

Gear:

Note: All Amazon, CW Morse, ABR, Chelegance, Spooltenna, eBay, and Radioddity links are affiliate links that support QRPer.com at no cost to you.

Radio:

Battery:

Key & Cable:

Other Accessories:

Camera & Audio Gear:

On The Air

I hopped on the air and started on 20 meters by calling CQ POTA.

Fortunately, 20 meters seemed to be in decent shape. Continue reading Parting Waves: My Last Activation with the Venus SW-3B

The POTA Babe Tries the CFT1

By Teri KO4WFP

Jonathan KM4CFT reached out to me recently to inquire if I was interested in trying his CFT1 QRP transceiver. The inquiry both surprised and delighted me as I’ve never had such an opportunity.

I nearly said no because I am no antenna expert and, as this rig has no internal antenna tuner, I’d need to learn more about antennas, SWR, and resonance.

My limited antenna experience dates back to when I first entered the hobby. I had ZERO antennas and no idea where to start. An acquaintance suggested I make a home-brew linked dipole and gave me a few pointers in doing so. I vividly remember limping through learning how to trim an antenna. That project taught me that I want as low a SWR as possible and to cut the antenna for the portion of the band on which I want to operate.

homebrew linked dipole

Those of you who read my articles here on QRPer know that I use an Elecraft KX2 for my field operations. I’m very happy with this radio and love that it has an internal antenna tuner. But the CTF1 does not. Here is where my hesitation and trepidation at trying this unit entered the picture. I figured the antennas I use on a regular basis might not play nice with the CFT1 and hence my reluctance to say “yes” to this opportunity.

“Craig”, my KX2

But this is ham radio, right? In ham radio, we relish challenges because they are opportunities to learn. This was my opportunity to learn not only about antennas in general but also to be more thoughtful as to how I deploy them in the field. This was an opportunity for growth.

I dug out the RigExpert Stick antenna analyzer I purchased nearly three years ago and tested each of the antennas I currently have, just for jollies. I understand that many factors impact SWR – height of the antenna, coax length, proximity of other objects, etc. For the purpose of this exercise, I just wanted a ball park idea as to what antennas I could or could not use with this rig without a tuner.

I found both the home-brew linked dipole and the Chelegance MC-750 would work fine. Out were the EFRW and AX1. As I’d been hankering for an EFHW in my kit, I purchased the Sparkplug EFHW and trimmed it. These kinds of projects intimidate me because I do not have much experience with them; however, one cannot learn what one does not attempt.

I used the CFT1 on three activations: April 25th at the Savannah National Wildlife Refuge (NWR) (US-0522) with the Chelegance MC-750, April 30th at the refuge again but this time with the Sparkplug EFHW, and Thursday, May 1st at George L. Smith State Park (US-2179) with the Chelegance again.

It was a warm day at the refuge on April 25th. I selected an open area in which I had set up in the past. There were wild blackberries growing directly under the oaks in the shade. The view was lovely and, when not engaged with the activation, the red-wing blackbirds, coots, and other birds kept me entertained. Unfortunately for me, the sun moved out behind the oak trees not long after I arrived and I soon called QRT to avoid being baked.

the field in which I set up
wild blackberries
cooter out sunning itself
water lillies in the impoundments
what is not to love about that view!?

I was pleased with the QSO map for this activation – 27 contacts on 40, 20, and 17 meters over the course of an hour and a half.

QSO Map for Savannah NWR 4-25-2025    Source: qsomap.com

My second experience with the CFT1 was on April 30th, again at the Savannah NWR, however, this time using the Sparkplug EFHW. I found a different spot, one I passed up before but was usable today as it was freshly mowed. There were wonderful, tall oak trees at this location which afforded shade and high, unencumbered branches for installing an antenna aloft. Continue reading The POTA Babe Tries the CFT1

Elecraft KH1 to the Rescue: Squeezing in a 20-Minute POTA Activation

I feel incredibly fortunate to live in an area where a POTA park—the Blue Ridge Parkway—quite literally runs through town. As convenient as that is, I’ve still struggled to squeeze in activations over the past few months. We’ve had so much going on that even impromptu POTA time has felt out of reach.

Fortunately, I have a secret weapon for making the most of even the shortest activation window:

The KH1!

Left: My accessories pouch with contains a throw line, antenna adaptors, audio recorder, cables, spare key, and extras. Right: My Elecraft KH1 in a Pelican M40 case.

My Elecraft KH1 goes with me everywhere—it’s my proper EDC radio. And on Thursday, April 3, 2025, it came in very handy.

I dropped my daughter off at a physical therapist’s office, which just so happened to be right next to the Blue Ridge Parkway. Instead of waiting in the office for 45 minutes trying to catch up on email, I opted for some POTA radio therapy instead!

I left the parking lot and drove to a nearby gravel pull-off along the Parkway—just about four minutes from the PT office.

I hadn’t originally intended to film an activation, but I happened to have my camera, digital audio recorder, and a new magnetic clip-on camera mount with me.

I purchased this mount specifically to record pedestrian mobile activations. The first time I tried it, the results weren’t great: I mounted it at chest level, but my arms dominated the screen, making it tough to see both the radio and the logbook.

That Thursday, though, I had everything I needed—and I figured it was worth another try, this time clipping the camera mount higher and on my right shoulder.

With the clock ticking, I deployed the KH1 and hit the air!

Gear

Note: All Amazon links are affiliate links that support QRPer.com at no cost to you.

Radio and Antenna System

Camera and Audio Gear

On The Air

If you’ve done any POTA or SOTA activations in the past six weeks, you’ve probably noticed conditions have been rough—at times, downright miserable.

Luckily, I picked a day with reasonably good propagation. Continue reading Elecraft KH1 to the Rescue: Squeezing in a 20-Minute POTA Activation

Activating on the Road:  The Last Park

by Brian (K3ES)

In case you haven’t seen previous Field Reports in this series, let me set the stage.  In September and October of 2024, my wife, Becky, and I set out with our dog, Molly, for a great cross-country driving adventure.

We left from our home in northwest Pennsylvania on September 18, driving west to spend some time with my parents at their home in California’s Bay Area.  We returned home on October 31, after driving through most of the states of the American West.  One of the goals for this trip was to activate Parks on the Air (POTA) entities in as many new states as possible along the way (it turns out that with good planning and good weather, it is possible to activate a LOT of states).  An overview of our trip can be found in the following Field Report (linked) on QRPer.com:  Six Weeks and 7300 Miles:  Activating on the Road.

On the westward leg of our trip, we zipped through Ohio and Indiana in a single marathon day of driving, without stopping to activate a park.  There was no intent to diminish these fine states of our union, but I had previously activated parks there.

On the return leg of the trip, our priorities and our perspectives had changed a bit, so we made up for our previous inattention by activating new parks in both states on the way home.  The change in priority came with the realization that we had succeeded in activating every state that I had planned to complete.  I have now activated every lower 48 state west of the Mississippi River, save Arkansas and Louisiana (we intentionally left them for a future trip through the southern states).  The change in perspective came from the realization that activating a park made for a nice break during a day of driving.

We planned for a modest 3-1/2 hour drive on our final day of the trip, so that we could arrive home before dark.

We spent the night near Mansfield, OH, and took our time getting breakfast and checking out in the morning.  We had also looked over our maps and found an Ohio park to activate during the drive:  Lake Milton State Park, US-3515.

Lake Milton State Park

Seen from the park, this bridge carries Interstate 76 across Lake Milton

As I-76 runs east-to-west across northern Ohio, it crosses over the middle of Lake Milton.  For radio amateurs familiar with other attractions along the I-76 corridor, Lake Milton is about 20 miles east of the DX Engineering store.

Lake Milton State Park incorporates the lake itself, as well as selected land around the lake-shore.    We decided to head for one of the park’s picnic areas, located on the eastern shore of the lake near the I-76 bridge.  We found a parking lot, a large grassy area running down to the lake, picnic shelters, and comfort facilities.  As Becky took Molly for a walk around the grounds, I set up to operate from a table in a picnic shelter.

A view of the picnic area beside Lake Milton shows me activating from the shelter at left.  I threw a line over a branch on the tree to the right, and used it to hold my antenna as a sloper.
The gull in this picture was riding the wind, but going nowhere fast.
Standing straight out from its flagpole, this flag spoke eloquently of the wind.

It was a nice afternoon at the park.  The weather was warm and sunny, but a stiff breeze was blowing across the lake.  An American flag stood straight out from flagpole, and soaring gulls hung near-motionless in the sky.  Both provided evidence of the wind’s power.  The warmth of the day and the winds cooling effect were in perfect balance to produce a comfortable environment for activating, even though the breeze provided a bit of audio spectrum QRN.

The Activation

Caught from behind, while focused on incoming code…

I tossed a throw-line over a branch on one of the large trees near the shelter, and quickly hoisted up my Tufteln 35 ft end-fed random wire (EFRW) antenna.  With the antenna set up, I connected the rest of the station.  Moments later, my log was ready, and I was on the air.

I was able to spend an hour on the air, and with the EFRW and the KX2’s amazing internal tuner, I was able to rapidly transition between HF bands.  Operating CW mode at 5 watts, I was successful in making contacts on the 40, 30, 20, 17, 15, and 10m Amateur bands.  In total, I logged 30 contacts, including 3 DX stations from Europe, a thoroughly satisfying activation experience.

This map shows the contacts made from Lake Milton.  It was gratifying to get some DX during the last activation of our trip.

Gear

Note: All Amazon, and eBay links are affiliate links that support QRPer.com at no cost to you.

Conclusion

Becky takes amazing pictures.  Here, another view of Lake Milton.

Packing up the station went quickly, and we were back in the truck and ready for the final leg of our trip.  In about 2 hours of driving, we were pulling into our own driveway for the first time in a month and a half.  It is difficult to fully describe the feeling.  It was really nice to be back home.  The prospects of sleeping in my own bed and relaxing in my own chair were really welcome.

But, at the same time, this adventure was over, and we would soon be back to our old routines.  After 6 weeks together, Becky, Molly and I would again be headed in the different directions occasioned by our day-to-day activities.  So, there was gladness of a return to the familiar, combined with the bittersweet feeling of the end of our travel adventure.

As I think about our trip from the distance of almost 6 months, and a long, cold winter, I realize that I am ready to start thinking seriously about our next driving (and radio) adventure!

Home.  After 6 weeks and 7300 miles, it was nice to get back…

Best 73 de Brian, Becky es Molly

Cherry Blossoms, History, and POTA in Ritsurin Garden

by Mark (JJ5GVY/KB2PIZ)

My wife and I visit Japan every year for 3 to 4 months, usually in the spring. This year, we arrived in early March, and the weather was a bit cold. However, recently, we’ve seen the temperature turn quite warm and mild, with the cherry blossoms just beginning to bloom! It’s a perfect day to play radio!

Since we live in Takamatsu on Shikoku Island, we have easy access to Ritsurin Park (JP-2051).

Wednesday, March 26, was a perfect day for my wife to stroll through the park while I played radio.

Here is the gazebo where I set up shop.

The History of Ritsurin Garden

It is believed that Ritsurin Garden was originally created in the late 16th century, from a garden belonging to the Sato Clan located in the southwest corner of the present garden.

What is now the Nanko Pond was created around 1625, when Takatoshi Ikoma ruled the Sanuki Province (present-day Kagawa).

In 1642, Yorishige Matsudaira began ruling the Takamatsu Domain and inherited the garden. He and the successive generations of his family kept developing the garden over the years, and the 60 scenic spots were named when the domain’s fifth lord, Yoritaka Matsudaira, was in power in 1745. Continue reading Cherry Blossoms, History, and POTA in Ritsurin Garden

From Box to POTA: First Activation with the New Elecraft AX3!

by Thomas (K4SWL)

If you’ve been a QRPer.com reader or subscriber to my YouTube channel for long, you’ll know I’m quite the fan of super-compact, low-profile antennas like the Elecraft AX1 and AX2.

In fact, I just checked, and my Elecraft AX1 activation video playlist alone includes 36 videos as of this post.

Although AX antennas are certainly a compromise in terms of performance, I find them surprisingly effective for on-the-air programs like SOTA, POTA, and WWFF. While they’re not high-gain, they’re also far from the “dummy load” some make them out to be. In fact, the best DX I’ve ever worked in the field was with my Elecraft AX2 and just 5 watts of power—check out the field report.

The New AX3

A couple of weeks ago, Wayne Burdick of Elecraft announced the new Elecraft AX3 portable antenna, the latest addition to the AX line.

Unlike the AX1 and AX2—which attach directly to the radio—the AX3 is fully self-supporting, thanks to its detachable tripod legs and 1/4-20 base mount. This adds next-level mounting versatility, making it ideal for tabletop or ground deployment. (Check out how Conrad so easily mounted it to two different tripod options in his recent field report.)

It covers 30 through 10 meters and uses a 4-position band selector plug, which I personally find more rugged than the AX1’s band switch. Like its siblings, the AX3 is designed to pair with an ATU, but unlike the AX1/AX2, it doesn’t need to physically mount to the transceiver—so it’s compatible with virtually any rig and tuner combo. The AX3 also supports up to 30 watts.

Despite the added versatility, the AX3 still packs incredibly small: the whip, base, and tripod legs collapse to just 6 inches, yet the whip extends to 45 inches in the field. The side-mounted BNC connector avoids awkward cable bends or adapters.

In the spirit of full disclosure, I’m in the testing group for the Elecraft KH1 and, as such, I was aware the new AX3 was on the horizon, but I had not yet tested it in the field until I ordered one and it was delivered on Tuesday, April 29, 2025.

From Unboxing to Activation

Since Hurricane Helene wiped out our local post office, my buddy Vlado (N3CZ) has kindly allowed me to have parcels delivered to his house. When he told me that “a small box” had arrived from Elecraft, I knew exactly what it was.

I had an errand in town that afternoon, so I swung by Vlado’s, picked up the package, and then stopped at the Blue Ridge Parkway Folk Art Center to perform the AX3’s debut activation.

Of course, I packed my Elecraft KX2, thinking it would only be right to pair the AX3 with an Elecraft radio for its first outing!

In my activation video (below), you’ll see that assembling the AX3 was incredibly simple right out of the box. I ordered the full AX3 package, which includes the antenna, mini banana plug, counterpoise wire, tripod legs, BNC-to-BNC cable assembly, and a small nylon storage bag.

I attached the tripod legs, screwed on the whip antenna, clipped the counterpoise to the ground lug, and connected the BNC cable. In less than a minute, the antenna was fully deployed and ready to go!

Gear

Note: All Amazon, CW Morse, ABR, Chelegance, Spooltenna, eBay, and Radioddity links are affiliate links that support QRPer.com at no cost to you.

Radio

Key

Antenna

Battery

Pack/Case

Log and Pen

Camera/Audio Gear

On The Air

The first thing I did was make sure the band plug was set to 14 MHz, then pressed the ATU button to find a match on 20 meters. Continue reading From Box to POTA: First Activation with the New Elecraft AX3!

Conrad Tests the Elecraft AX3 at Silver Sands State Park

Elecraft AX3 Field Report

By: Conrad Trautmann (N2YCH)

My new Elecraft AX3 antenna arrived in the mail. The weather when it arrived was 73° F and sunny with a slight breeze. Space weather was calm.  It seemed like the perfect recipe for a POTA expedition to the unofficial antenna testing range at Silver Sands State Park (US-1716) here in Connecticut on the Northern shoreline of Long Island Sound to try out the AX3. Given that this antenna is specifically designed to be light and portable, I chose my Elecraft KX2 to pair it with, which is also light and portable.

Conrad, N2YCH testing the new Elecraft AX3 at Silver Sands State Park, Connecticut

The AX3 operates on six bands. Out of the box, it can do 30,20,17,15,12 and 10 meters. With the optional AXE1 adapter, you can add 40 meters as well. Elecraft says an ATU is required, which I have built into my KX2. I tested using FT8 on 30/20/17 & 15 meters, the four positions labeled on the front “jumper block.” Using FT8, I was able to use the PSKreporter.info website to get a sense of where my signals were being received. This antenna is capable of handling 30 watts, which is amazing for its size. I ran 10 watts from the KX2.

Unlike the AX1, which needs something to hold it in place such as a tripod or the optional bipod, the AX3 comes with three legs to turn the base into a tripod.

AX3 integrated Tripod

At the park, I tried using the legs which lasted all of 30 seconds before the Long Island Sound breeze blew it right over on its side. Anticipating that it might be too breezy down at the shoreline, I brought a slightly heavier tripod along. The good news is that the bottom of the antenna is tapped with a ¼-20 hole to connect to any standard camera tripod. The heavier tripod did the trick.

Elecraft KX2 with new AX3 antenna

I used a three foot piece of coax as recommended and I had no problem with RFI into the radio or the computer. The KX2 was able to tune to 1.0:1 SWR on all bands except for 17 meters, which was right around 2.0:1. I should note that I had the 13’ counterpoise laying on the ground for this test.

KX2 1.0:1 SWR on 20 meters

I began on 20 meters and in 20 minutes, I had the 10 QSO’s needed to activate the park.

Map showing spots on 20 meters.

Next I QSY’d up to 17 meters.

PSKreporter.info spots on 17 meters

Here, I had plenty of spots, yet I struggled to get two in the log before I gave up and QSY’d to 15 meters. Changing frequency is as simple as pulling the jumper block out and moving the arrow to the correct frequency.

Jumper Block used to change bands

Thankfully, 15 was open and my first QSO was with a station in Ukraine and my second was in California.

QSO Map – Dark Blue are 20 meter contacts, Light Blue are 15 meters and Purple are 17 meters
Completing a QSO with the Ukraine on 15 meters

I made contacts on 20, 17 and 15 meters. Could I manage something on 30? I tried but to no avail. I was spotted by stations on PSKreporter, but after calling for some time, I figured that midday in Connecticut was just not the best time for that band. Before I packed up for the day, I went back to 17 meters which was definitely better than earlier and I logged three more for a total of five on the band.

PSKReporter spots on 15 meters using the AX3 antenna

I took the opportunity to go back to Silver Sands a few days later to try the antenna on 12 and 10 meters, which I did not do on the first trip out. I also wanted to see how elevating the counterpoise might affect the performance. It was downright windy, so I brought along a camera tripod this time to provide more stability. Obviously, the extra weight carrying a full size tripod wouldn’t be ideal for a SOTA activation, but for my test, I brought it along.

AX3 on camera tripod

The high band propagation was miserable when I went out, I was wondering if I’d be able to make any contacts at all. I was pleased to see that elevating the counterpoise allowed 17 meters to easily match to the antenna with a 1.0:1 SWR. I then tried 15, 12 and 10 meters which also tuned right up and I made contacts on all bands.  10 and 12 meters were open to my south. I made QSO’s with Belize, Mexico, Ecuador, the Dominican Republic and Puerto Rico.

QSO Map Day 2 – Purple is 17m, Light Blue is 15m, Pink is 12m and Yellow is 10m (click image to enlarge)
AX3 on camera tripod with elevated counterpoise

The AX3 did not disappoint.

Making QSO’s from California to the Ukraine and down into South America while sitting at a picnic table in a park in Connecticut with just 10 watts using such a small antenna is simply amazing to me. I like the AX1, which I used primarily on 20 meters. Having the multi-band flexibility of the AX3 is very nice, especially now that the upper bands are active, and it provides more flexibility for operating portable and being able to change bands on the spot to adapt to the ever changing band conditions.

Click here to check out the AX3 product page.

Three Generations of CW Ops: Battleship North Carolina Activation and a Family Legacy

by Micah (N4MJL)

It’s not every day that I get the chance to do a POTA activation from the radio room of a battleship. But thanks to the Azalea Coast Amateur Radio Club, I was able to do a POTA activation of US-6831 from the radio room of (BB-55) USS North Carolina in Wilmington, NC.

If you would like the chance to be a guest radio operator for the BB-55, check out http://ac4rc.org to set up your activation.

The below-deck self-guided tour takes you through Radio Central. The radio room that the radio club utilizes can be seen from Radio Central; however, it is separated from public access by a clear plexiglass bulkhead door. Because the public can watch from the other side of the glass, be aware that it can be very noisy.

To make things more distracting, there is a loudspeaker in the radio room central playing pre-recorded Morse code for ambiance.

Radio Central is located a couple of floors down in the belly of the iron-armored beast, so be sure to schedule your activation on the POTA page. There is no cell phone reception below decks.

The radio club has an IC-756 Pro III available for use. I am not sure about the status of the other WWII vintage radios. I definitely recommend you bring your own key! They had a Bencher paddle thrown in the filing cabinet; it was not usable due to the contacts being bent way out of position. Fortunately, I brought my BaMakey TP-III key with me. If you are using a 3.5mm stereo plug, make sure to bring a 1/4” plug adapter for use with the IC-756 key/headset jacks.

The radio club has the IC-756 and external tuner hooked up to one of the battleship’s original long wire antennas. During the activation, I only operated on 20M. I did attempt to tune 17m and 15m, but I was unsuccessful in getting a match. However, that may have been operator error on my end since I was unfamiliar with the radio and that particular external tuner.

After a minute or so of calling CQ, the Reverse Beacon Network did its magic, and I was blown away by an insane pileup. I realized that I am used to operating QRP with somewhat compromised antennas. In sheer panic, I started looking to see how to turn the power down from 100 watts to, say, 2 watts!!!!

In that moment, I saw a vision of a seasoned Navy Radio OP sitting beside me. He reached over and smacked me on the back of my head and said, “Listen, kid, you’re not some hippie tree hugger operating QRP on some windswept mountaintop. You are operating from the battleship USS North Carolina. She has participated in every major naval offensive in the Pacific area of operation during WWII. Now stand tall, run full power, and work ’em all!”

With that old-school counseling session complete, I began to work the pileup. After being on the air for one hour and fifty-three minutes, I worked 67 stations, with two duplicates and one busted call sign (that I know about). Eventually, no one responded back to my CQ, and I sent “Last call fer POTA de N4MJL” twice. After no one responded to my second message, I quickly sent QRT and started breathing again!!!!!!

In addition to working SA4BLM from Sweden, one of the coolest contacts I got that day was from my dad, AC0UT, located in Missouri.

It’s not every ham that can say that their dad called them using CW while on a battleship.

CW actually runs in my family. I am a third-generation CW op. Continue reading Three Generations of CW Ops: Battleship North Carolina Activation and a Family Legacy