Many thanks to Dave (K1SWL) who shares the following field report:
October 6th POTA activation
by Dave (K1SWL)
I’m pretty much a died-in-the-wool CW guy. I’m not averse to dabbling in other modes, though. Friday, October 6, 2023, was such an occasion. I’d noted that there’d been little recent Digital activity in one of our area’s Parks. As if it needs more familiarity, it looms over I-91 only three miles from the Connecticut river. As a result, it’s been activated more than 75 times.
This was Mount Ascutney State Park in VT, and at 3144′, features a paved road to the summit. Off I went!
Finding a parking space at the summit lot wasn’t an issue. The top of the mountain was socked in above 2500 feet. Visibility was 30 to 50 feet, and sightseers were inexplicably scarce.
I normally use a 20M end-fed antenna and homebrew pneumatic launcher. The stunted trees at that elevation made that less practical. I used instead Hustler resonators for 10M and 20M atop the truck cab on a mag mount. I usually consider that setup a compromise, but at 2000 feet above average terrain (HAAT), it didn’t matter.
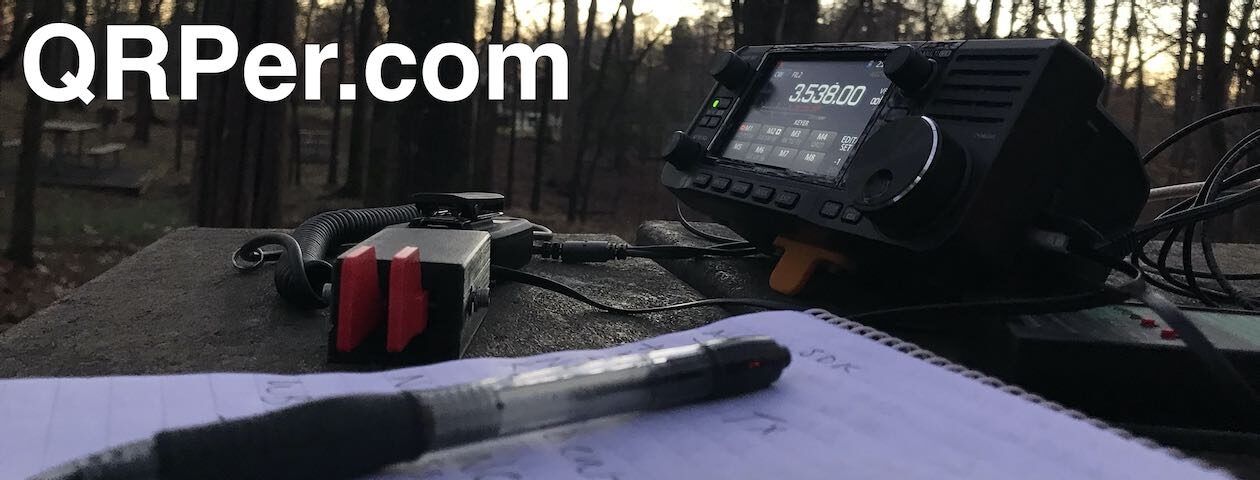
The operating position inside the truck is quite comfortable. A melamine-clad slab serves as the operating surface. (see above) The chain at the far end was a design ‘iteration’. I’d originally just supported that end on the passenger-side arm rest. I’d operated from the driver’s side, and one day got out, went around and absent-mindedly opened the passenger door. The whole station headed for the ground. I caught the rig but the Vibroplex Iambic paddles were a loss. A fabulous excuse for a Begali- and a hard protective case! When I’m operating from the truck, an IC-706MKIIg and 15-AH Bioenno battery does the honors. If gear needs to be carried any distance, the KX3 makes more sense. The station itself takes two minutes at most to set up.
So how’d it work out? A closeup of the WSJT-X screen (seee above) illustrates it. (The device is an MS Surface.) I was getting as many as 3 replies to my CQs at a time. I wound up ‘interleaving’ three contacts at a time. It got confusing! I need to look into ‘Fox/Hounds’ operation to speed things up for the future.
All in all- a great success. A total of 62 FT8 contacts in a little over 2 hours. 16 of these were on 10M at the start and the balance on 20M. The attached QSO Map (att. 4) shows the contact distribution- mainly eastern US with a few Europeans for good measure. Will I do it again? You bet!
Many thanks to Jim (KI7URL) who shares the following article about his portable field radio kit which will be featured on our Field Kit Gallery page. If you would like to share your field kit with the QRPer community, read this post. Jim writes:
(tr)USDx Ultralight Portable Kit
by Jim (KI7URL)
I like to take amateur radio with me wherever I go. In my backpack, I keep a Yaesu FT-60 (powered by 18650 batteries, but that is a different discussion). But I do not like to limit myself to VHF/UHF.
My wife, on the other hand, does not think my “go bag” should take up a significant portion of our suitcase when we travel. I did build a slimmed-down go kit with my Yaesu 891, but that was still north of 12 pounds (vetoed by Wife). Then, I made a go kit with my Yaesu 818, but that was still near the 10-pound zone (again, vetoed). I needed a slimmer package.
I turned to the likes of the QCX mini or other CW-only radios. The problem is that I still am far from proficient with my code, so relying only on CW was a bit more frustrating than I wanted it to be. The (tr)USDx, an open-source radio about the size of two stacked decks of cards, interested me in both price point and functionality. It has SSB, CW, and digital capabilities….on five different bands! Once it was in my hands, I had to build a kit around this new radio!
I want to keep my radio protected, so I started with a small dry box. On the inside, I printed a ‘redneck laminated’ (see also: packing taped) a quick setup guide for using the radio on digital modes if I ever have an in-field case of “the dumb.”
The radio is powered by a small RC battery. I chose this for size, weight, and availability (had it lying around from another project). When fully charged, it reads 12.6 volts. I added powerpole connectors to it because who does love powerpoles (be careful not to short the battery when adding power poles)? I have a small power adapter that goes from powerpoles to the 1.3mm connector so I can use my bench supply or other power sources without making another cable.
I have two antennas that I use (a K6ARK end fed and a QRP Guys No-Tune end fed with 26 gauge wire for 20m). But I like the QRP Guys one because I mostly do 20m and I think it was slightly lighter than the K6ARK antenna (don’t quote me on that though, I loaned the K6ARK one out and have not gotten it back). Plus, not having a tuner lightens my load as well!
Deployed for digital modes.
I have a retired smartphone in my kit that I use for some logging and some other ham-related apps, but mostly for FT8 using the FT8CN app. I also have WoAD on there and soon I hope I can get WinLink functionality with a small TNC as per this video by OH8STN. HF WinLink would be a good benefit with a lighter load than packing in a laptop or Raspberry Pi.
The kit weighs in at 2 pounds 6 ounces (just over a kilogram). This could be stripped down if I only did an SSB, Digital, or, gasp, a CW activation. But as it stands, the small form factor and low weight make the wife happy!
As many readers know, I am on a Parks on the Air (POTA) quest to activate all references in the state of Connecticut. There are 136 parks, and four of them are only accessible by boat. You may have seen my recent field report here on QRPer.com about activating three islands located in the Connecticut River. For those islands, I enlisted professional help from a boat captain with the navigation experience and proper tools (like radar and maps) to access those islands.
The final boat-only accessible island is Minnie Island, located in the middle of Gardner Lake in the town of Salem, Connecticut. I DO have experience kayaking on a Lake, thanks to my uncle, who has two kayaks and has taken me out on Tillson Lake in New York’s Hudson Valley a number of times. Unlike the challenges the river posed, I felt like I could manage the lake on my own. I did need a kayak, though, which I didn’t own.
I had to do some kayak research then. In case you didn’t know this, different kayaks have different specifications on how much weight they can hold. I’m a big guy, six foot five inches tall. Add me, plus a backpack of radio equipment, and I needed to be sure I didn’t sink.
I started on eBay, looking for people selling used kayaks. There are all different kinds of kayaks. Some made for the ocean and dealing with waves and others for casual lake paddler. Some have rudders, some have small, sealed cockpits and some even have motors. I had no idea how serious you could get with all of the accessories and options. I was really looking for something simple.
After striking out on eBay, I found a fishing supply store at the end of the Connecticut River that also had kayaks you could rent. I visited their web site and was happy to see that they were having an end of season clearance sale, where they were selling their rentals. I visited their shop and after looking at my options, I ended up buying an Old Town Vapor 10 kayak. It came with a paddle and life jacket and it was 50% of the price new. A great bargain. The added benefit is now I own my own kayak…a friend suggested that now that I do, there might be IOTA activations in my future.
What sold me on the Vapor 10 was the open cockpit. No trying to squeeze myself in and plenty of room to bring a backpack with the radio equipment in-between my legs. Also, I was able to fit it into my Jeep Wrangler.
Many thanks to Scott (KK4Z) who shares the following post from his blog KK4Z.com:
Georgia Parks on the Air at FD Roosevelt SP K-2173
Friday evening, Mary K4SEZ and I traveled to FD Roosevelt State Park for a weekend in a very nice cabin. The cabin is located on Pine Mountain with some exceptional views. As you can guess, I brought some radios with me. I went QRV right before 1800 hrs. local to make sure all my equipment worked prior to the contest. Besides, the contest I had a regional HF net that I needed to check into Saturday morning. The contest starts at 0800 hrs local Saturday and the net was also at 0800 and lasted about 20 minutes.
Friday night was amazing! Twenty and forty meters was wide open. Using FT8, I made 223 contacts between 1800 hrs Friday and 0300 hrs Saturday morning. I worked stations as far west as Japan and Australia and as far east as Rwanda, Ukraine, and European Russia. Unfortunately, the rest of the weekend was not near as exciting. Between 0800 hrs Saturday morning and 1230 hrs Sunday, I made an additional 477 contacts. The bands were up and down and the pace was a little slower. I worked 48 States and 34 countries when it was all said and done. Sunday morning had an opening on 10 meters and I made 19 contacts many into Europe. In total, I had 700 contacts.
My antenna was my tried and true homebrew 28.5-foot random wire antenna which I named my K4SWL antenna as the original idea from Tom. It uses one 17-foot counterpoise. On this trip, the wire I used was 14 ga (I think), coated Flexweave I got from The Wireman many years ago. I was using some 20-something gauge I got from SOTABeams but because I use this antenna a lot, I worried about the thin wire breaking. I use a 9:1 UnUn with a 1:1 current BalUn to help with matching. The antenna is matched by an LDG RT/RC 100 matching unit. This is fairly new to and so far I like it. The tuning circuit out by the antenna helps keep stray RF out of the shack. It was also quite windy here Friday night and Saturday. The antenna held up well. The only issues I had were some of the sections on my MFJ push-up pole would collapse affecting the tuning. This pole is probably nearly 20 years old and should be replaced.
The radio was “The Rock” my IC-7300. I ran FT8 the whole time at 35-45 watts and the temperature gauge on the radio never moved past cool. Now that the FTDX10 has found a home in the shack, it’s nice to have my old friend back in the field with me.
The cabin is located on the ridge line of Pine Mountain, elevation ~1250′ ASL. Besides great views, it also gave my antenna a large aperture which may account for the many DX contacts I made.
I mainly worked FT8 as I also had to listen to a couple of conferences on the Internet and didn’t want to disturb my wife when she was doing things other than radio. We had a nice weekend away and of course, being able to bring radios is a huge bonus. When I get back home and settled, I may send the log to the GA POTA people. I don’t really contest anymore but they might find it useful for cross-checking.
Many thanks to Adam (BD6CR) who shares the following guest post about his latest project:
From Open Source Project ADX to Kit ADX-S
by Adam (BD6CR)
BD6CR @ CRKits.COM
Original Design: WB2CBA
Modification and Kitting: BD6CR
I knew Barb, WB2CBA from his uSDX design a few years ago and I introduced both DL2MAN and his designs in my blog. So, when I came across the ADX – Arduino Digital Xcvr a few months ago, I immediately ordered both the ADX (through hole) and the ADX UNO (surface mount) PCB samples.
I started building the ADX UNO and put it in a dental floss case and made a few contacts on park bench. However, the soldering is too much for my eyesight. So, I turned back to the ADX because I don’t need to solder any SMD parts, since both the M328P and SI5351 are module based. I could build the project in 3 hours and it worked the first time.
However, I felt unsatisfied with the strong BCI since the CD2003 radio receiver chip was connected as a direct conversion receiver. JE1RAV mentioned in his QP-7C modification project that he tried JA9TTT’s idea to build a superhet SSB receiver with the TA2003 or CD2003, so I tried and it worked very well. I have decided to name the new circuit as ADX-S, where S stands for Superhet.
I shared the great news with Barb and he encouraged me to carry the flag to make it a kit, since my design D4D was his first digital radio and he loved it.
My hardware modification can be outlined in this schematic. I have added an FL1, PFB455JR ceramic filter by Murata and a C25 coupling capacitor from CLK2 of SI5351 module. The RX audio comes from pin 11 instead of pin 4.
Many thanks to Conrad (N2YCH) who shares the following field report:
Field Report :POTA Activation K-0228, Stuart B. McKinney National Wildlife Refuge, Great Meadows Unit
by Conrad (N2YCH)
January 21, 2023
Parks On the Air’s Support Your Parks weekend event for winter 2023 is the third full weekend in January and I found myself without my Jeep. I sold my ten-year-old Jeep Wrangler and my new Jeep wasn’t due to be delivered until the following week, leaving me without my “POTA activation vehicle”. I ended up borrowing my XYL’s MINI Countryman to activate K-0228, but let’s face it, a MINI is not a Jeep. It didn’t have all of my “stuff” in it. I needed to get creative about what to bring along with me that would fit easily in the MINI, yet work well enough to activate the park.
I started with my backpack kit which contains an Elecraft KX3, battery, Signalink and computer (for FT8 and logging).
It includes everything I need to transmit and it’s easy to toss in the car. I just needed to decide on what antenna to use. Since it’s winter here in Connecticut and pretty cold outside, this would be an “in-the-car” activation and without the Jeep, my antenna options were limited. I could have brought my Sotabeams Tac-Mini which could fly my PackTenna EFHW up about 20’. However, anchoring the mast would be a challenge in the cold weather. In the end, I decided to bring my Buddipole tripod and nested mast, which are compact and fit in a small bag which fit right in the passenger seat. Continue reading MINI Portable: Conrad’s POTA field report from Stuart B. McKinney National Wildlife Refuge→
Many thanks to Conrad (N2YCH) who shares the following field report:
QRP-Labs QDX Field Report
K-1716, Silver Sands State Park, Milford, Connecticut
January 13, 2023
By: Conrad Trautmann, N2YCH
A digital mode multiband transceiver for $69? Yes! QRP Labs has the QDX kit available for $69 US. Add $20 if you would like a very nice black anodized aluminum case to mount it in and if you want it assembled and tested add another $45. Visit the QRP Labs web site for all of the details (QDX 4-band 5W Digi transceiver (qrp-labs.com)
How well can a $69 digital transceiver work? Read on…
I ordered my QDX kit back in May 2022. It arrived in June, I assembled it and ran some tests at home. It worked well on FT8 into my home antennas. It interfaces nicely with WSJT-X and I liked the idea of using a low power transceiver to band hop on WSPR. My QDX is an early four band version, which does 20, 30, 40 & 80 meters. I set it to band hop on all four bands not remembering that my multiband offset center fed dipole is not resonant on 30 meters. Since the QDX does not have a tuner, it didn’t like the higher reflected power of a two minute long WSPR transmission into a bad load and smoke resulted. I was fortunate that the failure was isolated to the RF power amplifier transistors and replacing those got me running again. This was my own fault, not the transceiver. Now, it band hops on 20, 40 and 80 meters with no issues, I eliminated 30 meters from the hop schedule.
I share this important story at the beginning of my field report as a warning to anyone considering using a QDX to be very careful when connecting an antenna to it. Since the QDX does not have an internal antenna tuner, you either need a resonant antenna or must use an external tuner to provide a 50 ohm load with low SWR to the QDX. The QRP Labs groups.io site has a number of posts from users with different tuner suggestions.
Now comes the fun part. I visited Silver Sands State Park, K-1716, located on Long Island sound in Milford, CT on January 13, 2023 in the afternoon. While it was Friday the 13th, I had nothing but good luck. Knowing I would be running QRP power, I decided to use what I consider to be my best 20 meter antenna. It’s a modified version of a Buddipole, which I call my “no coil” Buddipole dipole. I use a Buddipole VersaTee mounted to a WILL-BURT Hurry Up mast, which is a push up mast that extends to about 25’ high. The dipole consists of two Buddipole 32” accessory arms, one for each side of the VersaTee and two MFJ 17’ telescoping whips, extended to just about 17.5’. This provides a very broad bandwidth and low SWR on 20 meters. See the screen shot of my antenna sweep from the RigExpert analyzer below.
Here’s a photo of the antenna in the air.
The temperature on this January day was a mild 55 degrees so I was able to set up my equipment in the back of my Jeep. Here’s everything I needed to do the activation. Since the antenna is resonant, I did not use a tuner.
My iPhone gives you an idea of just how big the QDX is, which is sitting just to the right of it. There are only three connections needed, the antenna cable, a 12V power cable and the USB cable. I was using my Bioenno 9ah battery for power. I brought the Bird Model 43 with a 25 watt element in it to monitor the output power and also to measure the reflected power, which barely even nudged the meter. It was effectively zero watts reflected. In the photo above, I was in a transmit cycle and you can see the power meter just a touch above 5 watts. On the computer, you can see a mini pile-up of six hunters in the queue. One thing to note about the QDX is that you can’t adjust the power by lowering the PWR slider in WSJT-X. It’s recommended to leave that at maximum. The way to adjust output power is to adjust the power supply voltage. In this case, the Bioenno had a full charge, so the radio was running full power.
I began the activation without spotting myself, just to see who’d hear me. Here’s a map of the pskreporter showing my spots.
I eventually spotted myself so hunters would know what park I was at. I was amazed that during my activation, I never ran dry or had to call CQ POTA, there was a steady stream of hunters the entire time. The QDX does a fine job receiving, here’s a screenshot of WSJT-X including the waterfall to show what it was receiving.
So, how did the $69 radio do? In a one hour and 17 minute activation, I completed 46 FT8 QSO’s. Here’s my coverage map.
I managed to complete three park to park QSO’s, too. One park called me and I called the other two who heard me and answered. I use JTAlert which helps me keep track of the order of who called. I always try to answer the hunters in the order they called me. I’ve set up a Directed CQ alert in JTAlert for anyone calling “CQ POTA” which helps me to see who else is at a park while I’m activating. If I’m able to contact them, I use the POTA spot list to include their park number in the SIG_INFO field of my log, which is N3FJP. N3FJP is handy to use since I start a new log for each activation and I’ve configured it to upload to LOTW and QRZ when I’m done for the day.
Another thing worth noting is that there is no speaker on the QDX. I’m one of those digital operators who actually listens to the cycles while I’m on the air. It provides a certain cadence to hear each cycle go by so you know what to be looking at or clicking on and when. With no sound coming out of the QDX, it forces you to find that cadence by looking at the computer screen. For me, it means watching the receive audio levels and the progress bar to see if I’m transmitting or receiving. The QDX does have a single red LED on the front panel that will flash during transmit cycles, which is also a helpful indicator.
I’d say the results shown here speak for themselves. I had a steady stream of hunters, I had just one or two QSO’s that needed a second RR73 to confirm and the coverage was as good as most activations I’ve done with more expensive radios and more power. Despite the self-inflicted hiccup I experienced at the beginning, I’d say that If you’re looking to try activating digital for Parks On The Air or even for your home, the QDX certainly works very well and provides a lot of value for the money.
Many thanks to Conrad (N2YCH) who shares the following field report:
New York City Park Rove, December 30, 2022
Conrad Trautmann, N2YCH
After being bitten by the Parks On The Air (POTA) bug, I became an activator in early 2022. I was hooked. Digital, and specifically FT8 & FT4, is the mode I prefer. A lot of experimentation ensued until I was able to refine my POTA setup to an Icom IC-7300 powered by a Bioenno 20ah battery mounted in a four rack unit Gator case and a Buddipole dipole antenna on a push up mast.
As a radio broadcast engineer by trade, I was very focused on maximizing performance and coverage and after much refinement and trying different things, I feel like my POTA kit performs well. I’ve made contacts as far away as Indonesia, Japan and Israel using the POTA setup in a park… so mission accomplished.
The POTA kit above is not something I can easily take with me on a business trip however, especially by air, so I turned my sites to a Xiegu G90 and various end fed half wave antennas and fiberglass masts and more Buddipole parts to pack into my carry-on luggage. Now I could activate parks wherever I could fly to and I’ve completed successful activations in Wisconsin and Georgia.
Still, I needed to pack a second bag and check the luggage to do these trips. What I really wanted was something I could carry on the plane with me.
I knew I had to change my point of view on what I could achieve using a portable kit. A small radio and antenna wasn’t going to get me contacts in Indonesia, but I could transmit far enough to have someone hear me and get my ten contacts to activate a park. Researching my options online constantly brought me to videos and blog posts here on QRPer.com. Thomas loves his Elecraft KX2 and in a few field report videos he demonstrates an Elecraft AX1 antenna connected directly to the radio for some fast CW POTA activations. This setup was appealing because of the size and he always has a successful activation.
I researched the Elecraft options and the KX3 seemed like the right radio for my digital activations. It has a DATA mode, it can run split operation, it’s got a wideband filter setting and while Elecraft only recommends 5 watts for data modes, it can do up to 10 watts. I managed to find and purchase one gently used on eBay.
I installed the Pro Audio Engineering Kx32 aftermarket heat sink to be sure I protected the final output transistors from overheating and use a Signalink model USB SLUSBKX3 as a sound card interface to the computer. The Signalink can key the radio using the audio keying feature, but I chose to use the Elecraft KXUSB cable to use CAT control and let WSJT-X key it instead. It also allows WSJT-X to read and control the radio’s frequency for easy band changes. I have a Bioenno BLF-1209A 9Ah battery to run it rather than use the internal batteries and I haven’t come close to running the battery out on an activation yet.
Then I bought the Elecraft AX1 antenna with the 40 meter AXE1 optional antenna extender and the AXT1 tripod adapter. It is tiny. There’s really no other way to describe it. It’s a little, baby antenna. Fully extended, it is about four feet tall. I was highly skeptical of how this might perform given its size. I’m using a 25’ Buddipole RG-58 A/U 50 ohm MILSPEC-17 cable terminated to BNC connectors to get the antenna away from my computer because I’ve found that RF and USB do not play well together. I typically try to get the antenna situated in a nearby spot, with a little distance between it and the computer. I bought the Maxpedition Fatty Pocket Organizer Thomas suggested on QRPer.com and a little Amazon Basics Lightweight Mini Tripod.
The AX1, the adapter and tripod all fit in the organizer with room to spare and it fits into a backpack with the radio, battery, cables and my Lenovo Thinkpad 3 laptop. I’m also able to fit in the the Bioenno battery and laptop chargers. At the urging of my XYL, I also have a printed copy of my license in the backpack, too. I haven’t had to show it to anyone yet, but I’m ready, just in case. The backpack is a Mindshift model 18L, designed for photographers, but is easily adapted to contain all of the components I need for a portable activation. Here’s a photo…
Many thanks to Scott (KK4Z) who shares the following post from his blog KK4Z.com:
The Maiden Voyage of the Radio Flyer
by Scott (KK4Z)
Radio Flyer Logo (PRNewsFoto/Radio Flyer, Inc.)
When I was young, it was a simpler time. All you needed was a pen knife, cap gun, your dog, and a Radio Flyer red wagon to put your stuff in. The world was your oyster and adventure was right around the corner. Even though I am much older now, and my horizons have expanded; adventure is still right around the corner. It was fitting that my new camper is also a Flyer. I thought it fitting to name my camper the Radio Flyer, big boy’s red wagon.
For my first adventure, I chose to go to the Stephen C. Foster State Park located within the Okefenokee Swamp. It’s about a 6-hour drive from my home QTH. Getting off of the interstate at Valdosta; it’s about a 45-mile drive down a highway that is largely uninhabited. For a man who likes his solitude, I felt alone. I pulled into Fargo, GA for gas, and then it was another 18 miles of desolation to the park. The first gate was entering the refuge. Then another lonely stretch to the park entrance.
The park was quiet with several different species of Owl providing commentary. The park never got noisy while I was there. I liked it. The campsite was rustic and nice. In short order I was set up and ready to go.
One of the things I like about the camper is its simplicity. The interior is open and spacious. there is enough room for me and my gear plus I can sit comfortably. The AC and heater work well. The galley is all I need. I added a microwave that fits on the storage shelf. Continue reading Scott takes the Radio Flyer on a maiden voyage→
QRP POTA Activation During the CQ World Wide Contest
by Joshua (KO4AWH)
I had an opportunity to activate Fort Yargo State Park (K-2177) during the CQ WW DX contest.
Fort Yargo is my local park, about 30 minutes away. The park features a great playground for the kids to play on and many tall trees which are perfect for deploying a wire antenna. There really is not much more I could ask for in a POTA location. Even the noise floor is very low, about S0, so I typically turn on the pre-amp which brings it up to S2-S3 on my Discovery TX-500.
This was very much a last minute plan. I knew the contest was going on which may present some difficulty activating QRP. I knew I would not be calling CQ on 20m where I normally activate and hunting stations could be difficult but likely doable.
There was a bit of rain at the house in the morning, then a promise of drizzle the rest of the day. Not too sure what I would find at the park, but hopefully the rain would hold off and I could get the activation in using the TX-500 without too much worry about it getting wet. I threw in a picnic blanket with a water barrier that promised a bit of protection from the rain if needed it.
I have a go-box setup with my TX-500 and IC-705, as well as several antennas, an ATU, and all cabling and power needed to run FT8 either on my Raspberry PI4 with the TX-500, or on my iPad through the IC-705.
I was taking my wife’s vehicle as she had the car seats needed for the 3 kiddos that were coming along. So, I had to be sure I had everything I needed. There are quite a few additional radio items I keep in the back of my car that I would not have available. But everything should be in the go-box, right?
Go-Box with two full stations, TX-500 and IC-705
After a bit of mist and some rain on the drive over, I planned to setup the TX-500 knowing it would get a bit wet. I tossed the throw line in the tree and pulled up my Tufteln EFHW QRP cut for 20m. In retrospect I probably should have pulled up the EFRW for a bit more band agility.
I tuned around for a few minutes.
Yup, there was not a single free place across 20 meters where I could start calling CQ in the clear. In fact, the stations I listened to for more than a few seconds had someone else start calling right on top of them. 20 meters was indeed crazy.
Connecting an international community through low-power field radio adventures.
Please support QRPer by adding us to your whitelist in your ad blocker. Ads are what helps us stay online. All of our ads are ham radio related--no junk, we promise! Thank you!