Tag Archives: Blue Ridge National Parkway (US-3378)

My First POTA Activation with the New Elecraft KH1 Handheld QRP Transceiver!

Yesterday, I posted some initial notes about the Elecraft KH1 and mentioned that I hoped to perform a POTA activation later in the day.

I’m pleased to report that I was able to fit in that activation!

I’m pushing this report and video to the front of the line because so many readers are eager to see how the KH1 performs during a field activation. Instead of focusing on the park, in this field report we’ll be taking a closer look at the KH1 and my initial impressions after performing a pedestrian mobile POTA activation with it.

Packing the KH1

I had a very hectic schedule yesterday and was on the road in/around Asheville from 8:00AM to 2:00PM before an opportunity opened to fit in an activation.

After a quick trip back to the QTH for lunch, I packed the Elecraft KH1 field kit in my EDC pack (a travel laptop bag).

Herein lies my first impression of the KH1: even though I knew I had packed the entire kit, I felt like I must have been leaving something behind.

Sounds funny, but even though I pride myself on making fully self-contained field radio kits, I felt like there must have be something else I needed. The KH1 field kit just seemed too small, too lightweight, and too compact to have included everything I needed for an activation.

Intellectually, I knew that it included everything needed, but I still did a mental inventory:

  1. Radio? Check.
  2. Antenna? Check.
  3. ATU? Check.
  4. Paddles? Check.
  5. Battery? Check.
  6. Counterpoise? Check.
  7. Log book and pencil? Check.

Hard to believe, but it was all there.

Trust me: the first time you take your KH1 to the field, I bet you’ll feel the same way I did.

Blue Ridge Parkway (K-3378)

Because I was so short on time, I decided to activate the Blue Ridge Parkway which is the most convenient POTA entity when I travel into Asheville from Swannanoa.

It was cold and blustery afternoon the afternoon of November 1, 2023. At my QTH, I checked the temperature and it was about 34F. I knew it would be a bit warmer in town which is a good 1,000 feet lower in elevation, but I still grabbed my gloves on the way out the door. Glad I did!

As I mention in the activation video below, I wasn’t exactly on my “A Game.” I had received a couple of vaccines the previous day and my body was a bit achy as if I was starting to get the flu. But, of course, I wasn’t. Still… I didn’t feel 100%.

I arrived on site and set up couldn’t have been easier:

  1. Open the KH1 pack
  2. Remove the KH1
  3. Attach the counterpoise and string out on ground
  4. Remove whip from clips and attach to top of KH1
  5. Extend whip
  6. Turn on radio
  7. Find a clear frequency
  8. Hit the ATU button for a 1:1 match!

We’re talking a 30 second process even for someone who moves slowly.

Important notes about my KH1

Keep in mind the following notes that are relevant at time of posting this field report (November 2, 2023):

  • I am waiting on a firmware update to add:
    • CW Message Memories
    • CW Decoding
    • Internal Logging
  • I purchased the full “Edgewood” package but I don’t yet have my logging tray/cover yet. Elecraft plans to ship this within the next few days.
  • My KH1 is a very early serial number because I’m in the volunteer testing group.

The KH1 Speaker

The KH1 internal speaker is located on the bottom of the radio between the AF Gain and Encoder knobs.

I consider the Elecraft KH1 speaker to be a “bonus” feature. The speaker is small (1.1 x 0.65”) and limited in fidelity.

I had planned to connect my Zoom digital recorder to the KH1 and record audio directly from the headphone port during this activation. Continue reading My First POTA Activation with the New Elecraft KH1 Handheld QRP Transceiver!
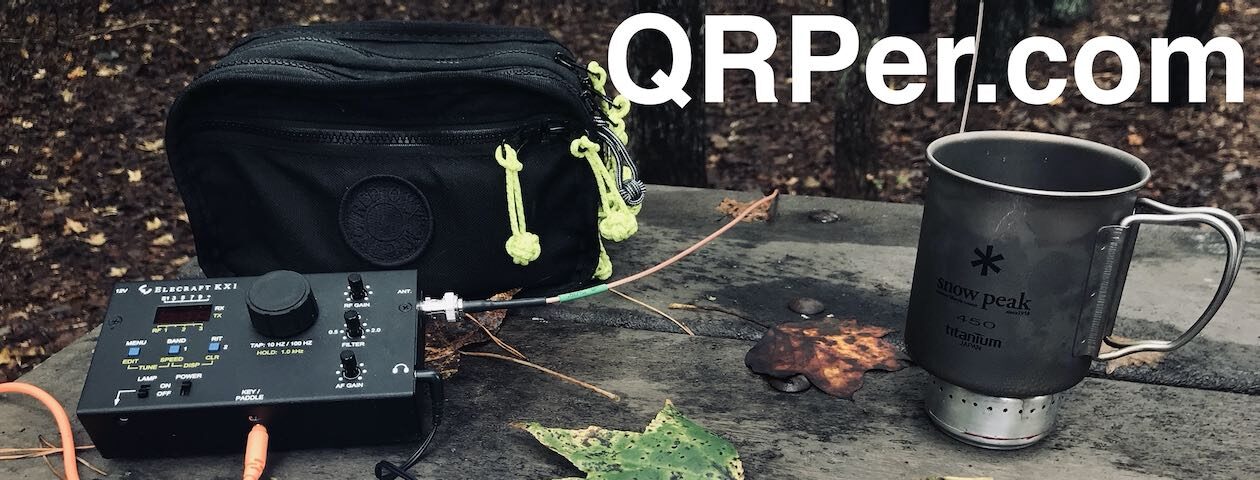
Amazing POTA Fun: Pairing the Elecraft KX1 and AX1…but first, a little lunch!

I was speaking with my buddy Joshua (N5FY) in mid September. He’d recently acquired an Elecraft KX1 and the topic came up about pairing the KX1 with the AX1 antenna. I realized that in all of my experimenting with the AX1, I’d never paired those two. What!?!

Time to fix that!

On Thursday, September 28, 2023, I had a nice midday window to play radio. After dropping my daughters off at their classes, I stopped by the French Broad Food Co-op and grabbed a container of their chicken noodle soup from the refrigerator section.

I then made my way up the Blue Ridge Parkway (K-3378) to the Craggy Gardens Picnic Area at Bearpin Gap–one of my favorite spots on the BRP.

Despite stunning weather and the beginnings of fall foliage, the parking lot was pretty empty. After all, it was a Thursday and a good week or two before leaf-lookers descend upon western North Carolina.

I pretty much had the picnic area to myself (there was one other person there). I picked a picnic table at the top of the hill under the trees.

Mahlzeit!

When my wife and I lived and worked in Munich, the salutation I learned before any other was “Mahlzeit!” At Siemens, I remember walking through the hallways and people I’d never met before exclaimed “Mahlzeit!” as I passed by.

I quickly learned that Mahlzeit essentially meant “Lunch Time!” and I still say it today to my family when I’m about to make or grab some lunch. Funny how these things stick with you.

Now where was I–? Oh yes…

First thing I did at Craggy was set up my stove to start heating the soup. I show this in my activation video below.

If interested, here are the components of my stove kit:

Quick continuity check!

Next, it dawned on me that I would need to attach the AX1 counterpoise to the KX1. I didn’t bring one of my copper clamps to attach to the outside of the AX1’s BNC connector, so I needed to find another grounding point on the KX1.

I then remembered that the KX1 has two thumb screws on the bottom of the radio. Knowing Elecraft, I assumed that these screws could be used as an attachment point for a counterpoise, but I wanted to confirm that the screw itself had a direct connection to ground.

Fortunately, I keep a small multimeter in my supplemental gear bag in my car. It’s an inexpensive Allosun Pocket Multimeter. I use it for things like this: testing.

I set the multimeter to read continuity and then placed one probe on the outside of the KX1’s female BNC and the other on one of the thumb screws. Sure enough, there was a direct connection to ground. I didn’t need to worry about the KX1 chassis paint insulating the connection to ground because the thumb screw had a direct connection. Perfect! Continue reading Amazing POTA Fun: Pairing the Elecraft KX1 and AX1…but first, a little lunch!

Nail-Biter of a Quickie POTA Activation on the Blue Ridge Parkway!

Monday, July 3, 2023, was a day absolutely chock-full of running around town. I had projects that morning to take care of, a doctor’s appointment in the afternoon, and I needed to chauffeur my daughters to/from a meet-up with friends.

I didn’t even have time to properly debate if I could squeeze in an activation. Before I left home, I simply grabbed a radio backpack and put it in the car just in case. If a window of time opened, I’d be at the ready, but there was no real way to predict in advance.

Even though I always have a radio at the ready in the car, I don’t carry all of the things necessary to film activation videos. That’s where my POTA pack comes in.

Since Hamvention, I’ve been using my GoRuck GR1 as a POTA backpack. It easily holds my radio and camera gear.

During the early afternoon, I could see a very short window of POTA opportunity opening: about 30 minutes (start to finish…or set up to take-down) to complete an activation.

Blue Ridge Parkway (K-3378)

Since time was so limited, I also chose to hit the closest predictable site: The Blue Ridge Parkway Folk Art Center. I could have easily set up at a slightly closer spot on the parkway, but if I wanted to include an activation video it would have taken longer to set up the chair, tripod, etc. Those minor details would eat up valuable on-the-air time, especially since I knew in advance that propagation was once again in the dumps (our local star has been in quite an activate state of flaring and spewing CMEs!).

So that I wouldn’t have to do an introduction once I arrived on-site, I started the activation video in the car as I was driving on the Blue Ridge Parkway. In the video, you’ll see the full set-up, activation, and pack-up. Continue reading Nail-Biter of a Quickie POTA Activation on the Blue Ridge Parkway!

Testing my new Headrest QRP POTA Field Kit!

I love field radio kits.

If you’ve read my “Anatomy of a Field Kit” series, you’ve likely gathered that field kits are a bit of an obsession. [Yeah, understatement alert!]

My field kits roughly fall into two main categories: modular and fully self-contained. My modular kits are ones where components like the battery, antenna, throw line, key, and radio are in separate pouches and can easily be combined to make a complete station before I leave for an activation.

My fully self-contained kits are ones that quite literally have everything needed to perform a park or summit activation in one pouch or box. A good example that I’ve documented here is my MTR-3B field kit.

For more on this, again, check out my “Anatomy of a Field Kit” series.

Vehicle kit

If you’re a devoted park and/or summit activator, I think it’s important to keep a dedicated kit kit in your car at all times. Why?

  • It’s ready to grab for impromptu activations
  • It’s handy in case of road-side emergencies in remote areas
  • It’s always  accessible to demonstrate amateur radio to those who are curious
  • It’s always always there for those times when you hadn’t planned to play radio, but the opportunity presents itself

I always have a full radio kit in my Subaru and over the years, I’ve changed and adapted it. For the most part, though, it’s been located in the trunk/boot and lives with anything and everything else I keep back there. Sometimes, it’s in the way when we need to fill that trunk space with family items for a trip or when we’re hauling things around town. Other times, it’s floating/sliding around freely in the back.

On long family trips, I’ve been known to store radios under the floor, but it’s a true hassle to remove them because I have to remove anything in the trunk before lifting the floor.

Contraband I hid in the car during our two month Canada trip last year.

I’ve always wanted a way to store my kit in the car in a dedicated space. In the past, I’ve tried to make a kit that could fit under the driver’s seat–thinking that might be ideal–but there’s very little clearance under it and it’s difficult to remove.

Enter the BROG Headrest Pouch Kit

Before I placed my initial order for the Blue Ridge Overland Gear (BROG) Gadget Bag, I checked out other items on their website. One that immediately caught my attention was their Headrest Kit.

It consists of a Velcro panel that fits around a vehicle headrest and a pouch (or pouches) attach to it.

BROG caters to Overlanders and vehicle storage/organization is huge in that community. The headrest kit makes a lot of sense: it’s using space that’s accessible, doesn’t interfere with any passengers, is off the floor, and is otherwise underutilized!

The big questions, of course:

  1. would the pouch offer enough space to store an entire radio kit,
  2. and would the kit weight too much for the Velcro back to hold it in place?

I asked for the Headrest Pouch Kit ($47.99) to be sent with my Gadget Bag order.

BTW: Big thanks to BROG for giving me flexibility with this order. Since I had no experience with their gear, I asked that they send me a list of items and allow me to evaluate them, then pay (full price) for what I decided to keep. 

Would it work?

I knew I’d need to store a very small transceiver in this dedicated pack. A few could potentially fit the bill–namely the:

  • Mountain Topper MTR-3B
  • Venus SW-3B
  • QCX-Mini
  • TEN-TEC R4020

I eliminated the QCX-Mini from this list because it’s mono band (mine is set for 20M) plus, I really love the field kit I already designed for it. Same for the MTR-3B–the kit I built for it is now time-tested and I love it as-is. The R4020, while quite compact, is the largest in this group of wee rigs. Continue reading Testing my new Headrest QRP POTA Field Kit!

Join Brooks (KO4QCC) on his First CW POTA Activation–!

Friday, March 24, 2023 was a very special day for Brooks (KO4QCC) and for K4SWL.

I’m so excited to share this with you.

You might recall that, last year, I met up with Brooks at Tuttle Educational State Forest as he performed his very first POTA activation in SSB. He did such an amazing job!

Since I first met Brooks, he’s always had a goal of learning CW and activating parks and summits using Morse Code.

I’ve been in touch with Brooks regularly over the past year and have followed him as he progressed on his CW journey.

Though, like me, he has an active family life, Brooks has found the time to practice CW both through lessons and actual on-the-air contacts. Fortunately, this is all possible because–again, like me–his wife and family are very supportive of his amateur radio adventures!

Early this year, we met on 80 meters and had a good one hour rag chew at about 12 words per minute. I could tell he was ready to do his first POTA activation in CW.

To give him a little real-world practice, we decided to hit the field on a day when I was performing an activation and he could log for me in real-time.

I could tell by how well he was logging as I worked stations at 18WPM  that he was ready to perform his first activation, so we made it a goal to do so within the next couple weeks.

Fast-forward to 8:30 AM on March 24 when Brooks and I met at the Folk Art Center on the Blue Ridge Parkway. Coincidentally, this is the same location where I performed my first CW activation!

We deployed his MFJ-1984MP 40 meter EFHW (End-Fed Half Wave) and connected it to his Xiegu X5105 transceiver in very short order. Brooks also chose his lucky CW Morse paddle for this activation.

But before hopping into the field report, let’s back up just a bit…

First CW Activation: Getting there…

Brooks very kindly wanted to share a bit about his CW journey in this field report. He writes:

From the moment I knew of its existence, becoming a POTA activator using CW has been at the top of my “radio bucket list.”

It seemed like the ultimate challenge and I knew I would never be satisfied until I was able to confidently activate parks using CW. There is also a bit of mystique to CW that other modes lack, making it inherently more interesting to me. In this article, I am going to share the path I took to learn CW and how it culminated in a very successful CW activation.

Continue reading Join Brooks (KO4QCC) on his First CW POTA Activation–!

Postcard Field Report: Cheap POTA thrills with the TEN-TEC R4020 and Chelegance MC-750

Welcome to another Postcard Field Report!

My Postcard Field Reports are information-packed, just slightly more concise and distilled than my average field report so that I can publish them on a busy day.

T-T R4020

One of the least expensive radios I’ve ever purchased is my TEN-TEC R42020 two-band CW only radio. I believe I paid $120 for it (shipped!) a couple years ago and it sat on my shelf unnoticed for months until I took it on a POTA activation last year.

Here’s the admission:  I really love this little radio!

It is not a feature-rich radio, and the sidetone sounds like a 1080s handheld arcade game, but it works a charm! The receiver and audio are fantastic and it sports two of my most useful POTA/SOTA bands: 40 and 20 meters.

What’s not to love?

POTA time!

I had an early morning doctor’s appointment on Thursday, February 23, 2023. As a little reward  for doing my annual physical I decided to add a POTA activation to my morning. This was a last minute decision, so only a couple minutes before leaving the house that morning, I grabbed my TEN-TEC R4020, the Chelegance MC-750, and my Spec Ops Backpack (filled with all other field accessories), and I hit the road!

I chose the MC-750 that day because I needed an antenna that could be configured to be resonant on 40 meters since the R4020 has no internal ATU. That and I couldn’t remember if I’ve configured the MC-750 for 40 meters in the past. I know I’ve deployed the MC-750 with the 40M coil, but I think I may have used an ATU to match it.

I arrived at the Blue Ridge Parkway (K-3378 NC) mid-morning and set up in very short order. Continue reading Postcard Field Report: Cheap POTA thrills with the TEN-TEC R4020 and Chelegance MC-750

Lunch Box POTA: Pairing the Elecraft AX1 with the Penntek TR-45L!

As I mentioned in previous posts, I’ve been using the Elecraft AX1 in heavy rotation this year. I made a commitment to myself to do a string of activations with it in January and February and also pair it with a wide variety of radios beyond the Elecraft KX2 and KX3.  So far, I’ve paired the AX1 with the:

In truth, the AX1 can be paired with any radio when you use a tripod mount.

It’s a bit trickier when connecting the AX1 directly to a radio and using the Bipod as a support because 1.) the antenna connector on the radio mustn’t be too high off of the surface, 2.) there needs to be enough clearance on the back of the radio to accommodate the bipod legs and 3.) ideally, it’s nice to have a ground point on the radio, else you’ll need to clamp the counterpoise to the shield of the BNC connector.

In addition, if your radio doesn’t have a built-in ATU of some sort, then you’ll also need a capacity hat or external ATU to finish off the impedance match. (For more notes about the AX1 and AX2, check out this previous post.)

Of course, you don’t have to use Elecraft’s bipod to support the AX1 when directly connected to a radio–you can build or 3D print your own support–but the bipod is really convenient when it does work.

Objective: Lunch Box Radio

One radio I’ve been eager to pair with the AX1 is the Penntek TR-45L.

Why? Because I love the form-factor.

Something about having a lunch box-sized radio sitting on a table with a telescoping whip protruding out the back and, with that combo, the potential of making contacts all over the globe. Continue reading Lunch Box POTA: Pairing the Elecraft AX1 with the Penntek TR-45L!

Speedy POTA: An impromptu post-hike activation with the Elecraft KX2 and AX1

On Friday, January 27, 2023, I dropped off one of my daughters at the library for a creative writing session.

Hazel was along for the ride, so we decided to hike on the nearby Mountains To Sea Trail (MST) while my daughter was in the meeting.

During the hike, I realized that I should have taken my field radio pack along because it would have been so easy to activate both the MST and Blue Ridge Parkway as a two-fer.

Instead, Hazel and I enjoyed our hike and got back to the car with about 35 minutes or so to do an activation–including set-up, on-air time, and pack-up.  That would leave me just enough time to pick up my daughter at the library before they closed for the day.

Challenge accepted!

Because I had been using the Elecraft KX2 and AX1 recently, I had both packed in my Spec-Ops EDC backpack.  In theory–even filming a video at the same time–I knew I could probably fit in a whole activation with 25 minutes on the air. I only needed 10 contacts, and I’ve never been in a situation where the AX1 couldn’t achieve that goal.

Hazel and I grabbed my bag from the car, I started recording a video, and we made out way to the nearest picnic table at the Blue Ridge Parkway HQ parking lot! Continue reading Speedy POTA: An impromptu post-hike activation with the Elecraft KX2 and AX1

New Year’s Day POTA: New VK3IL Pressure Paddle, New FT-817/818 Narrow Filter, and New TPA-817 Pack Frame!

I try to start each year by doing a POTA or SOTA activation on New Year’s Day.

POTA actually issues a certificate for completing an activation on New Year’s Day so there are typically loads of activators and hunters working the bands. It’s an ideal time to play radio.

This year, we had a number of family activities on New Year’s Day, but I made a little time to fit in an activation during the late afternoon at my most accessible spot on the Blue Ridge Parkway: the Southern Highland Folk Art Center.

As with my last activation, I suspected I would be operating in the dark, so I brought my LED lantern along for the ride.

Although not intentional, this New Year activation had a lot of new-to-me stuff involved!

New VK3IL Pressure Paddle

The prior evening–on New Year’s Eve–while my wife and daughters were watching a classic movie movie marathon, I used the time to heat up the soldering iron and work through a few kits and projects that had been sitting on my desk.

One of those projects was a Pressure Paddle designed by David (VK3IL).

Michael (G0POT) sent me the Pressure Paddle circuit board and heat shrink via Andy (G7UHN) several months prior. [Thank you so much, fellas!]

To my knowledge, the VK3IL Pressure Paddle isn’t available in complete kit package, but it’s quite easy to source everything yourself.

On his website, David provides the Gerber files you’ll need in order to purchase the circuit boards from your favorite manufacturer (I’m a huge fan of OshPark here in the States).

Next, you simply need to order the components. Here’s the list assuming you’re using DigiKey:

  • Quantity of 2: 732-7579-1-ND (CAP CER 10000PF 10V C0G/NP0 0805)
  • Quantity of 2: BSS806NH6327XTSA1CT-ND (MOSFET N-CH 20V 2.3A SOT23-3)
  • Quantity of 2: 311-470KCRCT-ND (RES 470K OHM 1% 1/8W 0805)
  • Quantity of 2: 1738-SEN0294-ND (RP-C18.3-ST THIN FILM PRESSURE S)
  • Quanity of 1: Three conductor wire with a (typically) 3.5mm plug (note that I had one of these in my junk drawer)

Keep in mind: the components are surface-mount. If you’re not used to working with SMD components (ahem…that would be me) I suggest buying a few spares of each in case you lose or damage one or more during the build.

It also helps to cover the finished board in heat shrink not only to protect the board and make it easier to grip, but most importantly (if you’re me) hide your electrically-sound yet unsightly surface mount soldering job.

The build might have taken me 20 minutes.

New FT-817ND Narrow CW Filter

Some time ago, I purchased a second FT-817ND with the idea of doing full-duplex satellite work. I later realized I could be taking the second FT-817ND out to the field more often if I simply had another narrow CW filter installed, so I built one.

This New Year’s Day activation was actually the first time I’d taken this particular FT-817ND and its new narrow filter out to the field!

New Armoloq TPA-817 Pack Frame

Earlier this year, I also decided that I wanted to outfit my 2nd Yaesu FT-817ND with an Armoloq TPA-817 pack frame. The idea was to experiment with building a rapid-deployment field kit around it.

This is actually one of the big projects I’m working on in 2023. I’ve yet to sort out the antenna mount I’d like to use with this frame based on how I plan to deploy it. Continue reading New Year’s Day POTA: New VK3IL Pressure Paddle, New FT-817/818 Narrow Filter, and New TPA-817 Pack Frame!

Breaking in my new-to-me Elecraft K2 and CW Morse SP4 paddles during a POTA activation

Radio addiction is a real thing.

We addicts often justify purchases knowing that, in the world of amateur radio, we can always sell gear we’ve purchased without losing too much money each time.

At least, in theory!

In November, last year, I was in touch with a friend who I recently purchased my second KX1 from; turns out, he had an Elecraft K2 he was willing to part with, as well. This is a radio he built (thus, the workmanship is top-shelf) and had updated over the years to be fully loaded the way I would want it myself: all firmware upgrades, all important upgrades for CW and SSB operation, and an internal ATU.

His was also a 10 watt (QRP) version of the K2; Elecraft owners call these “K2/10s.”

My first K2/10 next to the TEN-TEC Argonaut VI I was Beta testing at the time.

I owned a K2/10 between about 2008 and 2016. I sold the K2/10 to purchase another radio. The week after selling my K2/10, a local ham offered me an insane deal on a used K2/100 (a version with a 100W amp) from a club estate sale. No one in our local club wanted it and he really wanted to unload it. I purchased it and for a good three years it was my only 100 watt radio.

My K2/100

Then, in 2019, I sold the K2/100 for $800 and purchased an Elecraft KXPA100 amplifier with ATU for $800 to pair with my KX2 and KX3.

Using my KXPA100 during Field Day in 2020.

I’ve never regretted that decision because I do love the KXPA100 amplifier, although I seldom use it (so much so, I’ve even considered selling it). To date, it is the only device I own that outputs 100 watts.

I did miss the K2. It’s a fantastic radio to take outdoors and has superb receiver chops for the most demanding, RF-dense conditions.

When my buddy offered up his K2, I couldn’t resist. I made myself a goal, though: I had to sell enough stuff to fund the purchase. My friend was good with this. Even though I could have paid him immediately, I asked if he could wait for payment and shipping until I had gathered the funds from sales. I needed that dangling carrot because, frankly, I dislike selling things; I’d rather give away or donate stuff, but I did need to raise funds for this purchase. Continue reading Breaking in my new-to-me Elecraft K2 and CW Morse SP4 paddles during a POTA activation