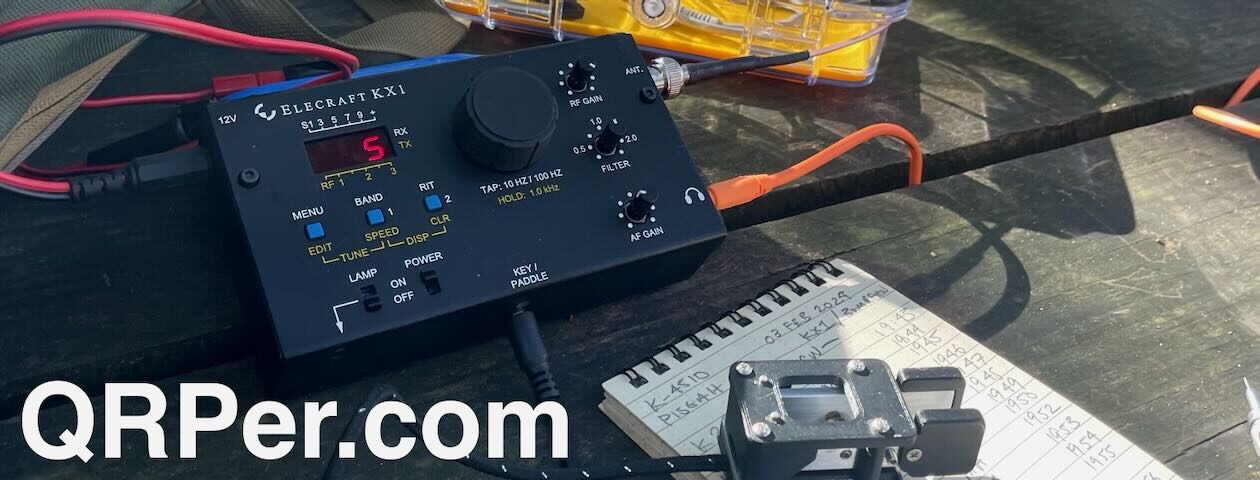
Video: Comparing the Elecraft KH1 with Mountain Topper Series QRP Transceivers

A couple weeks ago, I posted a video where I compared the Elecraft KH1 and KX2;I mentioned that it was the most requested comparison I’d received after I started taking the Elecraft KH1 to the field.

The second most requested KH1 comparison focused on various Mountain Topper series models: the MTR-3B, MTR-4B and MTR-5B.

That’s what we’ll take a look at in the comparison video below!

Basic KH1 ($550)

So when folks have asked me how the KH1 compares with a Mountain Topper, I think of the basic KH1 ($550 US) package, not the ($1100 US) “Edgewood” package like I have.

Why?

Without the Edgewood package, the KH1 lacks the internal ATU, coils for the whip antenna, internal battery, internal battery charger, logging tray, whip antenna, counterpoise, case, and attachable paddles.

In short, the basic KH1 is a 5 band CW-only radio, much like Mountain Topper series radios–in fact, a lot like my 5 band Mountain Topper!

This is why, in my video below, I base the comparison on the basic KH1 package which includes the KH1, power cord, USB cable, and manual only.

Video

I should note that this video primarily focuses on making a purchase decision–it’s not a receiver comparison or in-depth reviews:

Click here to view on YouTube.

A few notes…

The video above contains a lot more detail, but at the end of the day, you can’t make a “bad” choice here. All of these are fantastic radios for someone who enjoys ultra-light operating.

The Elecraft KH1 is more a more feature-rich transceiver; it has adjustable filters, attenuation, CW encode/decode, mini pan/scan, general coverage, SWR/power meter, more message memories, internal logging options (soon), user upgradable firmware, an internal speaker, and much, much more. On top of that, the KH1 can be upgraded to become a complete shack-in-a-box radio with internal battery, charger, ATU, attachable whip antenna, and attachable paddles.

That said, even thought the Mountain Topper radios are spartan in terms of features compared with the Elecraft KH1, they get the job done effectively. Their feature set is laser-focused on providing a SOTA activator everything they need in order to complete an activation and not a lot else. They will also operate effectively on the smallest of batteries and consume a mere 20-17 mA in receive–proper battery misers! For more of my thoughts of the Mountain Topper, check out my MTR-4B review and my “Getting To Know You” report on the MTR-3B.

Again, you can’t go wrong with a Mountain Topper or a KH1: they’re both made by fantastic companies and have a loyal customer base for good reasons.

Price

The Elecraft KH1 base model (40, 30, 20, 17, and 15 Meters) is $550, the complete, fully-loaded, “Edgewood” package is $1,100. They are currently on backorder, but Elecraft does note that they intend to start shipping again mid-January 2024. Click here for the latest news about lead times.

The Mountain Topper MTR-4B V2.

The LnR Precision MTR-4B (80, 40, 30, and 20 Meters) is the latest Mountain Topper radio and the current model at time of publishing. You can purchase these new for $369 US. LnR Precision builds roughy 25 per month when they have the parts. You will need to follow LnR closely in order to be updated when a production run is shipping. Each time units are offered, they’re snatched up in a matter of hours. You can find used Mountain Toppers out there, but pricing tends to be within 10-20% of the new price.

Thank you

I hope you enjoyed this little comparison video and that it might help you make a purchase decision.

Of course, I’d also like to send a special thanks to those of you who have been supporting the site and channel through Patreon and the Coffee Fund. While certainly not a requirement as my content will always be free, I really appreciate the support.

As I mentioned before, the Patreon platform connected to Vimeo make it possible for me to share videos that are not only 100% ad-free, but also downloadable for offline viewing. The Vimeo account also serves as a third backup for my video files.

Thanks for spending part of your day with me!

Cheers & 72,

Thomas (K4SWL)

Greg discovers the joy of QRP in his first QRP SSB POTA activation

Many thanks to Greg (KJ6ER) who shares a post he originally published on Facebook regarding his first ever QRP SSB POTA activation. This post is just as much a break down of his field kit, so we’re also including it in our Field Radio Kit Gallery.


My First POTA QRP SSB Activation

by Greg (KJ6ER)

Wooo hooo! After 700 QRO SSB POTA activations in California over the past 2 years, I decided to try my first 10-watt QRP SSB activation from K-3473 in San Jose. To my pleasant surprise, it was very successful: 121 SSB QSOs in 4 bands (10, 12, 15 and 17M) across 5 countries including DX to Japan, Alaska and Argentina. I worked 34 U.S. states and 5 Canadian provinces. I operated a total of 4 hours, averaging a QRP QSO every 2 minutes. Lesson learned: Inspired by my QRP mentor Kevin Behn, QRP is not only as fun as QRO (when the bands are working) but it is simpler and faster to deploy. And I can wear the entire station on my back!

My QRP shack-in-a-pack is the ICOM IC-705 (in an ICOM backpack) with a 7M Spiderbeam fiberglass telescoping pole and my homebrew resonant halfwave monoband antennas. Quite frankly, a significant contributor to my success was the monoband resonant halfwave antenna: low angle of radiation and more gain than a typical quarterwave with radials. I modeled this after my homebrew POTA Dominator resonant halfwave antenna. If you’re interested in more detailed information about this antenna and components in my backpack, take a look at each photo with descriptions (below).

Starting on 10M, I was planning to work my way down the HF bands to 20M where I assumed would get me the most QSOs and help me officially activate.

Well … I never made it to 20M: by band, 24 QSOs on 10M, 13 QSOs on 12M, 32 QSOs on 15M and 52 QSOs on 17M = 121 QSOs! I will plan to do a 20 and 40M QRP activation soon, as well as 2M and 70cm since the IC-705 supports those bands, too.

Many thanks to all the hunters who helped me complete my first QRP activation! While I certainly did not experience any massive pile-ups like my typical QRO activations, the slower pace QRP activation made it very relaxing. I strongly recommend it! Feel free to let me know if you have any questions, I’d be happy to help  72 KJ6ER, San Jose

Field Kit Details

My complete QRP shack-in-a-pack!

The ICOM IC-705 running 10 watts off a 3Ah Bioenno battery. Just to the right of the pack in the field is my 7M Spiderbeam fiberglass telescoping pole supporting monoband resonant halfwave wire antennas for 10M, 12M and 15M. I also use the pole to operate on 17M and 20M as a sloper or inverted-V, and 40M as an inverted-V. I love how fast I can get operating with just a backpack and telescoping pole!

My first QRP SSB 10-watt activation resulted in 121 QSOs on 10-17M including DX to Japan, Alaska and Argentina.

I thought I would need 20M to activate but the uppers bands worked so well, I never got there. I completed my activation in 4 hours and averaged about 1 QRP QSO every 2 minutes. While I was not getting my usual 5-9 QRO signal reports, I was heard clearly on the low noise upper bands with my QRP SSB signal.

The 7M Spiderbeam fiberglass telescoping pole supports my monoband halfwave vertical wire antennas for 10M, 12M and 15M, as well as 17M and 20M when used as a sloper or inverted-V. I also use it as a center mast for my 40M inverted-V. Continue reading Greg discovers the joy of QRP in his first QRP SSB POTA activation

Field Radio Kit Gallery: KF6EFG’s Not so QRP box(es)

Many thanks to John (KF6EFG) who shares the following article about his portable field radio kit which will be featured on our Field Kit Gallery page. If you would like to share your field kit with the QRPer community, read this post.


Hello Thomas,

Thanks for posting so much interesting content on your website, and helping to host the Ham Radio Workbench! I have gotten a number of ideas for my ‘Fat Boy’ kit from you guys.

I am sending a couple of images of my not-so-lightweight field boxes.

I have been under time constraints while at work, so I developed a series of boxes that can be used in the field while on lunch break.

The core is a black watertight box and a 21ft mast. I can make do with my truck battery in a pinch, and did until I purchased an external battery.

Since I took these images, I have moved the RG-174 and choke to the black box, making black box a complete kit, sans power.

I am playing with a small netbook and will become FT-capable soon!

Black Box:

Orange box:

  • 50ft RG-8x coax cable
  • Bioenno Li4po battery, charger in box.
  • Tufteln Choke adapter
  • Tufteln EFRW antenna cut for 20m.
  • 25 ft RG-174
  • Amazon small packing cube with assorted adapters, small bungee cords, and tools.

Not shown:

  • 21ft fiberglass pole, in a PVC pipe case. Case doubles as a base and short guy point for the mast.
Please don’t mind my messy truck bed!

Green box:

  • Tripods
  • Wolf River Coils WRC-1000
  • Extra 21ft fiberglass pole.
  • Construction twine for disposable guying.
  • 2 extendable whip antennas

Also pictured above:

  • Adjustable antenna clamp
  • Homemade trailer reciever antenna stand off

The Amazon medium packing cube contains:

  • Various adapters
  • Various power pole wires and other ends (clamps, cigarette lighter, ring)

Tool kit:

  • Multi tool
  • Tape
  • Connectors (one screw on UHF, ring, butt)
  • 4 Radial wires , 17 ft.

This box resides in the truck bed for use when I want to use a vertical antenna.

I usually end up on my lunch break at the local RC flying club. I work at a multi use airfield, and the club has graciously allowed me to use their field when no flying activity is present.

73,

John McGrath

Getting To Know You: The Yaesu FT-817/818 Series Portable QRP Transceivers

I’m very fortunate in that in the past few years I’ve acquired a number of QRP radios that I use in rotation when I do park and summit activations.

I’m often asked for advice on choosing radios, and as I’ve mentioned in the past, I feel like the decision is a very personal one–everything is based on an operator’s own particular preferences.

I’ve written formal reviews about most of the field radios in my collection. In those reviews, I try to take a wide angle view of a radio–to see how it might appeal to a number of types of operators. I highlight the pros and cons, but I don’t focus on my own particular take because, again, my style of operating might not match that of readers. I try to present the full picture as clearly as I can and let the reader decide.

The Getting To Know You series gives me an opportunity to highlight one radio at a time and showcase what I love about it and why it’s a part of my permanent radio collection. After we spend a bit of time talking about the radio, we’ll do a park or summit activation with it!

The Yaesu FT-817 and FT-818 Series

As I mention in my “Getting To Know You” video below, my very first dedicated QRP field radio was the original Yaesu FT-817 (non-ND version), so it has a special place in my heart.

At the time, I was living in the UK and travelling extensively throughout Europe with my UK call (M0CYI).

The FT-817 hit the market and it blew my mind. Up to that point, there were no general coverage QRP radios on the market that small, that comprehensive, and that even sported VHF/UHF multi-mode coverage. It even had a small internal battery pack! What?!

I was an early adopter of this radio and travelled with it extensively–indeed, in all of the years I lived in the UK and Europe, the FT-817 was my only amateur radio transceiver.

Fast-forward to 2023–some 23 years later–and I still have an 817. Actually, I have two 817ND’s and one 818ND (although, I plan to sell one of my 817NDs soon–I don’t need three!).

I find the 817/818 to be an incredibly robust and capable field radio. It’s also a brilliant value–few radios offer you the capabilities of the FT-817/818 for under $700.

My FT-817ND in an Armoloq TPA-817 Frame.

Yaesu discontinued the FT-818ND almost exactly one year ago. Retailers no longer have new stock, but there are loads of them on the used market. Keep in mind that the FT-817/818 was a cash cow for Yaesu for over two decades–the used price remains fair because there’s just so much supply out there. I routinely see 817ND and 818ND models selling for between $375-700 depending on how they’re configured and what’s included.

If you’re looking for a comprehensive article about the Yaesu FT-817/818 series, I would encourage you to check out this piece I originally wrote for The Spectrum Monitor magazine.

Time to activate! Continue reading Getting To Know You: The Yaesu FT-817/818 Series Portable QRP Transceivers

Learning from the best – a perfect SOTA morning with K6EL

San Francisco Radio Diary – Part 2

by Leo (DL2COM)

I can’t remember if I have ever walked through a eucalyptus forest before but I am pretty sure I have not as I would have instantly remembered the intense and pleasant smell.

eucalyptus trees
High eucalyptus trees on the north side of Mount Davidson (W6/NC-423)

The morning sunlight and a few scattered low clouds created a rather mystical atmosphere as I was hiking up a narrow and slippery trail on the north-east side of Mt. Davidson in Central San Francisco (W6/NC-423).

sun, fog and trees
This here? Yes please.

My research regarding the trail system of this compact urban mountain was barely existent so I did not end up using the south entrance (Landsdale Ave. & Dalewood Way) which would have taken me to the summit in only a few minutes on a dry and tidy path – but then sans the nice forest panorama. Not worth the tradeoff I’d say.

Mount Davidson Cross
Mount Davidson Cross – memorial to the Armenian genocide in 1915

Due to its proximity to the city center, Mt. Davidson is as easily accessible as pretty much anything in SF for visitors who don’t want to travel further than say a 30 min bus/Uber ride or so. Activators will be rewarded with stunning views of the bay area and the city’s skyline as well as a majestic cross, apparently a well-known SF landmark.

plateau on the summit of mount davidson
The big plateau on the summit of Mount Davidson

I had contacted Elliott (K6EL) prior to my trip to the U.S. who according to the SOTA database has been on Mt. Davidson many times (and on many other summits as I only learned later). This morning I got up early, texted him and was very happy that he agreed to join me spontaneously for my first U.S. activation. Elliott arrived only a few minutes after me as I was struggling to tie a rope to a stone slightly squinting from jetlag. Neither did I bring a throw weight nor a mast due to cabin luggage restrictions. I now know why I cherish these things so much but Elliott assured me that we’d get that wire up eventually and we started to chat.

It turned out that Elliott has done a lot of work for the SOTA and ham radio community. For example, as part of the SOTA management team and being a super active activator (only scratching the surface here): e.g. no.4 Honor Roll Summit-2-Summit (S2S) world-wide pushing almost 10k S2S QSOs. Wait what? That’s a hell of a lot of mountain-top radio experience, so his reassuring words instilled a high degree of confidence for my improvised antenna setup. Not only did we manage to get the 31’ random wire up in a high tree but he also brought a 2m HT which I had (I admit) forgotten in Germany.

While I was still busy setting up the station he had already bagged a handful of FM S2S QSOs. That’s how it’s done.

wire antenna in high trees
31′ random wire to 1:9 unun & 17′ counterpoise in a sorta inv. v-to-l’ish-shape

Suddenly two police officers showed up on motorcycles and I started gathering a number of arguments in my head as to why our activation is a completely legitimate thing (strange reflex or comprehensible?). They approached us in a very kind way and after we greeted each other Elliott pointed to our wire antenna and let them know that “We are ham radio operators and this will be our antenna for the next hour.” Full stop. Ha.

In fact the two officers didn’t need any arguments from us, instead they showed genuine technical interest and at some point we were all joking around together. I believe they were just happy to find everything in good order and maybe also catch a few warming sun rays. Still I loved the way Elliott presented our activity as the most natural and non-optional thing. I guess I just didn’t know how local police would react at first. A good reminder that mutual respect goes a long way.

By now the fog had cleared and blue skies showed all around. I was itching to get on the air! To break the ice I logged a quick S2S contact with WD4CFN on Max Patch, a mountain on the NC/Tennessee border. Off to a great start! Elliott suggested starting on 10m so that’s what I did.

ham radio operation from mountain top
Random rock – the best shack

CQ SOTA DE W6/DL2COM K…uff I needed a few attempts to get that W6/ prefix into a somewhat natural CW flow but then first contacts started rolling in.

F4WBN, Chris, with a strong signal from France. So cool to hear him on the other side of the planet as well. He was shortly followed by LW2DO from Argentina and then a bunch of US operators including four more S2S QSOs before S57S (Slovenia) and JG0AWE (Japan) topped off the log with a warm DX rain. WOW!

Today’s QSO Map

I could have called CQ forever but decided to call it a day after 27 QSOs and rather enjoy the sun, view and good company. After all, I also needed to get back to the city in time.

ham radio operators on a summit
Good times atop la montagna

Elliott kindly offered to give me a ride so we had some time to discuss – how could we not – the KH1, current DXpeditions, and various topics around SOTA, U.S. ham radio and the city of San Francisco.

san francisco park rules sign

I am thankful for this perfect SOTA morning.

Gear used:

vy 73 de Leo W6/DL2COM

Field Radio Kit Gallery: Bob’s MTR-3B Bug-Out Go-Kit

Many thanks to Bob (K4RLC) who shares the following article about his portable field radio kit which will be featured on our Field Kit Gallery page. If you would like to share your field kit with the QRPer community, read this post


MTR-3B Bug-Out Go-Kit

by Bob (K4RLC)

I wanted to build a lightweight Bug Out Go Kit around the incredible Mountain Topper MTR-3B LCD model.

Bass Pro Shop sold a tackle box that seemed perfectly for this. I took a Bear Grylls Scout Knife and cut/customized the partitions as needed. The Elecraft AX 1 antenna and tripod mount, and a flexible tripod fit perfectly.

Counterpoise consists of three 13 ft BNTECHNO 22 AWG silicon wires, attached with a Mueller 55 alligator clip to the tripod mount.

The CW Morse Outdoor Pocket Paddle (and cable) fit into another section. For audio, use either generic ear buds or the rechargeable cell phone speaker with PChero volume adjustment cable.

For power, rechargeable Li-Ion 9 volt batteries use a USB connection, so no separate charger is needed. I keep this in the car.

It’s a great set up for POTA and lightweight enough to throw into a backpack for the steepest SOTA climb. The MTR-3B, the size of a deck of playing cards and not weighing much more, is an awesome QRP rig that’s still a keeper, if you can find one.

Equipment List:

Comparing Coaxial Loss in RG-58 and RG-316

by Eric, WD8RIF

I recently decided that I would operate portable during the upcoming ARRL 10 Meter Contest and would combine this operation with a pair of Parks on the Air (POTA) activations, one on the Saturday of the contest and one on Sunday. While putting together my field station for this, I realized I wanted to see how lossy my RG-58 and RG-316 feedline cables were on 10m. Yes, I could have resorted to online charts of feedline losses, and I know that the RG-316 is lossier than the RG-58, but I thought it would be fun and more enlightening to make actual measurements, to empirically determine the losses in my particular coaxial cables.

The two coaxial cables in question are both 25′ in length and both are equipped with BNC male connectors on each end. The RG-58 cable is a high-quality cable that was originally manufactured to be a 10Base2 ethernet cable, but it’s probably now over twenty years old. The RG-316 cable was recently purchased from Tufteln (link) and includes an RF choke near one end.

To make my measurements, I used my Elecraft KX2 (link) to generate RF into an Elecraft DL1 dummy load with RF detector (link), using a digital multimeter to measure the voltage at the DL1’s measurement points. I used the formula that came with my DL1 assembly instructions to calculate the measured wattage:
P = (((V x 1.414) + 0.15))^2)/50

I made measurements in the CW portion of the 10, 15, 20, 40, and 80m bands, with the KX2 set at 5 Watts output.

My first set of measurements was made with the DL1 connected directly to the KX2’s antenna jack using a BNC union:

Direct (no feedline)
Band Volts Watts
10 11.62 5.498
15 11.59 5.470
20 11.61 5.489
40 11.63 5.508
80 11.63 5.508

My immediate observation was that the KX2 appears to be generating more than 5w when it is set to be producing 5w but also that the KX2 output is essentially same from 10m through 80m.

My second set of measurements was made with the DL1 connected to the KX2 through the RG-58 cable:

Direct RG-58
Band Watts Watts
10 5.498 4.809
15 5.470 4.844
20 5.489 5.004
40 5.508 5.184
80 5.508 5.276

My third set of measurements was made with the DL1 connected to the KX2 through the RG-316 cable:

Direct RG-316
Band Watts Watts
10 5.498 4.190
15 5.470 4.322
20 5.489 4.507
40 5.508 4.774
80 5.508 4.959

I was pleased to see to see that both the RG-58 and RG-316 behaved as I expected them to: the loss increased with increasing frequency.

Using the magic of MS-Excel, I created a table of Loss in Watts for both cables, relative to direct connection and to each other:

Direct Difference (Loss) (Watts)
Band Watts RG-58 vs
direct
RG-316 vs
direct
RG-316 vs
RG-58
10 5.498 0.690 1.309 0.619
15 5.470 0.626 1.148 0.522
20 5.489 0.485 0.982 0.497
40 5.508 0.324 0.734 0.410
80 5.508 0.232 0.549 0.317

In looking at this table, it was immediately obvious that RG-316 is much lossier than the RG-58, particularly on 10m. By looking at the row for 10m, one can see that I am losing nearly 0.7 watts in the RG-58 but I am losing over 1.3 watts in the RG-316.

For completeness, I added columns for Loss in dB to the spreadsheet:

Difference (Loss) (dB)
Band RG-58 vs direct RG-316 vs direct RG-316 vs RG-58
10 0.582 1.180 0.598
15 0.528 1.023 0.495
20 0.402 0.856 0.454
40 0.263 0.621 0.358
80 0.187 0.456 0.269

This exercise showed me that for my upcoming ARRL 10 Meter Contest POTA outings, I would do best by connecting my antenna directly to my transceiver, if possible, without using either coaxial feedline. If conditions at the operating site require me to use feedline, I will chose the RG-58 over the RG-316.

The tables also tell me that RG-316 is pretty lossy regardless of the band; for my regular field operating, unless I’m planning to do bicycle- or pedestrian-portable operations where weight and bulk is a consideration, I’ll carry RG-58 instead of RG-316. (I purchased the RG-316 specifically for bicycle- and pedestrian-portable operations, and I plan to continue to use the RG-316 for those applications.)

At some point, I will repeat this exercise with RG-8X, a feedline that is very close in size to RG-58, is less lossy, but is also heavier and stiffer.

Field Radio Kit Gallery: WN1C’s Elecraft KX3 Camera Bag Activation Kit 

Many thanks to Thomas (WN1C) who shares the following article about his portable field radio kit which will be featured on our Field Kit Gallery page. If you would like to share your field kit with the QRPer community, read this post


KX3 and Speaker Wire Camera Bag Activation Kit 

by Thomas (WN1C)

For the QRPer’s Field Radio Kit Gallery, this is my KX3 and speaker wire in a camera bag activation kit.

This kit is the continuation of the equipment I used for my Maine ATNO expedition and other activities on that return to my parents almost a year ago. Primarily, it’s a change in bags and an improvement of the audio connection options for more sustained activations. Writing up this kit for the gallery also will probably be an incentive for further change. With how loosely packed it is, there’s space for options! You can see this kit in action on my recent trail activation.

The bag packed and ready for an expedition, even if just a little ways away.

The outside is the discontinued Peak Design Everyday Messenger 15″ v1. I picked this up lightly used on my local craigslist with an eye for expanding the kit contents capabilities. In that endeavor, it has been successful, but concentrating on this configuration to start:

Open the top to reveal the gear packed between dividers!

There’s a certain pattern (that I might not keep following in future re-packings), but the arrangement internally is:

  • Outer pouches: coax, radials, headlamp as necessary
  • Lid flap padded pouch: infrequently used adapters and short cables
  • Left division: antenna(s), throw line and weight, headset, coax, banana cables
  • Mid-left division: logging pouch with paddles and notebook
  • Mid-right division: KX3 with cover and heatsink
  • Right division: power cables, hand microphone, lithium-ion battery banks, LiFePO4 battery pack
  • Flopping around on top: TH-350 HT
  • Front zipper pouch: additional notebooks, earbud headphones, pen, coax, ARRL VE badge

Of course, not all of this gets used at the same time. Different LiFePO4 options with Anderson Powerpole connectors can be substituted. For quick and lighter operating (or when wearing more hats), the headset can be left behind. Anyway, to the details!

Full contents spread out much wider than I usually have space for! Featuring the wooden floor I rarely operate over because apartment living.

So, what is all of this?

Bags

  • Peak Design Everyday Messenger 15″ v1 (discontinued, acquired second hand) with an additional bright red divider stolen from one of my Crumpler camera bags
  • Case Logic accessories pouch from who knows where (underneath the notebook)
  • One of WesSpur’s low cost throw line bags (don’t get it, it’s smelly plastic and falls apart, as shown in the picture)

Radios

  • Star of the show: Elecraft KX3 in the “KX3 Pack” configuration (KX3, KXAT3, KXBC3, MH3) with Side KX KX3 Combo panels and cover, plus an aftermarket heatsink
  • TYT TH-350 tri-band HT (144-222-430 MHz) with bundled SRH-17 tri-band whip

Getting RF Out

  • 2x 28′ (ish) speaker wire on BNC-F to binding posts/banana connector, in use for a while, though now beefed up with a bit of heat shrink and crimped spade lugs
  • 4x 17′ speaker wire shorted together on dual banana plug (radials)
  • 6′ RG-58 BNC-M to BNC-M with a random split ferrite on it from who knows where
  • 2x Pomona banana test leads for occasions of connecting more things together
  • 60′ Marlow Excel Throw Line 2mm (a K4SWL recommendation)
  • WesSpur 10 oz Throw Weight
  • Assorted S-Clip Plastic Carabiners for the speaker wire, throw line, and whatever else needs clipping together
  • CablesOnline 25′ RG-316 with BNC for spare feedline
  • 2 foot BNC RG-316 jumper
  • Adapters: BNC F-F coupler, BNC-M to dual Banana-F/Binding Post, Dual Banana-M to BNC-F, BNC tee, BNC to center Banana-F/Binding Post; all provide options of hacking some options together

Getting Signals In and Out

  • Koss SB-45 Communication Headset (cheaper relative of the popular Yamaha headset; it shows, mostly in the cable quality)
  • Bamatech Bamakey TP-III Rot (an excellent set of dual paddles that can also serve PTT duty) stored in an Altoids Peppermint tin
  • Cable Matters Retractable 3.5mm Audio Cable
  • Hosa YMM-261 Stereo Breakout to allow use of the SB-45 electret mic with another switch wired to a 3.5mm plug for PTT on the KX3 mic port rather than just VOX
  • Custom microswitch to 3.5mm PTT (not very good at its job) using this snap switch
  • Elecraft MH3 hand mic from the kit configuration
  • Old Apple earbuds, headphones only (TRS)

Power

  • Bioenno BLF-12045W 12V / 4.5Ah LiFePO4 pack (can be substituted with the 3Ah pack I also have)
  • Anderson PowerPole to barrel plug for KX3 power
  • Old (sometimes RF noisy) USB Type-A power banks, one with a built-in flashlight (souped up with a much nicer white LED)
  • Misc USB cables, A to Micro-B and C for charging from batteries

Documentation

Steve tests the Diamond RHM-8B during a SOTA activation

Testing the Diamond RHM-8B portable screwdriver antenna

By Steve (MW0SAW)

I have seen many amazing K4SWL SPOTA pileups on YouTube using the AX1 antenna and the extension coil. I have fancied trying a small walkie talkie style whip antenna for a while now.

I have a AX1 and KX2, but my Yaesu FT-818 was the radio with a fully charged battery. So I pulled out The Diamond RHM-8B, an antenna I purchased a while ago but never used in the field. It has a BNC fitting and you tune the antenna by sliding the coil up and down for loudest signal and best SWR. They make one very chunky walkie talkie together! Diamond products do have a fantastic air of quality about their construction.

Radio conditions weren’t great, and bands were busy being the weekend of the CQ WW CW contest. So decided to go the my nearest summit that’s amount 12mins in the car and about a 25mins hike up. This was GW/SW-034 Garth Hill. On a clear day you can see out over the Bristol Channel into England, but mist/fog were the order of the day.

I wore the FT-818 and rubber duckie around my neck with the neck strap for a couple of 2m FM contacts, before setting up on 40m SSB sitting on the ground. Without a tablet or chair with me I found it most comfortable to support the radio between my knees.

I was really pleased to get 9 QSOs in the log, some 59 reports, some difficult contacts. Moving on to CW I managed another 8 QSOs with an S2S into Germany.

All the QSOs were UK and mainland Europe, but I was more than happy with the haul for such a small antenna.

So conclusion about the Diamond QRP antenna.

Can you qualify a SOTA summit on a short 1.5m whip antenna? Absolutely, no sweat!

Does it work as well as a full size wire antenna? Of course not. Nowhere close.

However, its makes such a great rapid deploy, ultra packable option with the Yaesu. Not quite as small as a AX1 but you have the bonus of not requiring a tuner. Definitely something for a travel bag if you own a FT-817/818.

Equipment:

Best 73
Steve
MW0SAW/P

POTA During a Beautiful Fall Afternoon at Tallulah Gorge State Park!

Sunday, October 15, 2023, was the final day of the W4 SOTA campout. That morning, Joshua (N5FY) and I packed up our tents/gear then played a little radio at our campsite (at Lake Rabun). We weren’t in a hurry because the morning was so enjoyable. In fact, I think we checked out not a minute before the dealine of 12:00 noon!

We both decided we wanted to squeeze in one more radio excursion before driving back to our QTHs.

Tallulah Gorge State Park (K-2202)

It wasn’t realistic to fit in another SOTA hike due to our schedules, but Tallulah Gorge SP was an easy detour for both of us.

We pulled into the park and queued up to to enter. The park was absolutely teeming with visitors that day. I would have expected nothing less on such a gorgeous Fall afternoon!

Joshua and I found a quiet picnic area–with a few picnic tables spaced apart from each other–near the lake shore. It turned out to be a perfect spot to play radio. We spaced our sites far enough apart so as not to easily interfere with each other while on different bands.

Joshua set up his KX1, a wire antenna, and used VK3IL pressure paddles.

Joshua deployed his KX1 next to the lake and I deployed my KX2 a bit further up the hill.

I paired my KX2 with my “no transformer” random wire antenna. Of course, I used a Tufteln antenna because, I mean, N5FY was standing right there! ?

This antenna consists of two 28.5′ 26AWG wires connected directly to a male BNC. Simplicity itself on the antenna side. It’s the KX2 internal ATU that does all of the matching (since there’s no transformer). I find that the KX2 can match this antenna from 40-10 meters with ease.

I think the magic of these simple random wire antennas is that they’re directly connected to the radio. There’s a bit of efficiency in having no line losses, etc. even if the ATU does soak up a bit of energy.

Time to hop on the air! Continue reading POTA During a Beautiful Fall Afternoon at Tallulah Gorge State Park!

Connecting an international community through low-power field radio adventures.