Category Archives: SOTA

POTA Activations in Canavese: Monti Pelati and Laghi di Meugliano

Many thanks to Christian (IX1CKN) who shares the following field report:


POTA Activations in Canavese: Monti Pelati and Laghi di Meugliano

by Christian (IX1CKN)

My Canavese connections, tied to the fact that my mom is from San Giorgio Canavese, have been strong since I was a child. Yet, at the ripe age of 50, I realized there are corners of that Piedmont area I hadn’t explored.

I discovered two such places this afternoon, activating POTA with Andrea (IW0HK), a significant motivator for seeking out new references. The first was the Monti Pelati and Torre Cives Natura 2000 (IT-0178), in the municipality of Vidracco (though the protected area also includes parts of Baldissero Canavese and Castellamonte).

This interesting site, reachable within 20 km of Ivrea, is where IW0HK and I met, coming from opposite directions. A short walk from the parking area leads to the summit, where Torre Cives stands, with a panoramic viewpoint facing east along the way.

Upon reaching the parking area with informative signs about the reserve.

Overall, not too many trees, altitude (around 570 meters), and a 360-degree view, an optimal situation for HF (High Frequency) operations.

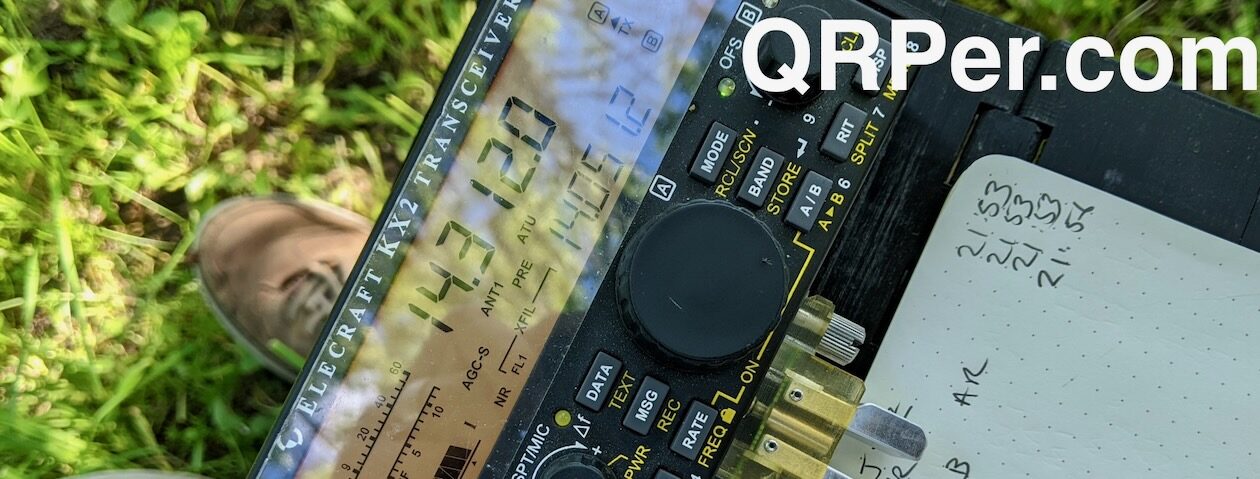
At the “peak,” we set up the HF station with Elecraft KX3 (8 watts), using a quarter-wave vertical on the ground (also on 40 meters, with the appropriate coil), and followed 144 MHz with Quansheng UV-K5.

No need to dwell on the propagation conditions this weekend (with Aurora seen in southern Florida, and around Rome in Italy!). In shortwave, given the sun’s antics, the situation wasn’t promising at all.

However, Andrea and I decided to overcome this fear. Hamradio is, above all, about experimentation and activity. So, instead of worrying about how many would respond before leaving home, we decided to go, turn on, call, and tally them up.

In 34 minutes on-site, we logged 16 QSOs. Nine on 20 meters, 4 on 40 meters (the coil seems to be working, although you can’t expect miracles compensating for a significant lack of physical length in the element): 1 on 15 meters, and 2 on FM 144 MHz.

As you can see from the map, the responders were mainly POTA friends: Spanish, Polish, and English stations. I won’t list the calls, but you could guess them. However, local stations also responded, even on HF, which is always pleasing. With some, it was natural to try 2 meters as well, getting solid signals.

So, satisfaction despite the complicated propagation, whether for the validity of the activation or for discovering a new place.

Ritual photos with the tower, and off to the second reference.

We’re talking about IT-1634, Laghi di Meugliano and Alice. We’re still within a twenty-kilometer radius of Ivrea (in the Turin province). This time, the municipality is Valchiusa (in Valchiusella), and the lake basin sits at 720 meters above sea level. Now, don’t let the fact that we’re about 200 meters higher than the previous reserve fool you. For HF operations, we immediately encountered a less favorable situation because the lake is of morainic origin, nestled in a sort of basin with trees all around.

We chose not to set up right at its edge (it was quite crowded being a Sunday), but – also fearing the rain (which was forecasted) – in a pine-like area near the restaurant that serves the lake.

The quarter-wave antenna, planted on the ground, perhaps wasn’t in the most unobstructed condition possible, but at least we could take advantage of the shelter of the trees and a convenient table/bench.

Here, besides the propagation conditions, maybe the timing didn’t help much either, as we started the activation at 15:30 UTC. Probably, it’s a time when anyone, in half of Europe, on a Sunday afternoon that’s easy to imagine being warm in a good part of the continent, isn’t at home. Anyway, we replicated the pattern of the previous activation, starting on 20 meters with the calls…

In this case, the activation lasted for 32 minutes. The overall result is 15 contacts. Ten ended up logged on 20 meters (including the always active I1JQJ Mauro), two on 40, and three on VHF 144 MHz. Regarding this last band, I would like to highlight both the QSO with Daniele IU1LCI, for a total of 47 km from his QTH, and the one with Beppe I1WKN and Fabrizio IZ1DNQ, who were mobile returning from a SOTA in Valle d’Aosta (ironically, I had contacted them before descending into Piedmont) and stopped near Ivrea to try the contact.

Once again, both Andrea and I, as we returned to the car to head home (and witnessed, among other scenes that only POTA can provide to a hamradio enthusiast, the movement of a flock of sheep), were filled with happiness at the sight of a new place.

Above all, though, as we reviewed the log, the activation remains an opportunity where some ham spirit close to the roots prevails, which warms the heart to keep seeing. Wanting to exaggerate, on the way back to the Ivrea toll booth, there was still the Bellavista hill with its woods and marshes (which is reference IT-1635), but time had truly run out, so that’s for next one.

K4AAC & K4RLC: SOTA Babe in the Clouds at Mt. Jefferson

Many thanks to Bob (K4RLC) for the following field report:


SOTA Babe in the Clouds at Mt. Jeff

de Bob (K4RLC)

Two weekends ago, Alanna K4AAC & I took a short trip to the beautiful Blue Ridge mountains of North Carolina to combine a POTA Weekend and Summits-on-the-Air. We stayed at the New River State Park, a small newer state park that the New River (actually the oldest river in North America) transverses. New River SP is also near some SOTA peaks and the idyllic Blue Ridge Parkway, an almost 500 mile highway that follows the Blue Ridge mountains, starting near Cherokee, North Carolina and ending in Northern Virginia.

Courtesy: National Park Service

This was a needed trip to the fresh air and incredible vistas, as this year brought health problems for both of us, especially an Emergency Room visit for Alanna Easter weekend. Fortunately, with great physicians from UNC and med changes, she was able to rebound fairly quickly.

Friday, we set up a trap Inverted-V on a push-up pole, lashed to the campsite split rail fence. For the radio part, the goal was to put the new Elecraft KH1 through it’s paces. While most rave about this new hand-held CW rig, I still prefer my KX2. Anyway, Friday night with 3 watts on 40 CW with the KH1 and the inverted-V. As it was rainy, I ran the coax inside our Winnebago Solis and set up at the kitchen table (the Winnebago Solis is their smallest vehicle, really just an ergonomic camper van built on a Dodge RAM Promaster chassis).

With a 140 watt solar panel on top and two 100-ampHr batteries, you can boon dock off the grid for several days. Had a productive run of Qs sitting at the table, and with several other LICW members.

As the weather report for Sunday was bad, we decided to do a Summits-on-the-Air activation Saturday on near-by Mount Jefferson, a nearly 5000 ft peak named  for its original owners, Thomas Jefferson and his Father. This is a partial drive-up south of the town of West Jefferson (named for ?).

There are several trails on the top, including the Mountain Ridge Trail and the Lost Province Trail. The trails are incredibly well maintained, flat gravel trails, not like the rock scrabble of the AT, but a definite steep incline. Alanna did great climbing  the steep trail, only having to stop a few times to catch her breath.

About half way up, we were in thick clouds, with visibility only a few feet. It was ethereal. At the SOTA activation zone, there is a rock ledge where you can set up….but be careful, as you don’t want to tumble off the ledge, way down to the valley below. At first, Alanna operated in the clouds. She looked like a spirit SOTA babe emerging through the clouds.

Mt Jeff overlook in the clouds

A few hours later, a cold front came through and blew the clouds away. What a difference! We could see 70 or more miles, down the valley and into the nearby state of Tennessee.

Mt Jeff overlook in the clear

Unfortunately, there was a major solar flare, with an A Index of 12, so conditions were very rough. At first, I tried the KH1 as a hand-held with the attached 4 foot whip and one 13 ft counterpoise. To make conditions better, I set up the Elecraft AX1 miniature vertical on a tiny tripod and attached four 13 ft radials, in the trees and over the rock ledge. It was still an effort, but managed to get the required SOTA contacts. As Mt Jeff (W4C/EM-021) is both a SOTA peak and a NC Park natural area, it’s a two-fer. Unfortunately, my luck capped below the required number of POTA contacts. Thanks to all who tried to dig me out. The Reverse Beacon Network spotted  us around the country, but with very weak signals on 20 CW.

Mt. Jeff with KH1 & whip antenna
Mt. Jeff with KH1 & AX1 on mini-tripod

Sunday, the weather was hit and miss, so we decided just to drive the Blue Ridge Parkway (US-3378), stopping at breath taking overlooks and hiking some on the Mountains-to-the-Sea trail. The MST runs almost 1200 miles from the Great Smoky mountains in the western part of NC to Jockey’s Ridge State Park in the Outer Banks, where North Carolina meets  the Atlantic Ocean. We’ve section-hiked the MST, just as we’ve done on the Appalachian Trail.

Cooking  over an open campfire is the only way to get that great wood smoke flavor. Our hot dogs and hamburgers by campfire, with guacamole, were delicious.

K4AAC Alanna with guac & campfire

Looking forward to trying the KH1 in decent propagation conditions, as it may be the go-to for SOTA and overseas travel.

All-in-all, the clear clean mountain air and great mountain vistas were really therapeutic for our health, and the kind of medicine you can’t put in a bottle.

73 de K4RLC Bob

SOTA, POTA, and a Total Solar Eclipse Adventure: Conrad and Peter Pack It In!

Many thanks to Conrad (N2YCH) who shares the following field report:


QRP POTA & SOTA on Killington Peak, Vermont

By Conrad Trautmann (N2YCH)

Peter (K1PCN) and I decided to travel from Connecticut to Vermont to view the solar eclipse that occurred on April 8, 2024.

We got an early start on Sunday morning April 7th to drive to Rutland, Vermont where we stayed overnight. This positioned us well for a short drive the next morning to drive North towards Burlington, where we’d be under the path of totality.

Knowing we’d have some extra time on our hands on Sunday afternoon, Peter planned two park activations. Our first stop was Calvin Coolidge State Park (POTA US-5541 & SOTA W1/GM-002), which encompasses Killington Peak and is also a two-fer with the Appalachian Trail (US-4556). We also activated Gifford Woods State Park (US-3115), which isn’t too far from Killington.

For the trip up the mountain, we “walked-on” the K1 Gondola ski lift to get up most of the way.

From the top of the ski lift, we hiked another 360 feet, up 100 feet in elevation, in the snow, to get to the actual summit at approximately 4,230’ above sea level.

Photo of Peter and me on the summit

Our kits needed to be self-contained and not too heavy for the hike. Peter packed his Icom IC-705 along with a fiberglass mast and an end-fed half wave wire antenna to do a sideband activation. I brought my Elecraft KX-3, 3Ah Bioenno LifPo battery, and the Elecraft AX-1 antenna to do a digital activation. We both activated on 20 meters and were far enough apart that we didn’t interfere with one another. We also tried 17 meters.

Conrad, N2YCH’s equipment list

Peter, K1PCN’s Equipment List

After the hike up, we surveyed the area to see where the best spots would be for us to set up. Peter took one side of the summit while I set up on an exposed rock so I wouldn’t be sitting in the snow. Peter wore his ski pants…I, on the other hand, ended up with wet jeans by the end. I’ll re-think my attire the next time I do this. I got the radio equipment right but not the clothing selection. Priorities!

Conrad, N2YCH on the summit of Killington Peak in Vermont
Peter, K1PCN with EFHW antenna, which you can see if you look very closely
Peter, K1PCN and his radio and antenna

In addition to the HF radios, we both brought our VHF/UHF handhelds to make contact with each other as well as anyone who might be nearby. Peter brought a Baofeng UV-5R and I brought a Kenwood TH-D72. I was lucky enough to complete a QSO with someone who was mobile and driving along US Route 89, which at its closest point to Killington Peak is a solid 20 miles away. I verified that via email with the other ham after the fact. Continue reading SOTA, POTA, and a Total Solar Eclipse Adventure: Conrad and Peter Pack It In!

POTA/SOTA: Why I don’t log signal reports

Many thanks to Peter (YO8CDQ) who writes:

“Why don’t you enter in the log the received RST and the transmitted RST. I know you’re recording with a tape recorder, but the QSOs are real. If you want to send a QSL to a hunter, what kind of RST do you enter in the QSL?”

Great question, Peter, and I’ve been meaning to make a post about this because it’s one of the top questions I receive from readers (along with why I send 72 instead of 73).

The short answer is: it’s a personal preference.

When I log a rag chew or “non-OTA” contact from home–and one that’s under no time pressure–I typically record a true RST; both what I sent and what I received.

During POTA or SOTA, however, I do not log true signal reports. Some activators do, though.  Again, it’s a personal preference, but here are some of the reasons why I do not:

I typically log on paper and on my phone in real-time. This means that when my hands aren’t sending my exchange, I’m logging as quickly as I can. I honestly don’t think I could keep up with my pace if I added RST to the mix even if just in the electronic logs!

Sometimes my hands are full which makes even basic logging a bit challenging for me!

The POTA and SOTA programs do not import RST info. When your logs are uploaded the RST info is ignored.

I rarely get paper QSLs and when I do, I can always look up the RST in my recordings if I feel it’s important to the other party. For example, I’ve received paper QSLs from DX county hunters (many of those programs require paper QSLs for confirmation) and I will look up the RST from my recordings if needed (it’s actually easy knowing the time stamps from the logs).

Also, since I send an ear-accurate RST to my hunters/chasers, I feel like they’re getting value out of my report in real-time. Many don’t need or want that confirmed on paper weeks later or in other logging systems.

Recording RST to a logging app on my phone–during the activation–simply isn’t easy for me. I struggle just typing and double-checking the callsign I enter. Going back into the app or adif file to enter real RSTs from my paper logs after the fact would be time-consuming and a bit futile since, as I mentioned, POTA and SOTA does not import RST.

In the end, though, you’ll notice that most avid activators don’t record the RST because it simply takes time and it’s actually quite rare that the hunter or chaser needs a true RST even if they follow up with a QSL confirmation. If they need it or ask for it–again–I can probably provide it! Most don’t though, because they receive your report during the exchange.

Should you record RST?

Check out VE6LK’s logs with RST!

If you want to? Heck yeah!

I’ll admit that recording the RST just makes for more complete looking logs. It’s also fun to go back through your logs and give them a once-over to see how a certain antenna might have been performing that day.

Most of the activators I know that record RST only log to paper in the field, then transpose the logs back home and enter RST. That is a much more elegant way to do things if you have the time and it’s important to you.

Since POTA and SOTA are on-the-air activities designed around having fun, do what you feel makes it fun!

How about you? Do you record accurate TX and RX signal reports during your activations? Please comment!

Handheld SOTA DX and Testing K6ARK’s New KH1 Pressure Paddles!

On Tuesday, March 12, 2024, I woke up with SOTA (Summits on the Air) on my mind.

That morning, I plotted to activate a local drive-up summit I’ve basically ignored the past few years.

Peach Knob (W4C/CM-097) is one of the most popular summits in the Asheville area no doubt because it’s so accessible. That said, it’s also a cell phone and water tank site with limited parking. When I first drove up a few years ago, there was a crew working and I would have only been in the way had I opted to activate. Also, to truly be within the activation zone on Peach Knob, there’s really only one small portion of the site where you can set up. Most of the summit is on private land.

I do SOTA primarily for the hikes. I’m not aggressively chasing activation points (ahem…obviously!) so I tend to ignore drive-up sites that are cramped and a bit awkward. Someday, I’m sure I’ll eventually hit Peach Knob just to do it, but that Tuesday? Yeah, I quickly decided I wanted a hike too.

I had a window of about three hours to fit in a SOTA activation. For POTA (Parks on the Air), that’s a generous number–I could easily hit three POTA sites in that amount of time, but SOTA takes more time. Typically there’s a longer drive to a trailhead, then a round-trip hike to figure into the planning as well. I immediately thought of one summit that would fit the bill.

Bearwallow Mountain (W4C/CM-068)

Bearwallow isn’t a long drive from downtown Asheville–maybe 20-25 minutes one-way. The hike to the summit is also fairly short and most enjoyable. The activation zone is the opposite of Peach Knob; it’s massive!

I arrived at the trailhead around 12:30 local and found that there were very few people parked there–-after all, it was a random Tuesday mid-day!

I’d packed my Elecraft KH1 field kit with the intention of doing a fully pedestrian mobile activation. I also had another goal: to test a prototype KH1 pressure paddle Adam (K6ARK) sent me to thoroughly test. I felt there was no better way than to SOTA with it!

Funny, but when operating pedestrian mobile with the KH1, you need so little extra kit. In fact, I could just grab my Pelican M40 case containing the full kit and be ready to go. But I always carry a first aid kit, headlamp, water, and other emergency supplies even if the hike is short and easy. Even if I have no need of those supplies on a short hike, someone else may. Twice, I’ve given other hikers first aid supplies from my pack.

Also, since I planned to film this activation, I needed to carry my camera, mics, and a tripod. I chose one of my favorite day packs: The GoRuck GR1!

My activation video, below, includes a bit of the hike and the contents of my backpack as I set up the KH1.

Gear:

Note: All Amazon, CW Morse, ABR, Chelegance, eBay, and Radioddity links are affiliate links that support QRPer.com at no cost to you.

On The Air

I decided to start this activation on the highest band the KH1 can serve up: 15 meters. After a delayed start (due to phone calls), I began calling CQ SOTA and the contacts started rolling in. It was funny–my first two contacts mirrored a previous Bearwallow activation: Christian (F4WBN) and Michael (N7CCD) in the same order! Within three minutes, I’d logged the four contacts necessary to validate the activation. Continue reading Handheld SOTA DX and Testing K6ARK’s New KH1 Pressure Paddles!

SOTA: First activation of VE6/RA-174

As always there are lots of links within the article. Click one! Click them all! Learn all the things! 

You can see a full video of this activation on YouTube. Use it for CW practice as the footnotes follow the callsigns but only once I’ve gotten it correctly and have transmitted it back.

Our local club runs a repeater network with a dozen repeaters connected hub and spoke style on UHF links. It covers an area approximately 42,000 square kilometers (16,200 square miles) in Southern Alberta. I help to maintain that network and am constantly learning from the smart people that put it together and fix it when it goes awry.

On a Sunday afternoon, in mid-March, I discovered that our club’s VE6HRL repeater at Longview Alberta wasn’t passing audio back to the network, only carrier and some white noise. Local audio was passing along just fine, so the issue is either with the controller or the linking radio. A plan was struck for a service call and to activate this summit at the same time.

Given the repeater is located on Longview Hill, SOTA entity VE6/RA-174, and it is on private land, this summit cannot be activated unless we have reason to be there. Performing repeater maintenance gave us that reason, and so I enlisted the help of Canada’s first double GOAT, VE6VID, to come along with me as it’s a 2 person job to remove a repeater from the rack. We’d activate the summit after the work was complete.

So, on a Sunday morning late in March, the two of us set out in our respective 4x4s to crawl up the road to the summit. In the event you’ve disremembered, I’m in shape -round- and, as a result, my favourite type of SOTA to do is a drive-up. For our repeater sites that are on top of summits, we always bring along two vehicles in case one has mechanical difficulty or gets stuck in the snow. Yes, we have used snowmobiles to do service calls in the past!

The road on the north side of the hill runs up through small valley and does not catch much sun, so the recent snowpack proved to be a small nuisance as we crawled forward. That small nuisance became medium-grade once I got stuck due to lack of forward momentum. A couple of backside-puckering moments later I backed down the hill to take a run at it with more speed and more potty-mouth. Success and no digging with snow shovels was involved.

View from the summit looking West-by-southwest

We arrived at the summit and the view was breathtaking! There were only a few clouds in an otherwise vibrant blue sky, and with the 4″ of snow on the ground it was simply VERY BRIGHT OUT making both of us wish we had darker sunglasses! We entered the repeater building and performed some simple testing in situ and then I powered off the repeater and we removed the gear from the rack and put our tools away a half hour after we arrived. Now we can do SOTA!

The activation zone is quite large at this site and Malen drove a few hundred metres away to set up, providing needed separation between us. He set about to do his thing and I did the same. I brought out my crappie fishing rod/mast and propped it up along the barbed wire fence and set about putting out my VE6VID 66′ EFHW. The folding lawn chair would serve as a table, and a nearby metal cabinet that houses phone lines would hold my Contigo mug and two video cameras.

EFHW running parallel to the fence. The tower is straight in real life, but my camera was not!

With the antenna oriented to the west and sloping downwards and parallel to the very old barbed wire fencing (I call it Tetanus fencing given it’s age and your need for a booster shot if it should puncture your skin), I was uncertain how it would perform. As it turns out I had no cause for concern as I was able to make contacts without too much trouble. I trudged back up the hill to the now-placed lawn chair and finished my set-up.

My “desk” for the activation

I evaluated the bands by listening briefly on the FT8 frequency for 10, 15 and 20m. For me it’s a quick measure of how active the bands are, and dialing off a few kHz or so will reveal how noisy the conditions are. I settled on 20m. Aaand right about then, as if I needed another distraction besides the Canadian Rockies staring me in the face, my HamAlert went off on my phone; regrettably I was unable to hear my friend N4JAW at his activation. As it was too cold to handle my cellphone for typing and spotting, I set about getting spotted via SOTAmat and got on the air. Continue reading SOTA: First activation of VE6/RA-174

Lightweight SPOTA Hat Trick on Angel Island

San Francisco Radio Diary – Part 3

by Leo (DL2COM)

Do you remember the last time you arrived at a new vantage point on a hiking trail and all of a sudden you were stunned by a view that you didn’t expect at all? 

“No kidding.” I said when I approached the summit of Mount Caroline Livermoore on Angel Island and “bang” there it was: San Francisco Bay showing itself from its best side all around and in beautiful sunlight. Wow what a moment to remember.

The stunning view from Angel Island
Is this CGI?

If you’re passing through San Francisco and you’re looking for the perfect ham radio-infused hiking day trip and a very hard-to-beat city panorama, Angel Island is your ticket to a heavenly experience. If you’re the fast type you could get an activation done in half a day even including the summit. My two cents though: Bring a little time and let it soak all the way in. It’s worth it and not just because you can log three references in one go:

Angel Island State Park is covered by the very large Golden Gate National Recreation Area. If you are eager to read about the history of Angel Island you can do so here or here (former immigration station).

A few hours earlier: 

KX2 radio kit, sandwich, granola bars, water. The contents of my backpack on November 8th 2023. This was going to be a good day. I just knew it when I approached the dock at San Francisco Ferry Terminal (Gate B).

San Francisco Ferry Terminal
See ‘ya city life

I had a couple of minutes left so I enjoyed walking through the ferry building with all its nice shops, bakeries and cafes. Many options for advanced coffee-heads to get their fix before going aboard.

coffee and backpack
Yes please

The ferry takes you across the bay in just about 30 minutes, past Alcatraz Island and without noticing you’ll have left big city life behind and swapped it for a remarkable landscape. You can check out their service times here and make sure to keep an eye on the last departure from the island. Otherwise you’ll have to stay for the night. Also the only restaurant on the island was closed (for renovation?) and I am not sure what their plans are to open again. 

From the arrival dock at Ayala Cove I decided to start the hike towards the north-east side of the island via the North Ridge Trail. It takes the better part of an hour to get to the summit if you walk at a constant pace but of course depending on your level of fitness and also how much time you take to enjoy the views. The trails are in very good shape and there is nothing keeping you from finding your personal and comfortable rhythm up the mountain.

Yes I admit it – I am getting excited before an activation.  Most likely it’s because I am looking forward to having fun on the airwaves but then it’s also about not knowing what to expect at the operating site and how to tackle potential challenges. So I usually try to get there fast.

At the summit:

I was still catching my breath from the not-so-difficult ascent and then I saw a demounted truss mast lying on the ground. Should I try to somehow get this up pointing towards the sky and use it as an antenna support? Tempting, but given the fact that I was alone and lacking proper guying material it seemed a bit mad. This brings me to an important fact: There are pretty much no usable trees inside the activation zone when it comes to hoisting a wire. So I do recommend bringing some form of a mast. A luxury I didn’t have due to luggage restrictions on my flight to the U.S.. So the trusty Elecraft AX1 needed to make do.

Truss mast on the ground
Should I or should I not?

There is however a very nice picnic area just below the summit and well inside the AZ. It doesn’t have a roof and it might get a bit windy but it sports a fabulous view and plenty of options to attach masts. Luckily, I was completely alone for the most part of the activation so I didn’t need to worry as much about someone tripping over the counterpoise wire. I used a second round of 50+ sunscreen on my central-European mozzarella body and got the antenna tuned up. 

Downtown San Fransico and Alcatraz Island
Downtown San Francisco and Alcatraz Island

A few seconds into calling CQ on 20m K6EL came in 599+ from a summit nearby and I was super happy to log him given the fact that we had completed an activation together only one day before. He was followed by many US operators almost all the way over to the east coast and then, of course, Chris (F4WBN) from France. Wait – which antenna was I using again in W6?

Ham radio QRP station in San Francisco
Dream operating location

I have “whipped out” this compromised whip so many times to complete an activation that it has become one of my favorite antennas in the arsenal. What fun to reach France from the West Coast with it.

40 QSOs on 20&17m later (yes including some S2S SSB via the KX2’s internal mic and even a contact on 15m thanks to the capable tuner) I had to go QRT because the sun was strong and I wanted to make sure I had a relaxed hike back down. 

ham radio QSO map
Testing the transmit and receive capabilities of a QRP dummy load

Because you get a couple of loop trail options you will also get a completely new perspective of the island and landscape while walking back to the dock which is nice. It is worth mentioning that poison oak is pretty common there and branches of these plants hang down across the paths. I actually touched a leaf accidentally with my arm but was lucky not to get a full load of the poison. The itching was already gone in about an hour.

At the dock I had a nice chat with some of the rangers and then hopped on the ferry back to SF. Thanks to all chasers and hunters for making this a truly special day.

Gear used:

ham radio gear and energy bars
Recharging for the next adventure

California, what have you done? I need to come back. I’ll be back.

vy 73 de Leo W6/DL2COM

Dale Goes “SOTA-Lite” with the Elecraft KH1

Many thanks to Dale (N3HXZ) who shares the following field report:


SOTA-Lite with the KH1

by Dale (N3HXZ)

My KH1 Edgewood Package finally arrived in late February. As an owner of a KX2, I wondered why the heck I was buying the KH1. I am perfectly satisfied with the KX2 for my SOTA operations. However, the idea of shedding a few pounds in my pack got my attention, and the notion that I could set up and be on the air in a minute or so was also intriguing. I like to do several summits a day and this would be a time saver.

I decided to take Elecraft to task by convincing myself that I could do successful activations with just the Edgewood package.

The only exception to the package was to bring along the AXE1 extender so that I could operate 40 M.

I also wanted to prove to myself that I could carry all my gear with just a waist pack (Hence SOTA Lite!). A picture of my gear is shown below. I have an older AXE1 and it does not fit into the whip post of the KH1. I reverted to using the AX1/AXE1/Whip attached to the bnc jack. I include the 33’ counterpoise for 40M, a right angle jack for the ear buds (to not conflict with the log tray), a small first aid kit, deet, a spare keyer, a power bar, and a waist pack. The total equipment weighs in at 2.9lbs (excluding water!).

My traditional SOTA gear includes the KX2, the Chameleon MPAS-Lite Vertical antenna, a small portable pad to set the gear on, and a folding stool. Along with a backpack, the equipment comes in at 17 lbs. Hence the KH1 gear saves me 14 lbs! I decided to jettison the folding stool and operate in true pedestrian style (standing) with the KH1.

Traditional SOTA gear:

KH1 SOTA gear:

Jim (KJ3D) and I have done several activations together and he also purchased the KH1. Our first outing was a day trip on March 4th from our QTH’s in Pittsburgh to Maryland to activate Marsh Hill (W3/WE-001) and Dan’s Rock (W3/WE-002).

Jim operated on 17M and 20M, I operated on 15M and 40M. My favorite band for morning operations is 15M. If you hit it right, you can work both Europe and the West Coast at the same time. 11 AM was such a time and with the KH1 at 5 watts, I was able to reach east as far as Sweden and west as far as California. Not bad for a compact transceiver, 5 watts, and a compromised whip antenna!

I decided to also check out 40M with the AX1/AXE1 on the bnc post. It tuned up nicely and I worked a couple stations (including an S2S!). The QSO map of the contacts is shown below.

The first activation also gave me some real-time experience using the log tray. I was skeptical going in as to how effective this would be, especially in a pile-up. I also like to record RST signal reports so I can report a complete QSO. The log sheets are not set up for that, but you can jot down the signal reports in a lower line. I was recording about 4-5 QSO’s per sheet. With a pile up going on, I found it easier to just stuff the sheets in my pocket after they were used up rather than trying to insert them in the log tray behind the unused sheets.

Still, I applaud Elecraft for the log tray design; doing the best you can with the real estate space available in an all-inclusive compact transceiver unit.

My operating platform switched from a rectangular pad holding the KX2 gear on my lap while sitting in a stool to operating from my left hand while standing. The picture below captures my operating set-up. As a courtesy, I like to include the chaser’s name in my QSO. I have a sheet of ‘Frequent Chasers” in my hand as a quick reference!

Having completed an initial outing to work out the kinks of operating a new rig, we took a two-day trip to the Blue Ridge mountains on March 14th-15th and activated seven summits along Skyline Drive. I wanted to see if the KH1 and my slimmed down gear would meet the challenge. T

he summit hikes along Skyline Drive are not too rigorous; roughly 0.5 to 1 mile each way with elevation gains from 200 ft. to 600 ft. We operated North Marshall (W4V/SH-009), Hogback Mountain (W4V/SH-007), The Pinnacle (W4V/SH-005), Stony Man (W4V/SH-002), Hawksbill (W4V/SH-001), and Hazeltop (W4V/SH-004). Here is a pic of Jim operating atop North Marshall.

The KH1 performed flawlessly. We operated all the bands (40/30/20/17/15). Activations got easier as we got more familiar with operating the rig. I grew very accustomed to activating standing up; Jim preferred to sit on a rock or log. What surprised the both of us was the positive impact on our physical endurance from shedding 14 lbs of gear. This cannot be underestimated for rigorous summit hikes and for me is a key reason to buy the KH1.

Another key factor was eliminating the time needed to set up and tear down a more traditional SOTA set-up (transceiver, antenna, cables, etc.).

Finally, my fears about operating 5 watts with a compromised whip antenna have vanished. From my experience having 5 operating bands is more important than more power, or a larger antenna. Below is a composite of my two-day activation QSO’s which encompassed the 5 bands available with the KH1.

Finally, the article would not be complete without a view atop Dan’s Rock (W3/WE-002) just off I68 near Cumberland MD.

No, your eyes are not deceiving you. Aside from a beautiful view looking east, you have psychedelic paint covering the rocks! At first you think this is an affront to the natural beauty of the land, but after a while it kind of grows on you. 🙂

Radio Gear:

SOTA and POTA in Japan: Ara combines travel and radio with a little help from friends

Abroad in Japan: SOTA and POTA

by Ara (N6ARA)

Getting the License

Several months ago, my wife and I were planning our first trip to Japan, and I couldn’t help but look at all the nearby SOTA summits and POTA parks and entertain the idea of activating one of them. While stunned by the sheer number of high point summits and local parks (many of which are easily accessible via Japan’s incredible public transport system), I realized one question I hadn’t asked myself yet: Can I even operate in Japan?

I recalled the concept of a reciprocal licenses from the ham test, but never really looked into it. A quick Google search yielded the JARL (the ARRL equivalent in Japan) foreign amateur radio license website, which details the process for submitting your documents to obtain the license.

However, I quickly learned that the application must be submitted at least 60 days prior to the date of operation. Problem was… I was 58 days out.

Around this time, I let my friends, Waka-san (JG0AWE), Kazuhiro (7N1FRE), and Ted (JL1SDA), know that I would be visiting Japan. They leaped into action and helped me figure out if there would be a way to obtain my reciprocal license in time, and advised me on which summits and parks would be doable with my constraints.

Thankfully, Waka-san was very generous and offered to make an appointment with Japanese government to apply for the reciprocal license on my behalf. I was absolutely stunned by this. I struggle to make appointments at the DMV office for myself, let alone for someone else!

Two weeks later, I was surprised to learn that my license had arrived. I was now JJ0XMS in Japan. This news fittingly arrived around Christmas, making it easy to remember the “XMS” part of my call. The reciprocal license I received was classified as “1AM”, meaning 1st Amateur license for mobile. This meant I could operate on all bands at power levels below 50W, which is perfect since I tend to operate QRP most of the time anyway.

It helps to have friends around the world, but please learn from my mistake, submit your JARL-96-04 application at least 60 days (plus margin) prior to your trip and obtain your license the right way. If you have any questions about the form or the process, contact Mr. Ken Yamamoto (JA1CJP) via email at [email protected] 

Band Plan

With my license sorted, the next step was to familiarize myself with the Japanese Band Plan. After careful review, I learned it is entirely possible to accidentally transmit out of band or mode if you are not careful. For example, in the US the 2m band ends at 148 MHz, but in Japan the band ends at 146 MHz. So in theory, an operator with a US radio could accidentally transmit on a forbidden frequency.

It’s also important to note that the calling frequencies are different for all bands and that some bands have dedicated emergency communications frequencies. Thankfully, the translated Japanese Band Plan covers these extensively.

Planning the Activations

I started planning my activations by setting the goal of activating at least one SOTA summit and POTA park. I figured I’d gain the experience of doing both to see how they differ from what I’m used to in the US (and writing this blog post).

For this trip, we mainly stayed with our friend in Tokyo, so I was limited to the summits and parks near the city. To start, I figured I’d take a look at the POTA map since Tokyo is a flat city (read as, no SOTA summits to be found within the city itself), so worst case, I’d only do a POTA activation.

Much to my delight, I learned that Tokyo has 146 POTA parks within the city alone… and best of all… they are accessible via Tokyo’s public transportation system! Overwhelmed with all the options, I figured the best thing to do next is to try and see which nearby parks had the most space and activation count. I figured that would improve my odds of activating without any issues.

To be honest, my main concern was putting up an antenna in a park which I’m not allowed to in, or folks approaching me to ask what I’m doing, only to run into a language barrier issue. After looking through several options, I landed on Yoyogi Park JA-1255. The park was near where I was staying, fairly large, and had almost 100 activations. 

Next was planning the SOTA activation. Since there are no SOTA summits in the city proper, it meant I would have to travel a little to get to one.

Coming from Los Angeles, one of the most car-centric cities in the world, I did not expect to find that most Tokyo residents (including my friend) don’t own a car. Renting one is an option, but I figured it’s not worth the effort. Especially since Japan drives on the left hand side of the road – which I’m not used to. That meant driving to a trailhead was out of the question for this trip. Thankfully, that wasn’t as much of a problem as I initially thought.

Looking through the SOTA map, I found several trailheads to the east of the city that are easily accessible via train/bus and short walk. Again, I looked at the activation count to get a sense of what is attainable and found Mt. Arashiyama JA/KN-032. The summit had 84 activations with a relatively easy 762ft gain across 2.25mi and the trailhead is a 15 minute walk away from the train station. The only downside was that the train ride itself was about an hour and a half away from Tokyo. But as those who do SOTA know, the commute to the trailhead is part of the journey. (I think there’s something wrong with us.)

Packing

With a game plan settled, it was time to configure the kit. One important thing to note here is that when I submitted my paperwork to apply for the license, I forgot to include the radio make/model I planned to use (required for the application process). Thankfully, Waka-san registered the ICOM IC-705, an HF/UHF/VHF all mode transceiver (which I so happen to have). This afforded me the flexibility to work a wide range of bands and maximized my odds of having a successful activation.

With the radio figured out, I thought to pair it with a portable antenna that strikes a good balance between volume/mass and performance. My hope was to cover 10/15/20m for DX and 40m for working locals, so naturally I gravitated towards my trusted K6ARK End Fed Half Wave EFHW with an added load coil, making it resonant on 10/15/20/40m. I like to use this antenna in an inverted-V configuration using a 7.2m fishing pole. Since I had one shot at each activation, I figured it would be wise to pack a back up antenna just in case something broke mid-transport, so I also decided to pack my Elecraft AX1 vertical whip antenna and T1 tuner.

For CW paddles, I couldn’t resist packing my recently acquired Ashi Paddle 45 from Mr. Haraguchi 7L4WVU in Japan. Only seemed fitting! Finally, I thought to print out copies of my US and Japanese ham radio license, and a translated note describing ham radio, SOTA, and POTA just in case someone asked what I was doing.

Packing List:

[Note: All Amazon links are affiliate and support QRPer.com at no cost to you.]

Welcome to Japan

As soon as we landed in Japan and settle in at our friend’s apartment, we couldn’t help but go out for a nice bowl of warm ramen at Ichiran. It was a cold night, I was jet lagged, and this was exactly the “reset button” my body needed to adjust to the new timezone. I slept like a log that night. Highly recommend. 

Since this was my first time in the country, I tried my best to absorb as much of the food and culture as possible. From the Yakitori, to the Tonkatsu, to all the various Japanese curries, and Onigiri, I was glad to be walking around the city to burn off all the calories I was consuming. Everything we ate tasted incredible!

One of the first orders of business was to visit Akihabara, the electronic town I had heard so much about. Walking through shops, I found every possible component imaginable. Want a transformer? There’s a small shop that has every variant you can think of. LEDs? There’s a shop with a selection that will make you see floating dots when you close your eyes. It was like living in a Digi-Key or Mouser warehouse.

Walking through streets and multi-story markets, I was constantly running into small radio shops. Some selling commercial radios, many selling various ham radios and ham radio accessories. One golden nugget I found was a shop that sells home-brew radios, one of which was a 47.1GHz Transverter! Where else are you going to find something like that for sale in a shop?!

One last stop in Akihabara was Rocket Ham Radio, one of the largest ham radio shops in Japan (think HRO in the US). I couldn’t help myself from buying a 2m/70cm whip antenna for my IC-705 for portable VHF and UHF operations while in town. Would feel wrong leaving without buying *something*!

POTA Activation and Logging

POTA activation day was finally here, and much to my delight, Mr. Haraguchi (7L4WVU) reached out to say he was available to meet me at Yoyogi Park for a joint activation. Continue reading SOTA and POTA in Japan: Ara combines travel and radio with a little help from friends

Field Radio Kit Gallery: Micah’s Flight-Ready Compact MTR-4B Field Kit

Many thanks to Micah (N4MJL) who shares the following article about his portable field radio kit which will be featured on our Field Kit Gallery page.


Mountain Topper MTR-4B Field Kit

by Micah (N4MJL)

I am a very, very new CW operator! I’m also an airline pilot who travels quite a bit. Many times when I’m out flying my company provided hotel rooms are within walking distance of POTA parks.

The MTR-4B is my travel radio. It lives in my suitcase nestled in a Magpul DAKA Utility Organizer pouch.

The DAKA pouch holds:

Everything has to fit nicely in my 22″ roller board.

As flight crew, our roller boards are typically from Luggage Works or StrongBags. I have found that I can always make room for more radio gear in my luggage by packing less undergarments. I mean, you can always make your underwear and socks last another 24 hours by turning them inside out for another wear. Lol

The SOTA beams Tactical Mini Mast fits diagonally in my 22″ roller board. Wrapped around it are some rubber coated heavy wire for securing it to a post/shrub if available.

The SOTAbeams Band Hopper III is my go to antenna. This antenna does it all!

  • rated 125W
  • it’s a a full size half wave dipole
  • with 33ft RG174 coax
  • guying system
  • resonant on (20m 30m 40m) no tuner needed
  • has a balun
  • only weighs 14oz

The wire/guying winders are awesome. I have used this system in the sand on a beach and on a mountain top above the tree line. I replaced the aluminum tent pegs with some plastic ones to keep TSA a bit more happy with me.

I use a Talent cell battery [affiliate link] everyday for a recharge while on the go. It is large enough to power my cell phone/iPad while also powering my MTR, and the voltage output is safe for the MTR to handle.

My CW skills are not yet to the point that I am able to activate a park by running a pile up, so I do a lot of hunting. If one day you have me in you log book from California and the very next day I’m sending from Massachusetts that’s not a mistake, that’s just my life. 73!

~ Micah J. LaVanchy N4MJL