Many thanks to Bob (K4RLC) who shares the following article about his portable field radio kit which will be featured on our Field Kit Gallery page. If you would like to share your field kit with the QRPer community, read this post.
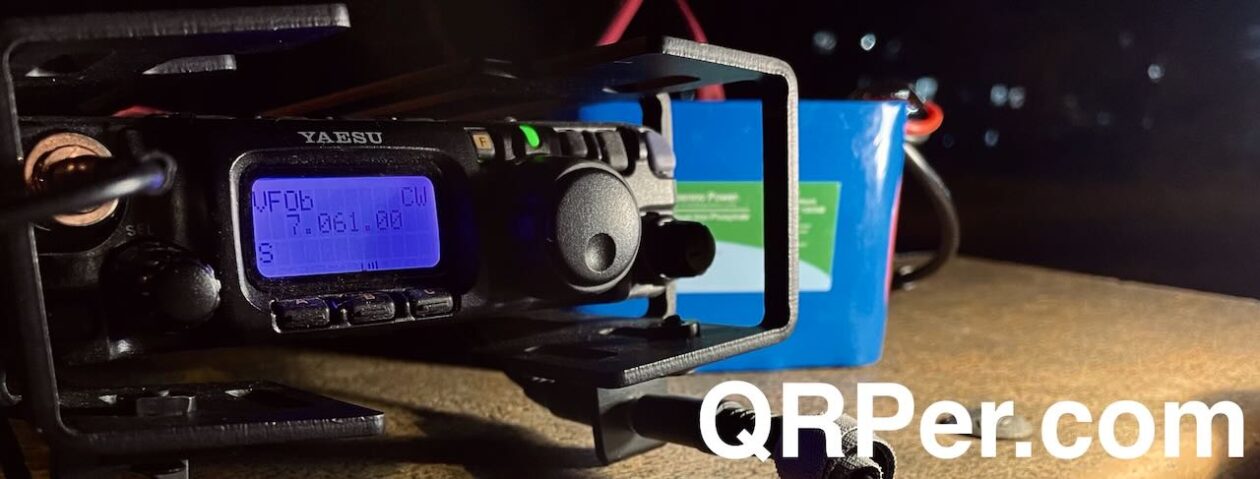
MTR-3B Bug-Out Go-Kit
by Bob (K4RLC)
I wanted to build a lightweight Bug Out Go Kit around the incredible Mountain Topper MTR-3B LCD model.
Bass Pro Shop sold a tackle box that seemed perfectly for this. I took a Bear Grylls Scout Knife and cut/customized the partitions as needed. The Elecraft AX 1 antenna and tripod mount, and a flexible tripod fit perfectly.
Counterpoise consists of three 13 ft BNTECHNO 22 AWG silicon wires, attached with a Mueller 55 alligator clip to the tripod mount.
The CW Morse Outdoor Pocket Paddle (and cable) fit into another section. For audio, use either generic ear buds or the rechargeable cell phone speaker with PChero volume adjustment cable.
For power, rechargeable Li-Ion 9 volt batteries use a USB connection, so no separate charger is needed. I keep this in the car.
It’s a great set up for POTA and lightweight enough to throw into a backpack for the steepest SOTA climb. The MTR-3B, the size of a deck of playing cards and not weighing much more, is an awesome QRP rig that’s still a keeper, if you can find one.
I recently decided that I would operate portable during the upcoming ARRL 10 Meter Contest and would combine this operation with a pair of Parks on the Air (POTA) activations, one on the Saturday of the contest and one on Sunday. While putting together my field station for this, I realized I wanted to see how lossy my RG-58 and RG-316 feedline cables were on 10m. Yes, I could have resorted to online charts of feedline losses, and I know that the RG-316 is lossier than the RG-58, but I thought it would be fun and more enlightening to make actual measurements, to empirically determine the losses in my particular coaxial cables.
The two coaxial cables in question are both 25′ in length and both are equipped with BNC male connectors on each end. The RG-58 cable is a high-quality cable that was originally manufactured to be a 10Base2 ethernet cable, but it’s probably now over twenty years old. The RG-316 cable was recently purchased from Tufteln (link) and includes an RF choke near one end.
To make my measurements, I used my Elecraft KX2 (link) to generate RF into an Elecraft DL1 dummy load with RF detector (link), using a digital multimeter to measure the voltage at the DL1’s measurement points. I used the formula that came with my DL1 assembly instructions to calculate the measured wattage:
P = (((V x 1.414) + 0.15))^2)/50
I made measurements in the CW portion of the 10, 15, 20, 40, and 80m bands, with the KX2 set at 5 Watts output.
My first set of measurements was made with the DL1 connected directly to the KX2’s antenna jack using a BNC union:
Direct (no feedline)
Band
Volts
Watts
10
11.62
5.498
15
11.59
5.470
20
11.61
5.489
40
11.63
5.508
80
11.63
5.508
My immediate observation was that the KX2 appears to be generating more than 5w when it is set to be producing 5w but also that the KX2 output is essentially same from 10m through 80m.
My second set of measurements was made with the DL1 connected to the KX2 through the RG-58 cable:
Direct
RG-58
Band
Watts
Watts
10
5.498
4.809
15
5.470
4.844
20
5.489
5.004
40
5.508
5.184
80
5.508
5.276
My third set of measurements was made with the DL1 connected to the KX2 through the RG-316 cable:
Direct
RG-316
Band
Watts
Watts
10
5.498
4.190
15
5.470
4.322
20
5.489
4.507
40
5.508
4.774
80
5.508
4.959
I was pleased to see to see that both the RG-58 and RG-316 behaved as I expected them to: the loss increased with increasing frequency.
Using the magic of MS-Excel, I created a table of Loss in Watts for both cables, relative to direct connection and to each other:
Direct
Difference (Loss) (Watts)
Band
Watts
RG-58 vs
direct
RG-316 vs
direct
RG-316 vs
RG-58
10
5.498
0.690
1.309
0.619
15
5.470
0.626
1.148
0.522
20
5.489
0.485
0.982
0.497
40
5.508
0.324
0.734
0.410
80
5.508
0.232
0.549
0.317
In looking at this table, it was immediately obvious that RG-316 is much lossier than the RG-58, particularly on 10m. By looking at the row for 10m, one can see that I am losing nearly 0.7 watts in the RG-58 but I am losing over 1.3 watts in the RG-316.
For completeness, I added columns for Loss in dB to the spreadsheet:
Difference (Loss) (dB)
Band
RG-58 vs direct
RG-316 vs direct
RG-316 vs RG-58
10
0.582
1.180
0.598
15
0.528
1.023
0.495
20
0.402
0.856
0.454
40
0.263
0.621
0.358
80
0.187
0.456
0.269
This exercise showed me that for my upcoming ARRL 10 Meter Contest POTA outings, I would do best by connecting my antenna directly to my transceiver, if possible, without using either coaxial feedline. If conditions at the operating site require me to use feedline, I will chose the RG-58 over the RG-316.
The tables also tell me that RG-316 is pretty lossy regardless of the band; for my regular field operating, unless I’m planning to do bicycle- or pedestrian-portable operations where weight and bulk is a consideration, I’ll carry RG-58 instead of RG-316. (I purchased the RG-316 specifically for bicycle- and pedestrian-portable operations, and I plan to continue to use the RG-316 for those applications.)
At some point, I will repeat this exercise with RG-8X, a feedline that is very close in size to RG-58, is less lossy, but is also heavier and stiffer.
Many thanks to Thomas (WN1C) who shares the following article about his portable field radio kit which will be featured on our Field Kit Gallery page. If you would like to share your field kit with the QRPer community, read this post.
KX3 and Speaker Wire Camera Bag Activation Kit
by Thomas (WN1C)
For the QRPer’s Field Radio Kit Gallery, this is my KX3 and speaker wire in a camera bag activation kit.
This kit is the continuation of the equipment I used for my Maine ATNO expedition and other activities on that return to my parents almost a year ago. Primarily, it’s a change in bags and an improvement of the audio connection options for more sustained activations. Writing up this kit for the gallery also will probably be an incentive for further change. With how loosely packed it is, there’s space for options! You can see this kit in action on my recent trail activation.
The outside is the discontinued Peak Design Everyday Messenger 15″ v1. I picked this up lightly used on my local craigslist with an eye for expanding the kit contents capabilities. In that endeavor, it has been successful, but concentrating on this configuration to start:
There’s a certain pattern (that I might not keep following in future re-packings), but the arrangement internally is:
Outer pouches: coax, radials, headlamp as necessary
Lid flap padded pouch: infrequently used adapters and short cables
Left division: antenna(s), throw line and weight, headset, coax, banana cables
Mid-left division: logging pouch with paddles and notebook
Mid-right division: KX3 with cover and heatsink
Right division: power cables, hand microphone, lithium-ion battery banks, LiFePO4 battery pack
Flopping around on top: TH-350 HT
Front zipper pouch: additional notebooks, earbud headphones, pen, coax, ARRL VE badge
Of course, not all of this gets used at the same time. Different LiFePO4 options with Anderson Powerpole connectors can be substituted. For quick and lighter operating (or when wearing more hats), the headset can be left behind. Anyway, to the details!
So, what is all of this?
Bags
Peak Design Everyday Messenger 15″ v1 (discontinued, acquired second hand) with an additional bright red divider stolen from one of my Crumpler camera bags
Case Logic accessories pouch from who knows where (underneath the notebook)
One of WesSpur’s low cost throw line bags (don’t get it, it’s smelly plastic and falls apart, as shown in the picture)
Radios
Star of the show: Elecraft KX3 in the “KX3 Pack” configuration (KX3, KXAT3, KXBC3, MH3) with Side KX KX3 Combo panels and cover, plus an aftermarket heatsink
2x 28′ (ish) speaker wire on BNC-F to binding posts/banana connector, in use for a while, though now beefed up with a bit of heat shrink and crimped spade lugs
4x 17′ speaker wire shorted together on dual banana plug (radials)
6′ RG-58 BNC-M to BNC-M with a random split ferrite on it from who knows where
2x Pomona banana test leads for occasions of connecting more things together
Adapters: BNC F-F coupler, BNC-M to dual Banana-F/Binding Post, Dual Banana-M to BNC-F, BNC tee, BNC to center Banana-F/Binding Post; all provide options of hacking some options together
Hosa YMM-261 Stereo Breakout to allow use of the SB-45 electret mic with another switch wired to a 3.5mm plug for PTT on the KX3 mic port rather than just VOX
Custom microswitch to 3.5mm PTT (not very good at its job) using this snap switch
Elecraft MH3 hand mic from the kit configuration
Old Apple earbuds, headphones only (TRS)
Power
Bioenno BLF-12045W 12V / 4.5Ah LiFePO4 pack (can be substituted with the 3Ah pack I also have)
Anderson PowerPole to barrel plug for KX3 power
Old (sometimes RF noisy) USB Type-A power banks, one with a built-in flashlight (souped up with a much nicer white LED)
Misc USB cables, A to Micro-B and C for charging from batteries
Sunday, October 15, 2023, was the final day of the W4 SOTA campout. That morning, Joshua (N5FY) and I packed up our tents/gear then played a little radio at our campsite (at Lake Rabun). We weren’t in a hurry because the morning was so enjoyable. In fact, I think we checked out not a minute before the dealine of 12:00 noon!
We both decided we wanted to squeeze in one more radio excursion before driving back to our QTHs.
Tallulah Gorge State Park (K-2202)
It wasn’t realistic to fit in another SOTA hike due to our schedules, but Tallulah Gorge SP was an easy detour for both of us.
We pulled into the park and queued up to to enter. The park was absolutely teeming with visitors that day. I would have expected nothing less on such a gorgeous Fall afternoon!
Joshua and I found a quiet picnic area–with a few picnic tables spaced apart from each other–near the lake shore. It turned out to be a perfect spot to play radio. We spaced our sites far enough apart so as not to easily interfere with each other while on different bands.
Joshua deployed his KX1 next to the lake and I deployed my KX2 a bit further up the hill.
I paired my KX2 with my “no transformer” random wire antenna. Of course, I used a Tufteln antenna because, I mean, N5FY was standing right there! ?
This antenna consists of two 28.5′ 26AWG wires connected directly to a male BNC. Simplicity itself on the antenna side. It’s the KX2 internal ATU that does all of the matching (since there’s no transformer). I find that the KX2 can match this antenna from 40-10 meters with ease.
I think the magic of these simple random wire antennas is that they’re directly connected to the radio. There’s a bit of efficiency in having no line losses, etc. even if the ATU does soak up a bit of energy.
Many thanks to Conrad (N2YCH) who shares the following field report:
Connecticut POTA/SOTA combined activation
By: Conrad Trautmann, N2YCH
November 24, 2023
Looking for my next activation challenge, I wondered if there were any overlapping POTA parks with SOTA summits in the state of Connecticut. I’ve only done two SOTA activations to date, one in Maine and the other in New Hampshire. I thought, there must be a few in Connecticut.
On my home computer, I brought up both the POTA map and the SOTA mapping page and quickly realized that it would take too much time to try and compare the two maps. Instead, both sites offer KML exports, so I exported all of the Connecticut parks from the POTA site and the summits from the SOTA mapping page and imported both files into Google Earth Pro. A yellow push pin represented the POTA locations and a blue triangle the SOTA locations. It was easy to spot the overlapping sites. Mt. Carmel and Talcott Mountain are both POTA parks and Summits for SOTA. There are a few other SOTA sites that have POTA trails that cross over as well.
I decided to tackle Mt. Carmel, SOTA W1/HH-002 also POTA K-1717, Sleeping Giant State Park. I’d already activated Sleeping Giant for POTA before, but not from the summit. For a SOTA activation to count, the operator must be within the “Activation Zone” as defined by the SOTA rules.
The Connecticut state web site has good maps and information about the park and showed that the trail to get to the summit is an “easy” 1.6 mile hike. I thought that sounded like a reasonable distance. What they don’t tell you on the web site that it’s also a 600’ climb up in elevation from the trailhead to the summit. I knew it would require a climb, but I didn’t expect that. I made the trip up, but it was challenging, especially carrying my backpack with the radio, a VHF handheld, antenna, batteries, computer, water, etc. I plan to travel lighter the next time.
Before I get to the activation, a little about the park. It’s called Sleeping Giant because from a distance, the ridge looks like a person laying on their back.
It’s located in a mountain range called Hanging Hills which extends North from Long Island Sound through Connecticut and Massachusetts up to the Vermont border. Quinnipiac University is across from the entrance to the park and the Quinnipiac Indian Tribe once inhabited the area. Please indulge me as I also share the ghost story of “The Legend of the Black Dog of the Hanging Hills.”
“If a man shall meet the Black Dog once it shall be for joy; and if twice, it shall be for sorrow; and the third time he shall die.”
As the legend has it, the Hanging Hills area is haunted by the Black Dog. You don’t want him to cross your path three times. It’s this story that is the basis for the SOTA “Master of the Black Dog” certificate. “An activator must have entered valid activation logs from each and every summit in the Hanging Hills Region and must have survived all of the activations.” There are currently four summits in the Hanging Hills Region. I need this award.
So far, I have completed activating one of the four summits and did NOT see the black dog. Wish me luck on the remaining three.
The lookout tower at the summit is the main attraction of the park. Built in 1936, it is listed on the National Register of Historic Places. It stands four stories tall and is 739’ above sea level, providing a 360 degree view in all directions and a clear view over New Haven to Long Island sound. According to the Sleeping Giant Park Association, over 100,000 people visit it each year.
I’ll admit, after hiking the trail up, the last thing I wanted to do was climb four stories more. I did go up before I left to get some photos.
For the activation, I found a bench to set up on with space behind me to set up the Chelegance MC-750 antenna. I ran FT8 on 20 meters beginning around 10 am ET and after roughly 30 minutes, moved up to 10 meters. My experience running QRP on digital modes is that I will cover the Eastern half of the US and some Europe on 20 meters. I can usually make contacts out to the West Coast and into Europe on 10 meters especially later in the day. By activating on both frequencies, I tried to cover as much area as I could to provide the best opportunity for hunters and chasers to reach me.
Samsung Galaxy Book Flex2 Alpha 2 in 1 Laptop with Outdoor mode
Looking at the map, you can see that I covered the Eastern portion of the US on 20 meters. It was also 10 am local time and still pretty early on the West coast. When I shortened up the antenna and retuned the KX3 for 10 meters, I started making contacts with Germany, Italy and other EU stations.
The hike down from the summit was much easier, the temperature had warmed up a bit and I stuffed my coat into the backpack for the trip down. When I got to my Jeep, I noticed a number of empty picnic tables nearby and decided to set up and get a few more POTA contacts while I was there. I ended up with 48 total for the day.
The summit I was at was an easy one (worth 1 point) compared to many and it was challenging to me. I came away from the experience with a new appreciation for the challenges SOTA activators face. I also came away with a new goal, to get the Master of the Black Dog certificate!
If you’ve been following QRPer.com and my YouTube channel for long, you’ll notice that I typically post two field reports with videos per week when my free time allows. Each report takes about four hours to produce along with a video. I’ve got a busy day ahead on the road (including a POTA activation), so in order to squeeze this field report into my schedule, I’m going to use my more abbreviated field report format: a “postcard” format!
Speaking of which….
Pisgah National Forest (K-4510)
On the morning of Friday, November 10, 2023, I had a couple hours to fit in some POTA time.
All morning, we had been receiving some much-needed rain in the form of scattered showers in a constant heavy mist.
I decided to explore picnic areas I hadn’t yet visited in Pisgah National Forest along the Pisgah Highway near Brevard, North Carolina.
I was curious if I might find a small shelter at one of the roadside sites. Unfortunately, I did not; however, I did find quite a few sites that were ideal for POTA with tall trees, space between picnic tables, etc. I decided to pick one at random that had no other park visitors.
I did have a small rainfly in the car I could set up, but I decided to simply risk it. The goal was to pair the new Elecraft KH1 with my (MW0SAW) End-Fed Half-Wave antenna.
I wanted to see if the KH1 ATU could match the EFHW on 30 and 17 meters (outside of its resonant bands of 40, 20, and 15 meters).
Even before I started taking my Elecraft KH1 to the field and generating reports and activation videos, I started receiving questions from readers and subscribers about how the KH1 might compare with other field-portable radios.
At least 70% of all of these questions asked specifically about the venerable Elecraft KX2.
Making a purchase decision
I’m not surprised so many are trying to make a purchase decision between the KH1 and KX2.
For one thing, the KH1 and KX2 represent some of the smallest, most compact and lightweight shack-in-a-box HF field radios on the market. We’ve a lot of QRP field radios to chose from these days, but few have options for both internal ATUs, internal batteries, and attachable paddles. Very few are as light and compact as either of these two radios.
Another reason for the comparison is that many are in the long queue to purchase a new Elecraft KX2. At time of posting this article, if you place an order for the KX2, you are going to wait a few months for delivery. The KH1 also has a lead time, but it’s likely shorter than that of the KX2 (check out the Elecraft Shipping Status page for more info).
Comparing models
While the KH1 and KX2 have a lot in common, they’re also quite different in many respects.
We radio ops like to compare features and specifications and Elecraft knew the KX2 and KH1 would be compared frequently, so they created a handy chart:
At the end of the day, though, I would argue that one’s enjoyment of a radio has more to do with how well it fits the operating style of the owner.
The KX2 is one of the best portable QRP field radios ever made, in my humble opinion. It’s a little high-performance machine that can handle any mode you care to use between 80-10 meters.
The KH1, on the other hand (pun intended), is designed to be an exceptional handheld radio for pedestrian mobile use and as a super lightweight, low-impact, field portable station. It’s essentially CW-only and operates on 5 bands (40-15 meters).
If you can be honest with yourself about how you plan to use the radio, it’ll help you make this purchase decision.
For example, if you never see yourself operating pedestrian mobile–you’re more of a sit down at a table sort of op–there’s a good argument to go for the KX2. If, however, you’re an avid SOTA/POTA portable activator who is primarily a CW op and you like the idea of a super quick deployment and handheld operating from anytime, anywhere, you should consider the KH1.
Video
To dig into this comparison a little deeper, I decided to make a video where I discuss the differences between the two radios and also speak to different styles of operating and which radio might suit that style best:
I would be curious which radio you prefer and why. Please consider commenting!
Thank you!
I hope you found this post and video useful.
As always, I’d also like to send a special thanks to those of you who have been supporting the site and channel through Patreon and the Coffee Fund. While certainly not a requirement as my content will always be free, I really appreciate the support.
Patreon supporters have access to 100% ad-free, and downloadable videos for off-line viewing via Vimeo. The Vimeo account also serves as a third backup for my video files. This is how your support truly helps this site and channel!
I’ve taken a wide variety of antennas on SOTA (Summits On The Air) activations, but one wire antenna I’ve always wanted to deploy is a simple vertical delta loop.
This summer, I mentioned to my friend Joshua (N5FY) that I planned to build a delta loop antenna and next thing I know, he built one. I suppose he’d been thinking about adding it to his line of portable wire antennas at Tufteln.
I was planning to build a 20M delta loop fed with twin lead, but Joshua’s choice is better for multi-band operating. His 20M delta loop features a 4:1 transformer so it can be fed with 50 Ohm coax like my RG-316 (which is also easier to pack than twin lead).
You might recall that I used his 20M delta loop antenna at Holmes Educational State Forest (see photo above) in early September. It worked a charm and wasn’t too difficult to deploy (loops are obviously more finicky than a one wire end-fed).
The great thing about this loop is it’s resonant on 20 and 10 meters, and it’s quite easy to tune on 17, 15, and 12 meters with pretty much any ATU.
Fast-forward to Saturday, October 14, 2023 when Joshua and I were participating in the W4G SOTA campout in north Georgia…
Yonah Mountain (W4G/NG-048)
It rained cats and dogs Friday evening into Saturday morning.
Fortunately, most of the rain stopped by the time I surfaced that morning.
Joshua and I ate a quick breakfast, grabbed our SOTA backpacks, then drove to the Yonah Mountain parking area/trailhead.
Last year, we also activated Yonah Mountain as well, but underestimated the hike and our timing. We ended up being a good hour or so late to our SOTA evening potluck. This time, we were keen to spend more time on Yonah Mountain and get back to the campsite in plenty of time to join everyone for dinner (and share exaggerated stories about our SOTA adventures).
Last year, we arrived at the trailhead and it was parked full. This year, even though we arrived in the morning and even though it was incredibly foggy/misty, it was still quite full!
Yonah Mountain is an incredibly popular destination.
Another fun fact about Yonah: it’s not really a beginner’s summit despite the fact it’s so popular with hikers and runners.
It offers up proper elevation change, gnarly trail portions, steep inclines, and about four miles of trail round trip. Although not an incredibly long hike, it’ll give you more of a workout than you might think first blush.
We reached the summit in due time and set up our stations about 30 meters apart.
The whole time, I was also monitoring the partial solar eclipse we were having that day.
I brought along some solar eclipse glasses and ended up sharing them with everyone on the summit. It worried me seeing so many young people staring at the sun with only their sun glasses or even–gasp!–with the naked eye. (I mean, weren’t they paying attention in science class–?) 🙂
Many thanks to Conrad (N2YCH) who shares the following field report:
Top Band POTA Activation Field Report
By: Conrad Trautmann (N2YCH)
November 15, 2023
In February 2023, Brian, K3ES, wrote here on QRPer.com about designing and building his own QRP portable random wire antenna he called the VK160 to work on 160 meters to make parks on the air contacts. This was in order to achieve his goal of getting the James F. LaPorta N1CC award where activating on 10 bands at 10 parks is needed. It’s not as easy as it sounds. As an avid parks on the air activator myself wanting to try activating on 160 meters, I built my own antenna based on Brian’s design and used it to get my first contacts ever at a park on the “Top Band.”
The Antenna
Brian used a 9:1 unun that he built himself in his design. Rather than build my own from scratch, I took a short cut and bought a QRPGuys 40m-10m UnUnTenna to use as the starting point for my VK160. Even though it says 40m-10m, it works on 160 meters, as you’ll see.
With shipping, it cost $36.00. It comes with all of the parts you need to assemble the antenna except for the wire. The main thing I liked about the QRPguys design was that the circuit board also doubles as a wire winder, so it’s all self-contained.
I sourced the wire from Davis RF and ordered 200’ of “POLY STEALTH – 26 AWG, 19 0.22000 44.00 STRAND COPPER CLAD STEEL, BLACK PE JACKET.” It cost $50 including shipping. The polyethylene insulation prevents the wire from knotting up. I measured out 144’ for the radiator based on Brian’s design and used the remaining wire as the counterpoise.
I did a back yard test once it was all assembled and it worked great. For $86, I had created my own VK160. I encourage you to read Brian’s detailed design/build report here.
The POTA Activation – November 14, 2023
Now that I had completed building and testing the antenna, the next challenge was how to actually put it to use at a park. 160 meters doesn’t really come to life until dusk or after dark. In Connecticut, most state parks close at dusk. The park rangers clear the parks to close them at the best time to activate the band. However, there is one park nearby my QTH, the Stuart B. McKinney National Wildlife Refuge, K-0228, that has an annex called the Great Meadows Unit in Stratford with a nice parking lot that is not gated and has no posted hours. I arrived and set up at sunset, around 4:30 pm ET and operated from 5 pm until 6 pm. It gets dark here early in the Northeast US in November.
Another challenge is how to manage and string up 144’ of wire. Brian suggested an inverted V over a tree branch in his write up. There were no trees nearby, so instead I used a Spiderbeam fiberglass pole secured to my Jeep to get the feed point up in the air about 25 feet. I used RG58 cable from the feed point to the radio.
Finally, I used one of my $3.00 Home Depot electric fence posts to secure the far end to keep it tight and up in the air and set up the antenna as a sloper. I laid out the counterpoise on the ground under the sloping wire.
By the time I had all of this set up, it was getting dark. I connected my Elecraft KX3 to the other end of the RG58 cable and to my surprise and delight, I was already receiving stations.
My KX3 has a built-in ATU and one tap of that ATU button and it tuned to 1.0:1. I started the activation right at 5 pm local time and in about 15 minutes, I had six QSO’s on 160 meters.
The PSK Reporter map showed me being received by stations on the dark side of the gray line in the Northeast. It was pretty much what I expected for QRP power on the low frequency. Then, the next ten minutes things were quiet. It appeared I had gotten everyone who could hear me.
Since this is a random wire antenna, it should work on all bands so I decided to test it on 80 meters. Again, the KX3 tuned right up and I got six more QSO’s. I was surprised to see Del, N2NWK from Washington, DC pop up on JT Alert. I have a an alert set for stations calling CQ POTA. Del was also at a park. I called and he answered and we ended up with a park to park. Anyone who knows Del knows that when you hunt him, he’s usually activating at a two-fer, at least. When I checked my hunter log afterwards, I saw four parks listed from him (a four-fer?).
At this point in the activation, I had gotten the ten QSO’s that I needed to call the park activated. I thought, let me try the VK160 on 60 meters. I re-tuned the KX3 and got five more fast QSO’s. The antenna worked great.
Before I packed up, I decided that I really wanted at least ten contacts on 160 meters, which was my original goal. I went back to 160 meters, now close to an hour later than when I began the activation, and easily added five more new QSO’s to the log. Maybe propagation had changed the later/darker it got or some new hams were on the band who weren’t on earlier, but I was satisfied to have gotten more than 10 on the top band.
The Results
Here’s how I did. Green pins are QSO’s on 160 meters, blue pins are 80 meters and the pink ones are 60 meters (click image to enlarge).
The “Top Band” activation was a success! The VK160 worked flawlessly, thank you Brian, K3ES for posting your design and providing the inspiration to activate on 160 meters.
My POTA “My Stats” page now shows 11 digital QSOs on 160 meters that I didn’t have before. I love conquering new challenges and given the challenge of going mobile with an antenna that will actually work and tune up on that low of a frequency at a park that won’t make you leave at sunset, well… that was quite an accomplishment!
Thank you to the 22 hunters (11 on 160 meters) who helped make it a success, including my friend Del, N2NWK in Washington, DC.
Fort Baker is a former U.S. Army post situated at the north of side of the Golden Gate, opposite Fort Point and adjacent the town of Sausalito, California. The post is now part of the sprawling Golden Gate National Recreation Area (GGNRA) which is also known as K-0647 for POTA.
Many of the good POTA spots in the GGNRA are heavily used for recreation and sightseeing on weekend days such as this, but Cavallo Point is out of the way enough that there was still ample, free parking today. This location offers spectacular views of the Golden Gate Bridge, the city of San Francisco, and Alcatraz and Angel Islands at anchor in San Francisco Bay.
Today the “pull of POTA” was strong as I wanted to get another activation done before the arrival of an anticipated solar storm as well as rains predicted for the coming week.
During the week leading up to this activation the Bay Area has experienced fine weather with mild daytime temperatures and light winds, but driving in, the sound of rigging slapping loudly against the aluminum masts of the sailboats docked in the Presidio Yacht Club marina told me that it was windy down here.
A short series of wooden staircases lead up from the parking area to Battery Yates, named for Captain George Yates of the U.S. Cavalry who fell in the Battle of Little Big Horn in 1876.
The gun battery is a reinforced concrete structure which once sported six rifles that fired a three inch caliber cartridge to provide for naval defense inside of San Francisco Bay. The guns were manned through the middle of World War Two when, by 1943, they had been moved to more strategic locations.
Today I had hoped to use the same steel pipe which supported a fiberglass mast and EFHW in an earlier activation from this spot, but unfortunately the pipe was too thick to get the jaw mount securely attached.
I went with plan B which was to use the pipe railing at the back edge of the gun pit. Being unsure whether or not the galvanized steel railing made any electrical connection to what surely must be rebar embedded in the concrete, I deployed the 17 foot vertical whip with three radials just in case.
Whatever was serving as a counterpoise, it was doing a great job, providing an SWR reading of 1.0 to 1 on the Mountaintopper MTR-4B. This was probably the third activation on this Lithium-Ion battery pack, so the power was down to 3.7 watts, still plenty for a CW activation with a resonant antenna.
The activation was scheduled ahead of time on the POTA web application so all I had to do was just start calling CQ POTA and let the RBN do the spotting. I soon heard from KG6HM from right across the Bay, followed by stations from Washington, Idaho, Utah, Arizona, and New Mexico.
I was starting to think it would be only western states calling in, but the band opened up a bit, bringing N3RT from Delaware. Now we had a proper coast-to-coast activation, and, I bagged a hard-to-get state needed for an informal CW “Worked-All-States” achievement.
By this time, the wind really started to pick up and with the sun so low in the western sky, it was becoming chilly. Satisfied with the 14 QSOs in the log, we packed up, made our way back down the pathway to the car, and then to a fancy coffee house in Sausalito for a nice warm cup.
QRP radios, product announcements, reviews, news and more. Low power amateur radio fun!
Please support QRPer by adding us to your whitelist in your ad blocker. Ads are what helps us stay online. All of our ads are ham radio related--no junk, we promise! Thank you!