Category Archives: POTA

Let’s Give it a Go: Pairing the Elecraft AX1 and Emtech ZM-2 Manual ATU

Last month, I received a comment and question from Gordon (KO4AYC) here on QRPer.com:

“I am curious if anyone has used the AX1 with the AXE1 40 meter extender and tuned this antenna for 40 meters using the Emtech ZM-2 tuner?”

For the life of me, I couldn’t remember if I’d tried this combo before.

The ZM-2 ATU is a simple manual antenna tuner that you can purchase either as a fun-to-build kit or fully assembled and tested.

I’ve owned my ZM-2 for many years, and I believe every QRP field operator should have one. They do a brilliant job of matching random wire antennas and taking your resonant antenna to a non-resonant band. Being a manual ATU, they require no power source. If you’d like to read a quick tutorial on tuning the ZM-2, read this previous post.

I figured the easiest way to answer Gordon’s question was to give it a go!

The AX1 does require a counterpoise, so before hitting the field, I did check to make sure there was continuity between the shield of the ZM-2’s BNC connector and the black binding post when the ZM-2 was switched to “GND” for coax antennas. Fortunately, there was! I loved this idea because it meant that no matter the radio, I knew I’d have an easy connection to ground for the AX1 counterpoise.

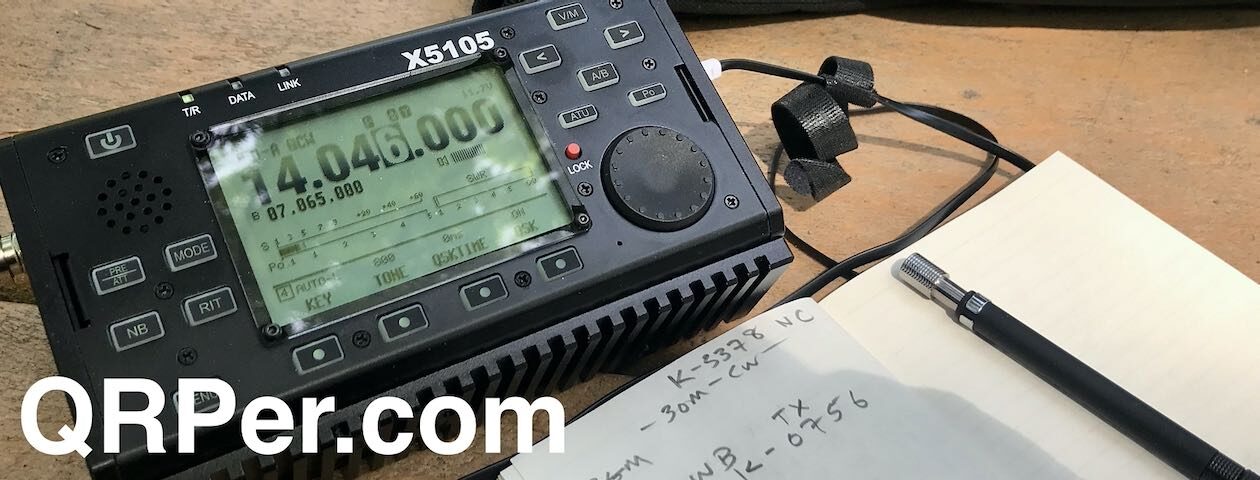
Blue Ridge Parkway (K-3378)

On Wednesday, February 21, 2024, I grabbed the ZM-2, AX1, and AXE 40M coil (since Gordon specifically asked about 40M) along with my Yaesu FT-818ND. It was time to see just how effectively the ZM-2 might match the AX1.

I store my AX1 in this Maxpedition pouch (see link in gear section below).

Upon arrival, I began setting up the station.

Even though it was approaching 2:00 PM locally, I wanted to see if the ZM-2 would match the AX1 (with AXE coil) on 40 meters first. I didn’t expect a lot of activity on that band so early in the afternoon, but I figured I could hopefully work a couple of stations.

I attached the AX1 directly to the ZM-2 antenna port and deployed the whip and 40M counterpoise.

It was a bit gusty, and I quickly realized that the AX1 might topple over in the wind. To secure the antenna, I used the handle of my GR1 backpack. It was a semi-effective arrangement (actually, the handle sort of pulled the antenna toward the pack, which wasn’t ideal either–I eventually removed it).

In calm conditions, I wouldn’t worry about the antenna toppling over; the ZM-2 provides enough of a base that it’s stable. In the wind, though, you’ll definitely need to secure the ZM-2/AX1 combo to keep it from being blown over.

My plan was to start on 40 meters, then also hit 30, 20, and 17 meters. This would give me an opportunity to see if the ZM-2 could match the AX1 on multiple bands.

Side note: I can’t remember if I mentioned this in a previous field report, but one sad bit of news for me is that there’s a new source of QRM at the Folk Art Center. It’s likely coming from the VA medical complex next door, but it raised the noise floor to at least S5 on most bands. This will make it more difficult for me to work weak signals from this particular POTA site.

Then again? My buddy Alan (W2AEW) recently pointed out to me that compromised antennas like the AX1 don’t feel the effects of local QRM as a higher-gain antenna would. I’d been thinking the same thing.

Gear:

Note: All Amazon, CW Morse, ABR, Chelegance, eBay, and Radioddity links are affiliate links that support QRPer.com at no cost to you.

On The Air

I hopped on the air and started calling CQ POTA on the 40-meter band. I worked one station quickly (thanks, W5GDW) and then silence. I didn’t expect 40 meters to be active this time of day, but I didn’t think it would be completely dead either.

I checked the POTA spots page and discovered that the connection to the Reverse Beacon Network was down. Even though I scheduled the activation, the system hadn’t spotted me.

Once spotted, I worked three more stations in quick succession.

I didn’t hang around on 40 meters. Continue reading Let’s Give it a Go: Pairing the Elecraft AX1 and Emtech ZM-2 Manual ATU

Leap Year Day report from the Great White North

by Vince (VE6LK)

It seemed easy enough on paper. Famous last words, right?

It’s a leap year in 2024 and how many chances will I ever get to activate on February 29th, at least that was the reason for the multi-entity rove. That and the fact I hadn’t been up close to the mountains in at least a month despite living in close proximity.

The day before departure for #POTAThon240229 my heart sank when I saw the forecast of 4-8″ of snow. I’d already done my planning and secured most of the day off work. The plan was bold, including 3 National Parks and 2 National Heritage Areas in two provinces and would take about 9 hours to execute from end to end. I was also badly in need of some mountain therapy as it had been a couple of months since I’d been close-up to the Canadian Rockies. I went to bed not hopeful for the next day but kept an open (hopeful?) mind.

The next morning, the forecast had changed drastically and the snowfall had been cut in half; 2 to 4″ of snow is pretty normal this time of year and that means the roads are usually no problem, and yes that is a foreshadowing .. The route planned was to go out along the Trans-Canada Highway to Field, British Columbia, and work my way back towards home with stops along the way. A simple out-and-back as it were.

I hit the road and aimed the F-350 for Yoho National Park in Field B.C. where I snapped the photo below. Two-thirds of the way there, the roads turned terrible, and a two or three lane road was open with only a single lane. Whiteouts happened on and off and travel was Sierra Lima Oscar Whiskey, to say the least.

Pottymouth made some short inward appearances, mostly exclamations about my lack of luck. With conditions like this, the basic rules are to take your time and allow twice the following distance you think you need. “Why not turn around?” you ask? Because I was already two-thirds of the way to the endpoint, thus deeply invested in the travel and I figured it would not get much worse.

Mount Dennis as seen from Field B.C.

It didn’t get much worse, and arriving at the Field Visitor Centre, I was parked within 100′ of the Kicking Horse River National Heritage Area by being in the parking lot pictured above. In the summer months, this lot is jammed with cars and the view is stunning as you are in a narrow valley with a small town across the fast-moving river. It appears that the 2-4″ of fresh snow was more like 8″ as the parking lot had not yet been plowed and it was up past the chest of Red Wrangler the Shiba Inu.

Red Wrangler the Shiba Inu, totally within his element

The parking lot is at ~1225m (4045′) Above Sea Level and the mountains nearby are ~2400m (7920′) and are just about right beside the road. The narrow valley runs Northeast to Southwest so it for certain affects takeoff angles on any antenna. Given the temperatures were plus or minus the freezing point, I opted to stay in the cab of the truck for the day. I completed my activation 25 minutes later and started driving. At this point I’m close to 2 hours behind plan and I made the choice to visit Lake Louise and do a food stop, but not to activate.

Lake Louise, lakeside and pretty snowy

If you are wondering what Lake Louise looks like without 2′ of fresh snow, you can do that here with Google Street View. Even though I was behind plan, it was a must-do visit in order to refresh my soul and get some fresh mountain air.  Mister Dog and I made a quick trip to the lake’s edge and back to the truck to continue along with our day, as even if I had the time, I did not bring snow-clearing equipment -like a front-end loader- to clear off a park bench to set up!

About 45 minutes later, I crossed over the fifth mountain pass of the day and ended up in Kootenay National Park (CA-0045) at the Alberta/BC border on Highway 93. It’s a geographically unique spot as it is also at the Continental Divide. It was the third point of the Continental Divide I’d cross during the trip. At least by now the snow has stopped falling.

The Continental Divide at AB/BC Highway 93

Once again, I arrived to a fresh 8″ of snow in the unplowed parking lot and Wrangler was most pleased to cavort about and stretch his legs. At this point, I was surrounded by ~3100m and ~2600m mountains while sitting at ~1631m ASL. Again, a narrow valley with rocks on either side of me and, thanks to low-hanging clouds, I couldn’t see much of them at all, sigh.

I’ve travelled up and down this valley before so I know that, as long as I’m not right next to the rocks, my signal will be heard someplace. I’d learned first-hand just how much close proximity to the side of a mountain can impair your signal during my trip to Montana’s Glacier National Park last August. The noise floor and signals will drop out as you drive along beside the rocks and then comes back up as you move away from them even by 50′ or so. Continue reading Leap Year Day report from the Great White North

POTA by Lantern Light: One Activation in Two Days with Two Antennas!

On Friday, February 9, 2024, I had an opportunity to do an extended Late-Shift POTA activation in Pisgah National Forest. I couldn’t pass that up!

Once again, one of my daughters had a casting call and a Shakespeare performance that opened up an activation window from about 17:00 – 20:00 local (22:00 UTC – 01:00 UTC).

If you’ve followed my POTA activities for a while, you’ll note that multi-hour activation windows are very much a rarity. More often than not, I’m squeezing activations into 30-60 minute windows of time as I go about my work and family duties.

Pisgah National Forest and Game Lands

The closest POTA site, once again, was Pisgah National Forest (K-4510) and Pisgah Game Lands (K-6937). There are so many sites to choose from within Pisgah; it’s always a difficult decision in terms of picking a location.

In this case, I decided to stay a little closer to mobile phone service just in case my family needed to reach me during that time. I chose the Sycamore Flats picnic area and was happy to see that the picnic shelter was available.

I thought it might be fun to set up two antennas since I had so much time. For the first part of the activation, on 20 meters, I would deploy the Chameleon MPAS Lite vertical.

For the second part (the following UTC day), I would deploy my MM0OPX 40-meter end-fed half-wave as I knew 40 meters would be much more active after sunset.

EFHW Deployment

Since sunset was approaching, I deployed my MM0OPX EFHW first because it’s much easier to deploy a wire antenna in a tree when it’s still light outside.

Side note: I mention in the activation video that a good headlamp (like my Fenix) makes working in the dark quite easy. I’ve deployed wire antennas after sunset with headlamps before–it’s quite doable–but I still prefer using a throw line when there’s still sunlight. It’s just easier (for me, at least) to judge distance.

I deployed the EFHW in a tree and in the brush between two pathways. While it would have been easier to deploy it on a path, I always try to deploy my wire antennas in a way that hikers and other park guests wouldn’t easily walk into them–especially at dusk when even high-visibility line colors are difficult to see.

Chameleon Carbon Fiber Tripod

The second antenna deployment was my Chameleon MPAS Lite vertical, and this activation gave me an excuse to test the new Chameleon carbon fiber portable tripod.

In January, Chameleon sent me a box with a few of their smaller accessories/promotional items. I plan to give away everything, save the tripod, in an upcoming QRPer giveaway.

I’ve been eager to test the tripod because it’s lighter and easier to transport (in my SOTA pack) than the stainless spike that comes with the MPAS Lite antenna system. This tripod will also come in handy when operating at parks that don’t allow stakes in the ground. Continue reading POTA by Lantern Light: One Activation in Two Days with Two Antennas!

SSB Style: Mark pairs the Elecraft KX3 and AX1 for some challenging activations

Many thanks to by Mark (W2ITG) who shares the following field report:


Elecraft KX3/AX1 Field Report

by Mark (W2ITG)

I’m an avid POTA activator and wanted to try an experiment to see if I could complete an activation using just the Elecraft KX3 & AX1 on 40 & 20m SSB. I’ve seen others do it on CW but not on SSB. My CW learning is not going well by the way.

This was at K-1635 Washington Rock State Park 02-07-2024, with a beautiful view of the NYC skyline approximately 20 miles away.

My 1st attempt was a failure because I ran into SWR issues on 20m when I picked up the microphone & RF was getting into the audio as well. This was with the antenna mounted directly on the side of the radio using a 90 degree elbow connector, the AX1B bipod & an elevated radial connected to one of the case screws of the radio, unfortunately it didn’t work.

It’s a good thing I had brought along my Tuftln EFHW and telescopic carbon fiber fishing pole as well because it saved the day which allowed me to complete the activation. When activating make sure to have a backup plan, so far I have no incomplete activations.

Fast forward to 02-27-2024 I’m making another attempt but using a clamp mount, clamped on to the side of the picnic table, 25’ of ABR Industries RG-316 with built in CMC choke, the Elecraft AXT1 tripod adapter, and an elevated counterpoise.

I was much more successful, but barely. I did get my 10 contacts, 7 on 40m and 3 on 20m. This really took me by surprise as the AX1 is more of a compromise on 40 than it is on 20m.

Radio set up at a different picnic table.
This clamp mount was taken from one of my BuddiStick setups.
Notice the electric fence post in the background to elevate the counterpoise.
The QSO map, it took me an hour and a half to get these 10 contacts.

Using the AX1 was quite the challenge to say the least. It does prove that even with a very limited antenna you can make contacts. My guess as to why it didn’t work as well on 20m, is poor band conditions. Living in the very populated northeast is what I believe allowed me to make more contacts on 40m.

Would I recommend buying this antenna? Most definitely, just as long as you know what it’s limitations are. I will try another attempt, but by trying 2 elevated counterpoise wires instead of 1. This antenna can use all the help it can get.

Elecraft KH1 Tabletop Mode: The new KHRA1 Right-Angle Adapter makes for a super-portable POTA machine!

It’s funny how sometimes one small accessory can have a huge impact on a field radio kit.

When I first learned about the Elecraft KH1 (basically, the day I was invited to join the volunteer testing group), I felt like Elecraft had designed my ideal QRP radio. The KH1 is super compact, weighs 13 oz completely loaded, covers my favorite bands, and has features I would expect in much pricier radios. It reminded me of my beloved KX1, but even more portable with more features.

The KH1 caters to handheld or pedestrian mobile operating–at least, that was the overarching design objective. It accomplishes this amazingly well. It’s so easy to operate handheld, and there’s nothing else quite like it on the market. I suspect that when others copy the design (I’m sure they’re already doing so–!) it won’t be as versatile, functional, and lightweight.

At the end of the day, though, I feel like I’m only using the KH1 pedestrian mobile about 30% of the time I have it on the air. Of that 30%, I’d say that only 10% of the time I’m pedestrian mobile while activating, and 20% of the time I’m doing little impromptu radio sessions in parking lots, ballparks, while visiting family, and even on my own mountain property.

While handheld operating is simply a game-changer, I knew I wouldn’t do this 100% of the time with the KH1. It’s for this reason that my very first bit of proper KH1 feedback to Elecraft, well before I had my hands on a prototype, was that a right-angle adapter for the whip antenna would truly round out the KH1’s field prowess.

This would basically give my KH1 the same functionality of my beloved KX2 and AX1 antenna combo, but in an even more portable package.

Turned out, Elecraft already had a right-angle adapter on the design board!

Fast-forward to present day…

Last week, Elecraft sent me a prototype of the right-angle adapter to test and evaluate. They’ve given it the model number KHRA1.

Full disclosure: Elecraft also gave me permission to post a video and article about this new accessory even though (at time of publishing) it’s not even showing up on their website. I will, however, link to it here as soon as Elecraft makes it available. This is an item I would otherwise have tested in private–thanks, Elecraft!

The KHRA1: Small accessory, big impact!

Illustration Source: Elecraft KHRA1 Instruction Manual

The KHRA1 is a simple adapter. Other than metal attachment hardware, most of it is lightweight and 3D-printed from a durable material (I assume the same material they use in the KH1).

Attaching it to the KH1 is very easy.

First, you unthread the large metal thumb nut from the KHRA1. You will need to hold together the remaining KHRA1 components (legs and attachment bracket) so that they don’t come apart before you attach them to the KH1. This is actually pretty easy to do, but users should know to follow the KHRA1 instruction sheet. If these parts fall apart in the field, it might require a bit of searching the ground for the pieces.

You simply thread the large thumb nut onto the KH1’s whip antenna antenna port, then thread the rest of the KHRA1 bracket/legs onto the large thumb nut.

Check out Elecraft’s illustration:

I then position the KHRA1 legs as shown above, then tighten the KHRA1 adapter so that everything is secure.

It’s super simple to do, and you can see this process in my activation video below.

Speaking of an activation…

On Saturday, March 2, 2024, (yes, only two days ago) I had my first small window of opportunity to squeeze in a POTA activation and test the KHRA1.

That day, my daughters and I had a number of errands to run, then a three-hour round-trip drive to pick up my wife. We were on a very tight schedule, but I had a 30-ish minute window of opportunity to fit in some POTA radio therapy.

I set my sights on the easiest-for-me-to-hit POTA site on the Blue Ridge Parkway: the Folk Art Center.

Amazingly, I discovered that morning, that the KHRA1 fits in my Pelican M40 Micro case along with my KH1, whip, counterpoise, key, spare N6ARA key, and earphones.

With the KHRA1, this means my M40 field kit can do both pedestrian mobile and tabletop operating. Woo hoo!

The weather that morning was simply glorious. A very wet front swept through the previous day leaving behind clear skies and warm temps. Frankly, it was a bit odd activating without wearing a jacket or hoodie.

Gear:

Note: All Amazon, CW Morse, ABR, Chelegance, eBay, and Radioddity links are affiliate links that support QRPer.com at no cost to you.

On The Air

Setting up was quick and easy, even though this was my first time using the KHRA1 in the field.

I hopped on the air and started calling CQ. Once spotted (for some reason the RBN auto-spotting feature wasn’t working again), the contacts started flowing in.

I worked a total of 18 contacts in 16 minutes. It hardly gets better than that for a CW activation!

I had to call QRT after my 18th contact. Even though I had a 30-minute window to POTA, nearly 14 minutes of that was taken up with my intro and summary for the activation video.

I called QRT with a small pileup still in place. I really hate doing that, but I had a schedule to keep!

QSO Map

Here’s what this five-watt activation with a 4′ telescoping whip antenna looked like when plotted out on a QSO Map:

Activation Video

Here’s my real-time, real-life video of the entire activation.  As with all of my videos, I don’t edit out any parts of the on-air activation time. In addition, I have monetization turned off on YouTube, although that doesn’t stop them from inserting ads before and after my videos.

Note that Patreon supporters can watch and even download this video 100% ad-free through Vimeo on my Patreon page:

Click here to view on YouTube.

A super-portable, low-impact POTA machine!

The KH1 works amazingly well as a tabletop radio when combined with the KHRA1 adapter.

At the end of the day, the KHRA1 is a very simple piece of hardware, but it effectively transforms the KH1 from a handheld radio to a tabletop.

Of course, I’ve used the KH1 numerous times with wire antennas in a tabletop configuration (I’m a massive fan of wire antennas) but the ability to use the 4′ whip antenna and internal KH1 loading coils means that I can operate anywhere I have a surface.

As I mentioned in a previous post, in some cases, low-impact, and low-profile are key to positive park relations.

Herein lies the thing I love about my KX2/AX1 pairing as well. It’s just with the KHRA1, the KH1 makes for an even smaller, lighter-weight field kit.

Any negatives? The only one I’ve come up with is that the KH1 is so lightweight that I realize I need to carry a small piece of shelf liner (something like this) to provide the KH1 with a bit more grip on a slick park table, especially those composite ones.

Again, I will update this post when Elecraft announces KHRA1 pricing and availability.

Thank you

I still can’t believe the entire kit fits in this small case. Even when I put the KHRA1 thumb screw on backwards!

Thank you for joining me on this quick little tabletop activation!

I hope you enjoyed the field report and my activation video as much as I enjoyed creating them!

Of course, I’d also like to send a special thanks to those of you who have been supporting the site and channel through Patreon, and the Coffee Fund. While certainly not a requirement as my content will always be free, I really appreciate the support.

As I mentioned before, the Patreon platform connected to Vimeo make it possible for me to share videos that are not only 100% ad-free, but also downloadable for offline viewing. The Vimeo account also serves as a third backup for my video files.

Thanks for spending part of your day with me!

Have an amazing week ahead and play some radio!

Cheers & 72,

Thomas (K4SWL)

POTA is changing park prefixes and, in some cases, park numbers

I’ve just learned that the Parks On The Air (POTA) admin is in the process of cleaning up and reorganizing the way Programs, Locations, DX Entities, and Parks are stored in its database.

Many thanks to Alan (W2AEW) who shared a link to this document which explains what they’re doing and even links to logs as they implement these changes.

In short, this will have an effect on activators, especially, because there’s a decent chance you will be using a new park prefix, and in some cases, possibly new park numbers.

A number of POTA prefixes have changed already.

In fact, if you’re activating in Canada, you might have already noticed that the park prefix is no longer VE, but is now CA.

As an example, in my activator logbook, what was once VE-1596 (Hog’s Back Conservation Reserve) is now CA-1596.

Here in the States, the prefix will soon change from K to US.

These prefix changes will happen for many other countries as well.

Of course there’s nothing, as an activator or hunter, you need to do other than start using the new prefix when it has been implemented. All of your old logs will automatically update in the POTA system with the new prefixes and/or numbers.

It might take time for logging applications like HAMRS to adjust to new prefixes. Activators might need to use the old prefix while live-logging during an activation, then use a find/replace string in a text editor later to fix the ADIF file.

Again, check out this document on the POTA website which goes into much more detail.

Thanks again, Alan, for the tip!

QMX – From Kit to Field!

by Matt (W6CSN)

The Radio

The QMX by QRP Labs is a five band, multi-mode radio introduced by Hans Summers G0UPL at FDIM in 2023. The QMX is the next logical step in the radio development journey at QRP Labs, bringing together the innovative approach to FSK modes like FT8 from the QDX and the CW performance of the QCX series. This is all done in same enclosure as the QCX-Mini which is not much larger than a deck of playing cards.

Size of the QMX compared to standard deck of playing cards.
The QMX is about the size of a deck of cards.

The keen observer will notice that the QMX also sports a built-in microphone which, along with associated circuitry, supports future introduction of voice modes by way of firmware update. Other notable features include SWR metering with protection as well as solid-state “PIN” diode T/R switching, plus the option for “high band” coverage of 20 through 10 meters in addition to the original 80m-20m version.

Most hams have, at one point or other, forgotten to throw the antenna switch, adjust the tuner, or even connect an antenna before transmitting. The SWR meter and protection really sets the QMX apart from earlier QRP Labs radios. There are plenty of sad tales on the QRP-Labs forums from QCX or QDX users that “smoked” the BS170 mosfet finals in a moment of operating into a badly mismatched load. It’s remarkably easy to do, ask me how I know!

The Build

Based on experience with the QCX-Mini and having put together several QDX’s, I admit to being hesitant to starting assembly of this radio. The level of integration in the QMX as a multi-band, multi-mode unit is probably the highest yet to come out of QRP Labs. The components that were merely small in earlier radios are absolutely tiny in the QMX, specifically the LPF toroidal cores. The main board, internal switching power supplies, display, and controls board are all sandwiched together in a tight fit for the custom enclosure.

photo showing a partially completed circuit board
Most of the electronic components installed on the main board.

The build started with a slow and methodical approach of doing a little bit each day and working in the morning when my mind was fresh and there was good light on my workbench, a.k.a. the dining room table.

The first “disaster” happened when performing the factory recommended modification to Revision 2 boards shipped in 2023. The mod calls for a protection diode to be installed across a SMD mosfet. Several leaded 1N4148 diodes were available in my “junque” box so I attempted to carefully fit one of these in the right position on the board. While soldering the diode in place I managed to lift C508, a microscopic .1uF SMD capacitor, clean off the board!

photo of circuit board with modifications
The suggested modification adding a protection diode.

Given the tools at my disposal, there was no way I was going to be able to get that capacitor back into place. Therefore, I grabbed a standard through hole .1uF cap and painstakingly got it connected in the right place, verified by lots of continuity testing.

Once finished with all the electronic components on the main board, I was feeling pretty cocky and also the completion of the project was more clearly in view. The cautious and methodical approach gave way to a faster build pace, which directly lead to the second “disaster.” While installing the headers that connect the main board to the display board, I failed to CAREFULLY READ THE ASSEMBLY MANUAL and soldered the male pin headers where I should have installed the female sockets!

This misstep might have ended the project right then and there if I had not at some point in the last year bought a proper desoldering tool. This is not an expensive automatic vacuum pump powered solder re-work stations, but rather a heating tip and manually actuated solder sucker built into one tool. Twenty-two unsoldered connections later, we were back on track. Continue reading QMX – From Kit to Field!

Teri: A Request from the POTA Babe to QRPer Readers

For those regular readers of QRPer.com, you know that this POTA Babe has a goal of 60 new-to-me park activations for 2024. I am planning a POTA trip this summer to North Carolina and/or Virginia. I will be on the road for eleven to twelve days with nine to ten of those days potentially available for activations. I’d like to hear from y’all what one park you think I should visit and why.

You can either leave your suggested park in the comments below or email me via the address on my QRZ page. As summer will be here before we know it, I’d like to nail down my plans soon. Please share your suggestions by Wednesday, March 6th.

For safety reasons, I will not share my itinerary before the trip; however, I will give credit in the articles I write from the trip to the op (or ops if the park is suggested by more than one person) who suggested that park.

Thank you in advance for your assistance! Keep having fun with your QRP adventures!

QRP & Coffee: Late-Shift POTA using the new Chelegance MC-750 80 Meter Coil!

I mentioned in a previous post that Jesse at Chelegance had sent me some antenna goodies to evaluate. One of them was the MC-599 portable dipole antenna which you might have read about in my previous field report.

Another item he sent, which I was equally excited about, was an 80-meter coil for my beloved MC-750 vertical antenna.

In the spirit of full transparency: he sent this at no cost to me, and, as a reminder, Chelegance is also an affiliate of QRPer.com.

I’ve been eager to take the 80-meter coil on a POTA activation because 1.) if it proved effective, it would be great to have such a low-impact, low-profile antenna for 80 meters, but 2.) it’s been very difficult to fit in an evening POTA activation with my family life.

It would have been difficult to gauge how effective an 80M antenna performs in the late morning or early afternoon when I typically activate local parks/summits.

On Wednesday, February 6, 2024, a two-hour window of opportunity opened. One of my daughters had a dress rehearsal that night, and I knew of a nice, quiet, secluded POTA spot only 25 minutes away.

Pisgah National Forest (K-4510) and Game Land (K-6937)

My original plan was to arrive at the Looking Glass Falls’ picnic area, deploy the antenna, fire up the stove, make some coffee, eat on-site, then begin my activation after the start of the UTC day.

So why wait for the new UTC day?

Mainly because once you hit the new UTC day, it counts as a new activation. That really works in your favor as an activator if your goal is to complete a valid activation (with ten contacts) and you’ve enough time to do that before the UTC rollover. If you time it all correctly, you could activate double the parks with a minimum of 20 contacts (split 10/10). In my case, that would mean a total of four parks activated in one evening (since this was a two-fer).

I decided fitting in an activation prior to the UTC rollover simply wasn’t worth the rush.

Once I arrived on-site, however, I was already changing my mind.

I started my activation video, deployed the MC-750, and looked at my watch. I had roughly 15 minutes before the UTC rollover.

It would be tight, but I decided to give it a go and try logging ten contacts before 18:59:59 local (or 23:59:59 UTC).

If I couldn’t log ten before the UTC day, who cares!? It would be a fun challenge for sure, but I wasn’t going to cry if I couldn’t gather enough contacts for a valid activation.

There was another factor, too: operating 80 meters with a 17′ loaded vertical isn’t exactly “efficient.” My theory, though? It doesn’t need to be efficient. It’s crazy portable, convenient, and as a POTA activator, I only need enough performance to get the job done.

Time to hit the air!

Radio Gear:

Note: All Amazon, CW Morse, ABR, Chelegance, eBay, and Radioddity links are affiliate links that support QRPer.com at no cost to you.

Coffee Gear:

Photo from the Fall of ’23.

On The Air

I’d scheduled my activation on the POTA website, so was relying on it to spot me via the Reverse Beacon Network.

I started calling CQ POTA and the contacts started rolling in… very… slowly.

Well, it felt slow because I had a goal of ten contacts in fifteen minutes. Continue reading QRP & Coffee: Late-Shift POTA using the new Chelegance MC-750 80 Meter Coil!

QRP POTA and testing the new JNCRadio MC-599 portable dipole antenna!

In late December 2023, I received a package from Jesse at JNCRadio/Chelegance. It was their new MC-599 portable dipole antenna. They sent it—full disclaimer: at no cost to me—for evaluation, but shortly after receiving it, life got crazy and I was delayed in taking it to the field.

Fast-forward to February, and I was eager to take it to the field and see how it might perform. On February 5, 2024, a nice window of opportunity opened in the afternoon while one of my daughters was rehearsing A Midsummer Night’s Dream with her cast. Pisgah National Forest and Game Land were a 20-minute drive from her meeting site, so I headed there to deploy this new antenna.

The JNCRADIO MC-599

On-site, I pulled out the two main components of the MC-599 dipole system: the bespoke padded bag holding the antenna and the portable mast.

I knew the basics about assembling the MC-599 because I had watched a video on the Chelegance website that morning.

However, this was the very first time I had deployed the MC-599. I had never even removed any of the antenna components from the padded bag.

With this antenna, it’s best to have an open area for the two sides of the dipole (two telescoping whips) to fully extend without touching tree branches, etc. I had one particular picnic site in mind at the roadside picnic area I chose, but a couple was having a picnic there when I arrived. I waited to see if they might be leaving soon, but they weren’t, so I chose a site I had used before, even though it was flanked by trees.

Assembly was easy: I simply attached the center of the dipole to the 13′ mast, then attached the two telescoping whips to either side and extended them to the 20M position silkscreened on the whip (identical to the MC-750 vertical markings—see below).

Next, you simply attach your coax to the center of the dipole, then extend the mast all the way up.

I had to avoid touching tree branches, but it actually fit quite easily into this small space.

Since it was a bit breezy, I used some line to guy the mast. Ideally, you’d want a minimum of three guying points, but I only had two lines with me, so I made do, and it worked fine—the antenna was stable.

Next, I set up my radio: the Yaesu FT-818ND. Since the MC-599 was, in theory, resonant, I didn’t need an ATU for a match.

I turned on the FT-818 and discovered that the SWR was a perfect 1:1. Amazing.

I suppose I shouldn’t have been surprised because my Chelegance MC-750 is always perfectly resonant (without needing a transformer) simply following the whip markings for guidance.

I should note here that the MC-599 can handle up to 200 Watts PEP—I was pushing 5-6 Watts. Also, the frequency range using the whips is from 20-6 meters. Chelegance also includes two 7 MHz wire elements that can be deployed in an inverted vee shape to play radio on the 40-meter band. It’s an efficient system and has many fewer components than a Buddipole systems I’ve used in the past.

Gear:

Note: All Amazon, CW Morse, ABR, Chelegance, eBay, and Radioddity links are affiliate links that support QRPer.com at no cost to you.

On The Air

Keep in mind that my POTA site was in a deep valley, flanked by high ridge lines–I wasn’t sure what to expect as I hopped on the air.

I started calling CQ POTA and the first station I heard was DL1OK operating in Spain as EA8/DL1OK. Logging Dmitrij was a good sign indeed for this portable dipole!

Stations kept flowing in. I worked my first ten contacts in ten minutes.

I continued working stations in a continuous pileup until I ran out of time. I ended up logging a total of 46 contact all within 50 minutes. I did spend a few extra minutes (as I always do) trying to pull out weak stations and slower code stations.

What fun!

QSO Map

Here’s what this five-watt activation looked like when plotted out on a QSO Map.

Note that this map does not include my contact with EA8/DL1OK in Spain:

Activation Video

Here’s my real-time, real-life video of the entire activation.  As with all of my videos, I don’t edit out any parts of the on-air activation time. In addition, I have monetization turned off on YouTube, although that doesn’t stop them from inserting ads before and after my videos.

Note that Patreon supporters can watch and even download this video 100% ad-free through Vimeo on my Patreon page:

Click here to view on YouTube.

MC-599 notes

I’ve got to admit: the MC-599 made a great first impression.

As with the MC-750, I’m most impressed with the build quality. The components are all sturdy and nicely machined. The padded case was custom made to hold the MC-599 and its components. Everything fits together as it should and—again—was resonant when deployed according to the whip markings.

Even on this inaugural deployment, it didn’t take long to set up. The next time I deploy it, it will go even faster. Packing it up afterward (as you can see in the video) went very quickly.

Keep in mind: the MC-599 is a low-impact, high-profile antenna.

If you’re at a site that doesn’t allow antennas in trees, the MC-599 could be an excellent option. Other than using optional guy lines that would require tent stakes in the ground, it would have no impact on park grounds.

I love the fact that the MC-599 is self-supporting. This would be an absolutely brilliant antenna to use at parks with wide-open spaces and few trees for support.

That said, it is not a stealthy antenna. In fact, portable dipole antennas are some of the most conspicuous portable antennas you could deploy. They’re maybe slightly less conspicuous than a hex beam or Yagi. Even though I was cloaked by a few trees, the couple that was occupying the picnic site I had hoped to use couldn’t help but stop by on their way out and ask what it was I was doing. I bet if I had been using a wire antenna, they wouldn’t have even seen it.

I would always ask permission before setting up an antenna like the MC-599 at, say, a small historic site or urban park.

I could also see using the MC-599 for SOTA (Summits On The Air), but primarily on summits that are either drive-up, or where the hike is minimal. The aluminum alloy mast is lightweight for its size, but it’s quite large to consider taking on an extended hike. However, for a nice drive-up summit, I imagine you could work some serious DX. Just bring a few guy lines in case it’s windy.

I do think the MC-599 would make for a great Field Day antenna. Since it can handle up to 200W PEP and is easy to lower and switch bands, it would be a brilliant portable option for those operating a multi-band 100W rig.

But obviously? It’s an exceptional performer with QRP power. It’s hard to beat a dipole even when it’s only 13′ off the ground.

Thank you

Thank you for joining me on this fun activation!

I hope you enjoyed the field report and my activation video as much as I enjoyed creating them!

Of course, I’d also like to send a special thanks to those of you who have been supporting the site and channel through Patreon, and the Coffee Fund. While certainly not a requirement as my content will always be free, I really appreciate the support.

As I mentioned before, the Patreon platform connected to Vimeo make it possible for me to share videos that are not only 100% ad-free, but also downloadable for offline viewing. The Vimeo account also serves as a third backup for my video files.

Thanks for spending part of your day with me!

Cheers & 72,

Thomas (K4SWL)