I’ve been spending more time with my Mountain Topper MTR-3B (“Tuppence”) recently and have been thoroughly enjoying this little radio’s companionship.
Since I made a dedicated ultra-compact field kit for the MTR-3B, it has also been even easier to toss it in my backpack and take it on little field adventures. The field kit is truly a grab-and-go and even includes a throw line and weight.
On Friday, January 28, 2022, after a total of six individual park activations during the previous two days (a POTA RaDAR run and my first 2020 Antenna Challenge activation) driving back to the QTH I thought, “surely I can skip doing an activation today.”
That quickly turned into, “Wait a minute…I’ve got enough time to fit in both an activation and a hike!”
So I made a quick detour off of I-40 to visit the Clear Creek access of South Mountains State Park.
South Mountains State Park (K-2753)
I pulled into an empty parking area; not really a surprise on an early Friday afternoon. In addition, I figured many were out grabbing bread and milk since winter weather was in the forecast.
On January 26, 2022, I fit in multiple park activations in one day as a RaDAR (Rapid Deployment Amateur Radio) run. My hope was to activate four or five sites between 14:00 – 21:30 UTC.
Here are the field reports and videos of my first four activations:
The next park in my run (#5) was Tuttle Educational State Forest and it was the final park in this modest RaDAR run!
I packed up the gear at Johns River Game Land in a matter of three minutes, popped it all in the car, then drove 8 minutes to nearby Tuttle Educational State Forest which, at this point, almost feels like a home away from home.
Tuttle Educational State Forest (K-4861)
As I pulled into the Tuttle parking lot, I found my buddy Max (W4GZ) activating the park from his truck. It was no surprise finding Max here since I had just worked him Park-To-Park (P2P) from Johns River next door.
Max delivered some precious cargo: some more of his mom’s homemade QRP pickles!
The Summits on the Air amateur radio award programme was the idea of John Linford, G3WGV. Although he had the idea many years ago, it was not until he ran across the European Adventure Radio website run by Richard G3CWI, that he put the idea down on paper. He emailed it to Richard with the a single question “should we try to get this going?”. The original idea ran to a few paragraphs on a single side of A4 paper but it took well over 1,000 man-hours of work to turn that idea into a viable award programme. Many people helped along the way, including Matthew M5EVT, Alan M1EYO and Roger MW0IDX. Much of the award was discussed and dissected on the internet before it was launched on 2 March 2002. England and Wales launched first, soon to be followed by Scotland.
Although neither John nor Richard envisaged huge numbers of people participating, the award was designed to be scalable from the outset. A key objective was making the award internet-based, for this an online database was needed. Fortunately, Richard knew Gary Bleads, G0HJQ who just happened to be a professional database designer. John and Gary met up and, after much hard work, SOTA had an “industrial strength” database. Gary assures us that it is sized such that it could deal with all the amateur radio contacts made in the whole World if required!
Simply having an award and a support infrastructure does not ensure success however, and a huge effort was put in to publicise the award. Both John and Richard wrote articles, gave numerous talks to radio clubs, at rallies and exhibitions and ran SOTA stands at various events. Over 1,000 leaflets were given out in the first 18 months of the scheme. But even that was not enough. International publicity was gained by constant news releases to overseas organisations and finally, a keen band of activators made it their business to explain SOTA to everyone they contacted on the air.
Today, SOTA has hundreds of participants in Associations across the World, all sharing the same award ethos and infrastructure.
Note that SOTA is an award programme not a club or society; as such you can’t be a “Member” of SOTA but you can certainly be a participant!
SOTA has become a true passion for me and I look forward to each and every activation. I also enjoy chasing SOTA activators while at the QTH.
SOTA combines my love of radio, hiking, and community. It really couldn’t get any better.
My thanks to all of the SOTA volunteers who make this program a reality. Happy 20th Anniversary, SOTA!
On January 26, 2022, I fit in multiple park activations in one day as a RaDAR (Rapid Deployment Amateur Radio) run. My hope was to activate four or five sites between 14:00 – 21:30 UTC.
Here are the field reports and videos of my first three activations:
The next park in my run (#4) was either going to be my last activation, or second to last depending on my available time.
After visiting with my buddy, Hamilton, at his ceramics studio in Morganton (read about that in the previous report) I looked at the time and decided I could fit in a very quick activation of Johns River Game Land (#4) en route to Tuttle Educational State Forest (#5).
I made up my mind en route that I’d use my fastest-to-deploy combo: the Elecraft KX2 and Chameleon CHA MPAS Lite.
I really wanted to be in and out of the site within a 20 minute window. That’s actually very doable as long as I could rack up at least ten contacts in 10-15 minutes. Some days, propagation can make that a tall order, though!
Johns River Game Land (K-6916)
Johns River actually has a number of access points and, frankly, none of them are exactly “bucolic.” Other than the river itself which is beautiful and the main access point for the river which is well-maintained, most of the game land parking areas are filled with litter.
I chose a parking area for this activation which has, in the past, looked like a dumping ground. I was pleased when I pulled into the parking lot this time to find it much cleaner (no old refrigerators or sofas dumped at the far end of the lot) but then again the snow on the ground was likely hiding quite a bit of litter! My philosophy is to always leave a site cleaner than I found it, but Johns River often has so much littler, I could spend a week picking up trash.
After doing a very short intro for my activation video, I set up the Elecraft KX2 and MPAS Lite antenna in a matter of two minutes.
I started calling CQ POTA (with my fingers crossed!) on 40 meters and was very pleased that chasers were out and about!
I worked my ten contact in 9 minutes and then went QRT! Woot! Here’s the log sheet:
In this short activation, there was actually a P2P with Max (WG4Z) who was just up the road at Tuttle Educational State Forest. We were definitely working each other via ground wave.
The contacts were flowing so well, that I wanted to stay on the air a bit longer, but I knew to fit in Tuttle and a hike, I really needed keep moving. As soon as I worked my ten, I hopped off the radio.
While I like putting more contacts in the log–especially when they’re flowing so freely–it was actually kind of fun to validate this activation in somewhat of a “sprint.”
QSO Map
Here’s what 5 watts and the MPAS Lite yielded in nine minutes on the air:
Activation video
Here’s my real-time, real-life video of the entire activation. This must be one of the shortest activation videos I’ve ever made:
Thank you so much for reading this short report and coming along with me on this RaDAR run! I’ll be posting Park #5–Tuttle Educational State Forest–soon where I catch up with Max (WG4Z) and we work park-to-park once again.
As always, I’d like to send a special thanks to those of you who have been supporting the site and channel through Patreon and the Coffee Fund. While certainly not a requirement as my content will always be free, I truly appreciate the support.
These are crazy times we’re living in these days (at time of posting). I wish all of you good health, safety, and peace–especially our good friends in Ukraine.
Let’s all treat each other with kindness and respect this week as we remember that all we’ve got on this old planet is each other.
“Any radio amateur currently transmitting from Ukraine is risking his or her life. If you hear a Ukrainian station, do not broadcast its callsign, location or frequency — whether on the band, in a cluster or on social media. You may be putting lives at risk.”
Steve (MW0SAW) and I were recently exchanging emails and he has kindly allowed me to share a few photos and details of the QRP field kit he has taken on holiday:
I’m currently in Switzerland (ski holiday)–I did bring the Venus SW-3B. I was very surprised to get 2 USA stations last weekend with 4-5 watts in the ARRL CW contest.
Only a couple of Europeans today. But it’s all fun and I did have a lovely morning ski so can’t complain lol.
Wow, Steve! I would love to be in Switzerland right about now. I’ve got a bucket list item to journey there someday (in summer months) and activate at least 10 summits. Having lived in Grenoble, the Alps always feel a bit like home.
I love how compact your setup is and obviously the K6ARK EFHW is doing the trick if you’re making contacts State side with QRP and during a contest competing with the big guns!
Hmmm…I’m now thinking I might grab a second Maxpedition Fatty Pouch. I just checked and Maxpedition still has the “buy one, get one free” deal on their website. The link above goes to Amazon (hence the affiliate link which my site auto-converts) because pricing is typically best there, but I believe you get an even better deal at present going directly to the source; especially if one could use two pouches!
Thanks again, Steve, for sharing your field kit photos and notes!
Josh (KI6NAZ), with Ham Radio Crash Course, has invited me to join him in a livestream tomorrow, February 26, 2022 at 20:00 EST/17:00 PST (01:00 UTC Feb 27, 2022).
We’ll be talking Morse Code, QRP, Field Radio and who knows what else! I’m looking forward to it.
On January 26, 2022, I decided to fit in multiple park activations in one day as a RaDAR (Rapid Deployment Amateur Radio) run. My hope was to activate four or five sites between 14:00 – 21:30 UTC.
Here are the field reports and videos of my first two activations from this run:
The next park in my run (#3) was Table Rock Fish Hatchery, a good 40 minute drive from the spot where I operated at activation #2.
The drive to Table Rock was most pleasant and I stopped a couple times to take in views along the forest service road leading down the mountain.
I was pointing my finger and saying, “I’m going to activate your summit soon, Table Rock!”
I mentioned in a previous post that I made this RaDAR run unnecessarily more complicated by deploying a different antenna and radio combo at each site.
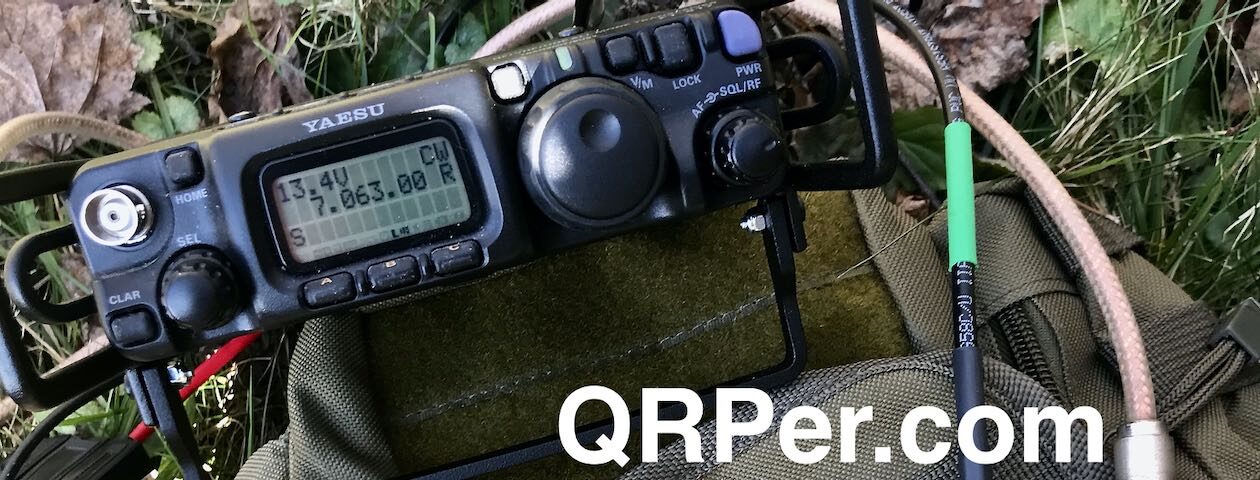
On the drive to the fish hatchery, I decided to use the PackTenna 9:1 UNUN random wire antenna and pair it with my Yaesu FT-817ND.
I have a number of friends (and many QRPer readers) in Ukraine, so it’s difficult to think of much else this morning after news of the invasion. From Reuters:
Russian forces invaded Ukraine on Thursday, assaulting by land, sea and air in the biggest attack by one state against another in Europe since World War Two.
Missiles rained down on Ukrainian cities. Ukraine reported columns of troops pouring across its borders from Russia and Belarus, and landing on the coast from the Black and Azov seas.
Explosions were heard before dawn and throughout the morning in the capital Kyiv, a city of 3 million people. Gunfire rattled, sirens blared, and the highway out of the city choked with traffic as residents fled.
The assault brought a calamatous end to weeks of fruitless diplomatic efforts by Western leaders to avert war, their worst fears about Russian President Vladimir Putin’s ambitions realised.[…]
Trevor (M5AKA) shared the following message via Twiter from Anatoly Kirilenko (UT3UY) of the Ukrainian Amateur Radio League:I’ve friends in both Ukraine and Russia and none of them want what’s happening here. My heart goes out to them. As with many of these situations, citizens have so little to do with the political, financial, and military interests of their leaders.
I might have mentioned in a previous post that I named my little Elecraft KX1 “Ruby.”
I name all of my field radios that are permanent; ones I never plan to sell or trade at any point in the future. Ruby is firmly in that keeper list.
Why do I anthropomorphize field radios? That’s perhaps a discussion for a different day but I reckon it’s because I feel they have a lot of character and are, quite literally, trusted companions. They go with me on travels, hikes, and all sorts of outings.
Ruby love
So Ruby is actually the second KX1 I’ve owned.
My first Elecraft KX1 also had a dedicated Pelican 1060 case. There’s even room to fit an external Whiterock paddle.
The first one I purchased in 2008 as a reward to myself for learning CW (see photo above). I enjoyed that KX1 until 2016 when I sold it to help fund the purchase of my KX2.
I immediately regretted selling it, although it helped that I sold it to an amazing person.
In October 2020, I purchased Ruby and wrote a post about how great it was to be reunited with this gem of a radio.
At the time, I had no idea what a great deal I had landed.
Ruby turned out to be a four band radio (it was advertised as three), included the built-in ATU, and the package came with a simple wire antenna, three different coaxial DC plugs, a Pelican 1060 waterproof case, earphones, and a set of KXPD1 paddles. All of this for $300 US shipped.
I took Ruby on a number of field activations and couldn’t have been happier
Intermittent issues surface
In the summer of 2021, I started noticing some odd behavior.
Sometimes, after turning on the power switch, the rig wouldn’t completely power up. Instead of the typical two clicks we KX1 owners are accustomed to hearing, I only heard one click and neither the display nor any of the functions worked.
This was an intermittent issue–the next day it might power up as it should.
I did a little troubleshooting: I completely disassembled it, visually inspected all of the solder joints, and removed/cleaned and reinserted the firmware chip. This had no effect at all.
So, I took Ruby to one of the best radio repair technicians in the world who also happens to be one of my best friends: Vlado (N3CZ). He actually does a lot of repair and even has a radio repair website.
Dr. Vlado
Vlado (N3CZ) draws a crowd during a joint park activation on the Blue Ridge Parkway a few years ago.
Vlado will be the first to tell you that the worst problems to diagnose are those that are intermittent; it takes much longer to trace the source of the problem.
A few days later, Vlado sent me a message notifying me that the patient (Ruby) was on the operating table and surgery was about to begin. (See why I call him “Dr. Vlado”–?)
Vlado checked the circuit board very carefully. He found a few solder joints that needed work including a couple on the chip holder. In fact, he completely desoldered the chip holder and soldered it back in properly. Keep in mind here that the KX1 was only ever available as a kit, so quality had everything to do with the skill of the original builder.
He re-assembled Ruby and she worked perfectly.
A second operation
I put Ruby back on the air for a few months, but then in December 2021, a variation of the same issue resurfaced. This time, the “two clicks” in startup took a couple seconds longer than it should. Then it simply stopped working altogether.
Vlado wanted Ruby back in surgery ASAP, so I dropped her off at his “Emergency Room.”
Since the problem was no longer intermittent, Vlado quickly sorted out the main issue: a faulty encoder.
I should note here that since the KX1 hasn’t been produced by Elecraft in many years, there’s always the fear that a replacement part might already be “unobtainium.”
I called Elecraft support and fortunately for KX1 owners everywhere, the encoder is one Elecraft uses in a few of their radios. They have a healthy inventory and the part costs less than $5.00. Woo hoo!
Admittedly, when I placed the order, I also order a few extra parts I thought could fail in the future and might be difficult to find: 3.5mm jacks, pots, and even the LED screen. If I was paying shipping anyway, why not add a few extras? The parts are all very reasonably priced.
The KX1 doesn’t seem to have a lot of unobtainium in it–I seem to recall though that the firmware chip can no longer be ordered from their website and neither can the pushbuttons. I bet you could find other pushbuttons if needed, though.
I had the encoder shipped directly to Vlado and he completed Ruby’s operation in short order. Thank you, Vlado!
To the field!
I’m so happy to have Ruby back on the air! We’ve chased numerous parks and summits in the past week and I took her on an activation Monday, pairing her with my recently-built K6ARK EFHW antenna.
I’ll post an activation report and video in the coming weeks.
KX1 advice
Elecraft KX1s have become as rare as hen’s teeth lately. You’ve no doubt noticed this if you’ve been looking for one. I’m sure I could sell my KX1 package in a heartbeat for twice more than I paid a year and a half ago. It’s a little insane, really, but I get it.
If you’ve been looking for a used KX1, I would offer the following notes/advice:
Since these were only available as kits, you might ask the seller about the original builder and/or have them take photos of the soldering work inside prior to purchasing.
Assume issues might arise with time. With radios like this, I mentally set aside at least a couple hundred dollars for future replacement parts and/or repairs.
Keep in mind that as with any other radio that’s a bit long in the tooth, you may find that some components are simply no longer available. That’s the risk we take being custodians of these cool little rigs.
Actively looking for a KX1 at time of posting (Feb 2022)? Note that interest in particular radio models waxes and wanes over time. With a little patience, you’ll eventually find one. I’ve seen this happen with so many other radios over the years.
The KX1, as with most Elecraft radios, comes in a number of configurations and you need to be aware of this if purchasing. Some only have two bands, some have three, and some have four. I’m not certain if band modules are still available via Elecraft, so you might get stuck with the configuration you purchase. Also, the internal ATU was an option; don’t assume the one you’re purchasing has the ATU.
KXPD1 paddles are very difficult to find these days. It’s a big bonus if your radio comes with them. Not everyone likes these paddles, but the version I have now seem to work really well, actually. N6ARA Tiny Paddles are a brilliant little replacement, but you might wish to make a 3D-printed holder to attach the the paddle point on the front of the radio to take a little strain off of the 3.5mm jack inside.
I should also add that Vlado is a brilliant repair technician and has worked on numerous Elecraft, Icom, Yaesu, Kenwood, and Ten-Tec models over the years–if it’s solid state, he can repair it. If you ever need his services he can be reached via his website HamRadio.repair.
Also, Dave (W8FGU) is an Elecraft employee that is devoted to their legacy radios like the KX1/KX1/K2, etc. He’s a great guy, brilliant resource, and I believe can also arrange repair, if needed.
Enough blogging: I think Ruby and I will chase a few summits now while I finish my morning cuppa’.
Connecting an international community through low-power field radio adventures.
Please support QRPer by adding us to your whitelist in your ad blocker. Ads are what helps us stay online. All of our ads are ham radio related--no junk, we promise! Thank you!
 I’ve been spending more time with my Mountain Topper MTR-3B (“Tuppence”) recently and have been thoroughly enjoying this little radio’s companionship.


