This article was originally published on the SWLing Post.
 Last August, SWLing Post contributor, Andy (G7UHN), shared his homebrew project with us: a genius companion control display for the venerable Yaesu FT-817 general coverage QRP transceiver.
Andy’s article caused me (yes, I blame him) to wax nostalgic about the popular FT-817 transceiver. You see, I owned one of the first production models of the FT-817 in 2001 when I lived in the UK.
At the time, there was nothing like it on the market: a very portable and efficient HF, VHF, UHF, multi-mode general coverage QRP transceiver…all for $670 US.
In 2001? Yeah, Yaesu knocked it out of the ballpark!


In fact, they knocked it out of the ballpark so hard, the radio is still in production two decades later and in demand under the model FT-818.
I sold my FT-817 in 2008 to raise funds for the purchase of an Elecraft KX1, if memory serves. My reasoning? The one thing I disliked about my FT-817 was its tiny front-facing display. When combined with the embedded menus and lack of controls, it could get frustrating at home and in the field.
I mentioned in a previous post that I purchased a used FT-817ND from my buddy, Don, in October, 2020. I do blame Andy for this purchase. Indeed, I hereby declare him an FT-817 enabler!
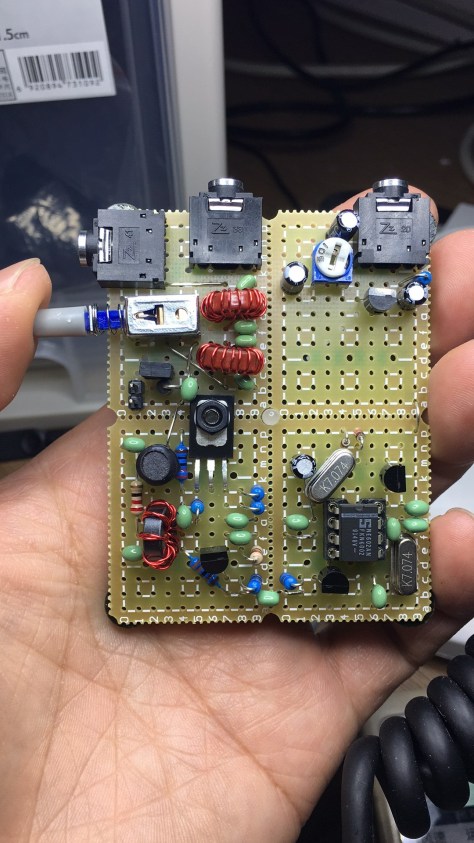
FT-817 Buddy board
When I told Andy about my ‘817ND purchase, he asked if I’d like to help him test the FT-817 Buddy board versions. How could I refuse?
Andy sent me a prototype of his Version 2 Buddy board which arrived in late November. I had to source out a few bits (an Arduino board, Nokia display, and multi-conductor CAT cable). Andy kindly pre-populated all of the SMD components so I only needed to solder the Arduino board and configure/solder the cable. I did take a lot of care preparing and soldering the cable, making sure there was no unintentional short between the voltage and ground conductors.

Overall, I found the construction and programming pretty straight-forward. It helped that Andy did a remote session with me during the programming process (thanks, OM!). Andy is doing an amazing job with the documentation.
 I do love how the board makes it easier to read the frequency and have direct access to important functions without digging through embedded menus. While there’s nothing stopping you from changing the program to suit you, Andy’s done a brilliant job with this since he’s an experienced FT-817 user.


The Nokia display is very well backlit, high contrast, and easy very to read.
“Resistance is futile”

I mentioned on Twitter that, with the backlight on, the FT-817 Buddy makes my ‘817ND look like it was recently assimilated by The Borg.
Don’t tell any Star Trek captains, but I’m good with that.
 Andy has a rev3 board in the works and it sports something that will be a game-changer for me in the field: K1EL’s keyer chip!
For more information about the FT-817 Buddy, check out Andy’s website.
Of course, we’ll keep you updated here as well. Many thanks to Andy for taking this project to the next level. No doubt a lot of FT-817 users will benefit from this brilliant project!

 There are two designs: one with an on/off switch, and a newer version without an on/off switch that has auto power save. Both circuits are the same but the software for the PIC chip is different. If you build the one without the on/off switch there is a very specific sequence of connecting and disconnecting the device and it’s my opinion that the one with the on/off switch is the version that makes more sense to build. It shouldn’t matter which order you connect everything up and you simply throw the on/off switch to turn the device on and off.