All posts by Thomas Witherspoon

Six things I learned after becoming a CW operator and activator

Friday evening, I met with my good friends on the crew of the Ham Radio Workbench podcast and we recorded an episode. During the recording, Vince (VE6LK) spoke about his CW goal progress (which, by the way, is going quite well) and he mentioned that he’s moving into the phase where CW is becoming fun.

Vince’s comment reminded me that I started a post draft many weeks ago that focused on several things I learned during my own CW journey. These were all surprises–perhaps even small revelations–that either no one ever told me about in advance or I thought couldn’t possibly apply to me.

This morning, I decided to finish off this post and publish it, so here are six things I learned after becoming a CW operator and activator:

1. More (much more) space on the bands

So, in theory, I understood this prior to becoming a CW activator. As we do our license study, we all learn that CW, as a mode, is a fraction of the bandwidth of Single-Sideband (SSB).

But in practice–when I moved from operating SSB to CW–it almost felt like I had an unfair advantage. That’s especially the case today with the popularity of POTA and SOTA. The bands can be crowded.

I love SSB, but if I’m being completely honest with myself, one of the reasons I operate the mode so little these days (besides the fact that many of my radios are CW only) is because it’s orders of magnitude easier to find a clear spot on the bands as a CW activator. This is especially the case on weekends when bands are generally more crowded.

CW is such a narrow bandwidth mode, I can be 500 Hz away from another signal and we don’t interfere with each other.

2. You really do begin to recognize peoples’ fists

My CW friends have always told me this, but I didn’t really believe it until I took a deep-dive into the world of CW.

You will start to recognize the cadence and “fist” of operators you work regularly who don’t send mechanically perfect CW (i.e. those sending CW from a keyboard).

This is especially the case with ops who use straight keys, cooties, and/or semi-automatic bugs, but even those who use electronic keyers.

Our brains are obviously quite good at recognizing patterns.  Without trying, variances in speed, spacing, and cadence of operators you work regularly become obvious and expected. After you recognize someone’s fist, their callsign will pop out of a pileup. It’s the equivalent of recognizing someone’s accent. It’s pretty amazing, actually.

3. CW gets easier with on-the-air time

Although some of my friends did mention this when I was learning CW, I think I just couldn’t believe it.

As a CW student–when I was learning all of the characters and trying to build speed–it felt like a real struggle. I remember how hard my brain had to work in some of my first QSOs and rag chews. I literally had to rest afterwards!

But a funny thing happens when you simply get on the air and start using CW regularly at comfortable speeds.

Without trying, CW just gets easier and easier. In fact, this is what Vince discovered too: CW evolved from being difficult to being downright pleasurable.

I remember in my early days of doing CW activations, I’d arrive on site and before I started calling CQ, I’d think, “I hope I remember how to operate CW–!” Of course I did, but there was a part of me that thought I could simply forget all that I’d learned and freeze up.

As I built confidence, I was still very much aware of just how much attention I had to focus on listening to the other op and copying their call and exchange correctly. It wasn’t easy.

But within just a few months of doing random CW POTA activations, the mode became a pleasure to use even though I still had to work a bit to copy fast operators or those with distinctive fists. Complicated copy  moved from being a struggle and brain-drain to being more of a puzzle I enjoyed putting together.

Your brain naturally taps into that language center whether you want it to or not and, quite often, without you realizing it.

It just gets easier and effortless. And fun.

4. CW therapy is a real thing

You’ve often heard me call POTA and SOTA “radio therapy” and indeed it is. There’s just something about tapping into that community of radio friends that puts me in a great mood.

CW maybe even takes it a step further.

I mentioned in point #3 that as you learn CW, it becomes a mode you look forward to using–one that gives you a great sense of pleasure.

For me–and for a number of my radio friends–CW is also therapeutic.

How so?

When I operate CW, I go into a focused state of mind that’s actually quite relaxing. When I’m operating CW, all of my stresses seem to melt away while I’m on the air and the feeling doesn’t end when I hop off the air. It just seems to put me in a good mood.

I liken it to mountain biking. When I’m cycling on a single-track trail, I have to give all of my attention to the path in front of me and simply enjoy the experience of pedaling through the forest. I don’t worry about my obligations, my email load, hectic schedule, or projects that need attention. I’m more mindful of tree roots, puddles, and wildlife.

For me, it’s the same when I operate CW; I simply live in the moment and, turns out, that’s therapy money just can’t buy!

5. CW opens the door to the 30 meter band

It’s funny, but I never thought about this prior to becoming a CW operator: CW (and digital mode) operators have access to the 30 meter amateur radio band.

What’s so special about 30 meters? Quite a lot actually:

  • 30 meters is a WARC band! So on contest weekends? It’s a refuge for non-contest activities like POTA, SOTA, and/or rag-chewing.
  • 30 meters feels like a blend of 40 and 20 meters in terems of its properties.  The propagation footprint is a little wider than 40 meters, but not quite as wide as 20 meters.
  • Sometimes the 30 meter band is open when 40 meters or 20 meters is closed or wiped out by flaring.
  • 30 meter antennas are easy to deploy in the field and at home. For example, a 30M end-fed half-wave (EFHW) is a little longer than a 20M EFHW, but shorter than a 40M EFHW. Also, it’s not difficult to build a 40M EFHW with a link that you can disconnect to make it a 30M EFHW.

Above and beyond all of these specific points, I remember times when the 40 and 20 meter band simply weren’t productive and the 30 meter band saved my bacon.

In short? If you’re a CW (or digital mode) operator, you really need to take advantage of the 30 meter band!

6. No one cares about how slowly you send or any mistakes you make as a new operator

Seriously.

I speak as someone who remembers all of my first CW QSOs and activations and as someone who regularly works new CW operators today.

Most of us are a bit self-conscious when we first try our hand at CW. We worry about how we’ll sound to other operators and we don’t want to annoy them.

I’ll let you in on a few secrets:

  1. Every CW operator on the air has been in your shoes at the beginning of their CW journey. They get it. They’ll be patient with you and, in fact, encouraging! The reaction you’re likely to experience from them is empathy–you just can’t hear that over the air.
  2. I get a thrill out of working new CW operators. When I hear a slow, nervous, and shaky fist, I go out of my way to work them. I’ll give them all of the time they need to get their exchange across accurately. It’s an honor to work a new CW operator.
  3. Don’t be afraid to ask other ops to “QRS” (slow down) or send “AGN?” (again?) or question marks to clarify an exchange or call sign. The other op would much rather slow down for you and repeat to help you. It’s not an annoyance…on the contrary…it benefits them.

In short: it’s safe to simply ignore these worries. The CW community is an incredibly supportive one. You’re among kindred spirits that are here to help you!

How about you?

These are just six things I learned after becoming a CW operator.

Of course, there were many advantages of CW that motivated me to learn the mode in the first place like:

  • Being able to use the Reverse Beacon Network for auto-spotting.
  • Opening the door to super simple, ultra-cool compact CW-only radios.
  • Making the most of my QRP power. I’ve often heard that 5 Watts CW is a rough equivalent to 70 Watts SSB.
  • Being able to operate stealthily when needed. When CW operators use earphones, we make almost no noise at all in the field save the sound of our key clicking!

So. readers, what did you discover after learning CW? Or, what are you looking forward to after you learn CW?

Feel free to comment!
KA4KOE takes a look at the FX-4CR by BG2FX

Many thanks to Philip (KA4KOE) for the following guest post:


The FX-4CR (Manufacturer’s image)

Review of the FX-4CR Mini-Transceiver: What’s Old is New Again.

by Philip (KA4KOE)

Introduction

My start in Amateur Radio began in 1979 as a newly-minted, 16 year-old Novice. At the time, my resources were slim. I worked in a country store; pushing a broom, putting up stock, bagging groceries, etc. I was paid $23.46 every two weeks. At this time, Heathkit was selling kits to the ham radio community that ran the gamut from simple to elaborate. Looking over the catalog, my young eyes were drawn to the HW-8. What drew my attention was not the radio’s features, but the price.

The Heathkit HW-8 was listed for $129.95, plus shipping. I did not even notice that the power output was specified at 3.5 watts on 80 meters. The green gem was a bonafide ham radio transceiver!

In due course, the kit was acquired, assembled, tested, and put on the air with an Elmer’s aid. I made a bunch of contacts with that CW-only transceiver. The term “QRP” never entered my mind. I don’t have any photographs from my early days on the air: the only photograph of the HW-8 dates from 1981 during my freshman year of college. By that time, I had acquired an HW-100 from a fellow ham. See Photograph No. 1: note the chrome Vibroplex Lightning Bug, homebrew “T” network transmatch, and of the course the ‘8 on far right (see red arrow).

Photograph No. 1: KA4KOE in 1981.
Photograph No. 2: Heathkit HW-8. (Image Source: WD8RIF)

Rationale and the radio

Without getting into my entire life’s story, I will start this paragraph by stating that my ham “career” has now come full circle as I’m back to using compact, lightweight, low power gear; this time by choice.

I had the bad habit of deploying too much gear during POTA activations. I came across internet chatter with regards to a relatively new product; the FX-4CR SDR mini-transceiver. The base specifications are as follows:

  • Dimensions: 107mm (4.2”) L x 65mm (2.6”) W x 43mm (1.7”) H.
    Weight: 0.46 KG (1 LB).
  • Bands/Power:  80 meters thru 10 meters, inclusive: 20 watts. 6 Meters: 5 watts.
  • Display and Panadapter Span: 50mm (2.0”) TFT, Approximately 24 KHz +/- (48 KHz total) and waterfall. See Photograph No. 3.
  • Modes: LSB, USB, CW, FM, AM, Digital.
  • Receive Current Draw: 210 mA.
  • Transmit Current Draw: 3.0A to 4.0A at full rated 20W output.
  • Input Voltage Range: 9 VDC thru 16 VDC (do not exceed). The optimal supply voltage is 14 VDC.
  • Connectivity: Bluetooth for CAT/Audio. USB Port for CAT/Audio and Firmware Updates. Integral audio soundcard input/output.
  • Output Power: Continuously variable from 0.1 thru 20W. Recommended maximum wattages are SSB – 20W, CW and Digital – 10W.
  • No internal battery or antenna matching unit.
Photograph No. 2: My FX-4CR, 6 AH Bioenno LFP, Genasun GV-5.

Expectations

The prospective buyer should realize what this radio “brings to the table”. As others have previously stated on the various internet chat groups and social media, do not expect Elecraft performance at the $550 (including shipping) price point for this radio. All radios have flaws and this one is no exception. Issues of which I am aware are as follows: Continue reading KA4KOE takes a look at the FX-4CR by BG2FX

Getting To Know You Series: The Mountain Topper MTR-3B — My thoughts, notes, and a POTA activation!

I’m very fortunate in that in the past few years I’ve accumulated a number of QRP radios that I use in rotation when I do park and summit activations.

I’m often asked for advice on choosing radios, and as I’ve mentioned in the past, I feel like the decision is a very personal one–everything is based on an operator’s own particular preferences.

Over the years, I’ve written formal reviews about most of the field radios in my collection. In those reviews, I try to take a wide angle view of a radio–to see how it might appeal to a number of types of operators. I highlight the pros and cons, but I don’t focus on my own particular take because, again, my style of operating might not match that of readers. I try to present the full picture as clearly as I can and let the reader decide.

The Getting To Know You series gives me an opportunity to highlight one radio at a time and showcase what I love about it and why it’s a part of my permanent radio collection. After we spend a bit of time talking about the radio, we’ll do a park or summit activation with it!

The Mountain Topper MTR-3B

The fourth radio in my Getting To Know You series is the Mountain Topper MTR-3B by LnR Precision.

And, spoiler alert: I think the MTR-3B is one of the most ingenious little QRP transceivers ever made.

In truth, all of the Mountain Topper series radios are outstanding if you’re a CW operator and into truly portable, ultra-lightweight, field radio activities.

Steve Weber (KD1JV), the designer behind the ATS and Mountain Topper series, created a brilliant platform that has only been improved upon over time.

I’ve only ever operated the MTR-3B and MTR-4B. That said, I’d love to add a high band MTR-5B to my field radio collection someday.

The Mountain Topper MTR-4B V2. Read the review here.

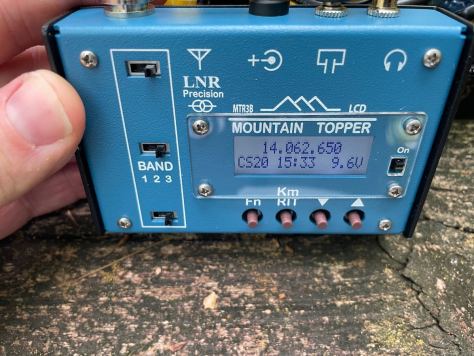
I recently reviewed the MTR-4B (see photo above) and I absolutely love it, but in truth? I prefer the more compact MTR-3B simply because it’s rare that I operate 80 meters in the field and I like the even more compact from factor of the 3B. It’s literally the size of a pack of playing cards.

That said, I wish the 3B had some of the later model MTR-4B upgrades like easy-access sidetone adjustments and power/SWR metering, but I still prefer the MTR-3B.

What? A second MTR-3B?

Confession time: last month, a good friend and QRPer.com patron/supporter offered to sell me his MTR-3B for a very fair market price. He could have put this on eBay or in ham classifieds and surely commanded a much higher price, but he knows how much I love this radio and offered his never used MTR-3B to me.

It didn’t take long for me to accept his offer–like quicker than the blink of an eye quick.

I’ve been looking for a second MTR-3B because 1.) these radios are no longer manufactured and 2.) if something happened to my one and only MTR-3B, I would sob uncontrollably.

I should state here that I blame my buddy, Vince (VE6LK), for introducing the “Two is one, one is none” slogan. Over time, I’ve convinced myself to keep two copies of my favorite radios such as the KX1, FT-817, and MTR-3B.

Vince, by the way, is a card-carrying, certified enabler!

Holmes Educational State Forest (K-4856)

On Friday, August 25, 2023, I made my way to Holmes Educational State Forest to play a little POTA with the MTR-3B.

The site was very quiet. The new school year had just started,  so it was too early for school field trips at the park.

I had my pick of spots to set up, so I chose a new-to-me picnic table. Continue reading Getting To Know You Series: The Mountain Topper MTR-3B — My thoughts, notes, and a POTA activation!

New Product: Xiegu has a new DDC/DUC portable transceiver in the works

Image source: Xiegu (click to enlarge)

It appears Xiegu has a new direct-sampling SDR portable transceiver in the works.

Image source: Xiegu (click to enlarge)

Along with the photos above, here’s the teaser Xiegu shared via their Twitter account today:

Xiegu New product Introduction

It is a new generation of ultra-portable shortwave transceiver. It adopts advanced RF direct sampling architecture and is equipped with powerful baseband and RF units. It integrates rich functions of major models and has built-in popular remote network control function. [B]ringing you a new amateur radio experience.

    • RF direct acquisition architecture, HF/50MHz full-mode transceiver
    • Supports listening to WFM broadcast frequency bands and supports listening to aviation frequency bands
    • Built-in high-efficiency automatic antenna tuner
    • Support network remote control
    • Integrated standing wave scanner and voice pager
    • Integrated modem, preset text messages, CW automatic calling
    • Standardly equipped with high stability TCXO internal clock source
    • External expansion equipment can be connected to expand the frequency band

Golden Hour QRP POTA Activation with the REZ Ranger 80 Portable Vertical Antenna

On Sunday, August 20, 2023, en route to check in with my parents, I popped by Lake James State Park for a little early evening POTA fun.

In the car, I’d pack the Elecraft KX2 kit and I still had the REZ Ranger 80 vertical antenna system on loan from REZ Antennas (it’s since been returned to them).

The last time I deployed the REZ was on Mount Mitchell in some pretty sketchy weather.  While I recorded a couple of short videos, I didn’t record a full activation video since we were having a family picnic that day.

Before sending the Ranger 80 back, I wanted to fit in a proper activation showing how I deploy the antenna, how I tuned it for the first time, and how it might perform on the 40 meter band.

Lake James State Park (K-2739)

It was golden hour at Lake James and the park was bustling with activity. There were kids running around, parents chasing them, and several families cooking out at the numerous picnic sites.

I sought out a location that was private and quiet mainly because the Ranger 80 antenna has four 31 foot radials, thus a large footprint; I didn’t want children, pets, or anyone tripping on the ground radials.

Fortunately, one of my favorite spots overlooking the lake was free, so I could simply set the Ranger 80 up in the woods where folks weren’t walking.

The Ranger 80 is super easy to deploy: simply extend the vertical, attach it to the top of the base, then attach the stainless spike to the base and plunge the entire thing into the ground. Next, you deploy the four radials and connect it to the base of the antenna.

It only takes a couple of minutes especially since the counterpoises are wound using the over-under method. I simply tossed each line into the woods and didn’t worry if they were all lying perfectly on the ground.

Note to REZ: Consider offering optional high-visibility counterpoise wires–for those of us setting up in busy parks, it would make the ground radials more conspicuous to passersby.

Next, I needed to tune the Ranger 80 for the forty meter band.

Typically, when I use a sliding-tap tuning coil style antenna like this one, I turn on the radio and move the coil until I hear an audio peak, then I fine tune it by sending a “dit” on the radio, checking the SWR, and adjusting the coil slider.

That evening, though, I had my RigExpert AA-35 Zoom antenna analyzer so I set it to continuous SWR monitoring and adjusted the coil until I achieved a good match. Easy.

I should add here that when you use an antenna like this frequently, you learn where the best tap points are on the coil thus tuning becomes easier. My friend Alan (W2AEW) actually made a PVC rig for his coil antenna (click here to check it out).

With the antenna all set up and ready to rock-and-roll, I simply hooked up the Elecraft KX2, my VK3IL pressure paddles, and prepared the logs.

It was time to play radio! Continue reading Golden Hour QRP POTA Activation with the REZ Ranger 80 Portable Vertical Antenna

Conrad’s Kayak POTA Activation on Minnie Island

Minnie Island K-1698 Kayak Activation

by Conrad (N2YCH)

9/1/2023

As many readers know, I am on a Parks on the Air (POTA) quest to activate all references in the state of Connecticut. There are 136 parks, and four of them are only accessible by boat. You may have seen my recent field report here on QRPer.com about activating three islands located in the Connecticut River. For those islands, I enlisted professional help from a boat captain with the navigation experience and proper tools (like radar and maps) to access those islands.

The final boat-only accessible island is Minnie Island, located in the middle of Gardner Lake in the town of Salem, Connecticut. I DO have experience kayaking on a Lake, thanks to my uncle, who has two kayaks and has taken me out on Tillson Lake in New York’s Hudson Valley a number of times. Unlike the challenges the river posed, I felt like I could manage the lake on my own. I did need a kayak, though, which I didn’t own.

I had to do some kayak research then. In case you didn’t know this, different kayaks have different specifications on how much weight they can hold. I’m a big guy, six foot five inches tall. Add me, plus a backpack of radio equipment, and I needed to be sure I didn’t sink.

I started on eBay, looking for people selling used kayaks. There are all different kinds of kayaks. Some made for the ocean and dealing with waves and others for casual lake paddler. Some have rudders, some have small, sealed cockpits and some even have motors. I had no idea how serious you could get with all of the accessories and options. I was really looking for something simple.

After striking out on eBay, I found a fishing supply store at the end of the Connecticut River that also had kayaks you could rent. I visited their web site and was happy to see that they were having an end of season clearance sale, where they were selling their rentals. I visited their shop and after looking at my options, I ended up buying an Old Town Vapor 10 kayak. It came with a paddle and life jacket and it was 50% of the price new. A great bargain. The added benefit is now I own my own kayak…a friend suggested that now that I do, there might be IOTA activations in my future.

What sold me on the Vapor 10 was the open cockpit. No trying to squeeze myself in and plenty of room to bring a backpack with the radio equipment in-between my legs. Also, I was able to fit it into my Jeep Wrangler.

Next stop, the Gardner Lake Boat Launch, which was about a 30 minute drive North. Continue reading Conrad’s Kayak POTA Activation on Minnie Island

Getting To Know You Series: The Ten-Tec Argonaut V (Model 516) – My thoughts, notes, and a POTA activation!

I’m very fortunate in that over the past few years I’ve accumulated a number of QRP radios that I use in rotation when I do park and summit activations.

I’m often asked for advice on choosing radios, and as I’ve mentioned in the past, I feel like the decision is a very personal one–everything is based on an operator’s own particular preferences.

I’ve written formal reviews about most of the field radios in my collection over the years. In those reviews, I try to take a wide angle view of a radio–I try to see how it might appeal to a number of types of operators: field operators, DXers, summit activators, contesters, rag-chewers, casual operators, SWLs, travelers, outdoor adventurers, mobile operators, etc. I highlight the pros and cons, but I don’t focus on my own particular take because, again, my style of operating might not match that of readers. I try to present the full picture as clearly as I can and let the reader decide.

On that note, I thought it might be fun to take a radio out for a field activation and spend a bit of time explaining why I enjoy using it and why it’s a part of my permanent field radio collection. Instead of taking that wide-angle view of a radio like I do in magazine reviews, I share my own personal thoughts based on long-term experience.

Each new video in the Getting To Know You series will highlight one of the field radios from my field radio collection.  I’ll spend time in each video explaining what I personally appreciate about each radio, then we’ll do a park or summit activation with the radio.

I’ll release these every few weeks or so–when the notion strikes me.  They will not be on a regular schedule, but I hope to include each of my radios in this series over the the next year.

The Ten-Tec Argonaut V

The third radio in the Getting To Know You series is my Ten-Tec Argonaut V (Model 516).

I’ve always been a big fan of Ten-Tec products because I love their focus on quality, high-performance receivers, and benchmark audio fidelity.

Ten-Tec has produced some impressive radios over the years and was a trail-blazer in the world of QRP with their Power Mites and original analog Argonaut series (check out these and more T-T radios here).

When Ten-Tec manufacturing was located in Sevierville, Tennessee, I knew many of the employees of the company and even did Alpha and Beta testing for their QRP radios like the Patriot, Rebel, and Argonaut VI.

I love the ergonomics and simple front panel design of the Argo V.

I purchased my Argonaut V used in 2021 when I saw it for sale on QTH.com. The price was right and, frankly, I wanted a Ten-Tec radio back in my life.

In the activation video (below) I’ll speak to all of the reasons I love the Argonaut V, why I think it’s so unique, and why I’ve no intention of ever selling it. Then, we’ll perform a POTA activation with it.

Keep in mind that my perspective will primarily focus on HF CW operating–I don’t actually own a microphone for the Argonaut V, but I do plan to at some point.

Lake James State Park (K-2739)

On Sunday, August 13, 2023, I made a detour to Lake James State Park en route to visit my parents in Hickory, NC. As I’ve mentioned many times before, Lake James is one of the easiest parks I can hit in my travels and it’s open every day of the week–in the summer, it’s also open quite late which is a bonus.

The only negative with evening activations at Lake James is fighting the mozzies–they can be persistent!

I picked out a picnic table close to the car and pulled the Argonaut V from my Husky latching box.

I then immediately deployed my MW0SAW 40 meter End-Fed Half-Wave antenna. Since the Argonaut V doesn’t have an internal ATU, the EFHW would give me the flexibility to operate on 40, 20, 15, and 10 meters natively.

Of course, it was in the early evening, so I only intended to hop on 40 meters, but I had the option to move up the band if needed.

After deploying my antenna, I recorded the “Getting To Know You” portion of the activation video–I’d encourage you to check that out below!

Time to hop on the air! Continue reading Getting To Know You Series: The Ten-Tec Argonaut V (Model 516) – My thoughts, notes, and a POTA activation!

KM4CFT: A Relaxing Labor Day SOTA Activation

Many thanks to Jonathan (KM4CFT) who shares the following guest field report:


A Relaxing Labor Day SOTA Activation

by Jonathan Kayne (KM4CFT)

September 4, 2023

Days off from work can be a really great thing. And for someone who spends most of his time indoors at a computer, I try to find plenty of excuses to go outside and get some fresh air. Labor Day is one of those days I get off from work, so I decided I would do a SOTA activation, but I wasn’t entirely sure where.

Luckily, there are plenty of tools out there to help with planning a SOTA activation, namely sotl.as, which shows all the summits on a map along with additional information about the summit.

I wasn’t entirely sure which one to pick, so I just searched around and came across Evergreen Mountain, which has the reference designator W0C/FR-076. Doing some research showed that it was about a 2-3 mile hike to the summit from the parking lot, which was perfect. The air around Denver, CO can be somewhat thin and these hikes can be strenuous if you aren’t used to it. I have been living in the Denver area for 2 years and I still am not used to it!

After a small amount of planning, I pack my radio and antenna into a bag along with the usual hiking gear and drive to the base of the mountain. There were a lot of cars already parked there, so I had to park on the side of the road. It seems other people had the same idea that I did!

The trail to the summit of Evergreen mountain was comparatively easy due to the trail being designed for mountain biking. Mountains in Colorado tend to be incredibly steep, which can make them quite the workout, even if the hike is short. This trail consisted of plenty of switchbacks, which made the hike incredibly easy, trading steepness for distance. This was a massive bonus from my perspective!

As you might have guessed, Evergreen Mountain (and the town) get their name from the impressive number of evergreen trees in the area. As you drive towards the town, it almost becomes exclusively pine trees everywhere!

As I walked, I couldn’t help but notice all the fallen pine trees, which concerned me, but I quickly came across a sign explaining the reason.

I really got to enjoy walking through these trees, and listening to the wind howl through the mountains. It also had the benefit of keeping me nice and cool in the reasonable 83° temperature outside.

The trees also blocked the views of the mountains to some extent, but my research showed me that we get plenty of gorgeous views closer to the summit!

Right before the summit loop, I was rewarded with a small glimpse of the views that were to come!

I made it to the summit loop trail, and advanced to the last little bit before the summit. Right before the true summit there is a tenth-mile little trail that leads to a scenic overlook. I, of course, had to go and take a look.

I went back and made it to the summit. The top of the mountain was pretty flat so I just went to what I thought was the summit and set up my station there. Searching around showed that I was well within the activation zone. The area had some nice rocks to sit on as well as trees for me to lash my crappie pole to with para-cord.

I unpacked my gear and started to set up. The gear I brought was as follows:

With SOTA, I have the opportunity to use my VHF/UHF equipment to make some QSOs. I find it quite rare for me to do simplex communication on VHF or UHF these days as I almost exclusively operate on HF. Also, I like to try to operate in the parts of the bands with the lowest license requirement so that the less experienced hams have an opportunity to work me. With this, I can give our technicians a chance to chase SOTA! Continue reading KM4CFT: A Relaxing Labor Day SOTA Activation

Alan’s Long Beach Island Radioactive Vacation!

Many thanks to Alan (W2AEW) who shares the following guest post:


Radioactive vacation on LBI (Long Beach Island)

by Alan (W2AEW)

We look forward every August to our much needed 2 week vacation “down the shore” as we say here in New Jersey.  Our vacation spot of choice is Long Beach Island, one of the barrier islands on the Jersey coast. This is an 18 mile long island that hugs the Atlantic coast of southern NJ, just north of Atlantic City.  The part of the island we love to stay in is called Surf City.  The Surf City area has been continually populated since 1690, although the town of Surf City was officially established in the late 1800s.

The XYL and I are both pretty fair skinned, so laying out on the beautiful LBI beaches everyday isn’t really our thing.

So, the house we rent is actually on the bay side, facing west, overlooking the Manahawkin Bay.  We enjoy sitting back and watching (and occasionally participating in) the wide variety of activities on the bay – the fishing & crabbing, the power boats, personal watercraft, paddle boarding, sailing, etc. Our favorite though, and the thing that keeps us coming back every year, are the awesome sunsets over the bay.

Of course, we always need to find a house that is pet friendly. Sophie loves LBI also, especially the long walks around town with the sea breeze.  Here she is waiting at the top of the stairs – hoping to hear the magical word….  “walk”…

LBI is certainly a family and pet friendly place.  Even the local Dunkin Donuts has a wall dedicated to the local pets:

I certainly planned to do a fair amount of QRP operating while on vacation – both from the rental house as well as POTA from the nearby parks (more about this soon).  But lest you think this was purely a radioactive vacation, let me reassure you that we did a lot of “normal” vacation activities too.

Like most, a lot of vacation is about relaxing, eating, other stress relieving activities, eating, shopping, and of course, eating…  Breakfasts were typically some homebaked muffins, or even some fresh biscuits from the oven with some great Black Bear Jam – a gift from a good friend in NC.  Yummy!

The main meals were a mix of good ‘ole home cooking and some great local cuisine, including great Jersey pizza from Panzone’s,  fresh local seafood from Mud City Crab House and   Pinky Shrimp’s Seafood Company.  Of course, no trip to LBI is complete without getting some of the best burgers in the state from Woodies Drive In in Ship Bottom, right next to Flamingo Mini-Golf – one of *many* mini-golf places on the island.  I’ve personally seen Ray Romano golfing at Flamingo with his family.

I did manage to do some other “normal” vacation activities besides radio…  A couple of relaxing afternoons on the beach, completed a 1000 pc jigsaw puzzle, read two James Patterson novels, lounging on the decks overlooking the bay and lots of strolls with the XYL and the dog.

But who’s kidding who, this is a QRP blog right!  Let’s get radioactive!

One of the first tasks after unpacking was setting up the antenna at the rental house.  The location was great, right next to the bay!  I strapped my slip-fit military fiberglass poles to the corner post of the 2nd floor deck, which made a great support for the 40m EFHW wire.  This is the same UNUN & antenna that I featured in a “build” video a few years ago. Continue reading Alan’s Long Beach Island Radioactive Vacation!

QRP SOTA: Beautiful day for a hike to the summit of Bakers Mountain!

Sometimes, I crave a nice summit hike but don’t have enough time in the schedule to fit in a long one.

When I’m doing overnight trips to my hometown of Hickory, NC, my go-to spot for a proper hike is Bakers Mountain Park. The icing on the cake is that Bakers Mountain is also a SOTA summit (W4C/WP-007).

I wish Bakers Mountain Park was a POTA site as well, but at present the US POTA administrators aren’t including county and municipal parks–only state and national parks.

For more information about Bakers Mountain, check out this field report in the archives.

On Tuesday, August 1, 2023, I only had about 2.5 hours to fit in a hike and SOTA activation. That was plenty of time to hit Bakers Mountain!

Bakers Mountain Park has a nice long-ish loop around the perimeter of the park called the “Bakers Mountain Loop”; it’s about 2.75 miles long and has a reasonable amount of elevation change over the topography.

Adding in the spur trail to the true summit of Bakers Mountain, I’d say my total hike is about 3.25 miles or so.

Lookout platform on the Bakers Mountain Loop Trail.

Note that I actually include a bit of my hike to and off of the summit in the activation video below.

Setting up

Can you spot the MW0SAW EFHW hanging in the tree?

Once on the summit, I chose a spot to set up. Since I planned to deploy my 40 meter end-fed half-wave, I looked for a branch overhanging the summit perimeter trail.

Next, I deployed my trusty 40 meter EFHW that Steve (MW0SAW) made.

I also forgot my Tufteln/N0RNM knee board, so used my GoRuck GR1 backpack as a field desk. It worked pretty brilliantly, actually. Continue reading QRP SOTA: Beautiful day for a hike to the summit of Bakers Mountain!