You might recall from my previous field report that I took the family on a camping trip at New River State Park in April 2022. During that trip, I made an activation of New River each day and also fit in a very fun SOTA activation (click here to read an overview).
Note that anytime you’re performing an activation over multiple days at any one park, you can only have one activation per UTC day.
Although I live in the mountains of North Carolina and am surrounded by SOTA summits, it’s much easier for me to activate a park rather than a summit.
Parks can be quite easy: find the park on a map, drive through their main entrance, find a good picnic table to set up, and next thing you know you’re on the air! Of course, wildlife management areas and game lands can be more tricky, but typically you can drive to the activation site.
Summits–speaking as someone who activates in North Carolina–take much more planning. If it’s a new-to-me summit, I typically need to:
find the GPS coordinates of the true summit
map out the drive to the trail head
read through previous activation notes (if they exist) to find out
what type of antenna/gear I might pack
and any notes I might need to find the trail or bushwhack to the true summit (quite often published, well-worn trails don’t lead to the actual summit)
look up the trail map and make sure I have a paper and/or electronic copy
pack all needed gear for the hike, activation, and emergencies
sort out the time it will take to travel to the site, hike the full trail to the summit, activate, and return home
If you ask most any SOTA activator, they’ll tell you that the planning is part of the fun.
It really is.
One summit I’ve had on my activation list for ages is Craggy Dome (W4C/CM-007). Out of the higher summits in this region, it’s one of the easier ones for me to reach from the QTH. In fact, as with Lane Pinnacle, I could simply hike from my house directly to the summit (although one way to Craggy might take the better part of a day). The trailhead is about a 50 minute drive, and the hike about 30 minutes.
SOTA notes and All Trails indicated that Craggy Dome’s trail isn’t always easy to follow and that it’s steep and slippery.
Craggy has been activated loads of times, though, so I wasn’t concerned at all.
Living here and knowing how much brush there was on the manway to the summit, I knew that Craggy would be a pretty easy summit if I could activate it after the parkway re-opened for the spring and before the mountain “greened-up”; about a five week window.
Meeting Bruce
My schedule opened up for an activation of Craggy Dome on the morning of April 21, 2022 and I was very much looking forward to it.
I wouldn’t be alone on this hike either. Bruce (KO4ZRN), a newly-minted ham, contacted me and asked if he could join me on a hike and simply be an observer during a SOTA activation.
A few weeks ago, I received an email from Brooks (KO4QCC), a newly-minted ham radio operator who asked to tag along on one of my POTA field activations.
Brooks, it turns out, lives within spitting distance of a number of parks I regularly activate here in western North Carolina. He mentioned he was interested in observing an activation to learn a bit about deploying a field radio kit and, of course, to learn what it’s like to be on the air.
Brooks was also plotting the purchase of his first field radio kit and was very interested in the Icom IC-705 and MFJ-1988LP End-Fed Half-Wave (EFHW) antenna.
Of course, I welcomed him to join me but since we both have busy family lives–and my schedule especially took some twists and turns in March–it took a few weeks before our schedules aligned.
I asked Brooks if he would consider actually doing the activation himself instead of simply observing or tag-teaming it. I’m a big believer in hands-on radio time.
Brooks loved the idea!
On Sunday, March 27, 2022, a window of opportunity opened in our schedules and we agreed to meet at Tuttle Educational State Forest (K-4861). I packed my:
As I’ve mentioned before, I’m not really a “YouTuber” so I’m not actually inclined to capture every moment on video, but it struck me that others may appreciate experiencing (vicariously) what it’s like to do a park activation for the first time.
Prior to meeting, I asked Brooks if it would be okay if I made a video of his activation adding that there was absolutely no pressure to do so–just a thought. I’ll be the first to admit that if I were in his shoes, I’m not sure if I’d want a camera capturing my first activation jitters for all to see.
Brooks loved the idea–as he, too, saw value in this sort of video–so I brought my camera along for the ride.
As I mentioned in a previous post, I do love rotating out radios I take to the field. Shuffling radios not only helps me remember a radio’s features and menu system, but it helps me understand any advantages one radio might have over another.
One radio I use at the QTH a lot is the Mission RGO One. I reviewed this radio for The Spectrum Monitor magazine, and later posted the review on The SWLing Post. It has been a few months since I posted a field report and video using this rig yet it’s one readers ask about all the time because this is a small production run radio.
Before heading out to Lake Norman State Park on August 9, 2021, I grabbed the Mission RGO One, the Chameleon CHA LEFS sloper, and my 15Ah Bioenno LiFePo4 battery. I knew this combo would serve me well as propagation that day was in the dumps!
Lake Norman State Park (K-2740)
Lake Norman is such an effortless park to activate. They’ve a huge picnic area, large trees (for both antenna support and shade!), and are typically not incredibly busy during the week. I love Lake Norman because they also have a very nice Lake Shore Trail I enjoy hiking post-activation.
That Monday morning, as I drove to the park, it was approaching lunch time and I did worry that some of my favorite picnic spots might be taken, but when I arrived, I was happy to see I pretty much had the place to myself!
Setting up the CHA LEFS sloper antenna takes a couple minutes longer than a standard end fed antenna only because the feed point is elevated and the radiator slopes down from the feed point. Since I typically do activations on my own (with no extra hands to help), I find that a little extra antenna prep equates to a quicker overall deployment.
My procedure for deploying the CHA LEFS
The CHA LEFS sloper
First thing I do is identify a good tree limb at least 45′ or so high and also identify an unobstructed path for the sloping radiator to travel.
Prior to hoisting the antenna, I stretch out the radiator and attach it to a tree or support (using the supplied paracord) in the direction I want the slope to follow.
I then use my arborist throw line to snag the desired tree limb and I connect the end of the throw line directly to the CHA LEFS’ feed point. Chameleon provides Paracord for hoisting the antenna, but the great thing about the arborist throw line is that it’s more than strong enough to handle this job. It saves the extra step of pulling paracord through the tree.
Next, I attach a 50′ length of coax (PL-259s on both ends) and stretch the coax out in the opposite direction of the CHA LEFS radiator. Doing this keeps the antenna from spinning and tangling the radiator and coax as it’s hoisted into the tree.
Finally, I simply pull the throw line and raise the antenna feedpoint to the desired height. Again, I like a height of at least 40-45′, but lower will still work. As I raise the antenna, I do put a little tension on the coax feedline just to keep it from swinging around the throw line or radiator.
Of course, if you have two people, one person can simply stretch the coax as you’re raising the antenna feedpoint which will also keep it from tangling.
That’s all!
In truth, the amount of extra time to deploy the CHA LEFS as opposed to, say, an end-fed half wave is maybe three minutes.
I picked the Mission RGO One because it has an amazingly quiet receiver and handles QRN like a champ. Plus, being a tabletop radio, it also sports a proper speaker, large controls, and up to 50 watts of output power if needed.
Although I’m a QRPer, on days with horrible propagation, I have been known to increase the power beyond 5 watts if operating SSB especially. This year, I set out to validate all of my park and summit activations with 5 watts or less, so at least my first ten contacts at a park will be QRP.
I thought I’d start by calling CQ on the 40 meter band in CW. Within 15 minutes, I snagged the ten contacts needed for a valid POTA activation. I was very pleased with this.
Since I had mobile phone service, I checked the POTA spots and worked AA3K (Park To Park) then moved to the phone portion of the 40 meter band.
During the exchange with AA3K, I did pump the power up to a cloud-scorching 20 watts! A proper rarity for me.
I then worked an additional five contacts in about 8 minutes in SSB. Very satisfying!
QSO Map
Here’s my QSO map of the entire activation. The red polylines represent SSB contact, the green are CW:
I was very pleased with the results especially after reading reports from other activators that same day who really struggled to get their ten.
Video
Of course, I made one of my real-time, real-life, no-edit videos of the entire activation. If you’ve never seen one of my videos before and have a strong dislike of professional, well-polished YouTube channels, you’re in for a treat!
Post-activation–and despite the heat and humidity–I hiked the length of the Lake Shore Trail; roughly six miles. I highly recommend this trail if you can fit it into your schedule.
Thank you!
As always, thank you for reading this report and thank you to those who are supporting the site and channel through Patreon and the Coffee Fund. While certainly not a requirement–my content is always free–I really appreciate the support.
Here’s wishing everyone a little radio fun this week!
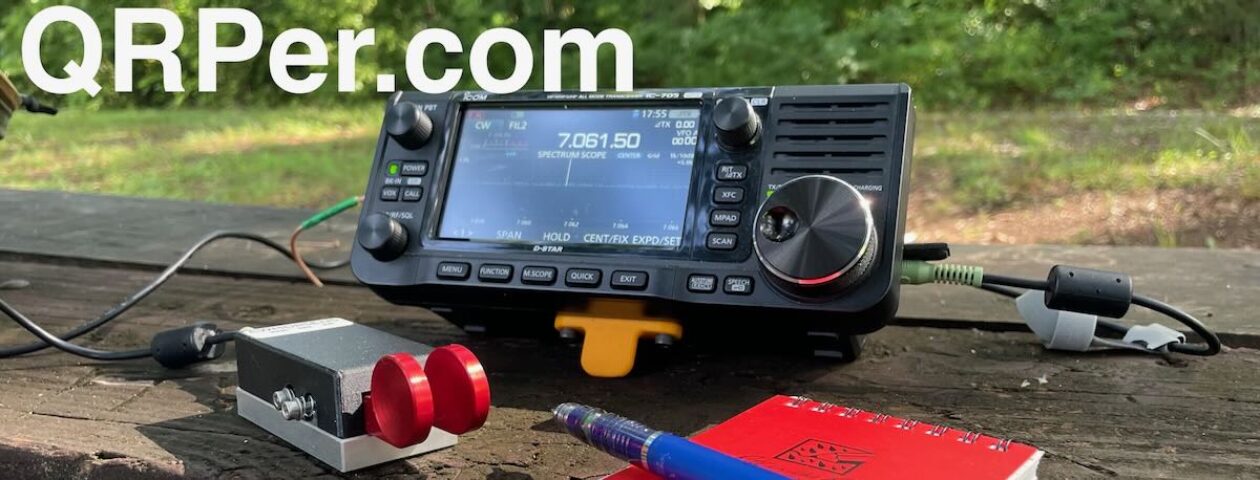
Thursday, I set out to test how long the Icom IC-705 could operate during a Parks On The Air (POTA) activation with one fully-charged Icom BP-272 Li-ion battery pack. This, following my listening endurance test.
I knew conditions were pretty terrible Thursday in terms of propagation, but that didn’t really matter. I intended to call “CQ POTA” in CW until the ‘705 finally shut down due to low voltage. In my head, I imagined this wouldn’t take much longer than 1.5 to 2 hours and during that time, despite propagation, surely I’d work 10 stations to validate the activation, right–?
Sandy Mush Game Lands (K-6949)
I picked Sandy Mush Game Lands as my test site. Since I’d been there before, I knew there were ample trees to hang the Vibroplex EFT-MTR end-fed antenna, and I knew I’d likely be the only one in the parking area as this site is secluded and this was not a designated hunting day.
The Vibroplex/End-Fedz EFT-MTR antenna
Setup at the site was pretty straight-forward. I quickly deployed the EFT-MTR antenna–using my arborist throw line–in a “V” shape hanging over a high tree branch.
I picked the EFT-MTR because it’s resonant on my three favorite POTA bands: 40, 30, and 20 meters. Note that the IC-705 does not have an internal ATU.
Although I have an mAT-705 external ATU on loan to test, I didn’t take it to this first activation–I wanted to keep the set up simple for testing battery endurance.
On the Air
I started calling CQ at 16:30 UTC on the 40 meter band and set the IC-705 to beacon mode call “CQ POTA K4SWL.” No replies for 10 minutes. At that point, I discovered the POTA spots website was down for a scheduled upgrade (I have impeccable timing!), so I posted my spot on the POTA Facebook page.
Then my buddy Mike (K8RAT) sent a text message stating that the Reverse Beacon Network (RBN) had spotted me, but with a very low signal report. Hmmm….why would that be?
Note to IC-705 owners: zero watts is not zero watts!
I turned up the power to 5 watts (the max the IC-705 will achieve on a 7.4V battery pack) and was greeted by an instant CW pile-up.
What a blast! I started on 40 meters in CW, but eventually worked both 40 and 20 meters in SSB and CW. I then lowered the antenna, removed the SMA cap on the EFT-MTR coil, and worked 30 meters CW for the remainder of my time.
I logged my first contact at 16:28, my last at 18:18 UTC. So 1 hour 50 minutes of near constant operating.
Remaining battery capacity after 1:50 of operating.
The IC-705 battery pack was still going strong and had about 40% capacity left, but I simply ran out of time as I needed to run an errand in town, so had to shut down the radio and pack up.
I must admit: the IC-705 is doing a much better job managing battery usage than I would have expected. I’m guessing I could have operated for 3 hours or so at 5 watts without needing to recharge the BP-272 1880 mAh Li-ion battery pack.
I do believe I’ll invest in the larger BP-307 battery pack which has a capacity of 3100 mAh. It’s a pricey battery, though, at $130 US.
How does the IC-705’s battery endurance compare with the Elecraft KX2? I’m not sure yet, but I’m guessing the KX2 will have even better longevity as its current drain is less than half that of the IC-705. The KX2 will operate at 10 watts output for about 1 hour 15 minutes with the internal battery pack, before decreasing to 5 watts output. I’ve never tried a battery endurance test with the KX2 at only 5 watts.
Of course, with an external 12 volt battery, the IC-705 will pump out a full 10 watts of power as well.
Five watts and a wire–wow!
The biggest surprise of the day?
I worked stations from Oregon, and Saskatchewan to the Azores…in single sideband!
Here’s a map of my contacts–red signal paths are SSB, CW in green (click to enlarge):
This was one activation where 5 watts SSB actually snagged more DX than CW. Great fun!
While I’d like to think it was a little IC-705 “mojo” on its first field outing, in truth it had everything to do with the EFT-MTR antenna and what must have been a moment of propagation stability.
This was also my maiden voyage with the CW Morse Single Lever paddle. CW Morse sent this paddle, along with their double lever paddle and a selection of straight keys, for me to evaluate. If you’ve been considering an affordable, portable single-lever paddle, this is a brilliant one. I really enjoyed using it and the action is very easy to adjust.
I’m already regretting the decision to send it to my buddy Eric (WD8RIF) for a proper evaluation. (Just kidding, Eric! (Maybe.)) He only uses a single lever paddle for his numerous field radio adventures.
Eric will give this single-lever paddle a proper workout and give us a full report.
I must admit, I had a lot of fun with the IC-705/EFT-MTR antenna combo.
Of course, I’ll be taking the IC-705 to the field a lot in the coming weeks.
IC-705 Questions?
Feel free to comment and ask any questions you may have about the IC-705. I’ll do my best to answer them.
Connecting an international community through low-power field radio adventures.
Please support QRPer by adding us to your whitelist in your ad blocker. Ads are what helps us stay online. All of our ads are ham radio related--no junk, we promise! Thank you!

 I’ve an insanely busy day today, what with exam study, errands, splitting firewood, and prep for our summer travels.


