Tag Archives: Packtenna Random Wire Antenna

Field Report: Some QRP POTA and SOTA at Hanging Rock State Park!

I’m not a summer-heat-loving guy. Quite the opposite, in fact. Give me cold weather and I can hike and camp forever.

On Tuesday, July 13, 2021, it wasn’t cold outside, of course, but I still wanted to fit in a park activation and hike. Despite the forecast highs of 90F/32C. I had almost the entire day to play radio, too–a rarity.

When I have an entire day to devote to radio, I can either hit the road and try to hit multiple parks–perhaps as many as 5 or 6–or I can choose to venture further afield and hit a new-to-me park.

I tend to choose the latter and that Tuesday was no exception.

North and north by NW of Winston Salem, NC, are two parks I’ve always wanted to visit: Hanging Rock State Park and Pilot Mountain State Park.

I devised a plan to first visit Hanging Rock, then Pilot Mountain. Both parks are close together geographically, but a good 30 minutes drive apart.

A quick check of the SOTA database and I discovered that there are actually two summits on Hanging Rock State Park’s grounds. One is off the beaten path a bit and would require some light map work, and the other–Moore’s Knob–is on one of the park’s main trails.  Since I was putting this whole plan together morning of, I opted for the “easy” summit as I didn’t have time to double-check topo maps, parking areas, etc.

Hanging Rock State Park (K-2735)

Travel time to Hanging Rock was about 1 hour 45 minutes. Once I arrived on site, I discovered that, like many state parks, the main visitor’s center is being renovated.

I easily found the parking area for the Moore’s Knob loop. It being a Tuesday, the parking lot only had a few cars.

Pro tip: with the visitor’s center out of commission, stop by the swimming area pavilion for some proper restrooms/washrooms!

I planned to take the full trail loop in a counter-clockwise direction.

I’m glad I did, too, as the bulk of the ascent was a long series of steps. I’m not a fan of steps, but I much prefer using them heading up a mountain rather than down.

Near the summit, there’s a very short spur trail to Balanced Rock which is worth a visit not only for the rock, but also the views.

It being a North Carolina state park, there are some obligatory warning signs about how falling off of cliffs can lead to injury or death. These warning signs aren’t as prominent as those at Crowders Mountain State Park, though!

Moores Knob (W4C/EP-001)
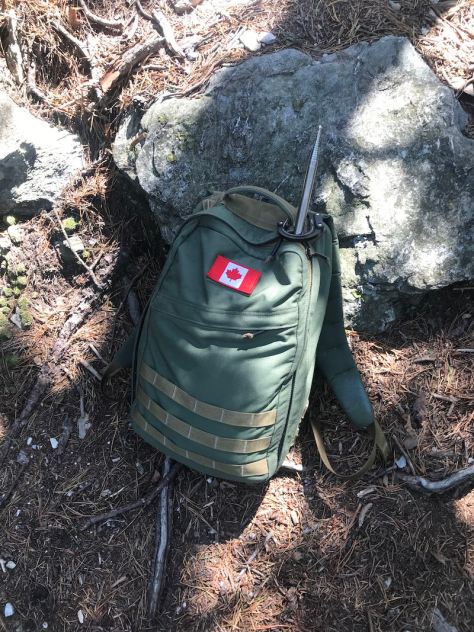
You can see my MPAS Lite vertical poking out of my pack. I brought it along in case I had no good tree options. In this case, I didn’t use it.

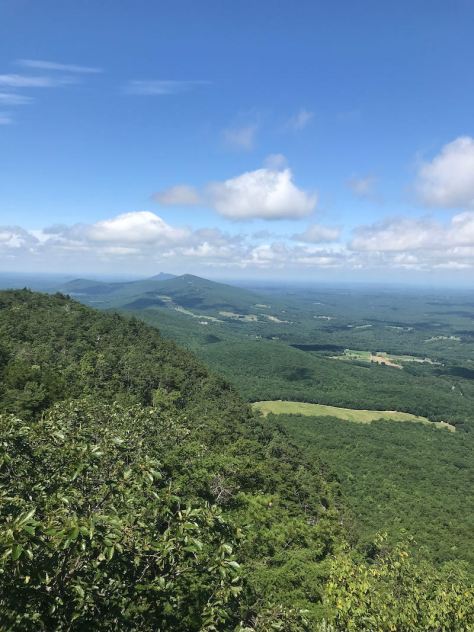
There’s no mistaking the summit as there’s a large observation tower on top that affords some spectacular views of the Blue Ridge Escarpment, the foothills, and Pilot Mountain (my next stop).
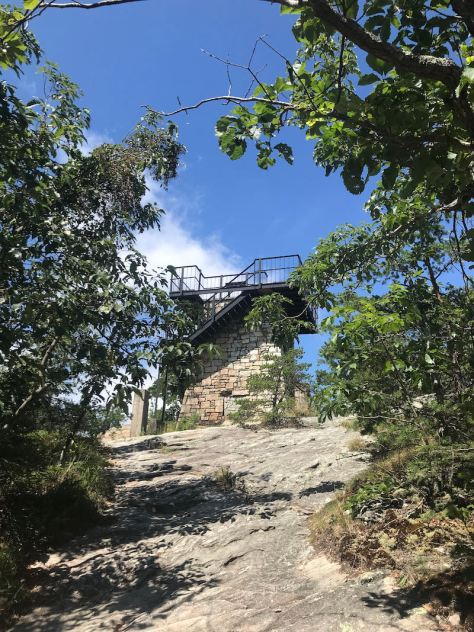
There were a number of hikers on the summit of Moore’s Knob and it was actually pretty gusty up there, too. I searched and found a nice little spot to set up that was sheltered from the wind, shaded, and even had trees tall enough to hang my Packtenna 9:1 UNUN random wire antenna!


Gear:

Set up was quick and easy on the radio side of things, but as with most SOTA activations, positioning my tripod to make a video was the tricky part. Since I’m sitting on the ground, it can be difficult to find the right angle so that the radio, key, and notepad are all in the frame. (See my video below).

I started calling CQ at 16:00 UTC on 20 meters. I had a reasonable cell phone signal on the summit, so I was able to spot myself. Problem was, though, my hiking app seemed to be draining my iPhone’s battery very rapidly (that and my aging iPhone 7 probably needs a new battery at this point). After spotting myself, I shut down the phone to save power.  I forgot to contact my buddy Mike (K8RAT) with a frequency, but he eventually saw me on the SOTA spots.

In a period of 29 minutes, I worked 20 stations on 20 meters.

Next, I moved up to 17 meters where I worked eight more stations in seven minutes.

I love effortless activations like this and part of me wanted to continue operating–even switching to SSB–but looking at the time, I knew I needed to hit the trail, make my way back to the car, and drive to Pilot Mountain.

I called QRT around 16:42 UTC and packed up my gear.

QSO Map

Not bad for 5 watts and a 31′ wire!

One highlight of this activation was meeting Jim (NA4J) who heard my CW from the summit and popped by to introduce himself. Although I trimmed out our conversation in the video (I’m not entirely sure he knew I was recording the activation), you’ll hear him in the first half of the activation.

Video

Here’s my real-time, real-life video of the entire activation:

Click here to view on YouTube.

The hike back to the car was very pleasant. It was a bit longer than the path I took to the summit, but the descent had no steps which made it a breeze.

I had a radio topic on my mind during that hike and actually pulled out the OSMO Action camera and made a bit of a “hike and talk” video.  It’s on the topic of ATUs and resonant vs non-resonant antennas. I haven’t yet decided if I’ll post it–the shaky camera might make some viewers sea sick! 🙂 We’ll see–maybe I’ll brave up and post it anyway…

Next, I drove to Pilot Mountain State Park for a quick afternoon activation. Although Pilot Mountain is a SOTA summit, too, it’s yet to be activated because the actual summit would require proper rock climbing, I believe.

Thank you

As always, thank you for reading this field report! And thank you to everyone who has supported me through Patreon and the Coffee Fund. I truly appreciate it.

I hope you find time this week to take your radios outdoors to play, or to hunt some parks and summits from your shack, backyard or vacation spot!

And for those of you working on your CW skills, don’t give up and don’t stress about it. Take your time and allow your brain to absorb code by simply listening. When you feel you’re able to copy even some of the contacts in the videos of my activations, you’re ready to start hunting CW activators!

You’ve got this!

73,

Thomas (K4SWL)


Do you enjoy QRPer?

Please consider supporting us via Patreon or our Coffee Fund!

Your support makes articles like this one possible. Thank you!
New River State Park: Pairing the Discovery TX-500, Elecraft T1, and PackTenna 9:1 UNUN

Last month, my family went on a camping trip to New River State Park and had an amazing time.

I first discovered New River much earlier in the year when I did a multi-park and summit run.  I really liked the park and, especially, the campground, so I decided to return with the family for some proper outdoor fun and relaxation.

Of course, the benefit of camping at a state park is being able to play radio pretty much anytime while on the park grounds. For a few days, it’s like you’re living in a park activation and can actually set up an antenna and use it over the course of multiple days.

It’s such a big departure from my typically short (45-90 minute) park activations.

When we first arrived at the New River State Park campground, I deployed my PackTenna 9:1 UNUN random wire antenna.

I brought two transceivers with me: the Xeigu X5105 and the Discovery TX-500–I pretty much split my operating the time equally between the two radios.

New River State Park (K-2748)

Although I spent much more time on the air than I normally do, I didn’t make videos of each session. One reason is I wanted to operate with earphones–especially since some of my sessions were later in the evening or early in the morning. I didn’t want to disturb my neighbors at the campground.

That and, especially with the X5105, I wanted to see what it would be like to operate with earphones for extended sessions. Prior to making videos of my activations, I almost exclusively used earphones in the field. I appreciate the sound isolation earphones offer–I also find they help tremendously with weak signal work. When I make videos, however, I don’t want to go through the hassle of recording the line-out audio separately in order to use headphones, so I use an external speaker.

I decided to record my Wednesday, June 23, 2021 evening session with the Discovery TX-500.

Gear:

This session started only a few minutes prior to the end of the UTC day which meant I had to watch the clock very carefully and clear my logs at the beginning of the UTC day (20:00 EDT).

In POTA and other field activities, if your activation straddles the UTC day change, you must keep in mind that any contacts made after 0:00 UTC can only be counted on the next day’s logs. This was not a problem for me because I had logged dozens of stations earlier in the day, but if you ever start an activation close to the UTC day change, you need to make sure you log your 10 contacts for a valid activation prior to 0:00 UTC.

Auto-spotting help

Another thing complicating my sessions at New River State Park was that I chose not to schedule my activation via the POTA website prior to our trip.

If you schedule your activation via the POTA website, anytime the Reverse Beacon Network picks up your CQ calls (in CW), the POTA spots website will scrape that information and auto-spot you.  It’s an amazing convenience for those of us who operate CW.

I chose not to schedule my activation days at New River because I had also planned to operate at another nearby park during my stay and I didn’t want the system to spot me incorrectly. That, and I thought I would have mobile phone coverage to self-spot.

It turned out that–contrary to my mobile phone company’s coverage maps–I had no internet service at the park. None.

In order to get spotted, I relied on my Garmin InReach GPS/satellite device to send short text messages to my buddies Mike (K8RAT) and Eric (WD8RIF). My pre-formatted message would prompt them to check the RBN for my frequency, then spot me to the POTA site manually.

I’m incredibly grateful to have had them helping me in the background. Everyone should have a Mike and Eric as friends!

Video

I made a real-time, real-life, no-edit video of the entire activation. Note that it took a while to get spotted, so the first ten minutes are simply me talking (it’s alright to skip that bit…it won’t hurt my feelings!).

Also, here’s a QSO map of that day’s contacts. Note that this includes stations I logged later in the UTC day (i.e. the following morning/day.

Due to some unexpected conflicts, our camping trip was shorter than we would have liked. We plan to visit New River later this year and spend much more time there. It’s a beautiful park!

Thanks for reading this short field report and here’s hoping you get a chance to play radio in the field soon!

73,

Thomas (K4SWL/M0CYI)

SOTA Activation Report: Crowders Mountain (W4C/WP-011)

“It’s not the heat. It’s the humidity.”

That’s what my grandpa used to say and he was right. It was certainly the theme on Tuesday, June 15, 2021, when I decided to activate Crowders Mountain (W4C/WP-011).

If memory serves, it was about 80F/27C that day–pretty reasonable for late spring in the Piedmont of North Carolina. But the humidity was quite high. I’m no meteorologist, but I’m guessing it was 7,400%. (That number may be a bit of an exaggeration.)

Still, I was eager to fit in a decent hike and I knew Crowders would be fun and easy in the sense that I wouldn’t need to carry a map or do bushwhacking to get to the summit. In fact, Crowders Mountain is possibly one of the busiest parks I ever visit; being so close to Shelby, Gastonia, and Charlotte, it can get crowded especially on weekends.

The amazing thing about Crowders Mountain State Park, to the amateur radio operator, is that it contains not one but two SOTA summits! And, of course, the park can be activated during the SOTA activation. Earlier this year, I activated The Pinnacle–it was amazing fun–and now I was ready to activate Crowders Mountain as well.

I arrived at the park visitor’s center around 11:30 AM local time and hit the trail.

I opted to take the longer trail to the summit which is about 6 miles round trip. There’s a shorter path to the summit via the Linwood Access, but I wanted a bit more trail time despite the humidity.

The hike was amazing and the trail very, very well-worn and marked.

The hike was overall what I would call moderate and very gentle. In fact, at about 2/3 into the trail, I was curious when I’d truly start gaining a bit of elevation. Turns out: all near the very end!

The final portion of the hike was pretty steep–mostly steps up to the summit. The humidity was thick enough, I took my time going up the steps.

In the end, you will put in a bit of effort to bag this one point SOTA summit if it’s hot and humid.

Crowders Mountain (W4C/WP-011)

Having been on the summit of The Pinnacle earlier this year, there was no mistaking the summit of Crowders Mountain, since it, too, has ominous warning signs!

I’m sure the sign is in response to people acting foolishly. Crowders Mountain is not a treacherous place, but like many summits, there’re ample opportunities to fall to your death, I reckon.

I’ve heard that even the summits of Crowders Mountain can get quite busy–this is why I chose a Tuesday to do the activation. Even then, I’m guessing there were anywhere from 8-12 other hikers on the summit with me at various times during the activation that day.

I was banking on the fact that Crowders Mountain had trees, so I only packed my short PackTenna random wire–no self-supporting vertical of any sort.

After a quick site search, I found an ideal spot to play radio just beneath the radio/TV towers on the summit.

Gear:

Deploying the PackTenna was incredibly easy with my arborist throw line. I meant to make a video showing the antenna deployment, but was distracted by some curious hikers who asked a load of questions as I launched the line. Somehow, I managed to snag the perfect tree branch despite an audience and a mild case of performance anxiety!

Next, I set up the Discovery TX-500 transceiver and paired it with my Elecraft T1 ATU since random wire antennas require matching and the TX-500 has no internal ATU.

I’ll admit here that each time I use the Elecraft T1 it reinforces why I like this ATU so much: it’s incredibly compact, runs for ages on a 9V cell, pairs with all of my transceivers, and it has a very wide matching range (although, in this case, the 9:1 UNUN doesn’t need a wide range ATU). The T1 gets the job done each and every time.

As with many of my activations, I made a real-time, real-life video and didn’t edit out a thing. If I had any self-respect, I would have edited out all of my keying errors that day, because I made numerous ones.  (For the record, I blame the humidity!) 🙂

Joking aside, I’m not ashamed of my keying mistakes. We all make them. No one is a perfect CW operator and, trust me, the op at the other end can sympathize. If I let my sloppy fist sessions prevent me from operating, I’d never get on the air.

On The Air

I hopped on the 20 meter band in CW and wow! I made 30 contacts in 39 minutes.

Since I had cell phone service, I also decided to spot myself to the SOTA network and do a little SSB on the 17 meter band. I made four contacts in four minutes.

Of course, this was not only a summit activation, but also a park activation (K-2726), so logs were submitted to both programs.

Here’s a QSO Map of my contacts (click to enlarge):


In truth, I would have liked to hang around on the summit a bit longer and work more stations, but I needed to start my hike back to the car.  I had a number of errands in the afternoon and also needed to be back in time for a live stream interview with Red Summit RF (click here to watch the archive of that show).

As I was packing up my radio gear, two young women stopped by and one asked, “Was that Morse Code we wear hearing earlier?” I confirmed this and she looked at her friend and said, “Yes, I knew it was!” I asked them if it was the first time they’d heard Morse Code “in the wild,” and they both nodded their heads. They then asked a load of questions that I was happy to answer.

Meeting Max

One of our readers, Max (W4GZ), had asked that I contact him next time I activated Crowders Mountain State Park as it’s not too far from his QTH. I sent him a message earlier in the day and when I got back to the car, I found Max set up with his IC-705 and vertical antenna next to my parking spot.

Max had just started his own park activation.

It was great meeting you, Max!

Photos

Of course, I snapped a few photos on the summit and the trail, so here they are in no particular order:

Thank you reading this field report! I hope you have an opportunity to play a little radio in the great outdoors this week!


Do you enjoy QRPer.com?

Please consider supporting us via Patreon or our Coffee Fund!

Your support makes articles like this one possible. Thank you!

A memorable Bakers Mountain SOTA activation with the Elecraft KX2 & PackTenna 9:1

Besides Lane Pinnacle, there’s been one SOTA summit, in particular, I was eager to activate this year: Bakers Mountain (W4C/WP-007).

I practically grew up in the shadow of this little outlier mountain in Catawba County, North Carolina–my home was only a couple miles away as the crow flies and it has always been a bit of a landmark in my childhood stomping grounds.

Growing up, the land in/around Bakers Mountain was basically off-limits and privately owned. In the late 1980s, one of the land owners gave a large tract of land to the county to protect it from development (which started booming in the area around that time).

In June, 2002, while I was living in the UK, Catawba County open up the 189 acre park and its 6 miles of trails to the public.

I love Bakers Mountain park. Even though the mountain isn’t terribly tall (1780 feet/543 meters ASL) parts of the trail system are fairly strenuous. When I want to escape and clear my head, the Bakers Mountain trails are the perfect medicine.

Bakers Mountain: What’s in a name?

An interesting tidbit about Bakers Mountain that I learned from one of the park rangers: it was originally called “McBride Mountain in the late 1700s, but as more German settlers moved into the area, German family names became predominant.

The Baker family had large tracts of land in/around the mountain and, locally, people started referring to it as “Baker’s Mountain” sometime in the 1800s and the name stuck.

Officially, the name of the mountain is “Bakers Mountain” although, I suppose, it should have been called “Baker’s Mountain” or maybe “Bakers’ Mountain.” An apostrophe was never added, though.

It’s a source of confusion for those who make maps and refer to the mountain. In the SOTA database, it’s referred to as “Baker Mountain.” That is incorrect, of course, but the SOTA database is likely built upon one of the topographic map databases where it’s incorrectly labeled.

So there you go. Tuck away this bit of trivia and sound like a local next time you’re in Catawba County!

Now where was I? Oh yes…

So on Wednesday, May 19, 2021, I packed my Elecraft KX2 and PackTenna 9:1 UNUN antenna in the GoRuck GR1, and hit the Bakers Mountain trail system.

The weather was perfect, although the humidity was incredibly thick that day.

Mountain Laurels were in bloom and flanked portions of the trail.

I took the main red-blazed loop trail.

The trail is very well-marked and maintained with maps posted throughout.

At one point, you’ll happen upon the old home site.

The trail has a few steep sections, but overall is pretty moderate.

There’s no missing the summit trail.

Following the orange mountain top trail will take you to a gazebo and observation deck near the summit.

Keep in mind, though, that this is not the true summit of Bakers Mountain and isn’t close to the 25M SOTA activation zone. Still, the views are fantastic here, so take a breather and soak up the Catawba valley.

Click the pano image below to enlarge in a new window.

To find the trail to the real summit, you must follow the path crossing under the power lines near the observation area–you can’t miss it. While the public isn’t encouraged to take this path–and it is not a part of the Bakers Mountain trail network–a park ranger told me that the current owners don’t mind the odd SOTA activator following the trail to the summit.

The path–since it’s not a part of the public trail–is a bit overgrown. Follow this path until you intersect an overgrown narrow access road. At the intersection take a left and this will lead you to the true summit. The ring road around the summit is well within the AZ.

I found a little spot to set up among the trees on the summit. No views, but it was the perfect space to deploy the PackTenna 9:1 UNUN!

Gear:

On The Air

This being my first time activating Bakers Mountain, of course I made a real-time, real-life, no-edit video (see link below). Sorting out a way to set up the camera position took me longer than deploying the antenna and unpacking the radio! It can be a real challenge on a stony mountain summit.

The KX2 paired beautifully with the PackTenna 9:1 UNUN. I got a great match on 20 meters.

I started calling “CQ SOTA” and spotted myself on the SOTA network using the SOTA Goat app.

My first contact was SA4BLM in Sweden–I almost fell off of my rock!

Next, I worked KR7RK in Arizona, AE0XI in South Dakota, and HA9RE in Hungary! All in eight minutes.

Wow!

Next, I moved up to the 17 meter band where I logged AC1Z in New Hampshire, F4WBN in France, and KT5X in New Mexico.

Finally, I moved down to 40 meters where I worked K3TCU in Pennsylvania, K8RAT in Ohio, W4KRN in Virginia, and K4MF in Florida.

My total activation time was about 25 minutes.

QSO Map

Here’s the QSO Map plotting out my QRP contacts. I must say, that modest PackTenna did a lot with my 5 watts! That and some good Bakers Mountain mojo! 🙂

Video

Here’s my real-time, real-life, unedited video of the entire activation from start to finish:

Click here to view on YouTube.

That was fun!

When I hike at Bakers Mountain, I add spur trails and connectors to make it as long as can in the time frame I have. The trip back to the car was actually a longer hike than it was to the summit.

But I had a spring in my step.

I was absolutely chuffed that my first activation of this particular summit was so exciting and fun. It still blows my mind what can be accomplished with 5 watts and a modest wire. I can’t wait to go back again.


Do you enjoy QRPer?

Please consider supporting us via Patreon or our Coffee Fund!

Your support makes articles like this one possible. Thank you!

Enjoying a casual trailside activation with the Xiegu X5105 and PackTenna 9:1 Unun

I love day hiking with radios.

When I pack all of my radio gear in a field kit that is compact enough to fit in a small day pack, it forces me to only take the essentials. This, in turn, makes for a quick deployment and pack-up.

I think this is one of the reasons I find Summits On The Air so appealing.

On Tuesday, May 18, 2021, I had a hankering to fit in a hike and, of course, play radio. I also wanted the option to fit in two activations, so needed a simple and short hike to minimize time.

Tuttle Educational State Forest (K-4861)

I decided to head to Tuttle Educational State Forest–one of my favorite accessible POTA sites–because their two mile loop trail was just what the doctor ordered. In fact, I knew exactly where I wanted to set up on the trail.

Tuttle is rarely busy–especially on a Tuesday afternoon.

I arrived on site and, as I was pulling my backpack out of the car, I was greeted by one of the Tuttle park rangers. He was incredibly nice and provided me with even more ideas of places to set up in the future along the trail and trail extensions. We must have chatted for 15-20 minutes–he had a number of questions about amateur radio and I never miss an opportunity to be an ambassador for both ham radio and POTA/WWFF.

Gear:

On The Air

The hike was amazing and, besides park rangers, I had the entire site to myself. About 1.5 miles into the hike, I found the spot I earmarked for this activation: a little open area with three wood benches on the side of the path.

This particular deployment reminded me how thankful I am that I discovered the Arborist Throw Line last year. I had the PackTenna deployed in three minutes.

It was so…effortless.

I decided to take the Xiegu X5105 out for another activation. Radioddity sent this to me on loan for a full evaluation and review. The previous day, I activated the Blue Ridge Parkway with the X5105.  I wanted to see how many activations I could accomplish off of one charge of the X5105’s internal battery, so after the BRP activation, I didn’t re-charge the battery.

As insurance at Tuttle, I brought along my trusty QRP Ranger LiFePo4 battery pack and hooked it up to the X5105. If the X5105’s internal battery died on me, it would be easy to simply turn on the QRP Ranger’s power switch and hop right back on the air.

I started one of my real-time, real-life activation videos (see below), then called CQ on 40 meters.

Maybe that quick antenna deployment was foreshadowing the activation, because in the span of 13 minutes, I logged 11 stations all on 40 meters.

I was very pleased to work P2P (Park To Park) contacts my friends Steve (KC5F) and Scott (KN3A). Thanks, guys, for hunting me!

Here’s my log:

I didn’t even move up to 30 or 20 meters after working the string of contacts on 40 meters because Tuttle is far from being a rare site and I wanted to fit in one more activation that afternoon.

The X5105’s internal battery easily powered the rig for the entire activation (perhaps a total time of 15 minutes). I suppose I’ll have to take it to yet another park on this same charge!

Packing up was nearly as quick as deployment. I owe thanks to one of my YouTube Channel subscribers for suggesting that I pack the Arborist Throw Line pouch by winding figure eight bundles of line on my hand (much like I do with antenna wire) and stuffing them in the pouch one bunch at a time. This saved me a lot of time.

While the portable throw line pouch isn’t as quick to pack as the throw line cube, this method made it a cinch!  I can’t find who originally made the suggestion, but I’m grateful–thank you!

Video

Here’s a link to the full activation video:

Photos

During my loop hike, I snapped a few photos (click to enlarge):


Well hello there, little fella’!

I’m most grateful to the late Ms. Tuttle for leaving this amazing park for all to enjoy. Her legacy protects this land for all future generations.

When you’re doing a park or summit activation, don’t forget to stop and take in a good dose of nature and the outdoors.

It does us all a world of good.

More X5105 thoughts

This second activation had me warming up a bit more to the X5105. I do like its size, and I think it’s a good rig for CW ops.

CW operation is very pleasant, actually, and keying feels natural. I was impressed that the battery held for a second activation, even though this was a very short one.

Again, I think the internal speaker audio leaves a bit to be desired–I dislike the audio splatter I hear at higher volumes–but for $550? It’s really hard to be critical.

During this activation, I still hadn’t learned how to program CW memory keying. A YouTube subscriber recently described the process and it seems overly cumbersome and much more complicated than it was in an earlier firmware version.  I’m going to contact Xiegu about this. Unless I’m missing something, it really holds the radio back from being pretty stellar on CW for the field op.

Readers, if you own the X5105 and can describe the best way to use CW memory keying, please comment with directions! I’d really appreciate it!

Thank you

Thank you once again for reading through this field report and perhaps watching the activation video.

I’d also like to thank the readers and subscribers who’ve recently supported me on Patreon and via PayPal. I am humbled and honored.

Thank you.


Do you enjoy QRPer?

Please consider supporting us via Patreon or our Coffee Fund!

Your support makes articles like this one possible. Thank you!

New radio day! A shakeout activation on the Blue Ridge Parkway.

I learn a lot about a radio the first time I take it to the field. I’m not sure if it’s because being out of the shack helps me give it my full attention, or if it’s because field conditions vary and this allows me to see how flexible and adaptable the radio is.

On Monday (May 17, 2021), I was eager to hit the field with a new-to-me radio.

The previous week I didn’t log even one park or summit activation. Typically I’d hit at least two. There were a couple of reasons for this…

First, we had a fuel shortage in western NC and I didn’t want to burn any extra fuel for activations knowing we had some important family errands that week.

Secondly, I needed to hunker down and finish a number of projects I’d been working on including a lengthy two-part field radio kit feature for The Spectrum Monitor magazine, and a new in-depth TX-500 review for RadCom.  FYI: Part one of my feature for TSM will appear as the cover article in the June 2021 issue.

We also had a number of family projects to sort out. So a week at home perfectly timed with the fuel shortage.

The new radio

I collect reader and viewer suggestions and when I see that there’s a radio or product, in particular, folks would like to see tested, I try to obtain one.

One of the most requested radios lately has been the Xiegu X5105.

A number of readers have asked me to obtain an X5105 and take it to the field. Many are considering purchasing this (incredibly) affordable full-featured QRP transceiver, others own it, love it, and want to see how I like it compared with my other radios.

Last year, I came very close to purchasing the X5105 for review, but opted for the Xiegu G90 instead (here’s my review of the G90).

Even though the X5105 is only $550 US, I really didn’t want to make a purchase at this point because I’m budgeting for a new MacBook, new video camera, and I just purchased the TX-500.

So I reached out to Radioddity who is a sponsor over at the SWLing Post. I’d been in touch with Radioddity a lot as of late because I’ve been evaluating and testing the Xiegu GSOC for the past few months. They lent me the GSOC (and a G90 because I sold after my review) and I was in the process of packing up both units to send back to them.

I asked if they could lend me an X5105 for a few weeks. They were quite happy to do so and dispatched one in short order.

A clear relationship

Side story…

Back when I decided to place ads on the SWLing Post and QRPer.com, I worried about any inherent conflicts of interest. I read magazines that review products and can tell that they’re being gentle in their criticism because there’s a two page ad of the product immediately following the review. I don’t like that.

This conflict is something that’s almost inevitable with any radio publication that grows to the point of needing monetization to support it.

I made a few Golden Rules up front:

1.) I would only place radio-relevant ads on my sites. Period.

2.) My ads and sponsorships would be hand-picked and by invite only. I choose who can be a sponsor.

3.) I’m up-front with sponsors that my reviews call it like it is. If they send me product to review, I will give it an honest evaluation based on real-life use. If I don’t like it or can’t recommend one of their products, I’ll let my community know.

I’ve lost a couple of sponsors over Golden Rule #3 over the years. I’m okay with that because I’d rather not allow an advertiser on my site that can’t take customer criticism.

I invited Radioddity to be a sponsor of the SWLing Post last year after I had some positive interactions with them.

The Xiegu GSOC

Radioddity sent me the new GSOC to review in November 2020. I discovered in short order that the GSOC had some major issues and, frankly, I didn’t like it and certainly couldn’t recommend it. I communicated my concerns about this product with detailed notes and suggestions for improvement. I was open and honest about the GSOC on the SWLing Post (read the thread here).

Radioddity not only embraced my criticisms but sent them to the manufacturer and thanked me.

Impressive.

Blue Ridge Parkway (K-3378)

But back to the activation!

So on Monday, May 17, I had an errand in town that took me right past the Blue Ridge Parkway Folk Arts Center. The detour to do an activation was maybe two minutes, so there was no “fuel-shortage” guilt! 🙂

Also, I had a good hour to burn before I needed to go home and pack for a quick trip to visit my folks.

Equipment list:

I deployed the PackTenna 9:1 random wire antenna specifically because I wanted to see how easily the X5105’s internal ATU could match it.

I hopped on 40 meters first, hit the ATU button and it quickly found a 1:1 match–good sign!

This turned out to be a pretty easy and simple activation.

I started calling CQ and within 12 minutes I logged 11 stations.

I moved up to 20 meters knowing it would be a tougher band, but worked one more station–KG5OWB at K-0756–pretty quickly.

I was quite happy with  logging 12 stations in short order. A nice contrast to recent activations where conditions were so poor it’s been a struggle to get even 10 contacts within an hour.

I would have stayed on the air longer but (as I mention in the video) I wasted a good 20-25 minutes waiting on the landscape crew to finish mowing on/around the site before I set up my station. I didn’t want to be in their way.

Here’s my log sheet from the POTA website:

Video

Of course, I made one of my real-time, real-life videos of the entire activation. I’ve quite a long preamble in this one, so if you’re interested in skipping straight to the on-the-air time, go to 16:24.

X5105 initial thoughts?

So far, I like the X5105. It certainly accomplishes its goal of being an all-in-one “shack in a box.”

I performed this activation only using the X5105 internal battery. In addition, the ATU worked perfectly with the random wire antenna.

I like the size–it’s much smaller than I imagined. It’s also fairly lightweight.

It feels rugged, too–I wouldn’t be concerned about it getting easily damaged in the field.

The speaker works pretty well, but if the volume level is pushed too hard, it starts to splatter. I wish it could handle a little more volume before the splattering kicks in.

The ergonomics are pretty good. It didn’t take long to sort out how to use most of the functions.

One area for improvement? The owner’s manual. It’s poorly written and (frankly) reads as if it was rushed to print.

For example, I wanted to set up CW memory keying prior to hitting the field. Unfortunately, the owner’s manual was no help.

There’s actually a dedicated page regarding CW memory keying, but the first thing it does is reference a different section of the manual (without giving a page number). I followed the procedure, but it didn’t work. In fact, it didn’t make sense as it seemed lead me down the path of digital mode macros. I think the manual may be referencing a procedure before the last firmware update (which, it appears, changed the menu structure significantly).

If you can help guide me through setting up CW memory keying, please comment! I’m sure it’s a simple process, but I haven’t sorted it out yet.

Overall, though? I see why the X5105 is so popular. It appears to compete with a loaded Elecraft KX2. It’s a bit larger, heavier, and less “refined” but it’s also half the price of a loaded KX2.

I also think it’s a great radio for CW operators. The keying feels natural and responsive. It uses relays instead of pin diode switching, so QSK includes a little relay clicking. I don’t find it to be too loud, though.

I’ll be taking the X5105 out again very soon.  I’ve got it for 6 weeks, so it will get plenty of park and summit time. If you own the X5105, I’d love to hear your comments on this portable rig.

Thanks for reading!

A windy, creekside QRP activation of Pisgah National Forest and Pisgah Game Land

Lately, I’ve had quite the backlog of reviews and evaluations building up. Family life has been active–and it always comes first–but also I’ve a number of projects on the table (two kit builds, one repair, two antenna projects), four articles for various publications, two new transceivers (the TX-500 and now an X5105 on loan), and a number of family business projects. ‘Tis the season, I reckon.

Normally, I’d be in Dayton, Ohio right now enjoying a weekend of fellowship and Hamvention/FDIM insanity, but all that was cancelled this year due to the pandemic.

I’ve had a number of projects that sort of force me indoors, but I haven’t felt like doing them. Spring in the mountains of western North Carolina is truly a thing to enjoy (save the allergies)–and it’s an incredible distraction.

On Saturday afternoon, May 8, 2021, my whole family wanted a little outdoor  distraction time, so we hopped in the car and drove to a nearby spot in Pisgah National Forest.

The drive takes nearly 50 minutes even though the actual site isn’t even 5 miles from the QTH as the crow flies. The weather was beautiful, but a front was moving through bringing strong wind gusts.

I had planned to set up my activation next to our  car along the forest service road, but to shelter myself from some of the winds, I decided instead to set up next to the nearby creek, down the hill a bit.

This particular site is actually located in both Pisgah National Forest and Pisgah Game Land–they overlap, which makes this a Parks On The Air “Two-Fer”.

Equipment

While setting up next to a creek makes for a beautiful little activation spot, it also adds a lot of extra background noise. Normally, I would have used some in-ear earphones with the TX-500 for sound isolation, but (after twenty minutes on the air and against my better judgement) I decided to make an activation video at this site, so used the speaker/mic instead.

I’ve activated this site numerous times in the past and while it has tall trees and loads of spots to set up, it’s also in a pretty deep ravine, surrounded by tall ridge lines.  While this is less a problem with HF as it would certainly be for line-of-site frequencies, history has proven that it makes for a challenging activation.

I deployed my new PackTenna 9:1 UNUN random wire antenna as a vertical. I’m glad I chose the PackTenna because it’s such a low-profile antenna, I knew it would be less affected by the strong wind gusts.

I also decided to employ my Emtech ZM-2 manual antenna tuner during this activation. Why? Because I had never used it with the PackTenna before. So why not?

On The Air

I hopped on 40 meters and started calling CQ. Thankfully, the Reverse Beacon Network found me and the POTA website automatically created a spot from the RBN information.

I worked four stations in four minutes! This was a much better start than I’d ever had at this site before.

Then, nothing…

About 20 minutes passed as I called CQ on 40 meters. This was going to be a challenging activation after all.

I decided to move up to the 30 meter band. I thought there might be some value in showing how to tune the ZM-2, so I started recording one of my real-time, real-life activation videos knowing that the audio might not be ideal with the rushing creek.

On 30 meters, I was able to pick up three more contacts in fairly short order, giving me a total of seven contacts. Only three more needed to validate my activation!

At least 20 minutes had passed since I was on 40 meters, so I decided to hop back down there hoping some new hunters might be monitoring the POTA spots.

Sure enough, I was able to add five more contacts in ten minutes!

My 12th contact is on the back of this log sheet: KF4YEY in FL.

I likely spent a total of one hour on the air. By the time it was over, my wife and daughters were ready to hit the road again: temps had dropped pretty quickly in that one hour time frame and the gusts were strong enough my wife was concerned it could knock some branches loose. (I was less concerned because I always check a site for widow-makers and power lines before setting up.

Video

Here’s my real-time, real-life activation video starting about 20 minutes into the activation:

With such a simple radio kit, packing up was very quick.

This was my second activation with the new TX-500. I really do love this radio.

A number of folks noted in my last TX-500 video that there was an audio pop present as I keyed the radio either with my paddles or with the built-in memory keyer. I had never noticed this before, but I think I know why it’s happening. In my videos, I crank the speaker/mic volume up all the way so the audio can be heard. When I do this, the T/R relay audio pop/recovery is quite noticeable.

I think I may slow the relay recovery to something like 400ms so the audio doesn’t try recovering between characters. The TX-500 isn’t capable of full break-in QSK anyway, so there’s really no need for a 100ms recovery. I’ll also share this feedback with the engineers at lab599 as I suspect this can be sorted out in firmware. In the shack, it’s not an issue because audio levels are in the normal range, but in the field when the audio is cranked up, it’s pronounced. This also would not be an issue if using earphones, of course.

I do love this TX-500 and am very happy I’ve officially purchased it from lab599 and added it to my transceiver arsenal! Now to give it a name and make it official…


Do you enjoy QRPer?

Please consider supporting us via Patreon or our Coffee Fund!

Your support makes articles like this one possible. Thank you!

Discovery TX-500: Attempting a speedy POTA activation with a new rig and new antenna

While I love the opportunity to head outdoors and play radio, I also love shaking up my field kit and trying different combinations of radios, antennas, and other station accessories.

When using new-to-you gear, though, a best practice is to set everything up at home before you hit the field. This way, you can confirm that you have everything you need and you can also familiarize yourself with the gear prior to activating a park or summit.

Last Sunday (May 2, 2021), I threw caution to the wind. Well, sort of.  At the very last moment, I decided to squeeze in an activation en route to my sister’s home to do some brush-cutting and yard work.

The lab599 Discovery TX-500

Basically, I was chomping at the bit to take my lab599 Discovery TX-500 to field.

You see, in August 2020, I received an early pre-production TX-500 to evaluate for one week. In that seven day span, I activated seven parks with the TX-500 and enjoyed every minute of it. Because the loan period was limited, I packed a lot of TX-500 air time that week, then wrote this review for The Spectrum Monitor magazine.

As I mentioned in a previous post, if I would have had the opportunity to buy that loaner TX-500 last year, I would have. It wasn’t an option, though, as so few working models existed at the time. Now that I had a TX-500 in hand again, I couldn’t wait to hit the field with it.

Last Sunday, the weather was beautiful in western North Carolina, but clouds were moving in and we expected scattered showers in the latter part of the afternoon. The last thing I wanted to do was my sister’s yard work in the rain, so I needed to make the activation a speedy one.

But the TX-500 wasn’t the only piece of new gear. I also recently ordered and received a PackTenna 9:1 UNUN random wire antenna. I wanted to see how well it would perform, too, so I decided to pack my Elecraft T1 ATU and give it a go, too!

For the record: when you’re in a hurry, it’s not only a really bad idea to hit the field with a new radio and antenna, but to also throw the entire field kit together in 5 minutes before walking out the door.

On the drive to Lake James,  I mentally packed and re-packed the field kit trying to decide if I might have left out a crucial component (say, an adapter or cable). I also made the decision not to make a real-time, real-life video because 1.) this would surely  turn into a very clumsy deployment, 2.) I was pressed for time and didn’t want to set up the video, and 3.) I only had my iPhone with me to make the recording which would mean I would be giving up Internet and mobile phone access at the park which is important for spotting purposes.

So what did I do?

As I turned into the park entrance, I decided to make a recording of the entire activation from set up until the last logged contact.

Why would I do this to myself?

I reminded myself that the goal of my YouTube channel is simple: real-life, unedited examples of field radio operating. 

All of us, at some point, use new equipment in the field and we stumble through the process as we give the system a shake-out. So why not record it, right?

My iPhone battery had about 80% capacity. I knew if I tried to use the personal hotspot while recording the video–so that I could spot myself on the Microsoft Surface Go tablet–it would run down the battery in 20 minutes or so.  I immediately put my iPhone in airplane mode to preserve the battery.

Lake James State Park (K-2739)

I know this park quite well and assumed it would be busy on a beautiful Sunday afternoon. It was, in fact. I was confident I’d find a good operating spot, though, because they’ve a large picnic area and loads of tall trees to support wire antennas. And mid-afternoon, it was unlikely all of the picnic tables would be occupied.

Gear:

I found a nice spot to set up and deployed the PackTenna in short order.

Since my iPhone was doing video duty, I didn’t take extra photos.

I hooked up the Elecraft T1 and attempted to find a match on 40 meters.  I thought I did find a match at first, but it turns out that the T1 was in Bypass mode. I didn’t have my reading glasses handy, so thought I saw a great match on the TX-500’s display. Turns out it was floating around 2:1. Still: not a bad match.

I worked five stations, then moved to the 30 meter band. It was then I finally realized the T1 was in bypass mode. I found my spectacles, read the front panel of the T1 and remedied that in short order (I can never remember the button press combo to toggle bypass mode!).

I tuned 30 meters and got a great match.

On 30 meters, I worked two stations.

I then moved up to 20 meters where I worked two more.

Then I moved back down to 40 meters where I topped off the activation with an additional three contacts for a total of 12 as I called QRT.

I’m very grateful to my buddy Scott (KN3A) who worked me on three bands all while he was activating a park in Pennsylvania! Thanks for those P2Ps, Scott!

In fact, I’m grateful Scott took the time to work me on multiple bands because it help bring my numbers above the 10 stations needed for a valid POTA activation.

Video

QSOmap

After going QRT, I quickly packed up my gear (which was easy because there were so few parts), and started the 45 minute drive to my sister’s house. Fortunately, the rain held off the whole time I did the yard work!

I’m so happy to have a TX-500 back in the field radio arsenal.

Shortly after this activation, I officially purchased this loaner TX-500 unit from lab599. As I said in my “unboxing” video, there was no way I was sending this unit back. 🙂 Now I won’t feel bad if it gets dinged or scratched!

I’m sure the TX-500 will be in heavy rotation for a while. Please comment if you have any questions about this radio or the 9:1 UNUN PackTenna. I’d be happy to answer your questions!


Do you enjoy QRPer.com?

Please consider supporting us via Patreon or our Coffee Fund!

Your support makes articles like this one possible. Thank you!