This field report picks up where we left off after my last post earlier this week at Lake Alma State Park (May 14, 2025).
Eric and I planned to hit two parks en route to Dayton, Ohio. Lake Alma was a successful park number one. The next park we planned to activate—another new-to-me park—was Great Seal State Park.
The skies opened up beautifully during our Lake Alma activation, so the drive to Great Seal was under clear, sunny skies.
Great Seal State Park (US-1954)
We arrived at the park around 11:45 AM EDT.
Great Seal State Park is tucked away in the hills just outside of Chillicothe, Ohio, and it’s steeped in early state history. In fact, the park gets its name from the Great Seal of the State of Ohio, which was inspired by this very landscape. Back in 1803, when Ohio was becoming a state, early leaders—including Thomas Worthington—looked out over the sunrise from Mount Logan and used that iconic view as the backdrop for the state seal: rolling hills, a rising sun, a bundle of arrows, and a sheaf of wheat symbolizing Ohio’s natural beauty and agricultural roots.
This area also has deep Indigenous history. Before statehood, the Scioto River Valley was home to the Shawnee, with several towns named Chillicothe located nearby. Later, Chillicothe became Ohio’s first state capital. These hills have seen a lot of history, and today I’m sure they make for some incredibly scenic and rewarding hikes.
Eric and I didn’t have enough time in our schedule for a hike that afternoon, but if I pass by here again, I’ll make time for one.
We first made our way to the main picnic area of the park but quickly discovered a large outdoor gathering for local utility workers. They absolutely filled that part of the park, so we checked out the campground area instead.
The campground was completely void of campers, so we felt it would be safe to set up without any issues. It was a beautiful site with numerous options for station setup.
I found a camping spot and parked there.
We decided I would set up at the picnic table at the site while Eric would use his folding chair and my Chelegance MC-750 antenna in the central island of the campground.
Poor Eric, though. When I started filming my activation video, I realized just how close we were to each other—and how much interference that could cause. I walked over to him (camera in hand) and helped him move a bit farther away.
As I was setting up my gear, Eric came back to my site and said the fellow doing the lawn mowing was about to work in the area where he had originally set up. So, Eric moved—again—a few campsites down from me. This time, he decided to use his fiberglass Jackite pole to support a random wire antenna.
This actually worked out quite well—the distance between us was just enough that we didn’t interfere with each other at all.
Gear
Note: All Amazon, CW Morse, ABR, Chelegance, eBay, and Radioddity links are affiliate links that support QRPer.com at no cost to you.
Radio
Penntek TR-45L “Skinny”
Antenna System and Throw Line
MW0SAW’s Homebrew 40M EFHW built on a SOTAbeams Winder
On Wednesday, May 14, 2025, my good friend Eric (WD8RIF) and I started our drive from Athens to Dayton, Ohio. We left Eric’s QTH early that morning—not because it’s a long drive (it’s only about 2.5 hours)—but because we wanted to activate at least two new-to-me parks en route and still arrive early enough to stop by the Commissary at Wright-Patterson Air Force Base, check into our hotel, and meet up with friends for dinner.
The day before, I wasn’t able to activate a park in West Virginia as planned due to thunderstorms in the area. I also heard that propagation was incredibly poor—something we’ve seen off and on lately—so if you’re planning to validate an activation, be sure to budget extra time to reach your ten contacts.
That Wednesday morning started off foggy and misty, but the clouds quickly burned away and gave way to a beautiful day.
Amish farmers are not an uncommon site in rural Ohio.
Since I was firmly in WD8RIF’s activation territory, I let him do all of the planning for us that day. (Let’s be honest—I tend to let Eric do all of the planning no matter where we’re roving! Don’t tell him that, though.)
Lake Alma State Park (US-1967)
Our first stop was Lake Alma State Park near Hamden, Ohio.
Lake Alma is a beautiful park with large parking areas, great lake access, and numerous ideal spots for a POTA activator to set up.
Eric suggested we check out the gazebo, but I was keen to use one of the picnic shelters because it sat right beside an old-growth hardwood tree—just the kind I like to use to support my antennas!
Often when Eric and I do joint POTA activations, we activate at the same time to save time. In this case, we decided to take turns—me first at the key.
I knew Eric had never used a Penntek TR-45L, so I brought along my “skinny” version of this magnificent little rig. Paired with a 40-meter EFHW deployed next to the shelter, I figured we’d have nearly ideal conditions—even if propagation wasn’t.
MW0SAW’s 40M EFHW ready for action!
Setup was quick and easy!
My Red Oxx Micro Manager has become the TR-45L Skinny’s pack of choice!
Somehow, I managed to go first, so I prepped my log and aimed to get ten contacts to validate this new park.
Gear
Note: All Amazon, CW Morse, ABR, Chelegance, eBay, and Radioddity links are affiliate links that support QRPer.com at no cost to you.
Radio
Penntek TR-45L “Skinny”
Antenna System and Throw Line
MW0SAW’s Homebrew 40M EFHW built on a SOTAbeams Winder
Readers, there’s a bit of a backstory to this guest post by my friend Jamie (AA4K). During the W4SOTA campout in October 2023, Jamie showed me his favorite field radio: the (tr)uSDX. I’ve used the (tr)uSDX for a couple of activations, but I’ll be honest—I haven’t exactly shown it a lot of love. I’ve even complained about its audio and receiver performance in the past. Jamie, on the other hand, really enjoys using his and makes a solid case for it as a field radio.
Jamie showing me his (tr)uSDX during the W4SOTA campout.
I asked if he’d be willing to write a guest post for QRPer, and he agreed (eventually!). When I saw him at Hamvention this year, he told me the article was ready—and in true form, he sent it to me via Winlink… using his (tr)uSDX.
A Case for the (tr)USDX
by Jamie (AA4K)
Introduction
There are many factors that must be considered when choosing a field radio. How big and heavy is the radio? How hard is it to repair or replace the radio if it becomes damaged or lost? How hard is the radio to operate? How power-efficient is the radio? Does the radio have the desired/required modes and features? Of course, the most fundamental question is, “Does the radio work?” I will try to answer these questions as I lay out… a case for the (tr)USDX as perhaps an almost perfect field radio.
The last two contacts on this page were with my friends Carlos (KB4CO, now AE2W) and Thomas (K4SWL).
How big and heavy is it?
The first question is an easy one. Aside from small home-brew radios such as K6ARK’s “Choking Hazard”, there isn’t a smaller or lighter commercially available radio out there that I am aware of. The (tr)USDX measures 112 x 61 x 50 mm (I trimmed the encoder post and used a lower profile knob), and weighs 5.3 oz, or 151 g. The next closest currently available commercial radio is perhaps the QRP Labs QMX. This radio is very comparable in size (110 x 64 x 38 mm) and cost, but it does weigh more at 7.3 oz, or 207 g. The more rugged metal case probably plays a big part in the weight difference.
The (tr)USDX is often sold as a kit for about US$86 (+$20 for the case) [QRPer affiliate links]. Any repairs should simply involve desoldering affected components and replacing, or possibly just updating the firmware. I am a relative noob when it comes to kit building and this kit is honestly not very difficult to build… about one day. The instructions and support videos provided by the hardware developer, Manuel DL2MAN, are very thorough. I learned a lot about radios from building the kit. If you have no interest in kit building, the assembled radio can currently be purchased from Amazon for US$138, complete with a case. Whether purchased as a kit, or already built, the band pass filters on the radio board will need to be tweaked to get the most out of your radio.
How hard is it to operate?
The (tr)USDX only has 4 buttons including the rotary encoder: Menu, Encoder, Enter, and PTT. The Menu and Encoder cover the majority of the adjustments, and most of the time I don’t use the Enter and PTT buttons. The PTT functions only as a ptt or cw key depending on the mode (yes, if your key breaks mid activation, you have a built-in backup key). The single-layer menu system is simple to scroll through, and the most commonly used items are near the front of the menu.
The most challenging aspect of operation for some people is the tiny OLED screen which gets obliterated in bright light. Reading glasses do help, although when you become familiar with the menu are not as important. I would love to see a version with an e-ink display and, more importantly, a push-button wheel rotary encoder (to remove the protruding knob).
How power-efficient is it?
This radio sips power. I tested the radio I built using a LiFePO4 battery that supplied 13.56v. The current draw on receive is 66.1 mA, and 570 mA on CW keydown into a dummy load. A properly tuned (tr)USDX delivers about 5w on each of the five bands when fed ~12v. A set of three 18650s in series will provide the proper voltage and power the radio through many activations.
Does the radio have the desired/required modes and features?
The (tr)USDX is not for princesses. It is a minimalist’s radio. But if you start from the perspective of an ultralight backpacker who has to justify every gram in their kit, this radio checks all of the boxes. It is a five band radio (Low, Classic, and High band models available). It is capable of doing voice, cw and digital modes. Thanks to a beta update from the firmware developer, Guido PE1NNZ, this radio will interface with a computer without requiring a soundcard. One of my favorite features of the radio is the built-in SWR meter. With the SWR feature enabled in the menu, just put the radio in CW mode and press the PTT to find out if your radio is happy with the current antenna arrangement.
This photo was taken while sending the text of this article via Winlink to Thomas, K4SWL.
Does the radio work?
Although my total activation count is nowhere near as high as many of you, I have used the (tr)USDX for a majority of my successful POTA (156 as of this writing) and SOTA (72 as of this writing) activations. My confidence in this little radio was demonstrated when I used it on an ATNO activation of Admiralty Island National Monument (US-4537) in Alaska.
Conclusion
One reason why I like to participate in SOTA and POTA is that it gives me an opportunity to practice field radio deployment and operation with the goal of being ready to communicate anywhere and anytime. This level of readiness means that I have the necessary equipment with me all the time. For me, the (tr)USDX is my EDC (every day carry) radio. It can bounce around in my backpack (in its protective case, of course) and be ready to deploy if needed. If it were to get lost or broken, I can fix or replace it easily. And I find it to be easy enough to use with the understanding that it isn’t a luxury radio.
The author at ~11,000’ in Uncompahgre National Forest.
On Tuesday, May 6, 2025, I made a little time in my afternoon schedule to take my Venus SW-3B on a final POTA activation.
I might have mentioned in previous posts (and certainly on the Ham Radio Workbench) that starting in April, I’ve been trying to downsize the shack a bit. This is a process I go through at least annually. My shack/office is very small, so things pile up quickly—and I like to divest myself of gear as best I can.
During this process, one of my readers here on QRPer reached out and asked—on a whim—if I’d consider selling him my Venus SW-3B. I gave it some thought and decided to do so.
I love the SW-3B, but the truth is, I hadn’t used it in a long while. It’s been tucked away in my headrest kit for more than a year, and I just haven’t been reaching for it. That and, frankly, I’ve a couple of MTR-3B LCDs, an MTR-4B, and an MTR-3B Currahee model–I’m flush with super compact transceivers.
I agreed to sell him the SW-3B but told him I wanted to take it out on one final activation—and that’s exactly what I did!
Blue Ridge Parkway (US-3378)
I had to fit this activation into a one-hour window while my daughter was in a class. Fortunately, the class was no more than a mile from the Blue Ridge Parkway. Unfortunately, if I wanted a site with a picnic table for easy operation and setup, I wasn’t terribly close to one.
Luckily, I had my complete SOTA kit packed, including my Helinox chair and Tufteln knee board. With those two items—paired with the SW-3B—I could operate comfortably just about anywhere.
I picked a spot on the side of the road, very close to the parkway entrance from US-25. I knew the drive back to her class would take no more than three minutes.
I paired the SW-3B with my KM4CFT 30-meter end-fed half-wave, which includes a 40-meter linked extension. I figured with this antenna, I could operate on 40, 30, and 20 meters (by removing the link if necessary).
Lately, propagation has been flaky, so having a bit of frequency agility is key to a successful activation!
Gear:
Note: All Amazon, CW Morse, ABR, Chelegance, Spooltenna, eBay, and Radioddity links are affiliate links that support QRPer.com at no cost to you.
I feel incredibly fortunate to live in an area where a POTA park—the Blue Ridge Parkway—quite literally runs through town. As convenient as that is, I’ve still struggled to squeeze in activations over the past few months. We’ve had so much going on that even impromptu POTA time has felt out of reach.
Fortunately, I have a secret weapon for making the most of even the shortest activation window:
The KH1!
Left: My accessories pouch with contains a throw line, antenna adaptors, audio recorder, cables, spare key, and extras. Right: My Elecraft KH1 in a Pelican M40 case.
My Elecraft KH1 goes with me everywhere—it’s my proper EDC radio. And on Thursday, April 3, 2025, it came in very handy.
I dropped my daughter off at a physical therapist’s office, which just so happened to be right next to the Blue Ridge Parkway. Instead of waiting in the office for 45 minutes trying to catch up on email, I opted for some POTA radio therapy instead!
I left the parking lot and drove to a nearby gravel pull-off along the Parkway—just about four minutes from the PT office.
I hadn’t originally intended to film an activation, but I happened to have my camera, digital audio recorder, and a new magnetic clip-on camera mount with me.
I purchased this mount specifically to record pedestrian mobile activations. The first time I tried it, the results weren’t great: I mounted it at chest level, but my arms dominated the screen, making it tough to see both the radio and the logbook.
That Thursday, though, I had everything I needed—and I figured it was worth another try, this time clipping the camera mount higher and on my right shoulder.
With the clock ticking, I deployed the KH1 and hit the air!
Gear
Note: All Amazon links are affiliate links that support QRPer.com at no cost to you.
My wife and I visit Japan every year for 3 to 4 months, usually in the spring. This year, we arrived in early March, and the weather was a bit cold. However, recently, we’ve seen the temperature turn quite warm and mild, with the cherry blossoms just beginning to bloom! It’s a perfect day to play radio!
Since we live in Takamatsu on Shikoku Island, we have easy access to Ritsurin Park (JP-2051).
Wednesday, March 26, was a perfect day for my wife to stroll through the park while I played radio.
Here is the gazebo where I set up shop.
The History of Ritsurin Garden
It is believed that Ritsurin Garden was originally created in the late 16th century, from a garden belonging to the Sato Clan located in the southwest corner of the present garden.
What is now the Nanko Pond was created around 1625, when Takatoshi Ikoma ruled the Sanuki Province (present-day Kagawa).
In 1642, Yorishige Matsudaira began ruling the Takamatsu Domain and inherited the garden. He and the successive generations of his family kept developing the garden over the years, and the 60 scenic spots were named when the domain’s fifth lord, Yoritaka Matsudaira, was in power in 1745. Continue reading Cherry Blossoms, History, and POTA in Ritsurin Garden→
If you’ve been a QRPer.com reader or subscriber to my YouTube channel for long, you’ll know I’m quite the fan of super-compact, low-profile antennas like the Elecraft AX1 and AX2.
Although AX antennas are certainly a compromise in terms of performance, I find them surprisingly effective for on-the-air programs like SOTA, POTA, and WWFF. While they’re not high-gain, they’re also far from the “dummy load” some make them out to be. In fact, the best DX I’ve ever worked in the field was with my Elecraft AX2 and just 5 watts of power—check out the field report.
It covers 30 through 10 meters and uses a 4-position band selector plug, which I personally find more rugged than the AX1’s band switch. Like its siblings, the AX3 is designed to pair with an ATU, but unlike the AX1/AX2, it doesn’t need to physically mount to the transceiver—so it’s compatible with virtually any rig and tuner combo. The AX3 also supports up to 30 watts.
Despite the added versatility, the AX3 still packs incredibly small: the whip, base, and tripod legs collapse to just 6 inches, yet the whip extends to 45 inches in the field. The side-mounted BNC connector avoids awkward cable bends or adapters.
In the spirit of full disclosure, I’m in the testing group for the Elecraft KH1 and, as such, I was aware the new AX3 was on the horizon, but I had not yet tested it in the field until I ordered one and it was delivered on Tuesday, April 29, 2025.
From Unboxing to Activation
Since Hurricane Helene wiped out our local post office, my buddy Vlado (N3CZ) has kindly allowed me to have parcels delivered to his house. When he told me that “a small box” had arrived from Elecraft, I knew exactly what it was.
I had an errand in town that afternoon, so I swung by Vlado’s, picked up the package, and then stopped at the Blue Ridge Parkway Folk Art Center to perform the AX3’s debut activation.
Of course, I packed my Elecraft KX2, thinking it would only be right to pair the AX3 with an Elecraft radio for its first outing!
In my activation video (below), you’ll see that assembling the AX3 was incredibly simple right out of the box. I ordered the full AX3 package, which includes the antenna, mini banana plug, counterpoise wire, tripod legs, BNC-to-BNC cable assembly, and a small nylon storage bag.
I attached the tripod legs, screwed on the whip antenna, clipped the counterpoise to the ground lug, and connected the BNC cable. In less than a minute, the antenna was fully deployed and ready to go!
Gear
Note: All Amazon, CW Morse, ABR, Chelegance, Spooltenna, eBay, and Radioddity links are affiliate links that support QRPer.com at no cost to you.
On the activator side of things, Parks On The Air is often a solitary pursuit for me. I typically squeeze in activations as my schedule allows—usually at random times during the day in parks that happen to be along my daily route.
But every once in a while, the stars align and I get the chance to activate with a friend. When that happens, it only amplifies the radio fun. Saturday, March 22, 2025, was one of those special days. My dear friend—and frequent field report contributor—Brian (K3ES), along with his amazing wife and photographer, Becky, stopped by Asheville en route to the Outer Banks.
I was so happy everything came together and we were able to meet up for a short, relaxed, and thoroughly enjoyable activation.
Two-Fer Time!
When out-of-state activators come through the area, I always try to offer them the option of a two-fer—activating two parks at once—to maximize their POTA opportunities. I’m not sure Brian had strong feelings about this either way, but it was simply too easy to pair the Blue Ridge Parkway (US-3378) with the Mountains-to-Sea Trail (US-8313). Since we were meeting at the Folk Art Center, all it took was picking the right picnic table near the MST.
In my rush to leave the QTH that morning, I realized halfway down the driveway that I’d forgotten to pack my antenna. I could’ve turned around, but I knew Brian would have a few antenna options stowed in his field kit—and of course, he did!
He chose to deploy a homebrew end-fed random wire with a 29.5’ radiator and 17’ counterpoise. We paired it with my Elecraft K1 transceiver–a radio I knew Brian had never operated.
The only drawback of this particular picnic table is its proximity to the Mountains-to-Sea Trail. When deploying a wire antenna, you have to be careful not to obstruct the path for hikers. We positioned the wire in a near-vertical configuration above the table and kept the throw line tucked away on the opposite side from the trail.
We were also quite conspicuous—another reason I usually avoid this picnic table when activating solo. On a busy day, it’s not unusual to have a dozen people stop by to ask what you’re up to. It’s a great outreach opportunity, but a string of interruptions can make it difficult to complete exchanges—especially while sending CW. Sadly, my internal CPU isn’t optimized for multitasking!
Right to Left: Brian (K3ES) and Thomas (K4SWL)
But when there are two of you taking turns at the key, it works beautifully—one person can handle the questions while the other shows just how cool Morse code still is in the 21st century.
It was a fairly quiet day at the Folk Art Center, but one curious family did stop by to chat with us during Brian’s turn at the key—and I really enjoyed the interaction.
Gear
Note: All Amazon, CW Morse, ABR, Chelegance, eBay, and Radioddity links are affiliate links that support QRPer.com at no cost to you.
Radio
Elecraft K1 (four band version with optional ATU and internal AA battery pack)
Many thanks to Philip (KA4KOE) who shares the following report:
Xiegu G106 Report
by Philip (KA4KOE)
Recent developments and other drivers pushed me to purchase a Xiegu G106.
This radio has dropped significantly in price recently. I figured, “Why not?!” given the paltry sum Radioddity was asking.
I will not delve deeply into the technical aspects of this radio, as others have covered this subject in great detail. In my opinion, the G106 is a viable QRP radio and excels at CW and FT8. I also made contacts using SSB, but given the lack of speech processing, I found the effort, shall we say, challenging. The firmware on my particular radio is Version 1.3.
I checked the spectral purity using the panadapter on my Flex 6300. I realize the Flex is not a lab-quality instrument, but the serious spurs and other trash around the carrier, noted by others, on a 5-watt CW signal appear to be minimal now and compliant with current FCC regulations.
Some get all caught up in demanding the absolute best specifications, performance, looks, etc., or whatever you find important in your personal metrics for a radio. As an engineer, I approach this philosophy from a different mindset. Often, striving for those final few percentage points of improvement is only noticeable under the most stringent of band conditions. The situation is essentially a cost/benefits analysis. So, my personal rationale is “good enough.”
Indeed, the Xiegu G106 is “good enough” for QRP field activations, provided one also deploys a good antenna. Here’s an analogy: will a steel sledgehammer or solid gold one (ignore gold’s softness in this example), of the same mass, both do the same job? The answer is “yes.”
The only issue I have noted, as have others, is that the radio’s AGC recovery isn’t quite correct. Occasionally, the audio will “pop” when switching from transmit to receive. Hopefully, the G106 will improve if Xiegu issues firmware updates beyond Version 1.3. The radio doesn’t exhibit this annoying behavior every time one switches from TX to RX.
I recently activated US-2190, Magnolia Springs State Park, near Augusta, Georgia.
Band conditions degraded over the course of the day due to coronal holes present on the earthward-facing side of the sun. I did manage to make 25 CW and 8 SSB contacts on 40 and 20 meters using a sloping 40–10 meter N9SAB End Fed Half Wave, supported on one end from a 32’ carbon fiber pole. See the QSO map below:
Here’s my activation video:
Bottom line: I like the G106.
Thank you for your kind consideration and attention.
73
Philip Neidlinger, PE
KA4KOE
Gailey (WV2P) and Frank (NM9X), pictured above, also accompanied me on this activation.
Glenn W4YES and I headed to Camden, SC the first week of April for some much needed rest and relaxation. Usually when I travel, I schedule a POTA activation or two. However, this trip I decided to try something new – getting on the air QRP at our Airbnb.
Camden is the oldest inland community in South Carolina. According to the town’s website, the earliest permanent settlers arrived in 1750. They experienced a crushing defeat during the Revolutionary War when the Patriots were defeated in the Battle of Camden. After the Civil War, the town “evolved into a tourist mecca for Northeners and Midwesterners seeking a warmer winter climate.” Those tourists brought money and an equine culture developed around racing and polo.
Our first day in Camden, we visited the Revolutionary War Museum. Though small in size, the museum’s exhibits are of excellent quality. They do a great job explaining who lived in the area, the quandary they faced as to whether to be a Loyalist or Patriot (it wasn’t as easy a choice as it might appear), and battles fought there.
Our second day, we explored the National Steeplechase Museum. This museum explores the history of steeplechasing and the personalities involved – owners, trainers, jockeys as well as those who care for the horses. The museum pays homage to Marion duPont Scott who developed the Springdale Race Course where the museum is located. This race course hosts two prominent annual competitions – the Carolina Cup and the Colonial Cup.
National Steeplechase Museum
an old scale used to weigh jockeystrophy room
We also spent some time driving through and walking in the historic neighborhoods of the city. The weather was gorgeous! Everywhere we looked, there were flowers – azaleas, wisteria, viburnum, and dogwoods (including the pink variety we do not see in Savannah).
a dogwood in full splendorazaleas at the corner of a homeviburnumpink dogwood
After exploring the area, it was time to explore the airwaves QRP at our Airbnb. To do this, I brought Craig, my KX2, and a home-brew linked dipole antenna. This is an antenna I built three years ago, when I first got into ham radio. At that time, I had no home station but wanted to get on the air portable for POTA. Despite knowing almost nothing about antennas, I built a usable dipole that became my main POTA antenna for quite a while.
the homebrew linked dipole (photo from GA State Parks on the Air event)
Why did I bring this antenna to Camden? I have the opportunity this month to try the CFT1, a QRP transceiver, by Jonathan KM4CFT. Because the rig does not have an internal antenna tuner, I am reacquainting myself with the subject of resonance and why it matters in antennas.
I set up a home-brew linked dipole Wednesday evening under some trees in a space between the Airbnb and a small lake on the property. The antenna was roughly 20 feet in the air.
the lake from the Airbnb2nd location for antenna by lake
My RigExpert Stick analyzer gave me 2.1 at 7.040 –
Thinking I could do better, I moved the antenna (a real pain to do with a dipole) to a different tree with a limb 30 feet high. (Frankly, Glenn and I were amazed I could snag that limb.) This setup generated better a SWR reading – 1.61 at 7.040 MHz.
Now the true test – how well would I be heard?
the bench at which I operated Wednesday eveningRBN picking me up Wednesday evening
CW nets are a great place to get on-the-air experience with morse code. It was my code buddy Caryn KD2GUT who first introduced me to the OMIK net. I found those who participate in this CW net to be welcoming and accepting of CW operators of all levels of proficiency. Over the past several years, the ops in this net have watched my skills grow and become friends.
Dennis NT4U and Steve W0SJS split net control station (NCS) duties. This evening, it was Dennis’ turn as NCS. As he is located in northern Georgia, I figured he would hear my QRP signal. He did and checked me into the net with a RST of 589. The icing on the cake was that I heard a station he was unable to hear – Charles AI4OT in Virginia – due to the S9 noise at Dennis’ location this evening. I notified Dennis of Charles’ check in so he was added to the check-in list for that evening. Way to go homebrew linked dipole and Craig!
The next day, Glenn did some exploring and found a better location on the property – a hill behind the Airbnb and some sheds. Several large oaks in this relatively open area offered prime limbs to snag with an arbor line. I installed the antenna on a limb roughly 25 feet up in the air.
open area at back of Airbnb propertylooking up into canopy at limb I used Thursday evening
Before attempting to check into another net, I spotted myself on QSO Finder, a new website and spotting tool by Mike N4FFF and Becky N4BKY of Ham Radio Duo. I had three exchanges, one each with Joel KE8WIC, Tom NG4S, and James KJ3D.
Spotting myself on CW QSO Finder
On Thursday evenings I check into the Sideswiper Net, a wonderful group of guys who meet on 40 or 30 meters (depending on propagation). Most of those who check in use a sideswiper (also known as a cootie) key but, like the OMIK CW net, they are welcoming of anyone who wants to participate no matter the level of proficiency or key. I’ve asked lots of questions of the members and appreciate their patience schooling me about CW nets.
The NCS this evening was Darrell AA7FV who is located in Arizona. The noise on 40 meters was rough but Darrel did copy me with a RST of 349. Two other stations – Bill WA4FAT in Alabama and Steve W1SFR – also copied me at 559 on this band.
When the net moved to 30 meters, my signal was worse. However, I expected that, as by this time it was dark and I didn’t want to mess with lowering the antenna to disconnect the link between the 40 and 30 meter wires. Darrel in Arizona could barely hear me (he gave me a RST of 129) but Bill could still copy me and acted as relay between our signals. I was thrilled that I had now checked into both nets QRP this week!
the RBN picked me up again
Even better, after the Sideswiper net, my code buddy Caryn KD2GUT and I were able to have our weekly code buddy QSO. We managed a 20 minute QSO on 40 meters before being swallowed up by noise and QRN on her end. Caryn is located on Long Island, NY. The previous night in the OMIK net, my signal was a 229 at her QTH. But tonight, we were both 599 and rocking it on the airwaves.
operating in the dark
During the Sideswiper net and my code buddy QSO, I sat head copying in the dark under the moon and thought, “It doesn’t get any better than this, right?”
Before we left the Airbnb Friday morning, Glenn spied several pitchforks sitting by the sheds. We picked one up and decided to have some fun, with our version of the famous piece “American Gothic” by Grant Wood. I had a difficult time keeping a straight face (watch the video linked down below) but eventually we got the shot.
“American Gothic” by Grant Wood source: Wikipediaus goofing off creating a version of the piece before checking out
QRP has its limits; however, I was sufficiently impressed by my experience on this trip that I will travel with a rig from now on. I’d like a better antenna and have ordered an EFHW as that is probably my best bet for a resonant antenna. This hobby NEVER becomes boring because there is always something to learn.
I look forward to trying the CFT1 and my new EFHW antenna when it arrives. How will that turn out? Stay tuned…
Equipment Used
[Note: All Amazon, CW Morse, ABR, Chelegance, eBay, and Radioddity links are affiliate links that support QRPer.com at no cost to you.]
Connecting an international community through low-power field radio adventures.
Please support QRPer by adding us to your whitelist in your ad blocker. Ads are what helps us stay online. All of our ads are ham radio related--no junk, we promise! Thank you!
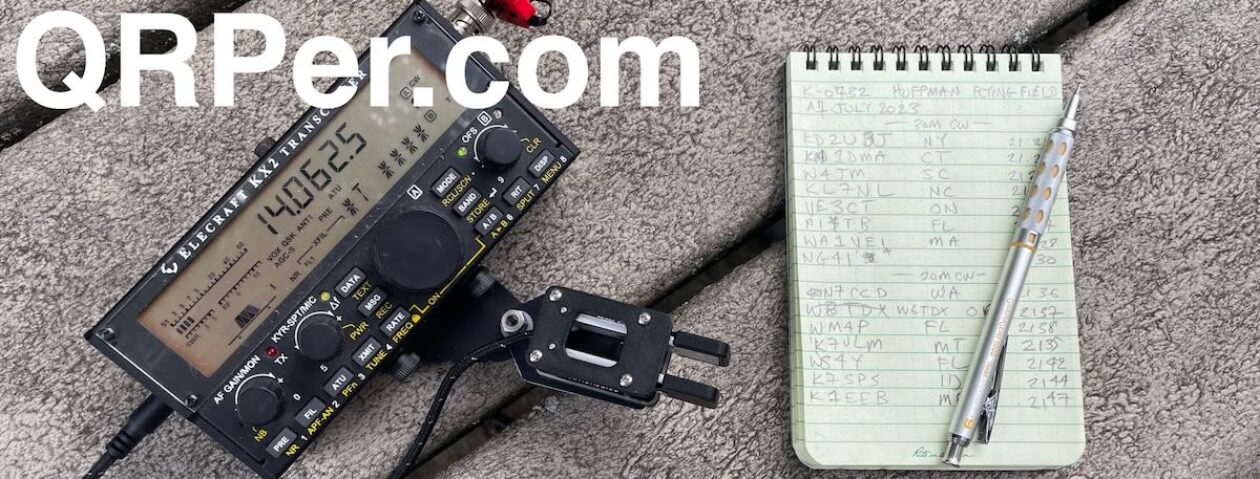

 We arrived at the park around 11:45 AM EDT.
 I found a camping spot and parked there.
 Poor Eric, though. When I started filming my activation video, I realized just how close we were to each other—and how much interference that could cause. I walked over to him (camera in hand) and helped him move a bit farther away.
 This actually worked out quite well—the distance between us was just enough that we didn’t interfere with each other at all.
 Note: All Amazon, CW Morse, ABR, Chelegance, eBay, and Radioddity links are affiliate links that support QRPer.com at no cost to you.
 I hopped on 20 meters and started calling CQ POTA. Fortunately, as with our earlier activation, the band had a little life in it. Continue reading En Route To Dayton: WD8RIF and I Activate Great Seal State Park near Chillicothe, Ohio


