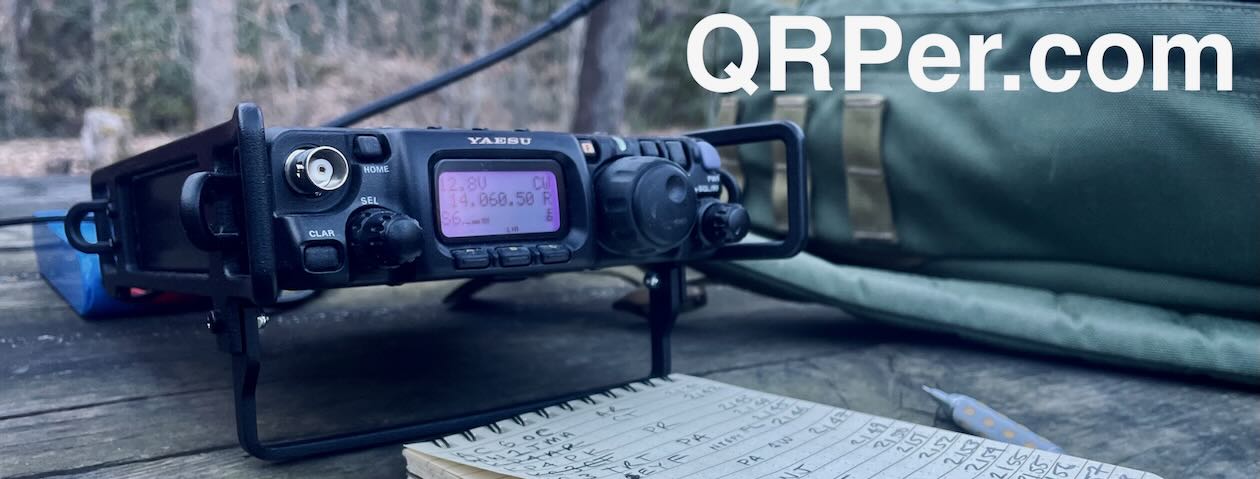
I had a topic on the mind as I made my way back to the trailhead after a SOTA activation recently.
I get a lot of questions from readers and subscribers about resonant vs. non-resonant antennas and whether or not an ATU is a good or bad thing.
If you know me, you’ll know that I tend to lean towards qualitative research; meaning, I like to base my opinions on first-hand observations rather than laboratory or textbook explanations. Part of the reason is I’m not an engineer, so specifications and performance stats don’t influence me–I don’t understand them half the time–rather, I base my opinions on trying or field testing.
The proof is in the pudding, right?
So with the topic of antennas and ATUs on the brain, I decided to turn on the action camera and do an unscripted video on the trail as I hiked back to my car.
This video is essentially stream of consciousness: I won’t blame you if you skip it.
With that said, if you manage to stay awake for the whole video (congratulations in advance) I’m curious what your thoughts are so please consider leaving a kind comment!
Many thanks to Don (W7SSB) who notes that Xiegu has now added a portable power station to their product line:
The new Xiegu BK300 has a form factor much like power stations in the popular Jackery product line.
The BK300 features:
a 296Wh Lithium [I assume Li-Ion] battery
one 12 volt, 10 amp, DC output
a pure sine wave inverter with 110V output rated at 300W continuous and 350W surge/peak
three USB-A and one USB-C charging ports
recharging via USB-C, AC, DC input, and solar panel
a large LED light with diffuser
I’ve never purchased a power station to power my QRP rigs as I’ve always preferred simply using small LiFePo4 battery packs with my own DC accessories. I feel like this is a more cost-effective and simple approach for radio operation (plus, LiFePo4 batteries have insane longevity and shelf-life).
With that said, Li-Ion power stations like the BK300 are absolutely brilliant for camping and for all of those times you might need to power consumer electronics off-grid (including when the grid might be down at the QTH).
In the past, I have tested similar power stations, but their inverters were modified sine wave and injected unacceptable amounts of noise in my radio gear. Hypothetically, a pure sine wave inverter should not generate broadband RFI. Of course, this would need to be tested in real-world conditions.
If the inverter is indeed quiet, this might make for a great power station for camping–I had been considering a similar Jackery, but the price point on this one is actually lower for similar features and capacity. Radioddity has listed a discounted pre-sale price of $200.
Since they’re a sponsor of the SWLing Post, I’m mighty tempted to ask Radioddity for a loaner, else buy one outright.
Curious if any readers would like me to check it out? If there’s interest, I’ll get the ball rolling. Please comment!
A revised prediction from the NASA High Altitude Observatory based at the University Of Colorado.
NASA Heliophysicists have released a revised prediction for Solar Cycle 25.
The report generated by Ricky Egeland a Solar Physicist working in the NASA Space Radiation Analysis Group now calls for the peak of Solar Cycle 25 to top out at a value of 195 ± 17 based upon the new scale for calculating Smoothed Sun Spot Number. For reference Solar Cycle 21 peaked at an SSN 233 (new scale) while Solarcycle 23 peaked at an SSN of 180 (new scale). If this predictions holds up Ham Radio will see Excellent Worldwide F Layer Conditions on 10 Meters for several years around Solar Max. 6 Meters conditions should be good in the Equinox Periods before and after Solar Max with consistent openings on Medium Haul Polar Routes. 6 Meter routes traversing the equator should experience consistent openings ± 9 months from Solar Max.
Ricky Egeland is a particpating member in the group headed up by Scott McIntosh and Bob Leamon that published a paper 9 months ago outlining the existance magnetic bands within the Sun that govern the Sunspot and Hale Cycles. At the time of its publishing the paper went on to predict the peak of Solar Cycle 25 could be as high Solarcycle 21. Today’s released is a revised prediction based upon data observed since the original paper was published. To be sure we are still in early days.
The Solar Rotation Cycle as marked by Sunspot Activity was established on April 19, 2021 so we are only 90 Days into actually observing Cycle 25 Activity. It is now agreed the dramactic run-up in Sunspot Activity we experienced late Last Fall while tied to Cycle 25 was an outlier. When asked directly about whether they can declare if the Terminator Event they wrote about in the Fall 2020 Paper has occurred Scott McIntosh stated “We can’t be sure just yet but we are very very close”. It also should be noted that while it has been over a year since the sun produced a Cycle 24 Region with a Sunspot worthy of a NASA Classification the Sun has been steadily producing Spotless SC 24 Active Regions the last of which formed right on the Solar Equator at N00-W54 on July 24,2021 as recorded by Jan Alvestad’s Solar Terrestial Activity Report Website. These Active Regions being part of a Solarcycle in its final stages of existence produce no spots and only last for a few hours before they dissipate away. The previous SC24 Active Region formed on June 28, 2021. Once the SC24 active regions cease forming Solar Cycle 25 will take off in earnest.
After a successful SOTA and POTA activation at Hanging Rock State Park on Tuesday, July 13, 2021, I drove to nearby Pilot Mountain State Park. It was quite warm, but a beautiful day with no afternoon thunderstorms in sight.
I couldn’t pass up the opportunity to play a little more radio. As the French say, “Il faut en profiter!”
Although I’ve seen Pilot Mountain numerous times in my travels, I had never actually visited the park so this was a new-to-me park activation.
Pilot mountain is a landmark in the Yadkin river valley and has a fascinating back story.
Per Pilot Mountain State Park’s website:
“Pilot Mountain is a remnant of the ancient Sauratown Mountains. A quartzite monadnock, this rugged mountain rock has survived for millions of years while the elements have eroded surrounding peaks to a rolling plain.
Pilot Mountain is capped by two prominent pinnacles. Big Pinnacle, with walls of bare rock and a rounded top covered by vegetation, rises 1,400 feet above the valley floor, the knob jutting skyward more than 200 feet from its base. Big Pinnacle is connected to Little Pinnacle by a narrow saddle.
The mountain was mapped in 1751 by Joshua Fry and Peter Jefferson, father of President Thomas Jefferson. Pilot Mountain became North Carolina’s 14th state park in 1968. The Pilot Mountain Preservation and Park Committee proposed the establishment of Pilot Mountain as a state park in order to protect it and the surrounding area from commercial development. The group secured options on the land and raised matching funds that made it possible to purchase with
federal grants.”
Pilot Mountain is a SOTA summit, but it has never been activated because it would require an experienced rock climber (assuming access is even allowed). The base of Big Pinnacle is 61 meters above the summit trail system, so well outside the 25 meter activation zone.
Pilot Mountain State Park (K-2750)
I only had my sights set on making a park activation out of Pilot Mountain and, frankly, I didn’t even have time to explore the trail system that Tuesday.
Finding a spot to set up was quite easy. I entered the park and took a right at the roundabout which lead to the parking area at the top portion of the mountain.
From there, I found a small picnic area perhaps 50 meters from the parking lot. I carried my gear there and set up shop!
Since I was doing this activation mid-afternoon, I had the picnic area to myself, save one unfortunate woman who was trying to (conspicuously, if I’m being honest) fit in a bit of meditation time. She picked out a picnic table near one of the main trails basically in the center of the picnic site , so I assumed she was pretty good at blocking out noises you’d normally hear at a busy park.
But the question remained: could she block out the sweet sound of CW emanating from my FT-817?
There was only one way to find out!
In truth, I try to lay low at parks and not disturb other people. In this case, I picked a table on the perimeter of the picnic area but it was still only a couple tables away from her. Since I was making one of my real-time, real-life field activation videos, I would be using the speaker–instead of headphones–with the FT-817.
In other words, there was no escaping a little CW music!
I shared my picnic table with this little Praying MantisI think he’s upset that my throw line is all over *his* ground.
This was also the first time I’d used my new orange single-level CW Morse paddle very kindly gifted to me by contributor/subscriber, Nathan (N8HWV).
Although it might look like a dual lever paddle, it’s actually a single lever!
Thank you so much, Nathan!
On The Air
I started on 20 meters CW and, fortunately, it was hopping!
I worked 18 stations in 19 minutes. Whew!
Many thanks to N2EIM and NA9M for the P2P (Park To Park) contacts!
I then moved to 40 meters where I worked K8DRT for a second time (first was on 20M) and my “it wasn’t a real activation unless I worked him” buddy, K8RAT.
40 meters wasn’t in as good of shape as 20 meters was.
Having no way to spot myself to the POTA site, I didn’t attempt any SSB contacts–I would have at least for a while, otherwise.
Video
Here’s a real-time, real-life, no-edit, no-ad video of the entire activation:
The Yaesu FT-817/818 (left) and lab599 Discovery TX-500 (right)
A reader asked this morning:
“[W]hat’s the toughest HF QRP transceiver on the market? I want a rig with good field performance and features, but I what I really want is something rugged…something that might survive falling off a rock or log while I’m doing a little SOTA.”
It was a no-brainer to me: either the lab599 Discovery TX-500 or Yaesu FT-818/817.
I feel lucky in that I’ve acquired a number of excellent QRP transceivers over the years. Most of my field-worthy radios are acceptably rugged, but the TX-500 and the FT-818/817 really stand out.
The Discovery TX-500
The Discovery TX-500 was designed from the ground up to be a rugged, weather-resistant portable radio that could operate in challenging environments (think the extremes of Russia where it’s manufactured).
If I’m heading outdoors and it could rain or snow? I’ll be grabbing the TX-500 for sure. It’s a brilliant portable radio
Yaesu FT-818 or FT-817
My Yaesu FT-817ND paired with the Elecraft T1 ATU
While the Yaesu FT-818/817 has no serious weather-proofing, it does have an incredible study chassis like the TX-500 and was obviously designed for outdoor use. Both of my FT-817NDs have side rails and with those in place, I really feel like it would easily survive falling off a rock or log. In addition, I’ve heard stories of the FT-817 surviving some hard falls–that goes a long way for me. No doubt, it’s a study little rig!
The X5105: A close runner up?
I’ll admit that the Xiegu X5105 feels like a very study radio as well. The chassis is made of an aluminum alloy and feels rigid. Mine has a polycarbonate screen protector. I also like the fact that its buttons and the main encoder are all low-profile. It’s still pretty new to me, but it’s obvious Xiegu designed the X5105 to be rugged. If it fell off a rock during a SOTA activation, I wouldn’t worry too much.
Admittedly, I feel like the X5105 wouldn’t be terribly weather-resistant–the buttons are somewhat recessed and the button openings are quite large, likely allowing water intrusion. Of course, I haven’t cracked mine open yet (it’s still under warranty and is sealed), so I’m assuming there’s no effort to stop water intrusion internally.
Do you need a “rugged” transceiver?
That’s up to you.
One of my favorite portable transceivers is the Elecraft KX2. I’ve taken it everywhere. I’ve dropped it, it’s rolled off my clipboard, I’ve got caught in the rain with it, and I’ve even slid and fallen on my backpack when it was stored inside. I wouldn’t classify the KX2 as a “rugged” transceiver, yet it’s survived all of this without even sporting side rails (like its bigger brother, the KX3).
You can add after-market side rails to the Elecraft KX3–and to most field radios–which will protect the encoder and front panel buttons/knobs.
At the end of the day, if you like to operate in extreme conditions, put ruggedness at the top of your priority list. Otherwise, simply protect your transceiver in transport with a good waterproof case or padded/waterproof pack. If you’re worried about rain or water, bring a rain jacket or portable fly/canopy to protect you and your rig during operation.
Did I miss something?
What radios do you consider to be some of the most rugged on the market? I’m certain I’m overlooking some. First hand experience would be most welcome! Please comment!
By Evgeny Slodkevich, UA3AHM/OH5HM, and Dieter Kuckelkorn, DL1DBY
When going to an outdoor camping trip, we will find that in many parts of the world there is no cell phone service avail able in the back country. To make matters worse, in these areas there is almost never a VHF/UHF ham radio repeater in range when we need wide-area coverage. Apart from strictly local communications using VHF/UHF simplex radio, how do we send messages to friends and family over great distances? How do we call for help? A similar problem can even arise in an urban environment if a major disaster strikes like the break-down of the power grid.
In activities like back country trips in areas without cell phone coverage or in a widespread emergency with the loss of our normal means of communication we can use satellite phones, but this technology is very expensive, requires subscriptions and there is no guarantee that the complex infrastructure of satellite communications will work under all circumstances. The obvious solution for Ham Radio operators will be to switch to shortwave communication using battery operated radios and often NVIS modes of operation. NVIS stands for Near Vertikal Incidence Skywave, which means transmitting with special antennas straight up to communicate with other stations 30 km to 300 km (20 to 200 miles) away with low power – which would be the most useful communications distance if help is needed. We could use SSB voice communications, but this requires that the person we want to reach is sitting constantly at his or her radio to be able to receive the message. This can be a problem: In a real emergency we probably won’t have time for this. We could instead use capable digital modes with automatic message handling capabilities like JS8Call, but these require notebook computers or other complicated setups in the field which consume a lot of energy and can be difficult to recharge off-
grid on a reliable basis.
Evgeny UA3AHM/OH5HM and Sergej UA9OV have developed another mode of digital shortwave communications, which aims to be easy to use, capable and – most importantly – friendly to the operator’s resources. Apart from a low power battery operated transceiver and a small digital interface, only an Android smartphone is needed, which can be recharged with cheap and readily available consumer-grade solar chargers. Evgeny and Sergej have created an app called “HFpager” which allows to use the smartphone’s sound chip to encode and decode audio signals in the SSB audio passband of the transceiver – similar to PC based modes like FT8 and JS8Call. It uses rates of transmission of 1.46, 5.86, 23.44 and 46.88 Baud. Modulation is 18-tone Incremental Frequency Shift Keying (IFSK) with forward error correcting Reed-Solomon code RS(15,7) and a superblock by 4 RS blocks with interleaving.
I’m not a summer-heat-loving guy. Quite the opposite, in fact. Give me cold weather and I can hike and camp forever.
On Tuesday, July 13, 2021, it wasn’t cold outside, of course, but I still wanted to fit in a park activation and hike. Despite the forecast highs of 90F/32C. I had almost the entire day to play radio, too–a rarity.
When I have an entire day to devote to radio, I can either hit the road and try to hit multiple parks–perhaps as many as 5 or 6–or I can choose to venture further afield and hit a new-to-me park.
I tend to choose the latter and that Tuesday was no exception.
North and north by NW of Winston Salem, NC, are two parks I’ve always wanted to visit: Hanging Rock State Park and Pilot Mountain State Park.
I devised a plan to first visit Hanging Rock, then Pilot Mountain. Both parks are close together geographically, but a good 30 minutes drive apart.
A quick check of the SOTA database and I discovered that there are actually two summits on Hanging Rock State Park’s grounds. One is off the beaten path a bit and would require some light map work, and the other–Moore’s Knob–is on one of the park’s main trails. Since I was putting this whole plan together morning of, I opted for the “easy” summit as I didn’t have time to double-check topo maps, parking areas, etc.
Hanging Rock State Park (K-2735)
Travel time to Hanging Rock was about 1 hour 45 minutes. Once I arrived on site, I discovered that, like many state parks, the main visitor’s center is being renovated.
I easily found the parking area for the Moore’s Knob loop. It being a Tuesday, the parking lot only had a few cars.
Pro tip: with the visitor’s center out of commission, stop by the swimming area pavilion for some proper restrooms/washrooms!
I planned to take the full trail loop in a counter-clockwise direction.
I’m glad I did, too, as the bulk of the ascent was a long series of steps. I’m not a fan of steps, but I much prefer using them heading up a mountain rather than down.
Near the summit, there’s a very short spur trail to Balanced Rock which is worth a visit not only for the rock, but also the views.
It being a North Carolina state park, there are some obligatory warning signs about how falling off of cliffs can lead to injury or death. These warning signs aren’t as prominent as those at Crowders Mountain State Park, though!
Moores Knob (W4C/EP-001)
You can see my MPAS Lite vertical poking out of my pack. I brought it along in case I had no good tree options. In this case, I didn’t use it.
There’s no mistaking the summit as there’s a large observation tower on top that affords some spectacular views of the Blue Ridge Escarpment, the foothills, and Pilot Mountain (my next stop). There were a number of hikers on the summit of Moore’s Knob and it was actually pretty gusty up there, too. I searched and found a nice little spot to set up that was sheltered from the wind, shaded, and even had trees tall enough to hang my Packtenna 9:1 UNUN random wire antenna!
Note: I brought the CHA MPAS Lite in case there were no good tree options on the summit.
Set up was quick and easy on the radio side of things, but as with most SOTA activations, positioning my tripod to make a video was the tricky part. Since I’m sitting on the ground, it can be difficult to find the right angle so that the radio, key, and notepad are all in the frame. (See my video below).
I started calling CQ at 16:00 UTC on 20 meters. I had a reasonable cell phone signal on the summit, so I was able to spot myself. Problem was, though, my hiking app seemed to be draining my iPhone’s battery very rapidly (that and my aging iPhone 7 probably needs a new battery at this point). After spotting myself, I shut down the phone to save power. I forgot to contact my buddy Mike (K8RAT) with a frequency, but he eventually saw me on the SOTA spots.
In a period of 29 minutes, I worked 20 stations on 20 meters.
Next, I moved up to 17 meters where I worked eight more stations in seven minutes.
I love effortless activations like this and part of me wanted to continue operating–even switching to SSB–but looking at the time, I knew I needed to hit the trail, make my way back to the car, and drive to Pilot Mountain.
I called QRT around 16:42 UTC and packed up my gear.
QSO Map
Not bad for 5 watts and a 31′ wire!
One highlight of this activation was meeting Jim (NA4J) who heard my CW from the summit and popped by to introduce himself. Although I trimmed out our conversation in the video (I’m not entirely sure he knew I was recording the activation), you’ll hear him in the first half of the activation.
Video
Here’s my real-time, real-life video of the entire activation:
The hike back to the car was very pleasant. It was a bit longer than the path I took to the summit, but the descent had no steps which made it a breeze.
I had a radio topic on my mind during that hike and actually pulled out the OSMO Action camera and made a bit of a “hike and talk” video. It’s on the topic of ATUs and resonant vs non-resonant antennas. I haven’t yet decided if I’ll post it–the shaky camera might make some viewers sea sick! 🙂 We’ll see–maybe I’ll brave up and post it anyway…
Next, I drove to Pilot Mountain State Park for a quick afternoon activation. Although Pilot Mountain is a SOTA summit, too, it’s yet to be activated because the actual summit would require proper rock climbing, I believe.
Thank you
As always, thank you for reading this field report! And thank you to everyone who has supported me through Patreon and the Coffee Fund. I truly appreciate it.
I hope you find time this week to take your radios outdoors to play, or to hunt some parks and summits from your shack, backyard or vacation spot!
And for those of you working on your CW skills, don’t give up and don’t stress about it. Take your time and allow your brain to absorb code by simply listening. When you feel you’re able to copy even some of the contacts in the videos of my activations, you’re ready to start hunting CW activators!
Ever have one of those days where nothing works out the way you had planned–?
Yeah, me too.
In fact–and this is purely a coincidence–today was one of those days for me!
Here’s how it played out…
A New-To-Me Park
This morning, I had an optometrist appointment in Hendersonville, NC and needed to fit in the appointment on my way to visit my parents for a couple of days. I don’t often venture out to Hendersonville so I looked up a few parks in the area and thought I might fit in a quick activation around lunch.
Keep in mind it’s been nearly two weeks since my last field activation, so this QRPer is having some serious withdrawal.
I looked at the map and realized that Green River State Game Land was a very short detour. I had meant to activate Green River last year and actually located an ideal spot for an activation via the NC WRC maps but never activated it. Since it would be awfully fun to fit in a new-to-me park en route to visit the folks, I mapped out my travels, scheduled the activation via the POTA website and notified my buddies Mike (K8RAT) and Eric (WD8RIF) so they could look for me on the air.
The optometrist appointment went well (thanks for asking) so I made my way to Green River Game Land. I had no problem finding the site–it was basically an open parking area off a rural road.
It was hot, though. My car’s thermometer measured 93F, the humidity wise high, and there were no trees to provide shade. I sat up the Chameleon MPAS Lite, a folding chair, and used the open hatchback of my Subaru as shade from the noon sun. It was *just* enough shade for my chair. I placed the Xiegu X5105 on my clipboard, connected the key, and turned on the radio.
QRM!
The first thing I heard on the radio is the last thing any activator wants to hear. Noise…lots of it.
The radio was tuned to 17 meters and the noise was approaching S9. The noise was raspy and sounded like arching from power lines. I looked at the road behind me where there were several power lines meeting at three different poles.
I checked 20 meters, 30 meters, 40 meters, and 60 meters. The noise was consistently loud across those bands.
I’m certain the noise was coming from a local power pole–it could have been a staple, nail, or something else that was arching.
It was so incredibly hot on site, I had no desire to attempt hiking into the game lands far enough to escape the noise. In my experience, power line/pole noise can propagate vast distances. Plus, again, it was just too hot.
Normally, I’d try to find another game land access point, but having already done a bit of research, I knew going to an alternate spot would be too much of a detour. This was the only access point along my route.
I decided, instead, to pack up my gear, continue my travels, and plot an alternate activation.
South Mountains Game Land
Photo from earlier this year.
I called my buddy Mike, and told him I thought I’d try South Mountains Game Land. In the back of my mind, I had been wanting to visit one portion of South Mountains I activated in the winter this year. I thought, perhaps, it was actually near a SOTA summit on the game lands.
I pulled over at a gas station a good 45 minutes from South Mountains and tried to log into the POTA website to change my scheduled activation (so it wouldn’t spot me at the wrong park via the Reverse Beacon Network). Problem was, before logging me in, Google wanted to initiate a two-factor authentication since I hadn’t logged into the POTA site on my phone in a while. Google wouldn’t send me a text message to confirm, it wanted me to dig a confirmation code out of my Pixel 3 phone that I only use as a video camera and the Pixel 3 was inaccessible.
I had a hunch that I wouldn’t have mobile phone access on site, so I called Mike back and he agreed to correct my spot on the POTA network. (Thanks, Mike!)
Ten minutes from the game lands entrance, I noticed dark clouds had formed to my north. I pulled over and checked my weather app while I had Internet access. Sure enough, a large line of thunderstorms had formed and were heading my way, very slowly. I decided then and there I was not going to do an activation–my phone was already giving me severe thunderstorm warnings–but I thought I might at least explore the site and see if the road would actually lead to a SOTA summit.
Three minutes from the site entrance, the heavens opened. It was a proper gulley washer of a deluge, too–the type that forces you to drive at a snail’s pace and the type that causes flash-flooding. I turned down the game land road and then the lightening started popping too.
I threw in the towel.
Although a part of me would have enjoyed taking the dirt road several miles into the game lands, these rains were the type that wash out dirt roads and I had no intention of dealing with that too. Plus, it would be my luck…right? Right.
Still…
I’m really not that bothered because I actually enjoyed the drive today (save when I hit the storms) and I also found a place in Hendersonville that makes excellent Gyros!
That and I fully intend to do an activation or two tomorrow, weather pending.
We’ll have to see how it plays out. It’s all a part of the field radio fun!
If you’ve been following QRPer or the SWLing Post for long, you’ve no doubt noticed that I am a certified pack geek.
I tend to buy high-quality packs from companies that both design and manufacture their products in the USA (i.e. Red Oxx, Tom Bihn, Spec Ops Brand, GoRuck, etc.).
In other words? The packs I evaluate are pricey, rugged, and backed by a lifetime warranty. Their quality is uncompromising and at the top of the market.
In addition, I’ve even helped some of these pack manufacturers during product design and development stages, much like I do for radio manufacturers.
Radioddity contacted me a few weeks ago and asked if I’d be interested in testing a backpack they’ve started selling that’s designed with field radio operators in mind. I checked out the info they sent me and the backpack design did, indeed, look bespoke–or custom–for field radio operators. In other words, it wasn’t a laptop bag merely labeled as a radio bag.
But the inner pack geek/snob in me worried that a $45 mass-produced backpack would only lead to disappointment. This is an area where I have tremendously high standards and feel like I get my money’s worth when I happily fork out $200-450 US for a pack.
Still, it’s difficult to find field backpacks that are designed to accommodate radio gear. So I told Radioddity to send me one–which they did for free (meaning, at absolutely no cost to me).
First impressions
The Raddy backpack arrived in two days (basically, everything from Radioddity seems to arrive within two days with tracking and updates).
My first impression was that the Raddy pack was very lightweight, but then again, I tend to buy backpacks made with Ballistic Nylon or 1000 weight Cordura–i.e. materials that are on the heavier side.
Radioddity mentions that this pack is “dust and rainproof” but then go on to say that it’s ” [m]ade of durable water-resistant polyester fabric with metal zippers[…]. [N]ote it’s not totally waterproof.”
Thus I believe I would classify this pack as water resistant only. I have had the Raddy pack out in light rain and the water seemed to bead up on it. The zipper openings–while covered–have no proper weather seals, but I see where it would be more than adequate for most rains or showers you would encounter on a day hike. I’m not sure I’d feel comfortable leaving it out in the rain for an extended period of time, though. Part of its ability to keep rain out relies on wearing the pack in an upright position.
The outer polyester fabric feels durable and is pleasant to the touch–it’s not abrasive like some heavier grade materials.
Opening up
First thing I wanted to do was open the main compartment to look inside. But first, I had to find the main zippered compartment.
The main zipper is recessed and protected by a rain flap.
Seriously! Turns out, unlike most backpacks, the main compartment opens from the back or shoulder harness side of the pack rather than the front. They obviously used this design to give the Raddy backpack a better operating surface for the rig inside.
Since the zipper wraps around the outside of the top of the straps, but on the inside of the straps where they attach to the bottom, I feel like the straps are always in the way.
Unzipping the main panel is a little awkward when compared with other packs mainly because the shoulder straps feel like they’re a bit in the way. Still, once I got used to this unconventional design, it became second nature to open.
The zippers are metal, but not YYK–zipper pulls are included.
Main compartment
The main compartment opens to 180 degrees if you wish, but sits comfortably at a right angle so that your radio (which will likely live in the pocket mounted on the interior side of the shoulder harness panel) will rest on a padded surface.
There are Velcro flaps on the hinge points of the interior of the pack that you can detach to have the pack open fully.
Rig Pocket
There is one large padded interior pocket that is the obvious choice for most portable transceivers–especially those with a front faceplate like the IC-703 Plus, Yaesu FT-891, Xiegu G90, etc.
This main pocket has openings at the back corners so that the rig’s power cord, coax line, and accessory cords can all be managed within the pack if you’d actually like to operate from the pack. Admittedly, I’m not certain I’d leave cables and cords attached to the back of my transceiver during transport, though, as it could cause some stress at the connection points on the back of the radio; stand-offs and/or right angle connectors might help with this, however. The back of the pocket is padded and so is he floor of the backpack, so your rig should be otherwise very protected when the backpack is placed on the ground.
The main internal pocket also has two elastic straps designed to hold the radio in the pocket during transport. I think this is a great idea, however, I’ve found in practice they quite easily slip off all but the largest field radios. Speaking of which, the largest field radio I own is the Mission RGO One which is ever-so-slightly too large for this pocket. I assume similarily-sized radios like the Ten-Tec Eagle and Elecraft K2 would not fit.
I wish the pack had a frame sheet and the main pocket had at least one compression strap attached to it to hold a radio in more firmly. The pocket is large enough that even my IC-703 Plus slides around inside.
Of course, this main pocket could also hold a laptop or tablet.
The main interior pocket is not well suited for “blocky” transceivers like the Elecraft KX3, Icom IC-705, or Xeigu X5105 for example. Although the pocket can hold most of these, they would simply fall to the bottom and could not benefit from the full dimension.
Battery pocket
The second large padded pocket inside the Raddy backpack is ideal for holding a battery, ATU, or even the “blocky” transceivers mentioned above. I’m calling it a “battery pocket” but in truth it’s obviously designed to also hold transceivers.
This pocket is shorter and has one elastic strap (I’d prefer a compression strap) with a Velcro attachment to hold the contents inside. It’s attached to the front panel of the backpack and when the backpack is zipped closed, this pocket and the rig pocket fit side-by-side.
When I’m carrying the Icom IC-703 Plus in the Rig compartment, I place my 15 Ah LiFePo4 battery in this compartment.
My Elecraft KX3
If I’m carrying the Elecraft KX3, I place it in this battery compartment and my tablet and clipboard in the main pocket.
My Icom IC-705
Like the main rig compartment, there are openings at the bottom corners to allow cable management and routing. I’m not so sure how convenient or practical it would be, however, to operate a radio from this particular internal pocket.
The LDG Z-100 Plus ATU tucked in the battery pocket
Mesh pockets
There are also two internal mesh pockets: one attached to the front panel and the other attached to the large rig compartment pocket.
There pockets would be ideally-suited to hold small cords, a key/paddle, and possibly a small hand mike.
While the top of each pocket has an elastic band, I would not trust these open pockets to hold small items like adapters. They could easily fall out if the backpack were turned upside down.
In addition, if you have heavier items inside, the pocket may sag a bit and look more like an accessories “hammock.”
Exterior front pocket
There’s also one large, flat exterior pocket on the front panel of the Raddy backpack. This pocket might be easy to overlook if the zipper is tucked inside.
The zipper is centered and oriented vertically. When opened, there’s a surprising amount of room inside, and all sides of the pocket are padded.
The opening isn’t large enough to fit my main clipboard (which is fine, because I would store it inside the main compartment), but it is large enough to allow one to store a tablet, notepads, pens, cables, etc. inside.
While the zipper opening has nearly overlapping seams which should help shed water, the vertical orientation of the zipper would potentially allow for heavy rains to penetrate the zipper opening, especially if that front pocket was bulging with gear. This is why conventional packs tend to have a horizontally-oriented front pocket zipper and rain flap over the zipper.
USB access
There’s also an USB access port on the pack that allows for a USB device to be plugged in on the outside and tethered to a device or battery on the inside. I assume this would mainly be used as a battery pack connection.
Interior USB extension cord
This would be handy during travels, but I doubt I would ever use it in the field.
Comfort
I’ve used the Raddy backpack on two short hikes and find it, overall, a very comfortable backpack. I do find the harness a little on the small side, but I have broad shoulders. For those with slightly smaller frames, I think this would work well.
The carry handle is attached across the top of the backpack/shoulder straps.
I also find this a bit odd, because if the pack is fully-loaded and heavy, it puts a lot of strain on the attachment points of the handles and at an angle–meaning, the double stitching isn’t providing the strength it otherwise could if the pack weight was distributed evenly on the top of the backpack body instead of the shoulder harness.
The back of the pack is padded with a mesh that allows for your back to relatively cool as you hike.
Nice touch! A strap you can use to secure the pack around the handle of rolling luggage.
Overall, it’s a very comfortable pack, although I wish the shoulder straps felt more robust and I wish the main handle wasn’t attached to the shoulder straps.
Low profile
One real bonus with the Raddy pack is that it’s low profile, has an “urban” look–in other words, fairly nondescript. This pack does not look like a radio manpack, nor is it tactical in design. If I were to take this through a large city, no one would assume this pack was full of radio gear. It looks like a normal, modern backpack.
There’s real security in a low profile, stealthy design.
In addition, other than the front vertical pocket, this would be an incredibly difficult pack for a pickpocket to steal from..
Quality
The Raddy backpack is designed to hold up to 44lb/20kg of weight. I’m not sure I’d ever need or want exceed 20-30 lbs with it myself.
Radioddity also backs this pack with an 18 month warranty. Exceptional. Radioddity told me they would offer a replacement if any stress points on the pack fail during that warranty period. They also told me they’d handle any warranty replacements within 1 business day. Having worked with Radioddity now for a year, I do believe they’ll stick by this quick response/handling time.
Summary
Is the Raddy Multi-function Backpack for you?
Keeping in mind (again) that I normally review packs at the high end of the market, I’m not familiar with with what would be expected at this $45 price point.
What I can say is that if you’re looking for a compact pack that’s designed to hold and protect radio gear, this is a good option and certainly one of the most affordable I’ve seen on the market.
This pack would best suit the casual park activator that doesn’t need to pack in a lot of extra supplies like field safety gear. It’s designed to only hold a radio, battery, ATU, cables, and a few other accessories–I’ve configured it with a number of radios and found that I can easily pack an entire QRP station inside.
I would use this pack for drive-up parks and summits, and especially for urban outings-. This would be a great pack to wear into a park in or near a city where I wouldn’t want to appear as if I’m a radio operator preparing for field combat scenarios. You could wear this pack into a historic POTA site and politely ask staff if you could activate the park with the low-profile gear you have inside. It would be much less intimidating and conspicuous than a tactical or large hiking pack.
This would also be a great pack if you plan to fly and wish to keep all of your radio gear in a carry-on. Being a compact backpack, the size should easily fit the description of a “personal” carry-on for most airlines (always check before departing, though, as these dimensions will vary by airline). With your gear loaded, it’ll might appear “intentional” and more normal as you go through Airport security as opposed to your gear being simply tossed in a suitcase.
The Raddy pack is not perfect: I would like something more rugged, with a better suspension system and even better weather-proofing around the zippers. I’d also like more rigid padded pockets inside with adjustable straps. I assume all of these things, though, would substantially add to the cost of the pack and might be overkill for most casual operators. While I wouldn’t choose this pack for a 10 mile round-trip hike to a SOTA summit, I would choose it for some casual picnic table operations and, again, for travel.
I love the fact it can be configured so that you can operate directly from the backpack. You could simply open up your pack in the field, connect the antenna, and operate from the open backpack.
I do like Radioddity and find that they stand behind their products. I’m happy to see that they’re offering a competitively-priced radio pack to supplement their product line. I hope other retailers and manufacturers will do the same.
PS: It’s my policy that if I receive a free review product from a retailer or manufacture–and they don’t want it returned–I either use it or give it away. Over the years I’ve had the pleasure of giving away review gear to readers and subscribers who I knew would appreciate it. In this case, I know exactly who I’ll be giving this pack to because she’ll give it a thorough workout and is need of a compact radio pack! Maybe I can even convince her to write her own review in a year or so–? We’ll see!
QRP radios, product announcements, reviews, news and more. Low power amateur radio fun!
Please support QRPer by adding us to your whitelist in your ad blocker. Ads are what helps us stay online. All of our ads are ham radio related--no junk, we promise! Thank you!
 I had a topic on the mind as I made my way back to the trailhead after a SOTA activation recently.


